
Best for: Most casual users who often transfer large photo libraries and need to move images and other files in both directions.
Contents
For editing, backing up, or printing purposes, you need to transfer photos from your iPhone to a computer. Or maybe the reverse: you have some important pictures on your desktop and want to copy them to your phone. The question is, how to transfer photos between computer and iPhone?
Whether you need to transfer photos from iPhone to PC Windows 10, move images from a Mac to your iPhone, or go the other direction, the right approach depends on your specific needs. Check the following five methods.
Before we dig in, one quick note on the comparison table below. Transfer photos between iPhone and computer with these 5 tested methods. Compare speed, wireless options, and find the easiest way to move your pictures today.
| Method | Transfer Speed | Wi-Fi Requirement | Best For |
|---|---|---|---|
| Aiseesoft FoneEase | Fast (USB) | No | Selective transfers, managing multiple iOS file types, users who want an all-in-one transfer tool |
| iCloud Photos | Medium (depends on internet) | Yes | Automatic syncing across Apple devices, hands-off backup |
| Windows File Explorer | Fast (USB) | No | Windows users who want free, direct access to iPhone photos |
| iTunes/Finder | Fast (USB) | No | Syncing entire photo libraries, users already in the Apple ecosystem |
| Google Photos | Medium (depends on internet) | Yes | Cross-platform users, unlimited storage option, accessing photos from any device |
If you are looking for a powerful data transfer tool that can handle all the commonly used files on your iPhone, iPad, Windows PC, Mac, and iTunes, give the reliable Aiseesoft FoneEase a try. It is an all-in-one data management assistant designed to simplify transferring, backing up, and managing files between iOS devices and computers.
Score:4.8/5
Best for: Most casual users who often transfer large photo libraries and need to move images and other files in both directions.
 100% Secure. No Ads.
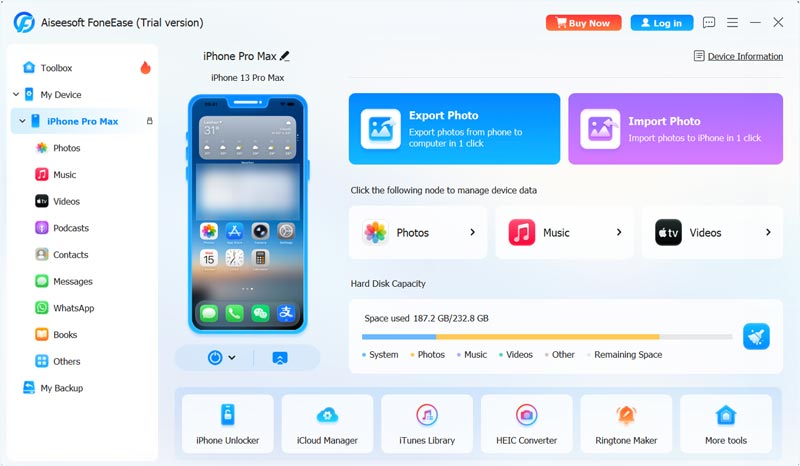
As you can see, it provides dedicated Import Photo and Export Photo options. You can start with one according to your needs.
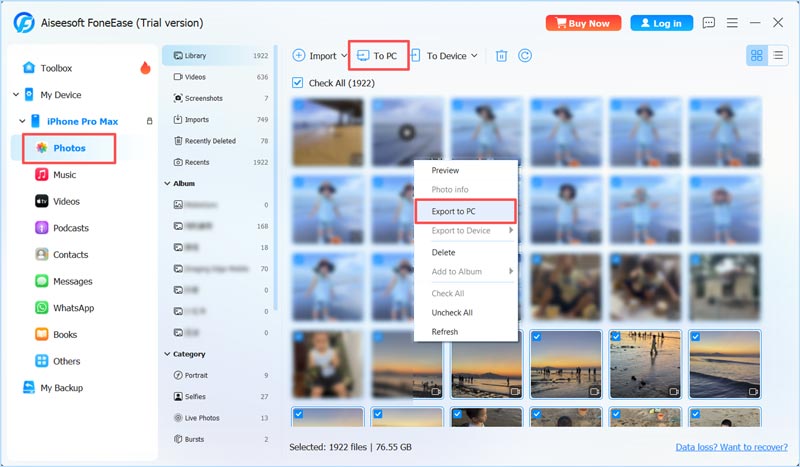
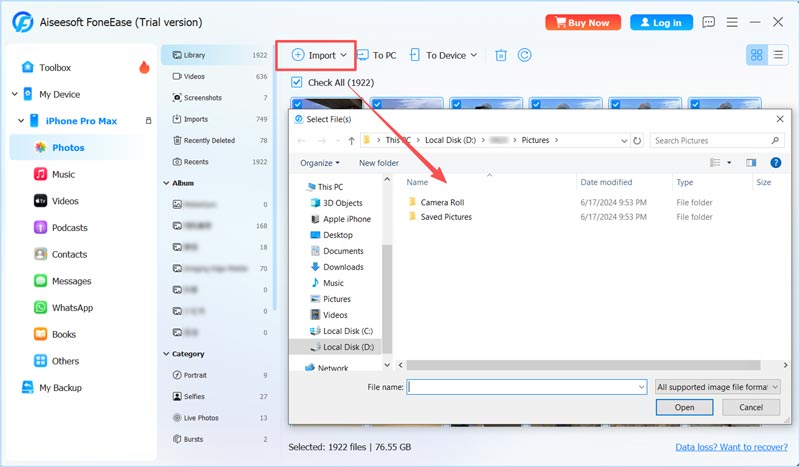
iCloud Photos is Apple’s native cloud solution that automatically keeps your photo library synchronized across all your linked Apple devices. Once enabled, every photo you take on your iPhone will automatically be synced to your computer (and vice versa).
Score:4.5/5
Best for: Apple users who want automatic, wireless syncing and don’t mind paying for additional iCloud storage beyond the free 5GB.
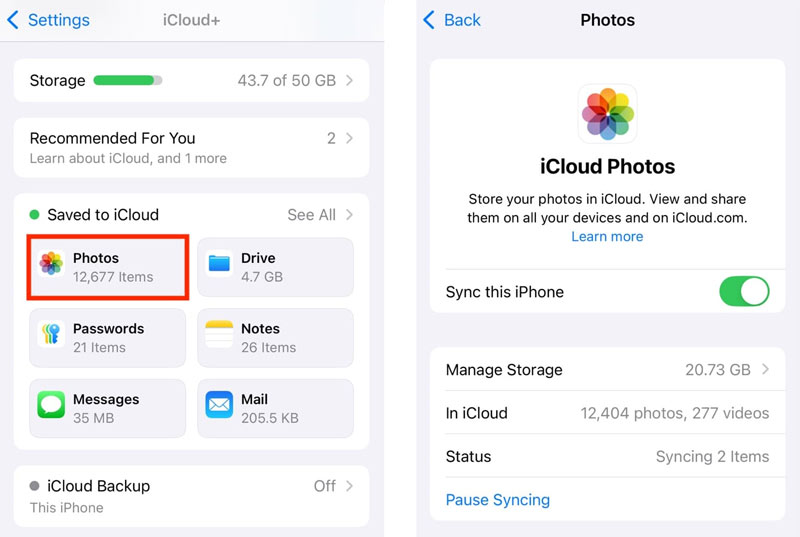
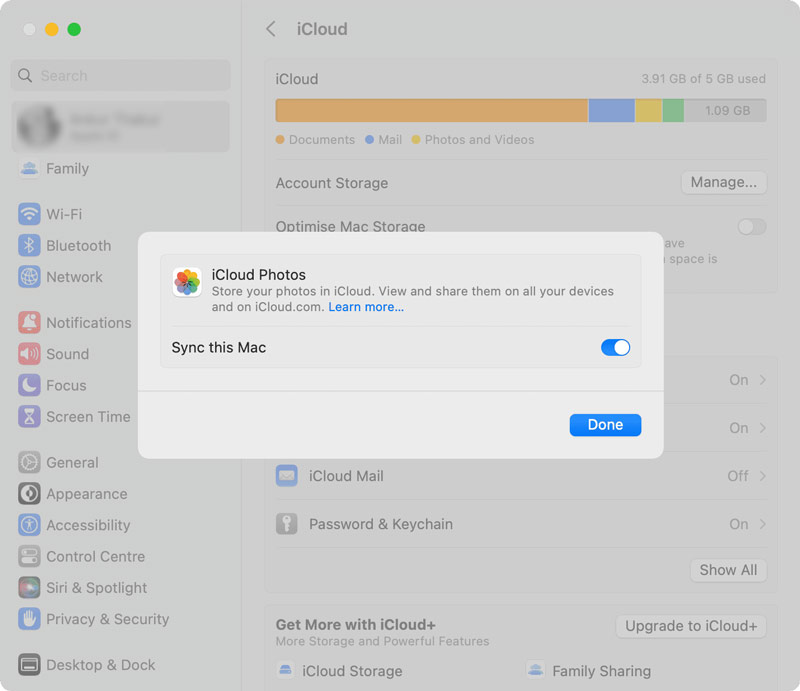
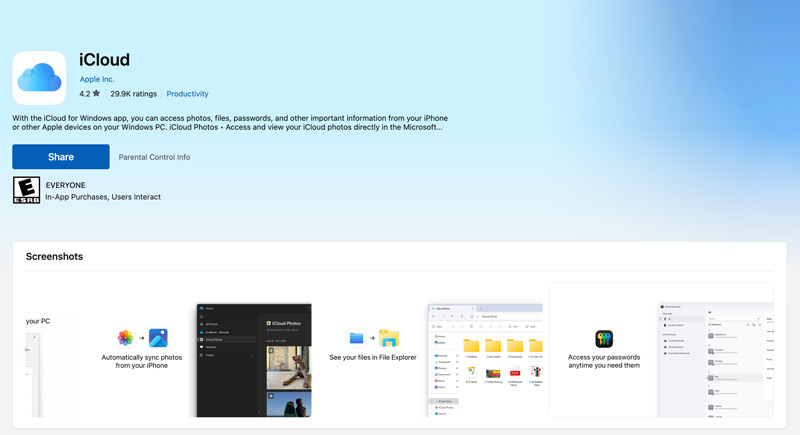
Your pictures will appear in the iCloud Photos folder on your PC, and any changes you make sync back.
You May Also Need:
This is the most direct approach available on a Windows computer, and it requires no extra software. When you plug your iPhone into a PC with a USB cable, Windows recognizes it as a digital camera and gives you access to the DCIM folder where your iPhone photos are stored. You can directly copy them to any folder on your hard drive.
Score:4.3/5
Best for: Quick, one-way transfers of photos from iPhone to PC when you do not want to install anything.
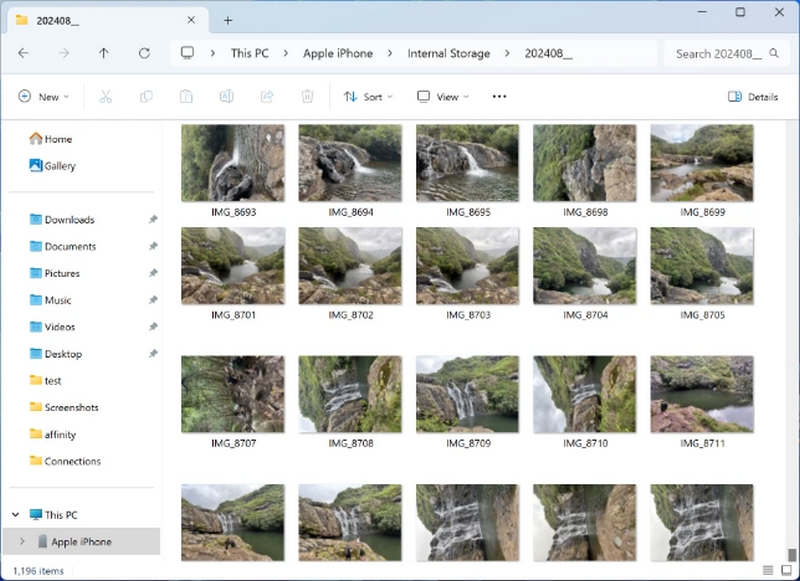
Note that you cannot import photos to your iPhone this way. File Explorer treats your iPhone as a camera, not as a storage device. The connection is strictly one-way.
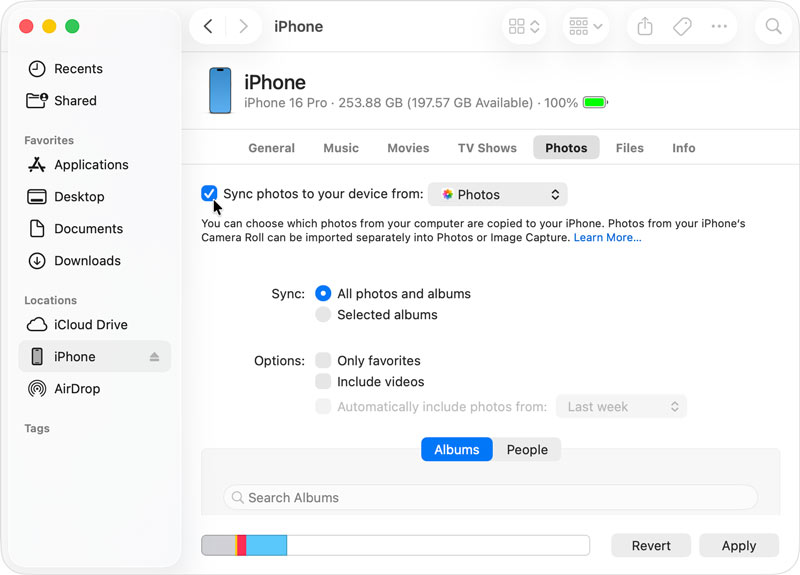
iTunes is the official, traditional data sync tool that allows you to manage all types of iOS files and transfer photos between your computer and your iPhone.
Score:4.2/5
Best for: Users who prefer Apple’s official tools and want to sync entire photo albums or folders rather than individual pictures.
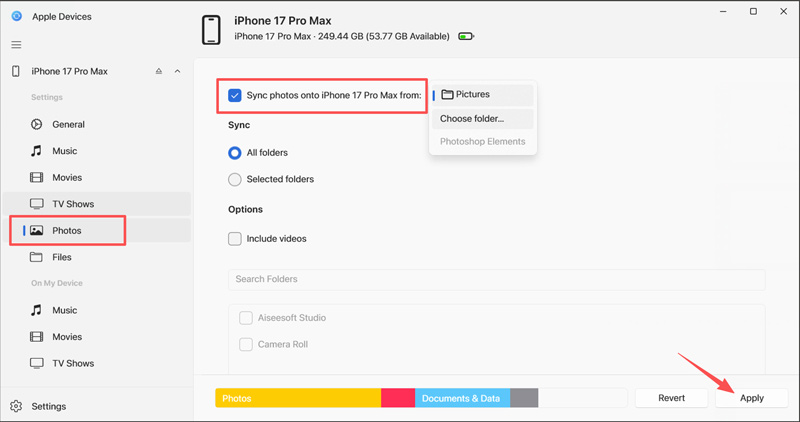
If your iTunes does not show a dedicated Photos category, use Apple Devices to manage and transfer your photos. Connect your iPhone to your computer, click Photos, tick “Sync photos onto iPhone from”, select a desired folder, and then click the Apply button.
Google Photos is a popular photo sync tool for iPhone, Android, Windows, and Mac users. It lets you upload image files to Google’s servers and then access them on any linked device with your account. You have 15GB of free space to handle your pictures.
Score:4.0/5
Best for: Users who want to transfer iPhone photos to PC wirelessly and often switch between multiple platforms.
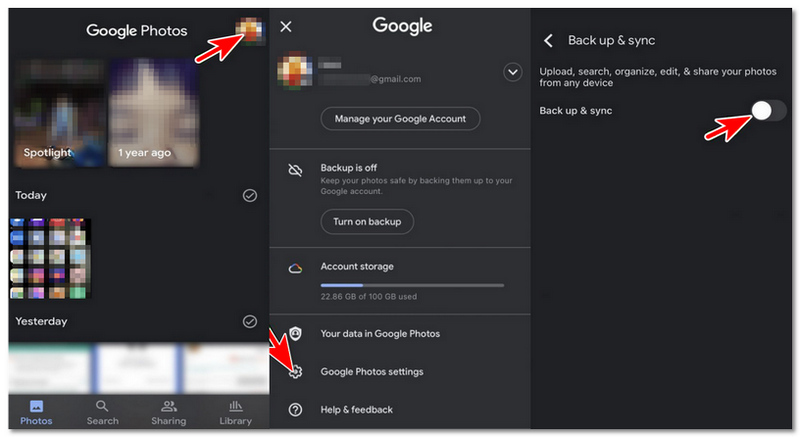
Wait for your photos to upload. This happens automatically when your iPhone is connected to Wi-Fi.

Question 1. Why can’t I transfer photos from my iPhone to my Windows 11 PC?
This is the most common question I hear, and the answer comes down to how Apple designs its ecosystem. As mentioned above, the DCIM folder that Windows can read is a compatibility layer. Apple does not make the iPhone appear as a standard USB mass storage device. That is why you cannot simply drag files to and from the phone’s internal storage like you can with an Android device.
Question 2. What is the fastest way to transfer photos from iPhone to PC?
A wired USB connection using Aiseesoft FoneEase or File Explorer is often the fastest way. Wireless methods are slower because they depend on upload and download speeds.
Question 3. Why are my iPhone photos in HEIC format and how do I open them on Windows?
HEIC is Apple’s efficient image format. On Windows, you can install a third-party image viewer to open them. Alternatively, change your iPhone camera settings to JPEG: go to Settings → Camera → Formats → select Most Compatible. In that case, your HEIC pictures will be automatically converted to JPEG during the transfer.
Conclusion
Transferring photos between your iPhone and computer shouldn’t be complicated. Whether you are backing up memories, freeing up storage space, or moving pictures for editing, you can use the five ways above to get the job done. You can select the right method to transfer photos between your iPhone and computer depending on your workflow.
 How to Easily Transfer Contacts from iPhone to iPhone
Want to transfer contacts from your old iPhone to your new iPhone? This article will show you how to export contacts from an iPhone to another iPhone in 6 ways.
 Google Photos Not Backing Up: How to Save and Recover Your Photos
Struggling with Google Photos Not Backing Up? Discover why it happens, how to fix it easily, and how to recover your photos safely using the best tool.
 4 Free Data Transfers to Copy Files from PC to iPhone [2026 Guide]
Is AirDroid wireless transfer free to use? How to transfer files from a PC to an iPhone for free? Get 4 free data transfer tools to add PC files to your iPhone.
 Leave your comment and join our discussion

Aiseesoft FoneEase is a data transfer and management tool that lets you seamlessly move, back up, and manage various data between iOS, Android, and computers without resetting your phone or relying on iTunes.
100% Secure. No Ads.

*Required field
*Please enter a valid email
