iCloud Music Library enables Apple users to share music on one Apple device with all the other devices with ease. However, cloud-based matching can be buggy. You may come across errors like missing or mismatched album artwork, live tracks matched to their studio versions, wrong metadata, iCloud music not syncing correctly, etc. when using iCloud Music Library.
You can disable iCloud Music Library on your iPhone/iPad or Windows/Mac computer if you don't want all your music in a mess. Or if you want to delete music music from iCloud, you can also find methods here.
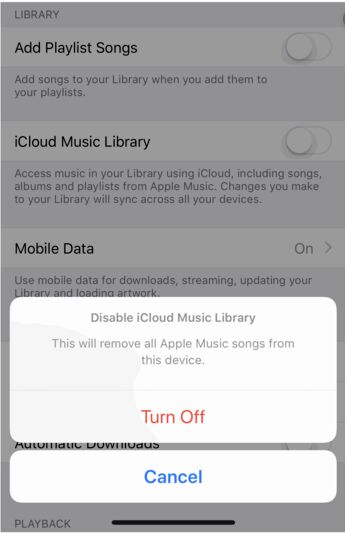
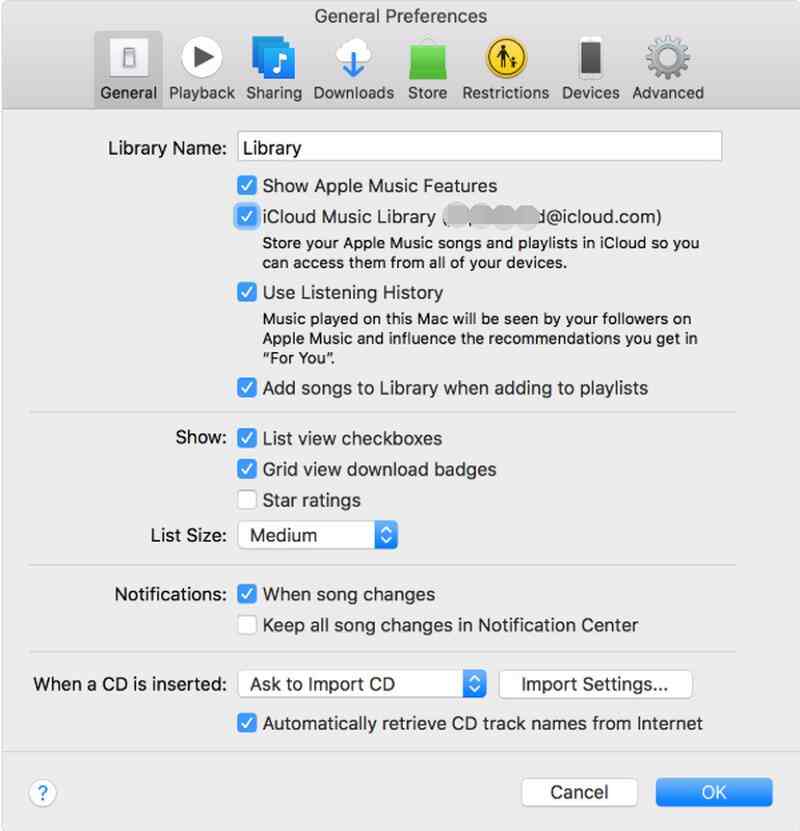
Turn off iCloud Music Library
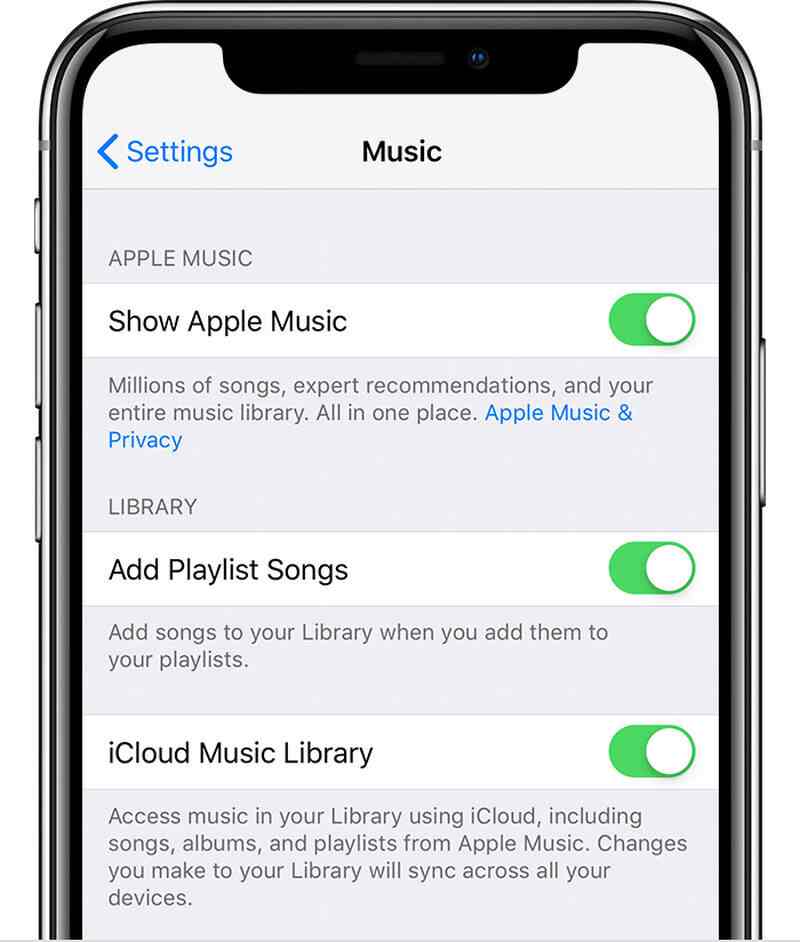
Please note that: What will happen after your disable iCloud Music Library
If you turn off your iCloud Music Library, you will end up losing access to the following files:
• A cloud-based copy of your Mac's iTunes library.
• If you were using iTunes Match or Apple Music, the Matched or Uploaded tracks on your Mac will not be available for steaming on other devices any more.
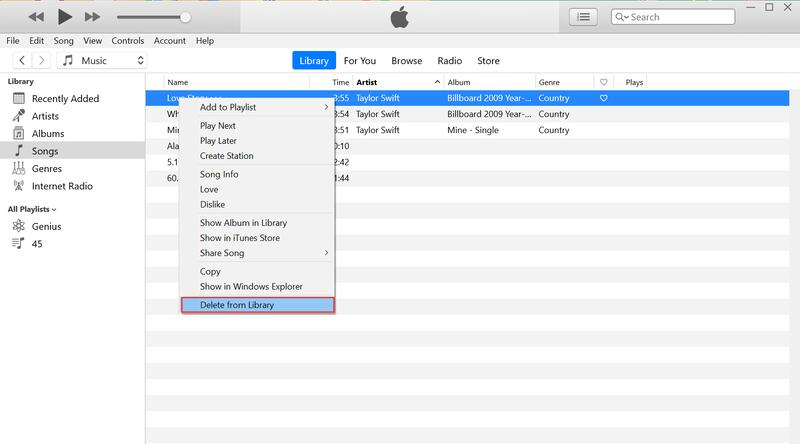
If you do not want to turn off iCloud Music Library but want to delete some songs from iCloud in order to free up more iCloud storage space, here we also prepare some tips for you.
Before you delete songs from iCloud, please make sure that all songs including the ones on iCloud can be accessed on your iOS device in the music library. This means that you have to toggle on Show Apple Music feature on your iPhone/iPad. Follow the guide below to turn on this feature.

After turning on Show Apple Music, you can start to delete music from iCloud by following the guide below.
If you want to delete all the songs in your iCloud Music Library, it's time-consuming to delete them one by one with the method introduced above. It'd be better to reset your iCloud Music Library with the steps below.
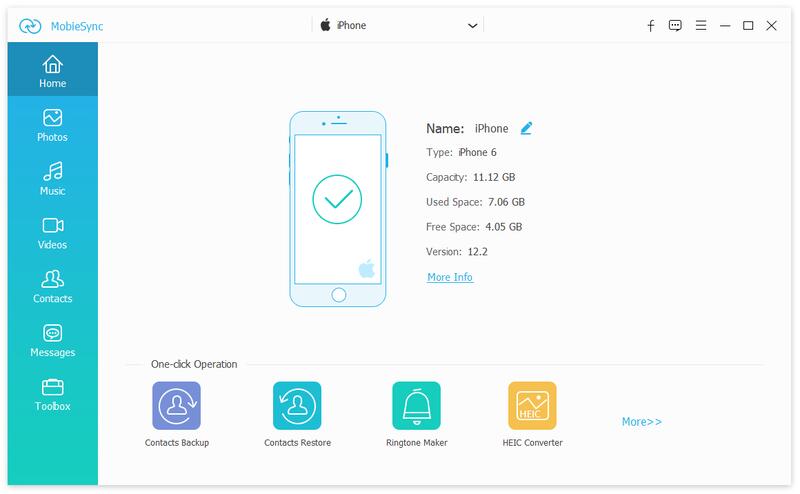
If you want to quit iCloud Music Library but still want to sync music among your devices at your will, here we recommend the best alternative for you. Aiseesoft MobieSync enables you to transfer music between iPhone and iPod or between iOS device and computer in one click. If you have the need to transfer files between iOS and Android, it's also possible.
Downloads
What MobieSync can do for you?
![]() 100% Secure. No Ads.
100% Secure. No Ads.
Follow the detailed guide below to manage your music files with this music organizer.
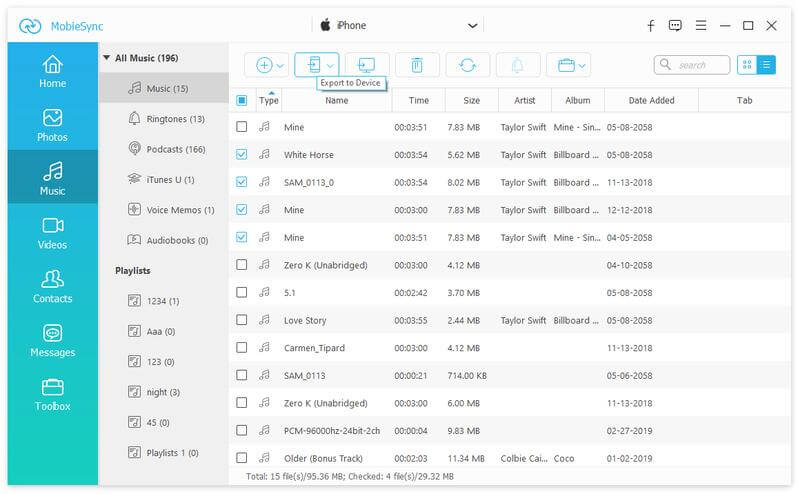
To transfer music files from iOS to computer: Click the Music data type and select the detailed items on the right panel. Then click "Export to Device" button to transfer music from iPhone or iPad to computer.
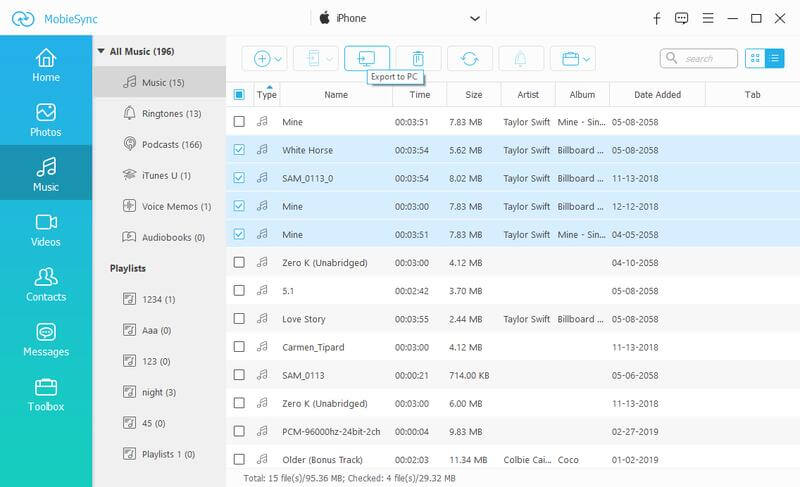
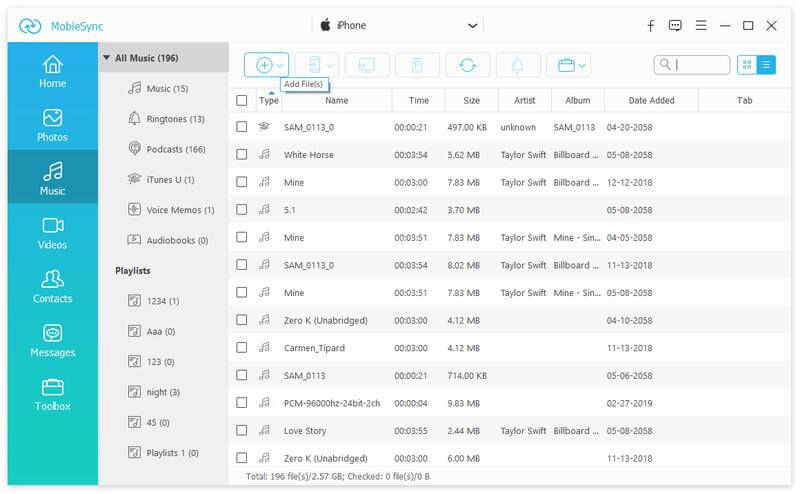
Import music files from computer to iOS device: Click the "Add File(s)" button to import music files from your computer to your iPhone, iPad or iPod.
Transfer music files from iOS to iOS: If you want to share music among your iOS devices, just connect the two iOS device to your computer at the same time and enable the source device to show in the Device list in the middle at the top. Then select the songs you want to share from source iOS device, then click "Export to Device" button to start the syncing.
In this way you can easily and freely manage all your music files according to your own demand.
Conclusion
If you have been fed up with all the limitations that iCloud Music Library has, you can turn it off with the methods recommended above and use its best alternative – MobieSync to manage all the music files as well as other data type in your device at your will.
 Top 10 Samsung iPhone Transfer Tools to Sync Files when Switching Phone
How to move files from Samsung to iPhone or reversely? Do you want to switch your phone in 1 click, or just transfer what you want? This article will provide all possible solutions to help you transfer files between Samsung and iPhone.
 How to Transfer Music and Playlist from Mac to iPod (3 Ways)
How to put Mac music on iPod for listening? This post shows 3 ways to transfer songs from Mac to iPod with or without iTunes.
 Complete Guide on How to Transfer Photos from Android to iPhone
Switch from Android to iPhone but have no idea about how to transfer your valuable photos from old Android phone to new iPhone? This post will provide the most complete guide for you.
The professional iPhone/Android data manager and transfer to transfer various files between iOS/Android phone and computer and between two mobile phones in 1 click.
![]() 100% Secure. No Ads.
100% Secure. No Ads.
*Required field
*Please enter a valid email
