Note
To reinstall a Mac OS system, select:
Mac OS Extended (Journaled) for the fastest wipe.
Mac OS Extended (Journaled, Encrypted) for a more secure wipe.
For various reasons, you will have the need to wipe MacBook Pro and reset it to factory settings. For instance, you may plan to sell or give it to a family member, donate it or bring it back to the original condition. Wiping a MacBook will erase all types of data and everything you've done on the Mac and make a fresh start. Now we back to the point, how to wipe MacBook Pro?

In fact, it's simple to wipe a MacBook Pro. You should know that, to better protect your privacy, just remove personal information alone isn't enough. You'd better reinstall a working version of macOS after wiping your MacBook. Let's get started and erase your MacBook Pro.
The process of wiping a Mac or MacBook to factory settings will delete all data stored on the computer. Surely, there are some parts you should pay attention to. First of all, you should back up all important data on Mac.
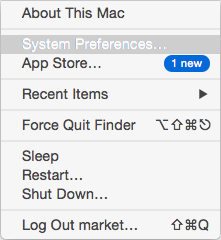
Step 1 Click on Apple icon on the menu bar and choose System Preferences from the drop-down list.
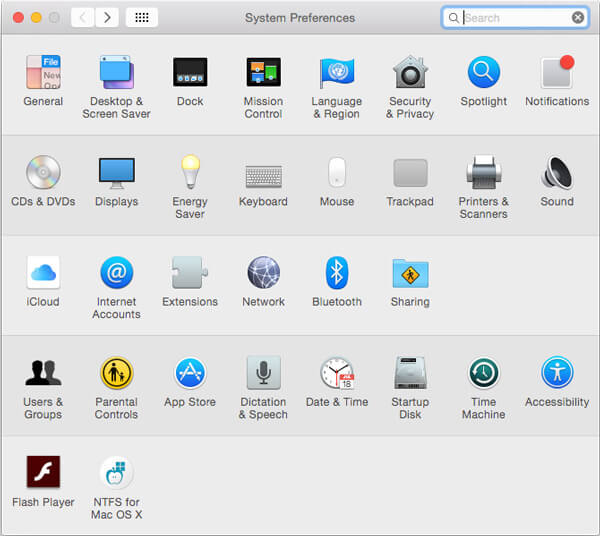
Step 2 Find and open the Time Machine app.
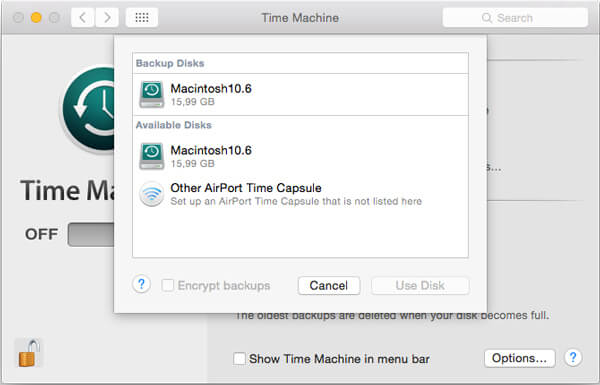
Step 3 Choose Select Backup Disk option and then pick the disk to create the backup. Or you can check the Back Up Automatically box in order to automatically back up your Mac to the chosen disks.
After the backup is done, you could easily restore data from Time Machine after wiping your MacBook Pro.
Open iTunes app on MacBook Pro and click on Apple menu.
From the drop-down list, click Account > Authorizations > Deauthorize This Computer to deauthorize the Mac. In this step, you need to log into your Apple account. Then you can log out of iTunes with ease.
To sign out of iCloud, you need to click on Apple menu > System Preferences > iCloud > Sign Out.
If you don't want to remove all contents and settings on Mac thoroughly, instead, deleting some unnecessary junk files is all you need, you can use Mac Cleaner to wipe your MacBook Pro in that kind of case.
Mac Cleaner is a free and professional Mac data management tool which can help you remove useless data quickly and safely. Moreover, it can enable you to delete unneeded, large and old files to make your Mac work better.
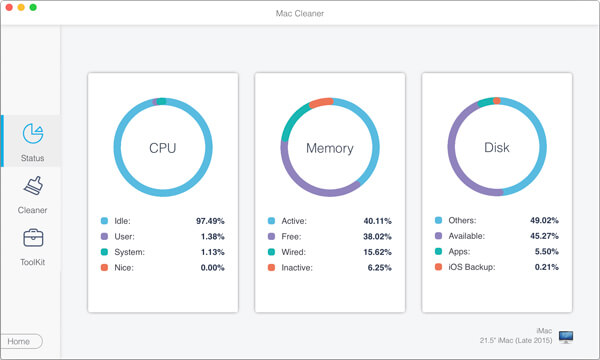
Step 1 Launch Mac Cleaner
With the download button above, you can handily get Mac Cleaner installed on your computer. Mac Cleaner will automatically detect your Mac OS system status after launching.
Step 2 Scan junk files
Click "Junk Files" on the left sidebar and click "Scan" to scan all useless cache files and logs on your MacBook Pro.

Step 3 Wipe a MacBook Pro
When the scanning process is finished, you can see all junk files are listed, including "Trash bin". Select the Mac data you want to remove, then hit "Clean" button to wipe your MacBook Pro.
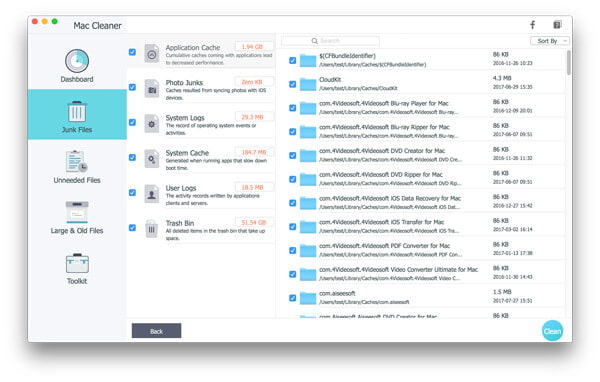
With this method, you can easily wipe a MacBook Pro without erasing all useful and useless files on Mac.
This part will show you how to restore a MacBook Pro to factory settings step by step.
Step 1 Click Apple icon on the menu bar and choose Restart... from the drop-down list.
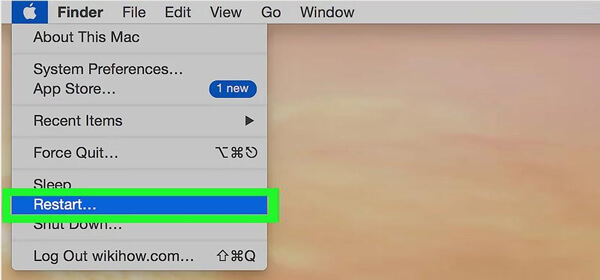
Step 2 A pop-up window will ask you if you want to reboot your Mac, click Restart button to confirm the operation.
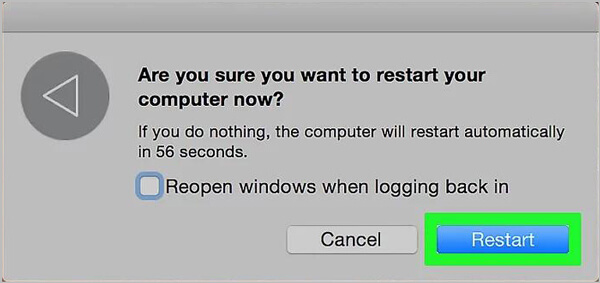
Step 3 Press Command and R on the keyboard while the restarting process.
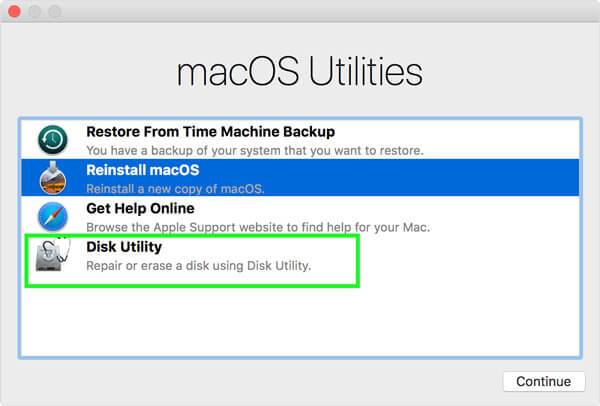
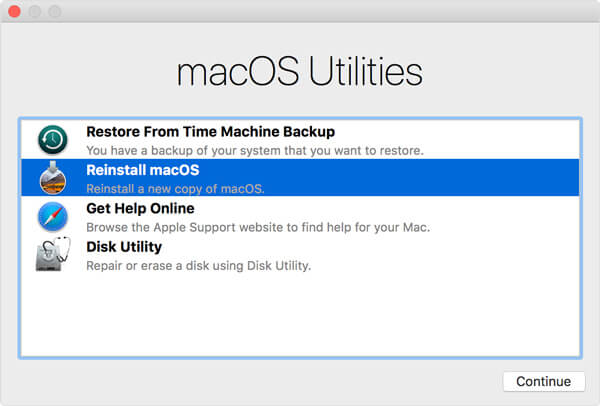
Step 4 Release the keys when you see the Apple logo appears on the screen. Then a new window named macOS Utilities will appear.
Step 5 Select the last option - Disk Utility and then click on Continue.
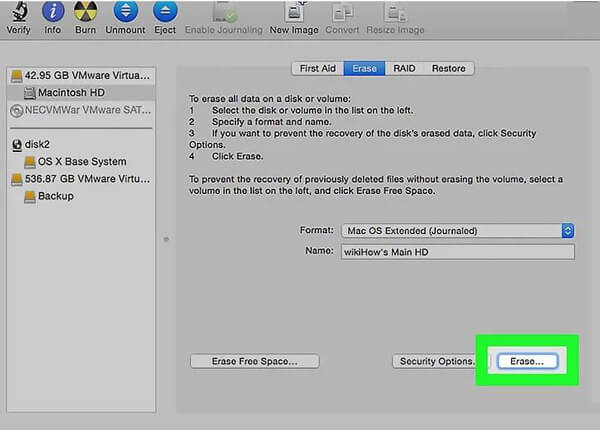
Step 6 Select your MacBook's hard drive in the upper-left of the window and then click on Erase. During this step, you need to name your disk.
Step 7 Click on Format and pick a suitable format from the drop-down list.
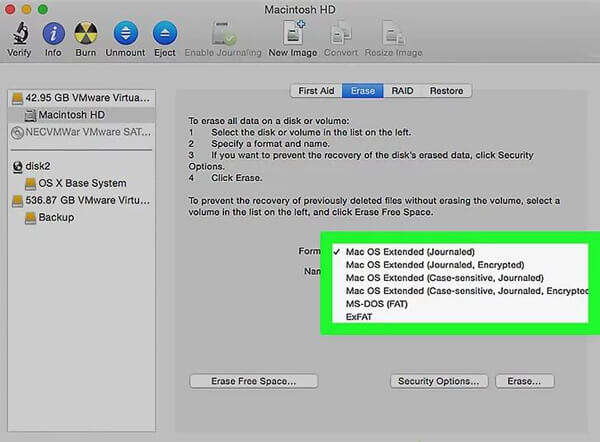
Note
To reinstall a Mac OS system, select:
Mac OS Extended (Journaled) for the fastest wipe.
Mac OS Extended (Journaled, Encrypted) for a more secure wipe.
Step 8 The last step is to click on Erase... button. This operation will wipe your MacBook Pro and reset Mac to factory settings.
The method above takes OS X 10.7 as an example. If you are using a later macOS version and want to wipe a MacBook, the steps will be the same.
Step 1 Follow the steps mentioned above to open macOS Utilities window. Here you will find the Reinstall macOS option. Choose and click on it.
Step 2 Follow the prompts and select which disk you'd want to install macOS.
Step 3 Plug in your power cable and then click Install.

When the installation is complete, you'll see the welcome screen with the region selector. You can continue the setup process if you want to keep using this MacBook. Or you can press Command and Q on your keyboard to shut down your Mac.
Conclusion
In this post, we mainly talk about how to wipe MacBook Pro. Two effective ways are provided for you to choose from. What's more, we show you how to back up Mac and reinstall macOS on your MacBook Pro.

June 06, 2019 17:43 / Updated by Louisa White to Clean up Mac
 How to Delete All History on Mac
How to delete internet history on MacBook? This article shows you how to delete browsing, search, download history on Mac.
 How to Empty Trash on Mac in Three Simple Methods
How to empty trash on Mac? Read this post and learn how to secure empty trash on Mac, force empty trash on Mac or empty trash on Mac with only one click.
 How to Clear Cookies on Mac
How do you delete cookies on a Mac? This post shows you how to clear browser cookies on Mac, including Safari, Firefox, Chrome and Opera.
