
Best for: Backing up Android photos to a USB flash drive through a computer.
Contents
Photos tend to be the major space hogs on phones, and sooner or later, you will probably want to have a safe place where those are kept. A flash drive is one of the top choices because you can carry it in your pocket, it doesn't depend on cloud storage, and it is also very easy and convenient in case you want to make sure that your treasured memories stay protected on a different medium. So, for sure, your question is: how to transfer photos from Android to a flash drive? You have landed on the suitable article. I will present you not just the most suitable option, but also a couple of other methods, and after that, you will be able to pick the one that best works with your hardware, transfer the photos, and at the same time protect your images.
Quick Summary
Make sure you have the right gear for the file transfer at hand before you settle on a transfer method. To help clarify that, here is a summary of the requirements and user types for each of the transfer methods.
| Method | Requirements | Best For |
| USB-C Flash Drive or OTG Adapter | Android phone with USB OTG support, USB-C flash drive or OTG adapter | Fast, direct transfers without a computer |
| Aiseesoft FoneEase | Windows PC, Aiseesoft FoneEase, USB cable, flash drive | Managing and transferring large photo collections with more control |
| Using a Computer | Computer, USB cable, flash drive | Backing up photos when a direct connection isn't available |
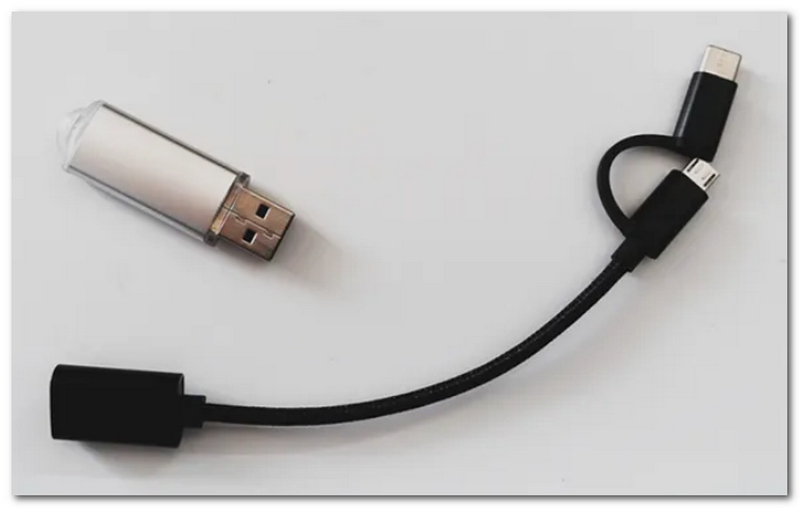
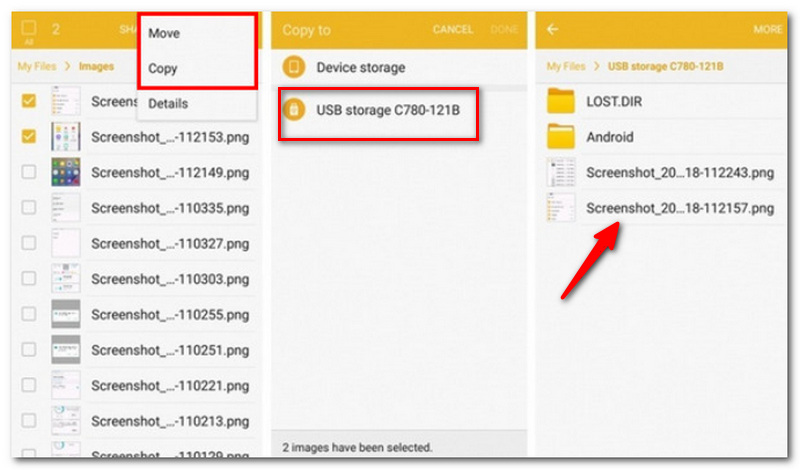
One simple method to move your pictures from your Android mobile phone to a flash drive is with a USB-C stick or an OTG (On-The-Go) converter. As only the mobile and the flash drive are involved in the data exchange process, no computer or internet is required.
Best For: Backing up Android photos directly to a USB flash drive.
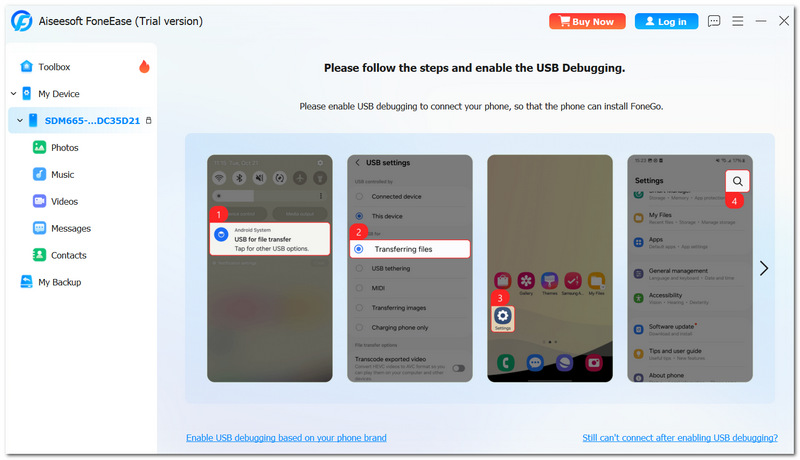
If you want to exercise more control over your photo backups, you could go for Aiseesoft FoneEase. With it, you can take a look at your photos, order them, and also transfer them from your Android device to a computer, so that later, you can make copies to a flash drive more easily. This type of approach comes in handy when you're a person who is backing up several thousand photos.
Best for: Backing up Android photos to a USB flash drive through a computer.
Main Features
 100% Secure. No Ads.
Steps to Transfer Photos with Aiseesoft FoneEase
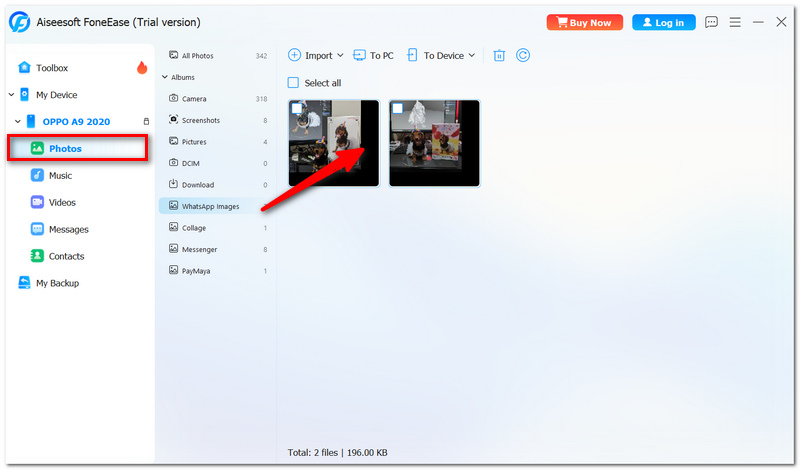
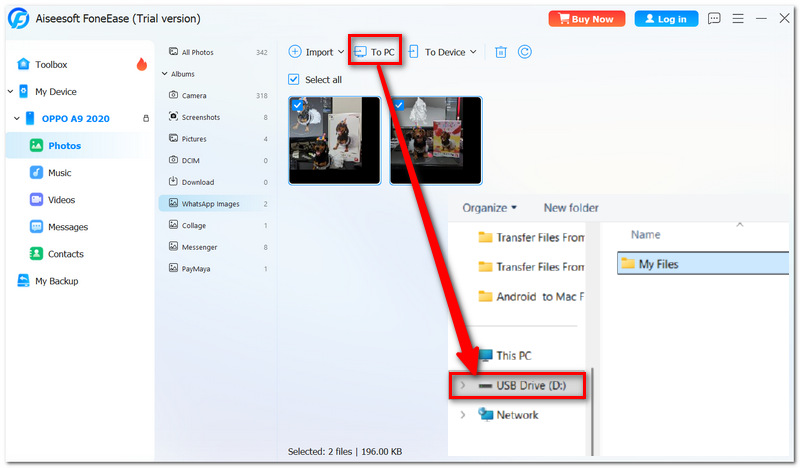
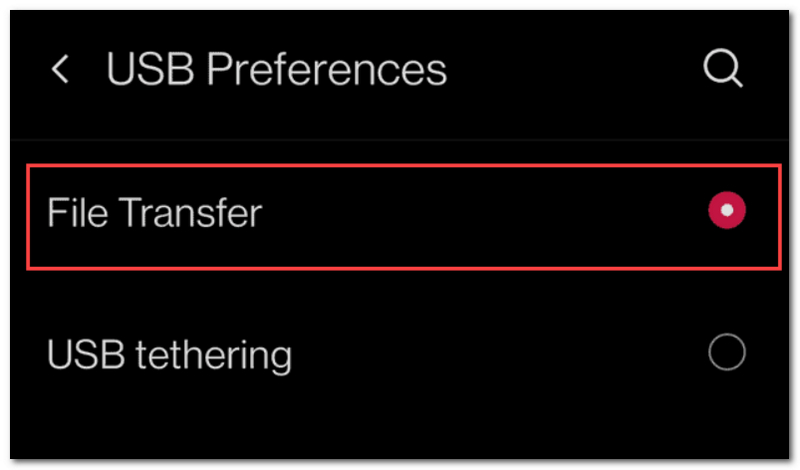
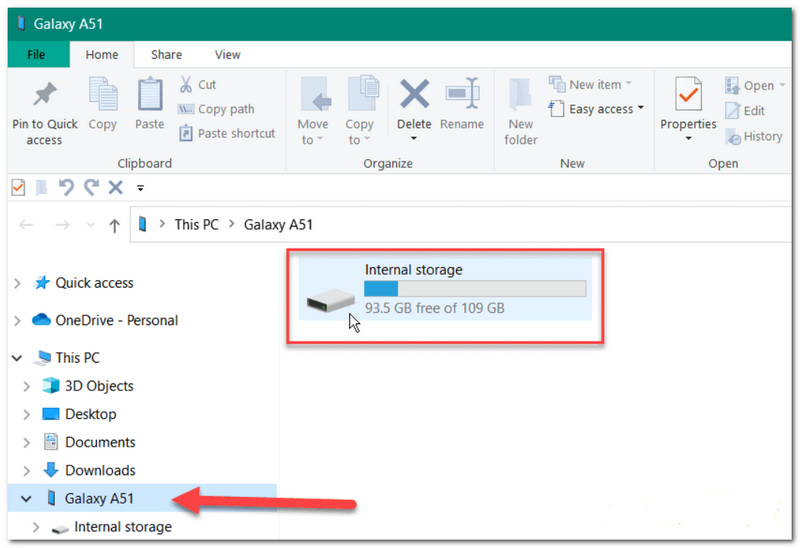
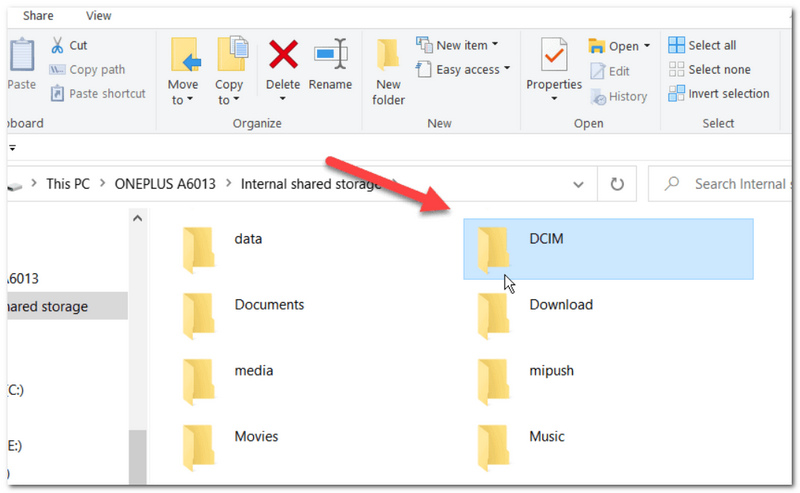
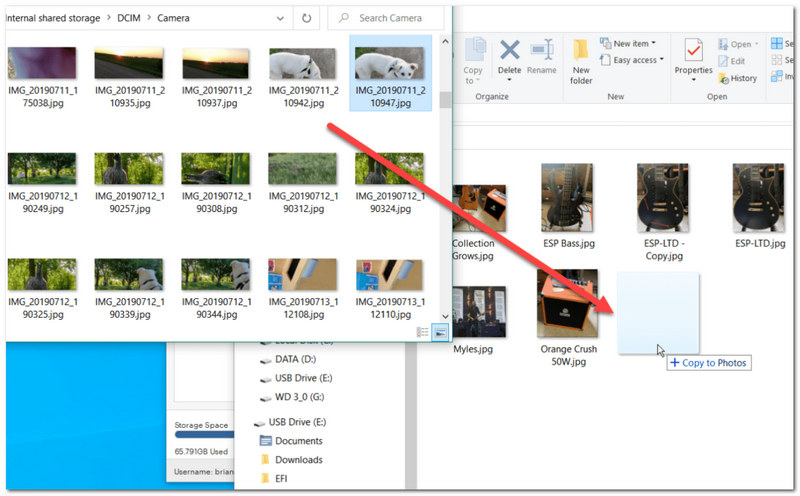
If you are using a device that doesn't require an external USB storage device via a USB-C port, then a good way for you to keep your phone's photos safe is through your PC. By this method, you can first transfer pictures from your phone to your PC and then to your portable USB drive.
Best for: Moving large batches of photos from Android to a flash drive.
Should I transfer photos from the phone regularly or wait until the phone is full?
Regularly transferring photos is better because it is a good way to free up space, and at the same time, it helps reduce the probability of losing very important photos if your phone gets damaged or lost.
Is there a way to get photos out of my Android phone with a broken screen?
If the phone is touch-responsive or an external mouse can be connected through an OTG adapter, you can still get data out of the Android with a broken screen and transfer them.
Why does my USB stick heat up when I am copying files?
One would say it is quite natural for a USB stick to get a bit warm while transferring a large number of files. Still, in case it gets very hot, you should stop the file transfer and allow it to cool down.
Conclusion
Having understood the methods of how to transfer photos on Android to a flash drive, you can now decide which one suits your device setup better. For those of you, it will definitely be easier to directly transfer the images, while others will prefer a method that involves a Windows or MAC computer. Either way, having an extra copy of your photos on a flash drive is the perfect and easy solution for storage management as well as preserving your priceless memories.
 Deal with Broken Android Phone: Best Ways to Fix and Save Your Data
The cell phone is at a high risk of damage. If you accidentally break it, this post will offer the best ways to help you fix it and maximize data protection.
 7 Easy Methods to Change the Resolution of Android Pictures
This guide will tell you how to change the resolution of a picture on your Android phone/tablet quickly and easily without losing quality.
 How to Open HEIC Images on Android Device with High Quality
HEIC is coming with the most outstanding feature that brings higher quality and less space. When it comes to open HEIC on Android, you will need this guide.
 Leave your comment and join our discussion
Aiseesoft FoneEase is a data transfer and management tool that lets you seamlessly move, back up, and manage various data between iOS, Android, and computers without resetting your phone or relying on iTunes.
100% Secure. No Ads.

*Required field
*Please enter a valid email
