
Best for: transferring hundreds or thousands of photos at once.
Transferring images from the iPhone to Mac is a common practice for those who want to back up their memories, edit photos on a bigger display, free up space on the iPhone, or simply sort out their photo collection.
With the help of the Apple ecosystem, moving photos between the two devices is quite easy. There are various Apple solutions that can be used for transferring photos. In other cases, if you require more flexible file transfer, third-party apps like FoneTrans can transfer photos in bulk or selectively without using iCloud. So, in this guide, we will present five effective methods step by step to help you transfer photos from iPhone to Mac.
| Method | Best For | Speed | Need Cable | Quality Loss |
| Photos App | Large photo transfer | Fast | Yes | No |
| iCloud Photos | Automatic sync | Medium | No | No |
| AirDrop | Quick transfer | Fast | No | No |
| Finder | Device management | ⭐⭐⭐ | Yes | No |
| Fonetrans | Advanced management | ⭐⭐⭐⭐ | Yes | No |
Best for: transferring hundreds or thousands of photos at once.
The Photos app is the official and most common way to import pictures from an iPhone to a Mac. It is ideal for transferring a large number of photos and videos while keeping the original quality. Moreover, no internet connection is required.

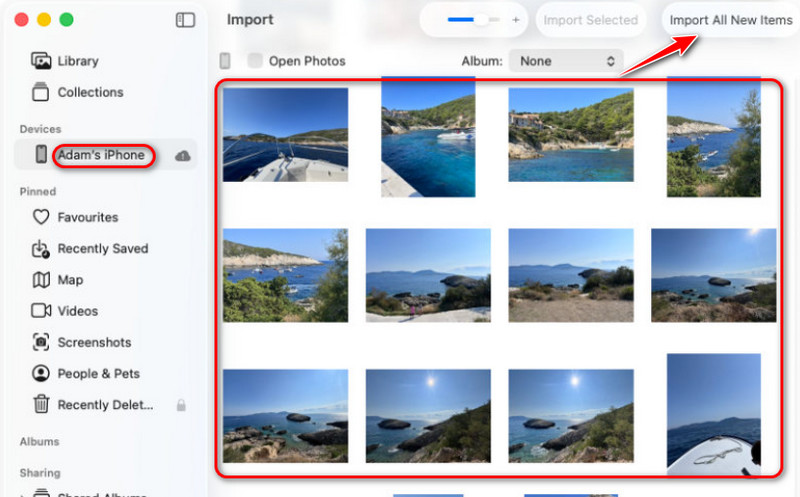
Note: Photos are imported into the Photos Library by default.
Best for: users who want continuous syncing instead of one-time transfers.
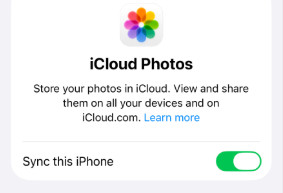
iCloud Photos allows your photos to sync automatically across Apple devices. Once enabled, photos taken on your iPhone will appear in the Photos app on your Mac without manual transfers. If you want to use this method, you need to know how to enable iCloud Photos.
On iPhone:
On Mac:
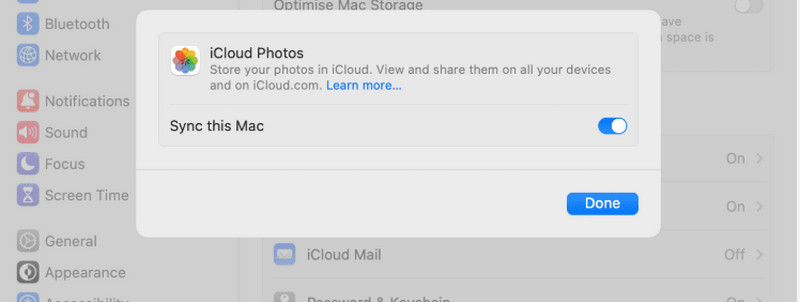
Your iPhone photos will automatically appear on your Mac when both devices are connected to the same Apple account.
Best for: quickly transferring a small number of photos.
AirDrop is one of the fastest wireless ways to send photos from an iPhone to a Mac. It is especially useful when you only need to transfer a few pictures or short videos, and it can maintain the original quality of photos.

The transferred photos will usually appear in the Downloads folder on your Mac.
Best for: users who want to manage their entire iPhone, create backups, or maintain device data. For directly transferring photos, the Photos app or AirDrop is usually a better choice.
Finder replaced iTunes for iPhone management on macOS Catalina and later versions. While it is mainly used for backups and device management, it can also help manage photo-related transfers through synchronization features.
Given that you need to transfer not only photos from iPhone to Mac, but also various files, like videos, music, messages and more, between phones and computers, we recommend a one-stop transferring tool – Aiseesoft FoneTrans. It is the best iTunes or Finder alternative that can help you transfer photos from iPhone to Mac and back up all types of iPod/iPhone/iPad files on Mac.
In addition to photos, it can also send music, contacts, notes, and messages from iPhone to Mac or the iTunes library. With easy-to-use features, fast transfer speed, and high quality, it is a reliable transfer software.
 100% Secure. No Ads.
100% Secure. No Ads.
How to transfer photos from iPhone to Mac with FoneTrans?
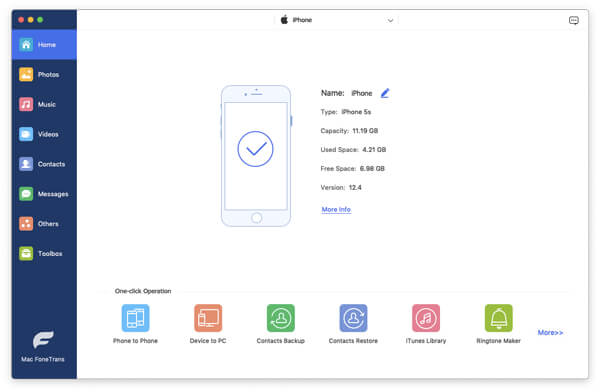
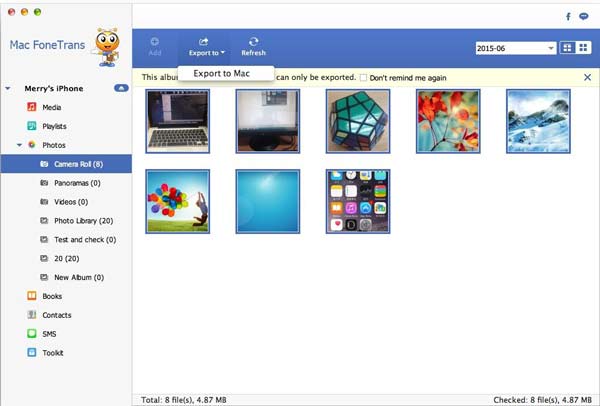
The above process shows you how to export and transfer photos from iPhone to Mac. If you are using a Windows computer, you can download its Windows version and check: how to transfer photos from iPhone to computer.
Can I transfer photos from iPhone to Mac without a cable?
Yes. You can use AirDrop or iCloud Photos to transfer photos wirelessly. But without a cable, you must ensure that the internet connection is stable. Otherwise, your photos may be damaged during transferring.
Why can't I import photos from my iPhone to my Mac?
Common reasons include: the iPhone is not unlocked, the computer is not trusted, the USB cable has connection issues, or iCloud photo syncing settings interfere with importing. Try reconnecting your device or checking your photo settings.
Does transferring photos from iPhone to Mac reduce quality?
No. Ways such as the Photos app, AirDrop, iCloud Photos, and FoneTrans can transfer photos without reducing their original quality. But you’d better make sure the internet is stable to retain quality.
Conclusion
There are several ways to transfer photos from an iPhone to a Mac, and the best method depends on your needs. The Photos app is the most reliable choice for large transfers, while iCloud Photos provides automatic synchronization across Apple devices. AirDrop is perfect for quick wireless sharing, Finder works well for overall device management, and FoneTrans offers more flexible photo management options, like adding, moving, renaming, deleting, etc.
Whether you need to back up your memories, edit photos on your Mac, or organize your photo library, these five methods can help you move iPhone photos safely and efficiently.
 6 Ways to Transfer iPhone Videos to PC (Win 11/10 Included)
Want to transfer large or 4K videos from iPhone to PC? Learn 6 easy ways to copy videos via USB or wirelessly without iTunes or losing quality.
 4 Easy Quick Ways to Transfer Notes from iPhone to Computer
How to transfer notes from iPhone X/8/7/6/5/4 to computer? Read this post and get 4 simple and fast methods to transfer notes from iPhone to computer.
 Simple Steps to Transfer Text Messages (SMS) from iPhone to Computer
How to transfer or download texts messages from iPhone to PC/Mac computer? This post introduces the easiest method to transfer & backup messages from iPhone to computer.
 Leave your comment and join our discussion
Aiseesoft FoneEase is a data transfer and management tool that lets you seamlessly move, back up, and manage various data between iOS, Android, and computers without resetting your phone or relying on iTunes.
100% Secure. No Ads.

*Required field
*Please enter a valid email
