iPhones today capture stunning, high-quality photos, making them a preferred choice over traditional cameras. Over time, your photo library can grow so large that it takes up almost all the storage on your iPhone. Deleting those precious memories isn’t an option, so the best solution is to learn how to transfer photos from iPhone to computer for backup and safekeeping. But how exactly can you do this efficiently? Whether you’re using a Mac or a Windows computer, there are several ways to export photos from an iPhone to a computer. In this guide, I’ll show you easy and quick methods to move your photos safely. Keep reading to find the method that works best for you.
If you want to transfer photos from your iPhone to a computer quickly and safely, it’s a good idea to use tools compatible with both Windows and Mac. Besides, these methods enable you to transfer a large number of photos without worrying about compatibility problems. In this section, I'll walk you through how to transfer photos from an iPhone to a PC step-by-step and demonstrate the most dependable methods.
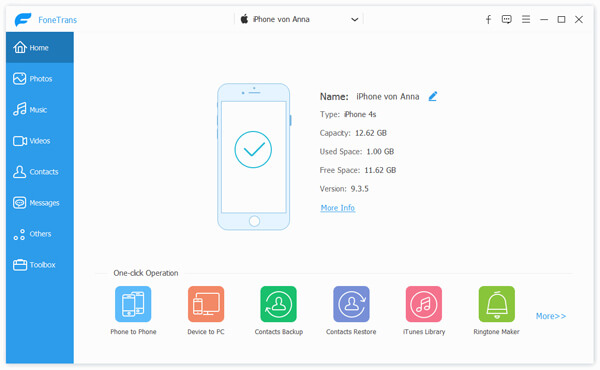
FoneTrans is by far the most effective tool for transferring photos from an iPhone to a computer since the transfer process is quick, secure, and selective. iTunes or iCloud does not offer such a feature, where you can pick only certain photos, albums, or media to transfer without deleting the current data. Additionally, it supports both Windows and Mac to make it a highly versatile method.
For me, using FoneTrans is the best way to transfer photos from an iPhone to a computer efficiently, safely, and without losing any data.

117,006 Downloads
![]() 100% Secure. No Ads.
100% Secure. No Ads.
![]() 100% Secure. No Ads.
100% Secure. No Ads.
Step-by-Step Guide to Transfer Photos:
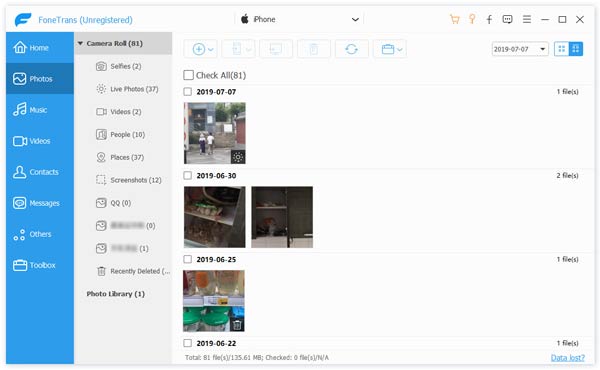
You can also transfer photos from your computer back to your iPhone by selecting the images on your PC/Mac and clicking Import to Device.
FoneTrans remains the fastest, safest, and most flexible method, which is why I always recommend it as the best way to transfer photos from iPhone to computer.
iTunes is the legitimate software developed by Apple for controlling and syncing your iPhone with your computer. You can store your photos, music, and other files through iTunes backup on either Windows or Mac, hence it is a dependable option for users of the Apple ecosystem. For Mac users, iTunes remains one of the easiest ways to learn how to transfer photos from an iPhone to a Mac computer safely, especially if you want to maintain full backups of your device.
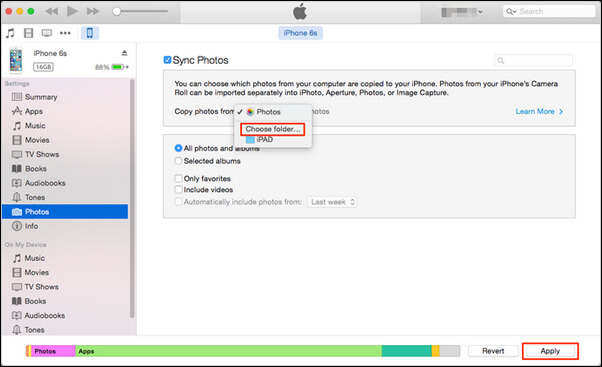
After syncing, you can view your photos in the Photos app on Mac. This method keeps your library organised and ensures your pictures are safely backed up.
For Apple customers, iTunes (formerly known as Finder) provides a dependable, built-in solution that makes moving pictures from an iPhone to a Mac simple.
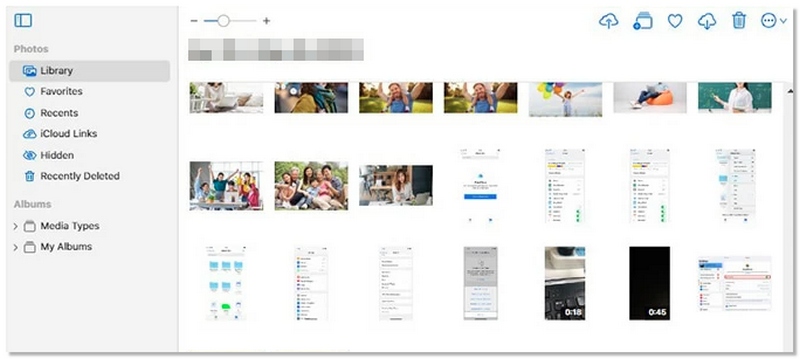
Cloud services are a convenient, wireless way to back up and transfer photos from your iPhone to your computer. Whether you use iCloud, Google Drive, or OneDrive, you can upload your pictures from your iPhone and access them later on your Windows PC or Mac without a USB cable. This method is ideal if you want a wireless solution and is perfect for transferring a large number of photos or keeping your backups in the cloud. It’s also one of the easiest ways to learn how to transfer photos from iphone to computer.
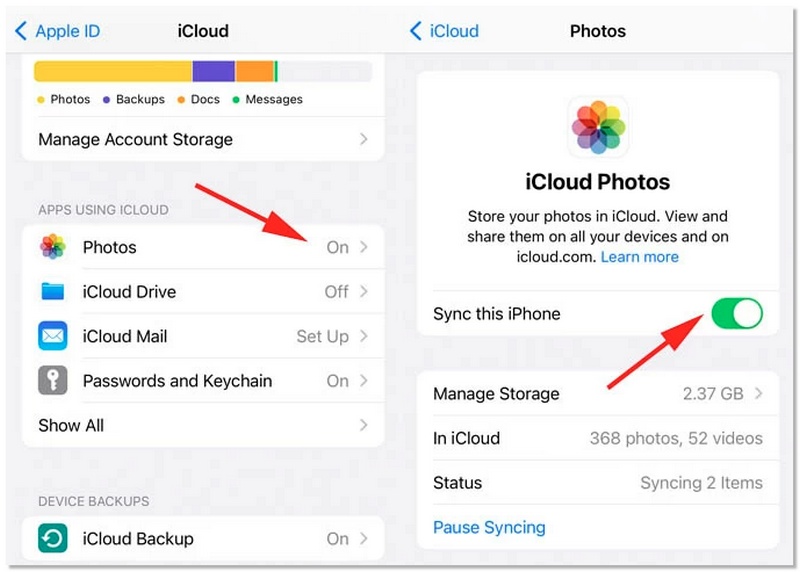
A steady internet connection and enough storage space in your cloud account are prerequisites for cloud transfers. It’s perfect for users who want a wireless backup solution without connecting cables.
One of the simplest, most adaptable, and convenient ways to move pictures from an iPhone to a computer is to use cloud services.
If your computer runs on Windows, you can easily choose from a number of built-in, straightforward methods to copy photos from your iPhone to your PC without a Mac. Such methods suit the users who want to stick to the original Windows instruments or just don't want to install third-party apps. This part will show you the quick ways to hand over your pictures using Windows Explorer, Windows Photos App, and Email for fast iPhone photos backup.
Windows Explorer is one of the fastest and most direct ways to copy photos from your iPhone to a Windows PC. It requires no additional apps and gives you complete control over which files you transfer. This method is also one of the easiest ways to transfer photos from an iPhone to a computer.
If your computer cannot detect your iPhone, check if the USB driver is disabled or try a different cable/port.
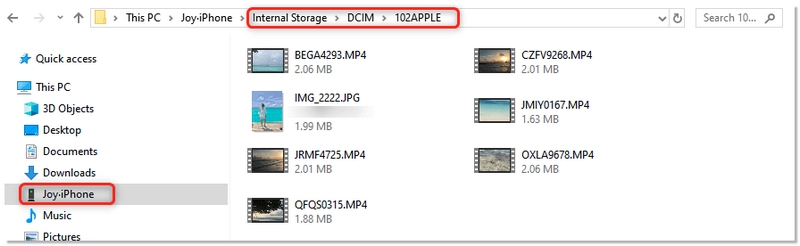
This method works on all iPhone models and is ideal if you want a simple, direct way to back up photos without installing additional software.
The Windows Photos App is an integral feature of Windows 10 or 11 that makes it easy to automatically transfer photos from your iPhone. It is very easy to use and great if you want a fast way to get pictures without manually navigating folders. This is yet another straightforward method for folks who are figuring out how to transfer photos from an iPhone to a computer via native Windows utilities.
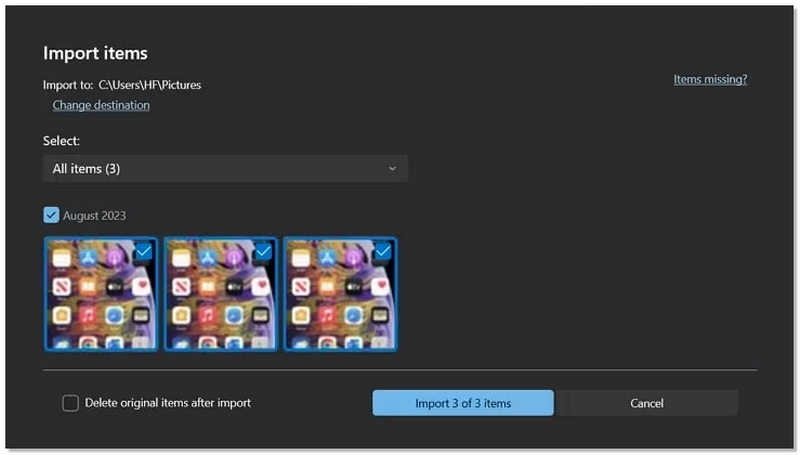
The Windows Photos App automatically sorts photos by date, making it easier to manage large photo libraries.
If you just want to transfer iPhone photos in a small amount, email is a handy and simple choice. This method is ideal for occasional backup or fast sharing because it doesn't require a USB cable or other software. But because of the restriction on the size of the attachments, it is not a good idea to use it if you want to transfer a lot of photos.
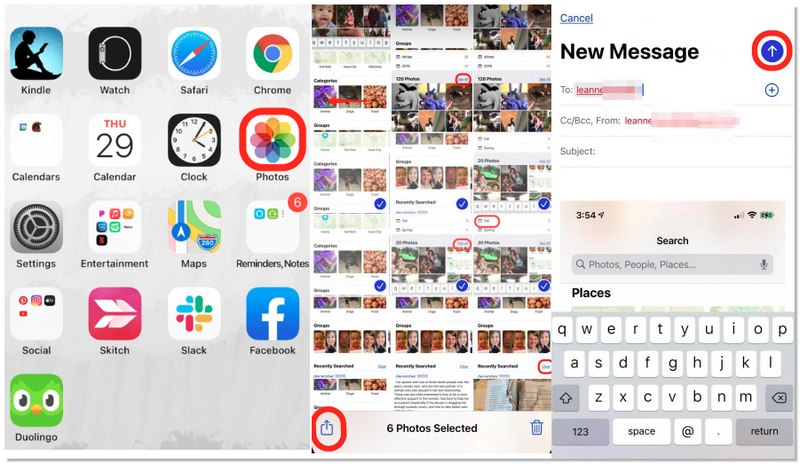
Limitations: Email services usually have attachment size limits, so you may need to send photos in multiple emails or accept reduced image quality.
Perhaps you may be interested in: How to unsync photos from iPhone with ease
If you have a Mac, Apple has included some handy tools that allow you to copy photos from your iPhone pretty easily and without any extra software. Here we will show you how to use the Mac Photos App and AirDrop to transfer your images. Both are great options if you want smooth integration within the Apple ecosystem.
The Mac Photos App is Apple’s built-in solution for importing photos from your iPhone to your Mac. It’s reliable, beginner-friendly, and perfect if you want to organise your photos directly in your Mac’s photo library without installing third-party software.

After importing, you can safely disconnect your iPhone and organize photos into albums, edit them, or back them up using Time Machine.
Before you start to transfer iPhone photos to Mac, you must make sure your iPhone runs iOS 6 or later, and your Mac runs OS X 10.5 or later to use AirDrop.

This method can only be used on a Mac. If you are using a Windows computer, you should choose other ways.
Why are some iPhone photos missing after transferring them to my computer?
Generally, this occurs when pictures kept in iCloud Photos are not completely downloaded to your iPhone prior to the transfer. Other reasons for missing files can be Live Photos, HEIC formats, or transfers being interrupted. Making sure your photos are completely synced or employing a professional transfer tool are two ways to help prevent this problem.
Why does my Windows PC fail to recognise my iPhone when transferring photos?
This issue may arise if you have old USB drivers, your iPhone is locked, the cable is defective, or you do not have Apple Mobile Device drivers installed. In most cases, the problem is solved by updating Windows, iTunes, or reconnecting the device.
Conclusion
Transferring photos from your iPhone doesn’t have to be complicated. Whether you use a cable, email, iCloud, or built-in apps, you can easily transfer photos from iPhone to PC computer. The best method depends on your situation—bulk transfers, quick single-photo transfers, or Mac vs. Windows options. Once you pick the proper process, backing up and organising your photos becomes stress-free and straightforward.
![]() 100% Secure. No Ads.
100% Secure. No Ads.
![]() 100% Secure. No Ads.
100% Secure. No Ads.
 How to Transfer Photos from iPhone to iPad
How to transfer pictures from iPhone to iPad? The article would introduce you 3 easiest ways to transfer iPhone photos to iPad directly.
 How to Transfer Contacts from iPhone to Computer
If you need to transfer contacts from iPhone to PC, this article will help you a lot. You will find the best solution to copy contacts from iPhone and save on your PC.
 How to Transfer Text Messages from iPhone to Computer
How to transfer or download texts messages from iPhone to PC/Mac computer? This post introduces the easiest method to transfer & backup messages from iPhone to computer.
Transfer from iPhone to Computer
Transfer Photos from iPhone to Computer Transfer Music from iPhone to Computer Transfer Contacts from iPhone to Computer transfer videos from iPhone to your PC Transfer Messages from iPhone to Computer Transfer Voice Memos from iPhone to Computer Transfer Voicemail from iPhone to Computer Transfer Notes from iPhone to Computer Transfer Data from iPhone to Computer
Transfer photos, music, contacts and more between iPhone and computer.
![]() 100% Secure. No Ads.
100% Secure. No Ads.
![]() 100% Secure. No Ads.
100% Secure. No Ads.
*Required field
*Please enter a valid email
