Summary: Want to know how to transfer notes from iPhone to computer? This post gives you 4 simple methods to transfer notes from iPhone to PC/Mac with iTunes, iCloud, Email or iOS Transfer tool.

How to transfer notes from iPhone to computer
Notes app is a great and popular thing among iPhone users. No need for a pen or paper, you can now easily open Notes on your iPhone to set reminders for a shopping list, business plan or quickly write down notes of something that just comes out of your mind. It is very convenient for you.
However, in the meantime, there are also some risks when you store important notes on your iPhone, since you might lose them due to many unexpected reasons, such as iPhone got stolen or lost, or broken down during iOS upgrade, etc. In order to better protect your notes, we strongly suggest you to transfer notes from iPhone to computer for backup. How can you do that? Read this post and you'll learn 4 easy and quick methods on how to transfer notes from iPhone to computer.
When it comes to transferring notes from iPhone to PC or Mac, an iOS Transfer tool would be the best option. Here you can use FoneLab, a perfect iPhone management assistant. As a professional iPhone transfer program, FoneLab helps you easily transfer notes from iPhone to computer as backup. It also comes with more features as follows:
1. Scan and manage more than 20 + types of iPhone data, including Notes, Messages, Contacts, Photos, Voicemail, etc.
2. Preview and select multiple or all notes for transfer.
3. Recover deleted notes on your iPhone.
4. Compatible with all iOS devices, including iPhone X/8/7 (Plus)/6s (Plus)/6 (Plus)/5s/5c/5/4, running iOS 11/10/9/8/7.
Now free download the program on your PC or Mac, and follow the steps below to transfer iPhone notes to computer.
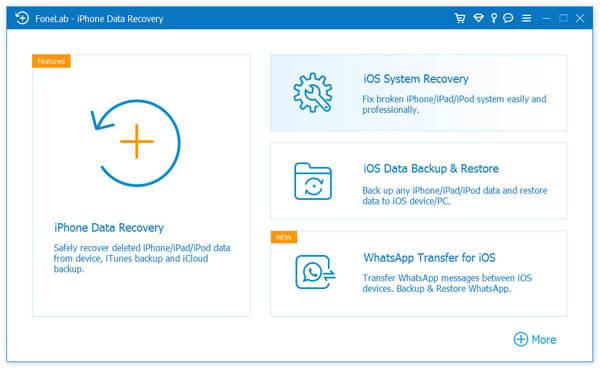
Step 1Open this iOS transfer tool on your computer. Choose "iPhone Data Recovery" feature on the main interface, then choose "Recover from iOS Device" mode from the left panel.
How to transfer notes from iPhone to computer - Step 1
Step 2Connect your iPhone to computer with a USB cable. Wait until your iPhone is detected automatically.

How to sync notes from iPhone to computer - Step 2
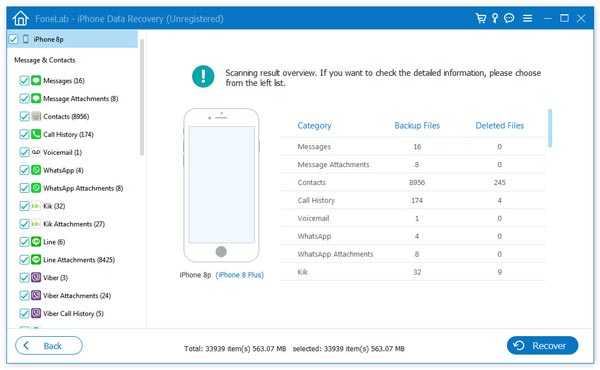
Step 3Click "Start Scan" to analyze all types of data on your iPhone. After scanning, you can see various files on list in categories on the left control, including Notes, Reminders, Voice Memos, Messages, Contacts, Media, etc.
How to transfer notes from iPhone to computer - Step 3
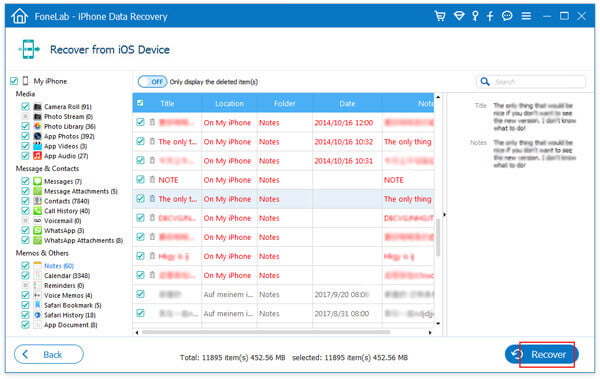
Step 4Click Notes option and all notes on iPhone will display in the preview window, along with detail info like title, location, folder, data, notes, etc. Choose the notes you need and then click on "Recover" button to export notes from iPhone to computer.
How to transfer notes from iPhone X/8/7/6/5 to computer - Step 4
Now your notes have been saved on your computer successfully. Even if your iPhone notes got lost, you can quickly restore notes from computer to iPhone.
Alternatively, iCloud provides you a fast way to transfer notes from iPhone X/8/7/6s/6/5s/5c/5 to computer. You can follow the step below.
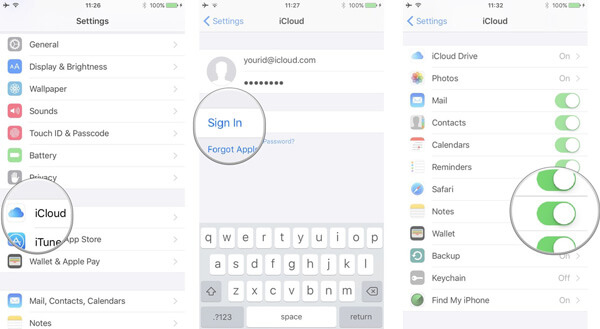
Step 1Go to Settings on your iPhone. Sign in to iCloud with your Apple ID and then turn on Notes. Your notes will be uploaded to iCloud server automatically.
How to transfer notes from iPhone to computer with iCloud - Step 1
Step 2To get notes on your computer, visit icloud.com in your browser. Sign in with the same Apple ID, copy notes and then save them into a document on your computer.
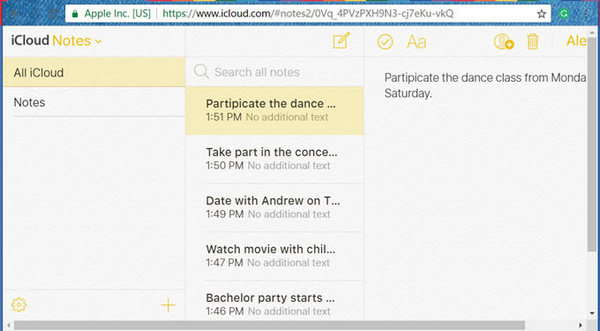
How to transfer notes from iPhone to computer with iCloud - Step 2
Step 3If you have many notes, you can also try to install iCloud on your computer and sign with your Apple ID, then you can view all your notes on your computer.
Apart from notes, you can also use iCloud to sync photos, contacts, messages from iPhone to computer. But some people may worry about their privacy issue. Besides, it requires that your phone should have access to the internet.
If you only have some important notes on iPhone that you need to transfer to the computer, Email would be a nice choice. The whole process is very simple, and you don't need any extra programs.
Step 1Open Notes application on your iPhone, select the note you want to transfer to computer, and then hit the Share icon at the top-right corner.
Step 2Choose Email, type email address and more info if you need, then press Send.
Step 3Access this email on your computer and download the notes.
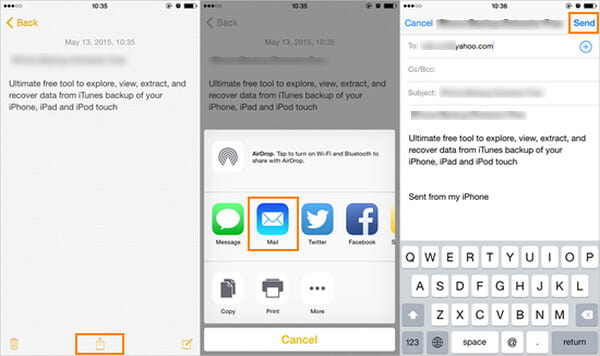
How to transfer notes from iPhone to computer via Email
Most people prefer a way to transfer notes from iPhone to computer without iTunes, but it can be actually quite effective to use iTunes, especially if you are an Outlook user. Here is how to transfer notes from iPhone to Outlook on computer.
Step 1Open the latest iTunes on your computer, connect your iPhone to computer via a USB cable, wait until your iPhone was recognized in iTunes automatically.
Step 2Choose Info in the Summary panel, then check Sync notes with and select Outlook in the drop-down menu.
Step 3Click Sync to start transferring iPhone notes to computer. When it is finished, you will find your notes are saved in the "Reminders" folder in your Outlook account.
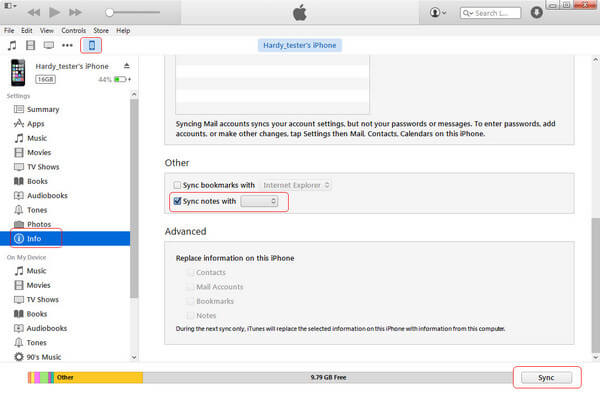
How to sync notes from iPhone to Outlook using iTunes
In this article, we mainly gave your 4 easy and effective methods on how to transfer notes from iPhone to computer. Still have more questions? Feel free to leave your comments down below.

June 05, 2018 16:40 / Updated by Iris Walker to Transfer iOS Data
 How to Sync iPhone to iPad or Computer/Mac
How to sync contacts/messages/notes/pictures from iPhone to computer/Mac/iPad? Read this article and learn how to sync iPhone.
 How to Restore Deleted Contacts on Android or iPhone
This article shows you how to restore iPhone contacts from iCloud or restore Android contacts from Gmail or Google.
 How to Transfer Photos from iPhone to PC (Windows 10/8/7 Included)
How to transfer photos from iPhone to Windows PC? This article will show you best ways on how to from iPhone X/8/7/6/5 to PC (Windows 10/8/7 included) with ease.
