Best For: Professionals and general users who need a reliable, all-in-one solution to record high-quality screen and audio on their Mac. It is ideal for recording streaming music, webinars, online meetings, and more.
Aiseesoft Screen Recorder
![]() 100% Secure. No Ads.
100% Secure. No Ads.
![]() 100% Secure. No Ads.
100% Secure. No Ads.
Contents
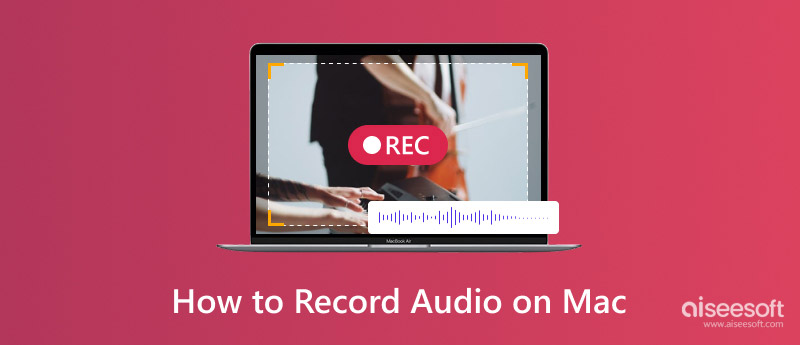
Recording audio on a Mac is a surprisingly common task. macOS is renowned for its robust creative capabilities, offering reliable built-in utilities to create both screen and audio recordings. It also supports third-party applications designed to capture voice, music, or internal audio.
Whether you are capturing an important meeting, producing a podcast, or simply leaving a voice note for yourself, knowing how to record audio on a Mac is an essential skill.
Considering that Apple restricts direct internal audio capture to prevent copyright infringement, you have to seek out the right tools to bypass this limitation legally. This guide shares the seven most effective methods for capturing your Mac audio. You can compare them and select your preferred recorder to start the sound recording.
To help you quickly identify the best recorder for your specific needs, we have evaluated the top seven tools based on their ability to capture internal audio on Mac, ease of use, their editing capabilities, and pricing.
| Mac Audio Recorder | Internal Audio Support | Ease of Use | Editing Features | Price |
| Aiseesoft Screen Recorder | Yes | Very Easy | Basic Trimming & Clipping | Paid (Free Trial) Starts at $12.50 |
| QuickTime Player | No (Microphone Only) | Easy | Basic Trimming | Free |
| GarageBand | No | Moderate | Extensive Advanced Multi-Track |
Free |
| Audacity | No | Moderate | Advanced Manipulation | Free |
| Audio Hijack | Yes | Moderate | Basic | Paid Starts at $69.00 |
| BlackHole | Yes (via Routing) | Complex | None | Free |
| Voice Memos | No (Microphone Only) | Very Easy | Basic Trimming | Free |
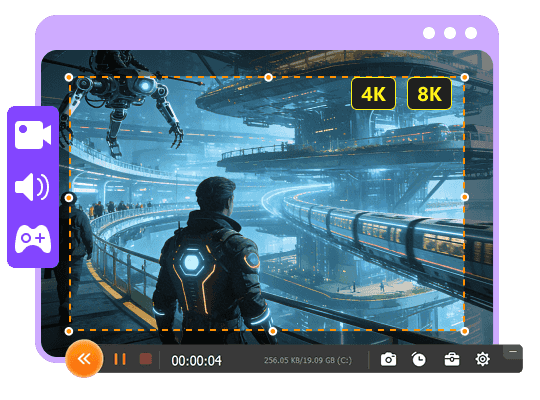
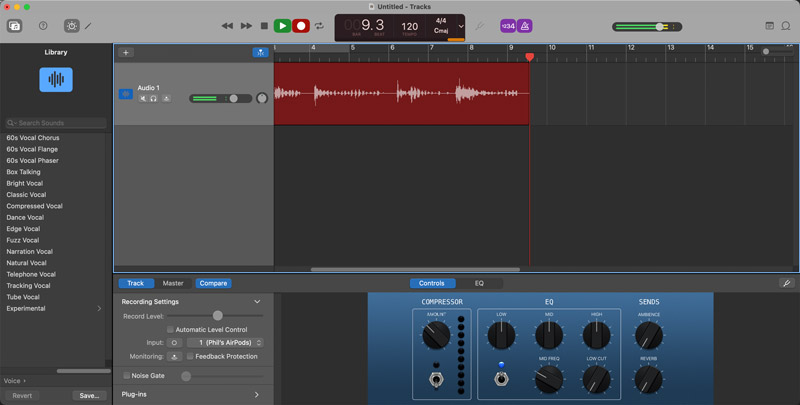
Aiseesoft Screen Recorder is a powerful screen and sound recording application designed to capture any activity on your computer, supporting both macOS and Windows. It offers several recorders for different image and sound recording needs. This all-in-one solution is particularly popular for creating video tutorials, capturing webcam, recording gameplay, and saving streaming audio. As an audio recorder for Mac, it can record the microphone voice, the speaker’s sound, and internal system audio clearly. The software stands out as the best overall choice.
Downloads
![]() 100% Secure. No Ads.
100% Secure. No Ads.
![]() 100% Secure. No Ads.
100% Secure. No Ads.
Best For: Professionals and general users who need a reliable, all-in-one solution to record high-quality screen and audio on their Mac. It is ideal for recording streaming music, webinars, online meetings, and more.
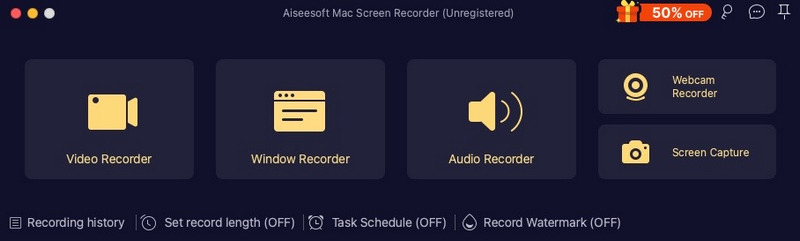
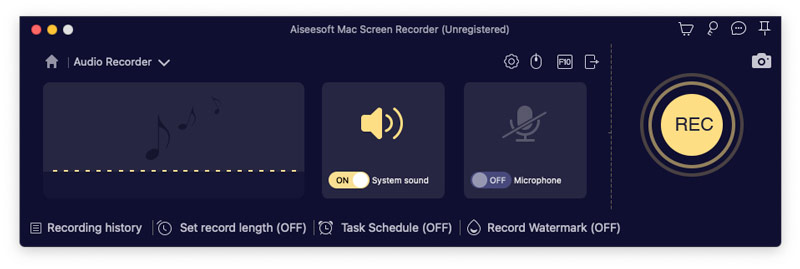
If you want to capture your voice, you should enable the Microphone. However, if you only want to record internal audio from a movie, game, or a web browser, only turn System Sound ON.

In addition to recording audio on a Mac, it can also record Mac screen videos with webcam windows. Therefore, try it now!
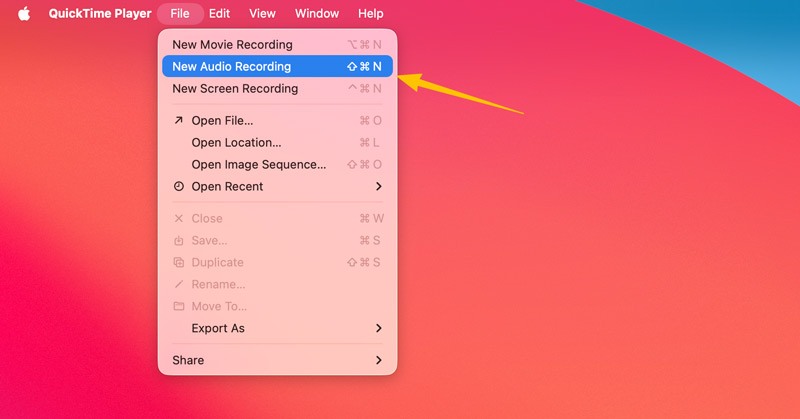
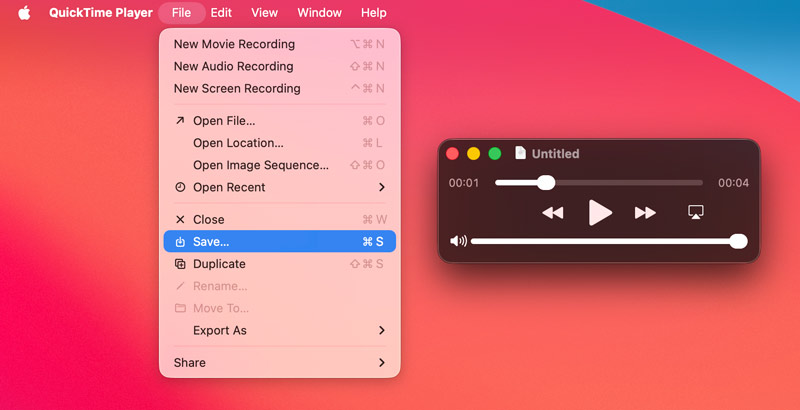
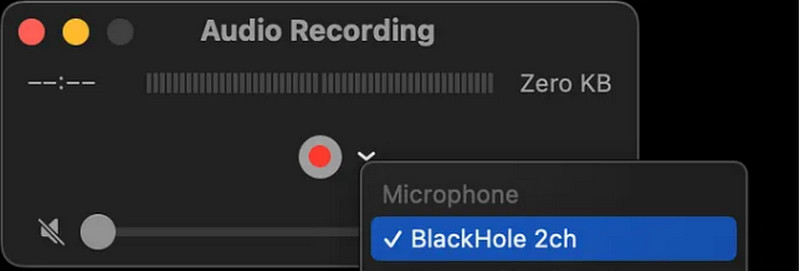
QuickTime Player is the default player on macOS, but it also offers a basic screen and audio recording feature. The software is preinstalled on every Mac for quick video/audio playback needs. It can be the most straightforward way to record audio (Internal Microphone) on a Mac smoothly.
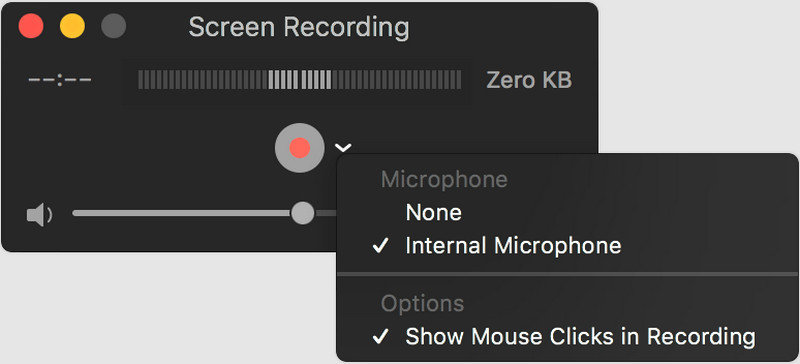
Best For: Casual users who want to quickly capture voice notes, record a conversation, and make a simple audio file using their built-in Mac microphone.
GarageBand is a free, professional-grade digital audio workstation developed by Apple. It is widely used by musicians to produce commercial tracks. This application is specially designed for music creation. It supports multitrack recording and allows you to capture multiple audio sources simultaneously. GarageBand is an excellent tool for recording voice-overs, podcasts, and other audio tracks on a Mac.
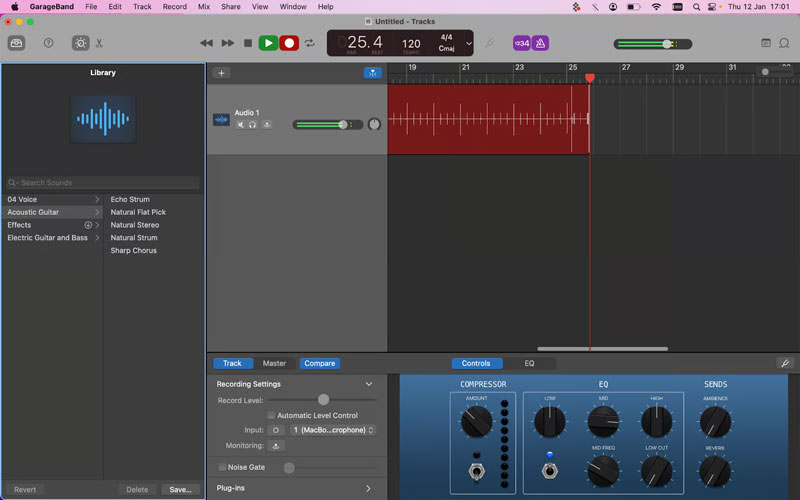
Best For: Musicians who often need to create multi-track audio projects with high-quality mixing, equalization, effects, compression, and advanced editing features.
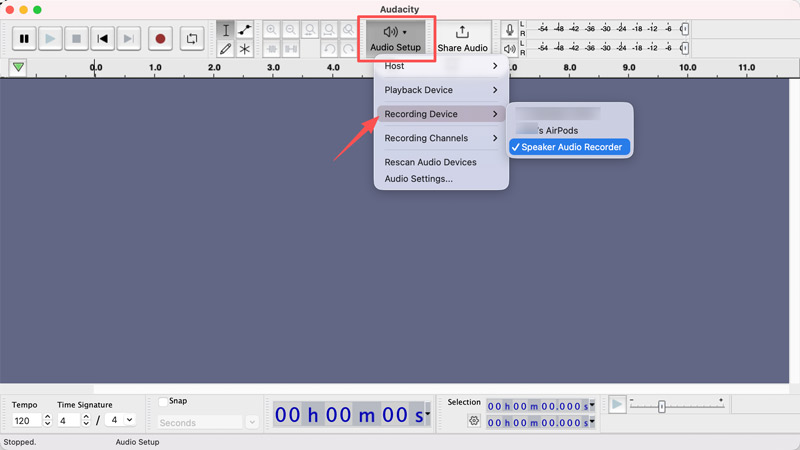
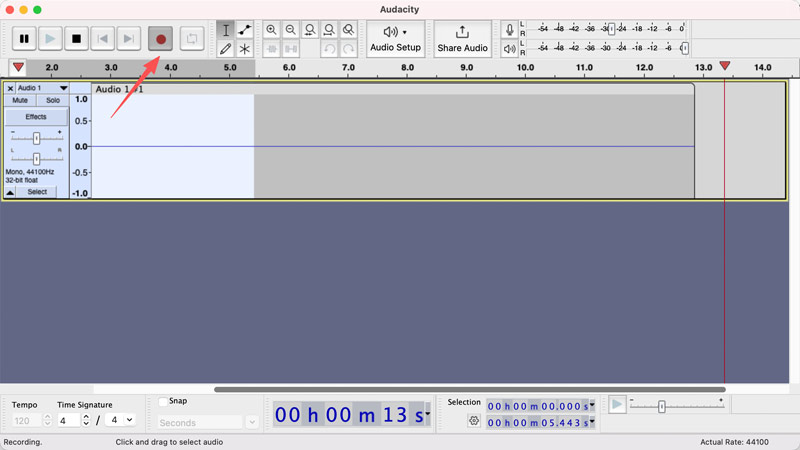
Audacity is one of the most popular audio editing and recording tools in the audio community. This free, open-source software supports numerous file formats and provides all the necessary tools for destructive audio editing, formatting, noise reduction, and more.
Best For: Audio creators and budget-conscious users who want a completely free tool that offers audio recording and editing capabilities.
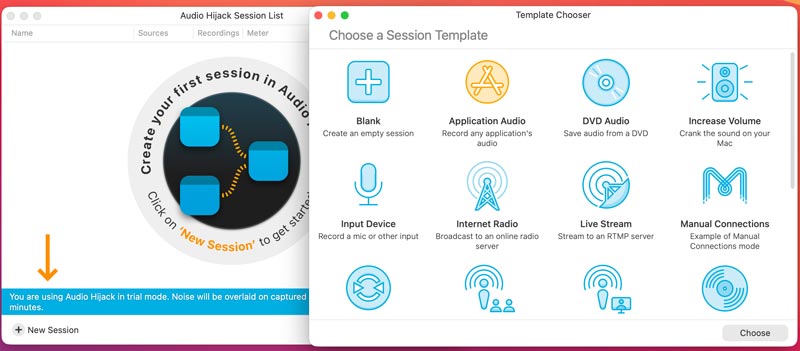
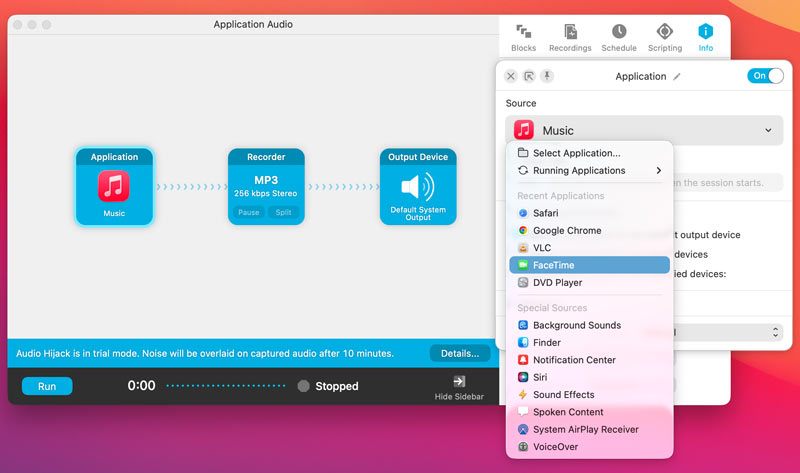
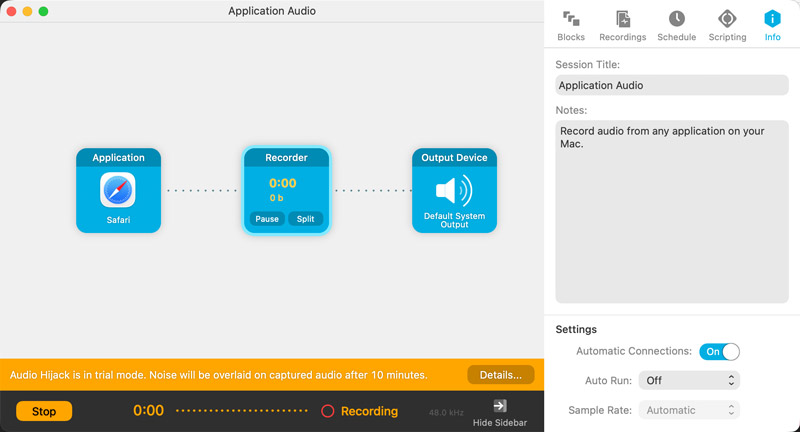
Audio Hijack is a professional-grade audio recorder developed by Rogue Amoeba. It is specially designed for audio recording on macOS. Unlike other recorders, Audio Hijack allows you to capture sound from individual apps, different hardware inputs, or even a combination of sources. It enables you to use its System Audio source to record internal audio on your Mac.
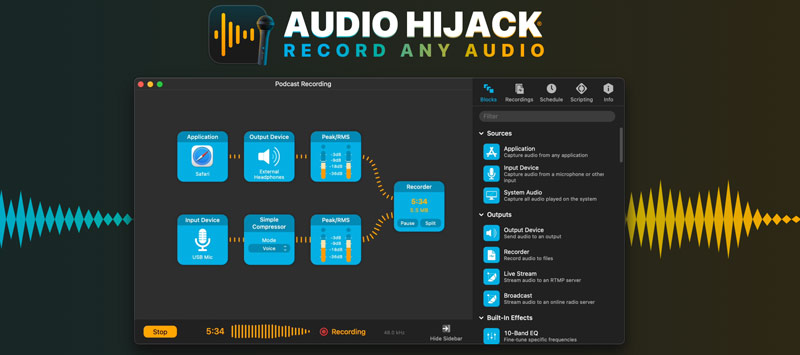
Best For: Professional podcasters and streamers who often need to capture sound from certain applications like Safari, FaceTime, and others.
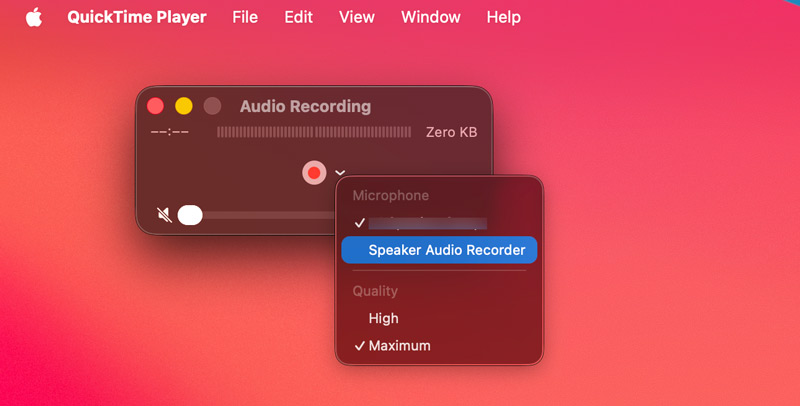
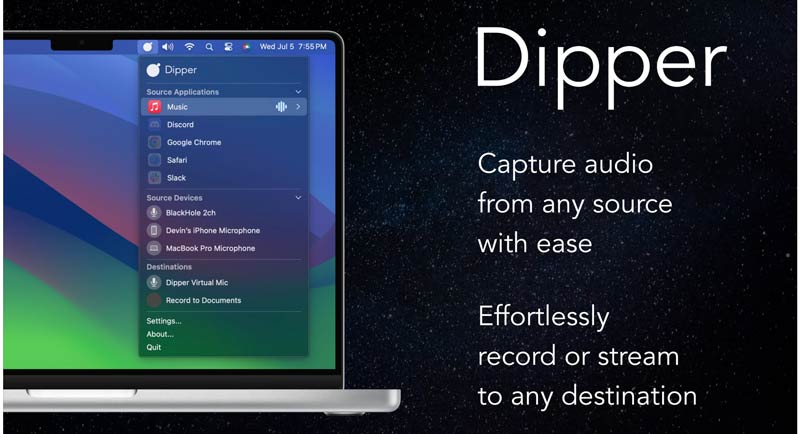
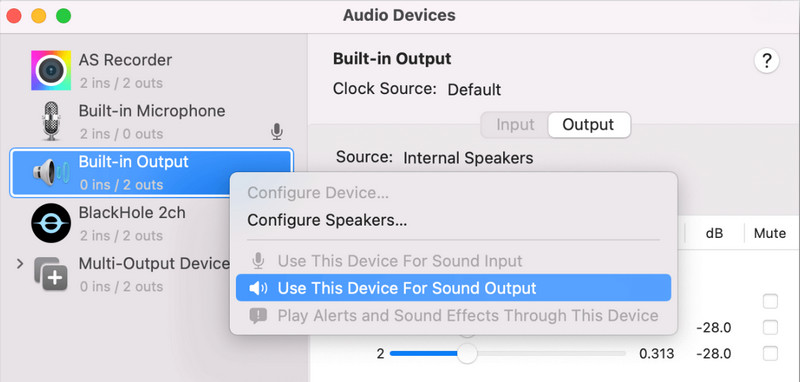
BlackHole is not a dedicated audio recorder for Mac. Instead, it is a free, open-source virtual audio driver that allows users to route audio between applications. It works as a digital audio cable inside your Mac and allows apps to pass audio. It is the essential tool that enables other recording tools like QuickTime or GarageBand to capture system audio on a Mac. You can also directly download its Dipper to record audio on a Mac.
Best For: Tech-savvy users who want a free, reliable way to record internal system audio on a Mac using QuickTime or GarageBand.
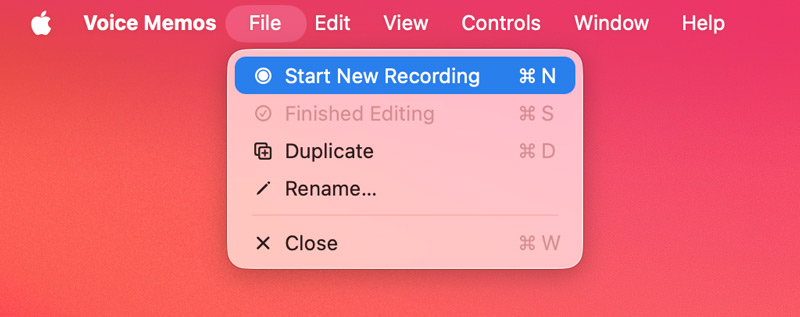
Voice Memos is the default voice recorder app in iOS and iPadOS. It is imported directly from the iPhone and iPad ecosystem in recent macOS updates. It offers a convenient way to capture your voice or background sound. This lightweight audio recording tool is designed purely for capturing voice.
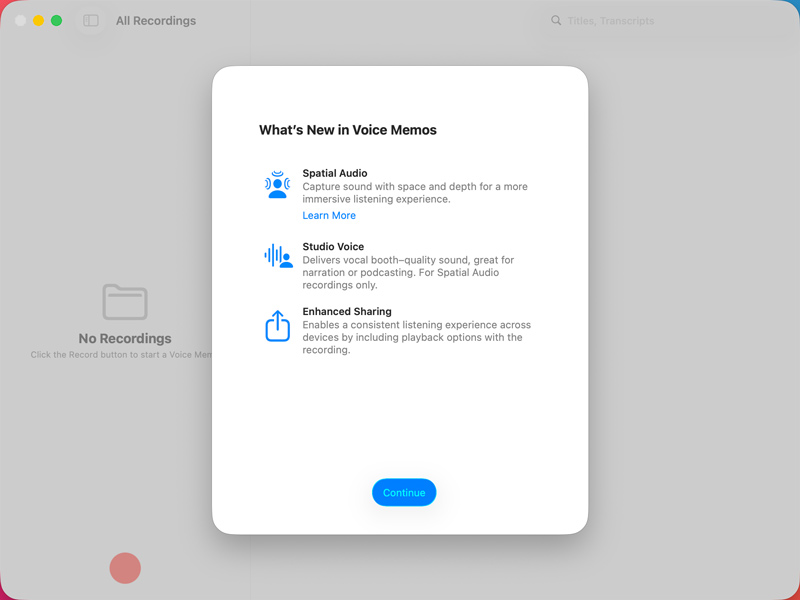
Best For: Users who want a free, quick way to record voices or leave quick notes.
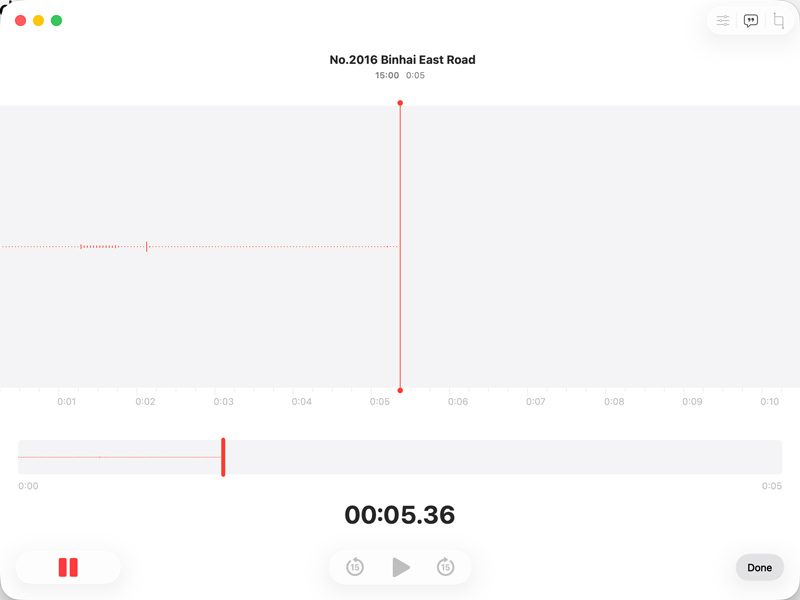
The recorded audio file will be automatically saved and synced to your iCloud account. You can click and drag the target memo from the sidebar directly onto your desktop or into a folder for local saving.
Question 1. What is the best free audio recorder for Mac?
For quick and basic voice recordings, QuickTime Player and Voice Memos are the best options for Mac. For multi-track audio podcasting and music production, GarageBand is the best free tool. Audacity is the best open-source audio recording software that offers advanced editing functions.
Question 2. Why can’t my Mac record internal audio?
As mentioned, Apple restricts the system audio recording ability to prevent users from capturing copyrighted content from Apple Music, Spotify, or audio from online streams. To bypass this, you must utilize a third-party audio recorder like Aiseesoft Screen Recorder or Audio Hijack.
Question 3. Can Audacity record internal audio on a Mac?
No. Audacity cannot directly record internal audio on a Mac. It needs to work with a third-party virtual audio driver like BlackHole or dedicated plugins to capture the system sound.
Conclusion
After reading this guide, you can easily find a preferred way to record audio on a Mac. The best solution depends entirely on your specific goal. If you need a reliable, all-in-one solution that can capture both microphone sound and internal audio, Aiseesoft Screen Recorder is the top choice. If you need to record a short podcast or music, QuickTime or GarageBand is a good option. You can compare the strengths of each of these seven tools and then make your decision.
 Adobe Screen Recorder - Adobe Screen Recorder Review and Alternative
Does Adobe have a screen recorder? How to use Adobe screen recorder to capture computer screen? This post will give you a detailed review of Adobe Captivate. Moreover, we will introduce you with the best alternative to the Adobe screen capture software.
 2026 Guide to Isolate or Remove Vocals from Video/Song (Lossless Quality)
Want to isolate vocals or remove them to make a karaoke track? This guide shows you how to use professional or AI tools to get crystal-clear acapellas and instrumentals.
 Step-by-step Tutorial to Completely Delete GarageBand from Mac
Yes, you can uninstall and remove GarageBand from your Mac if you do not use this app at all. Here are a comprehensive to free up space by deleting the app along with relative music libraries.

Aiseesoft Screen Recorder is the best screen recording software to capture any activity like online videos, webcam calls, game on Windows/Mac.
![]() 100% Secure. No Ads.
100% Secure. No Ads.
![]() 100% Secure. No Ads.
100% Secure. No Ads.
*Required field
*Please enter a valid email
