Best for:Users who want a built-in recording solution on Mac.
Worst for:Be complex and technical when configuring.
Best 8K Screen Recorder for PC
![]() 100% Secure. No Ads.
100% Secure. No Ads.
![]() 100% Secure. No Ads.
100% Secure. No Ads.
Whether for content creation, recording an online lecture as a student, or recording a business meeting as a professional, recording internal audio on Mac is an important skill to know. Unlike Windows, macOS does not, by default, have "Stereo Mix" because it prevents system sound capture due to privacy and copyright protections.
This is, however, very easy to do in 2026 once you have the right tools at your disposal, from built-in utilities and open-source software all the way to professional recorders. We shall go through 7 effective methods of recording internal audio on Mac with clear quality, including the official, third-party, online, and desktop ways. Plus, they support the latest macOS Sequoia and Sequoia (Apple Silicon). Let’s dive in!
| Latest Mac Version | Mic/System Audio | Editing Features | Ease of Use | Pricing Plans | Cons | |
| QuickTime + BlackHole | √ | Both (requires MIDI setup) | Basic trimming only | Complex (Technical setup) | Free | Requires installing 3rd party drivers; complex setup. |
| Aiseesoft Screen Recorder | √ | Both (Simultaneous) | Advanced (Trim, Merge, Metadata) | Easy (One-click) | Paid (Free trial) | Requires license for full features. |
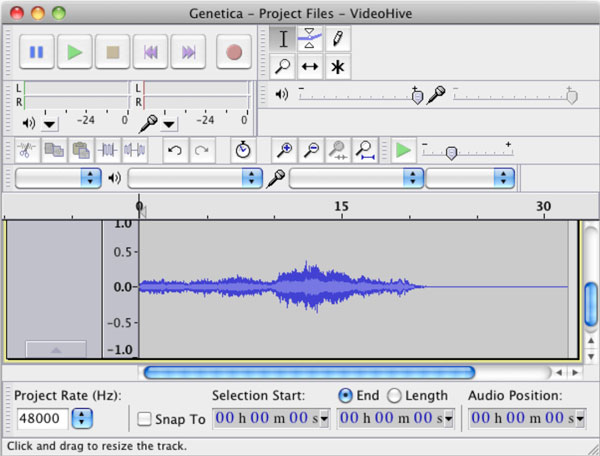
| Audacity | √(drive needed) | Both (Multi-track) | Professional Audio Suite | Moderate | Free | Steep learning curve; outdated interface. |
| OBS Studio | √ | Both (Advanced Mixing) | None | Complex UI | Free | Resource-heavy; overkill for simple audio recording. |
| Apowersoft Online Audio Recorder | √(setup needed) | Both | Basic | Easy | Free | Depends on internet stability; privacy concerns. |
| Recordit | Limited | System Audio (Short clips) | None | Easy | Paid (Free trial) | Focused on GIFs; limited recording duration/quality. |
| MP3 Audio Recorder | √ | System | Basic | Easy | Paid (Free trial) | Limited to specific formats; lacks advanced tools. |
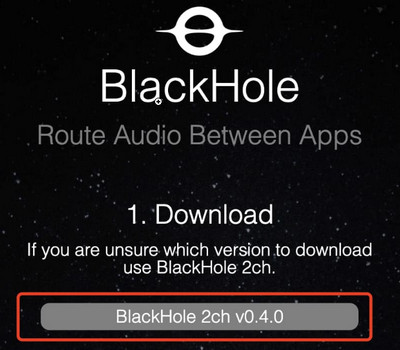
You probably know that QuickTime Player can record your Mac's screen and microphone for free, but if you want to capture internal system sound, you are going to need a plugin. Soundflower was the old favorite, but it struggles for compatibility on M1 and M2 Macs. Today, BlackHole is the superior, high-performance replacement for capturing internal audio on macOS Sequoia and Apple Silicon.
BlackHole is a modern, open-source virtual audio driver for macOS. It acts as a "bridge" between different applications on your computer. Since macOS doesn't allow one app to "listen" to the output of another for security reasons, BlackHole creates a virtual input/output path. You set your Mac's sound output to BlackHole, and then set your recording software (like QuickTime or Audacity) to use BlackHole as the microphone. This "routes" the internal audio directly into your recording without any loss in quality.
Best for:Users who want a built-in recording solution on Mac.
Worst for:Be complex and technical when configuring.
Follow the steps below to record audio on a Mac with QuickTime:
Visit the BlackHole official website or GitHub page, download and install BlackHole 2ch (the 2-channel version is sufficient for recording regular audio).
After installing the driver, your Mac still cannot directly "internal recording" because the system can only output sound to one device (headphones or speakers) by default. So, we need to create a virtual pathway.
1. Press Command + Space bar to search for and open Audio MIDI Setup.
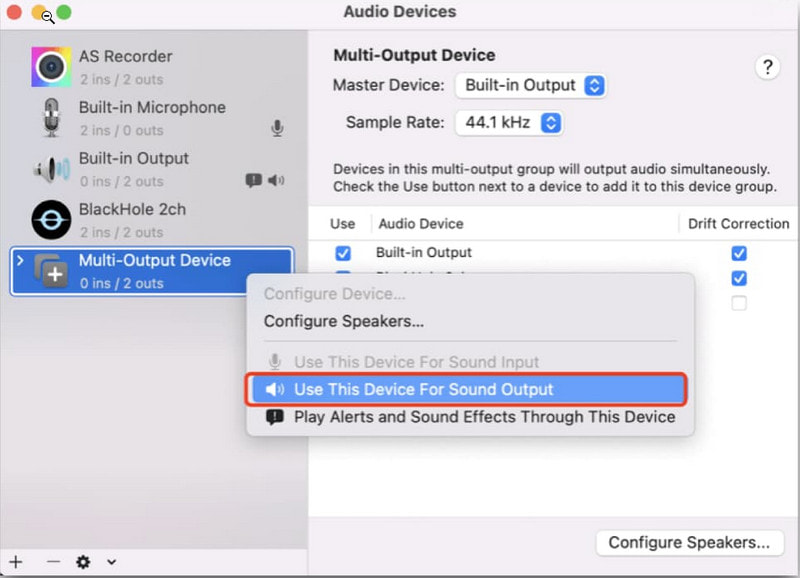
2. Click on the + sign in the bottom-left corner and select Create Multi-Output Device.
3. In the list on the right, check BlackHole 2ch and Built-in Output (speakers).
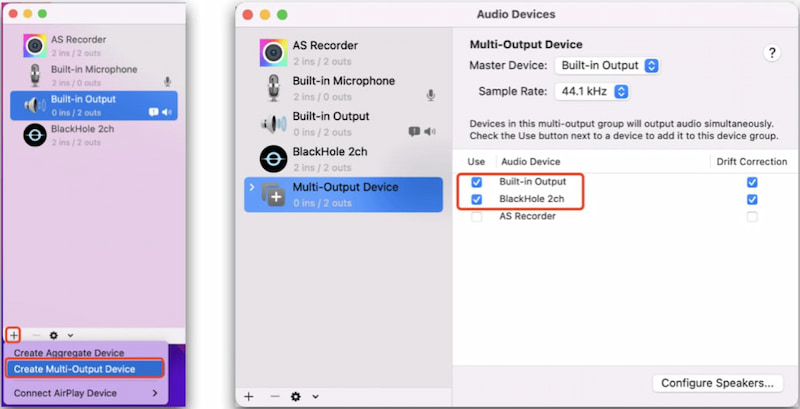
4. Right-click on the newly created Multi-Output Device on the left list and select Use This Device For Sound Output. At this point, adjusting the volume control button may not work, which is a normal phenomenon.
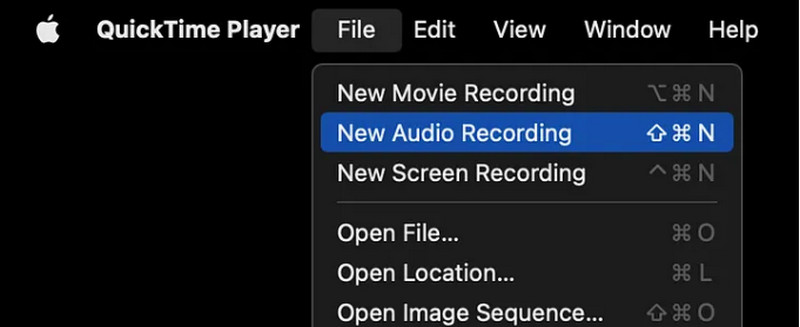
1. Open QuickTime Player. Select File > New Screen Recording or New Audio Recording from the top menu bar.
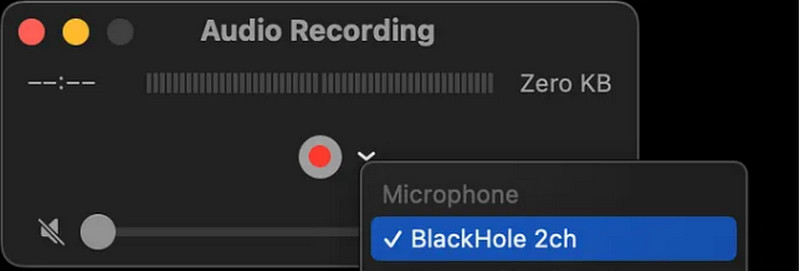
2. Set the microphone to BlackHole 2ch in the drop-down arrow (or Options) next to the recording button.
3. Finally, you can click to record system audio on your Mac computer.
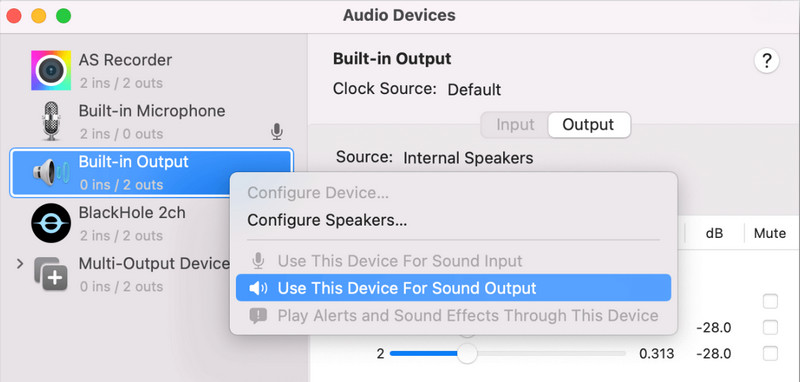
Tips: After recording, if you find that you cannot adjust the volume through keyboard keys, it is because the system is still using a Multi-Output Device. If you need to restore it, go to Audio MIDI Setup again, right-click on Built-in Output and select Use This Device For Sound Output.
This method is free and official, but the process of setting is much too complicated. Want a 1-click solution? Skip the complex setup by using the professional tool in Method 2. Let’s go on.
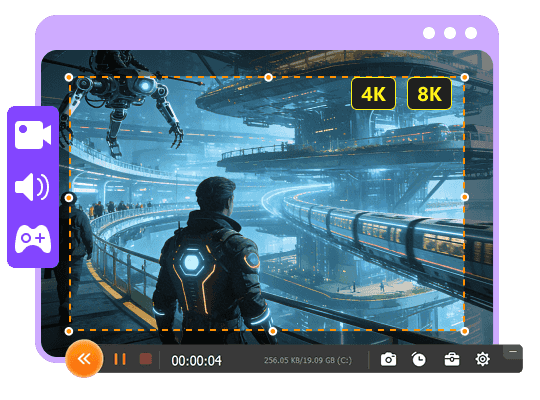
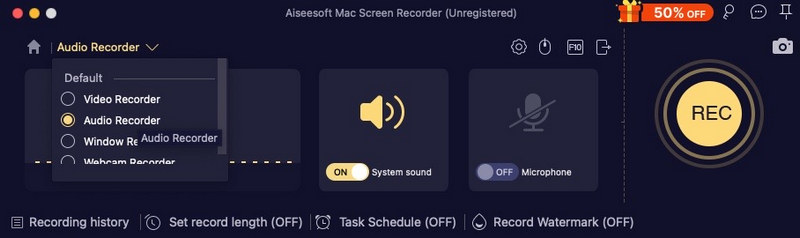
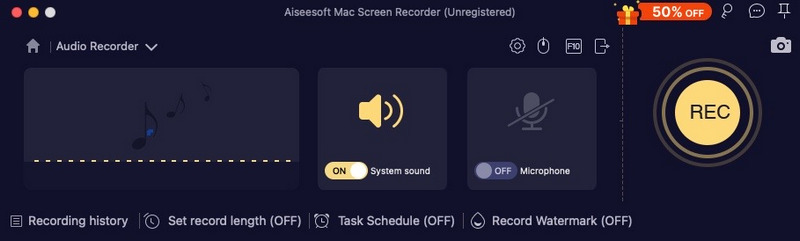
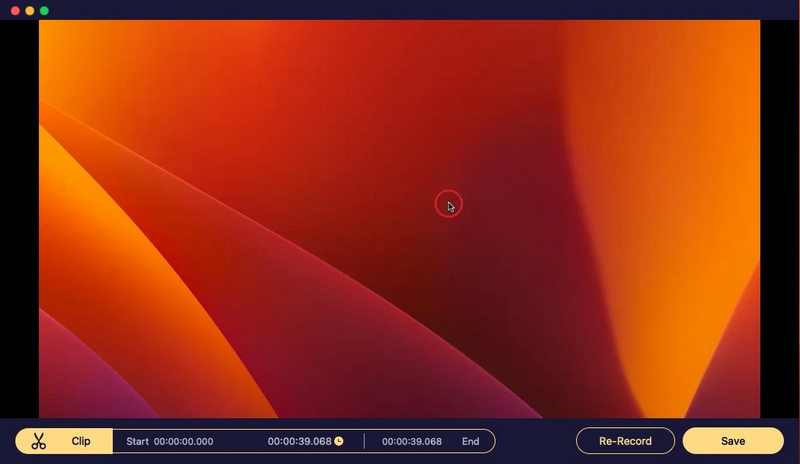
If you want to screen record with Mac computer sound and microphone voice, Aiseesoft Screen Recorder can be your first choice. You can record any sound from your computer without losing quality. The internal and external audio recording triggers are easy to use. No matter you want to record screen audio on Mac only, or record both computer and microphone sound, you can get satisfying results here.
Downloads
![]() 100% Secure. No Ads.
100% Secure. No Ads.
![]() 100% Secure. No Ads.
100% Secure. No Ads.

Audacity for Mac is also a free Mac audio recorder you can use. Here you can digitalize audio recordings from other media platforms, as well as an external microphone or mixer. Moreover, you can edit audio with Audacity by trimming, merging, etc. To start with, you also need to install soundflower to record system audio on Mac with Audacity.
Best for: Users who want to record audio only.
Worst for: Users who are reluctant to download extra software.
Follow the steps below to record sound on a Mac with Audacity:
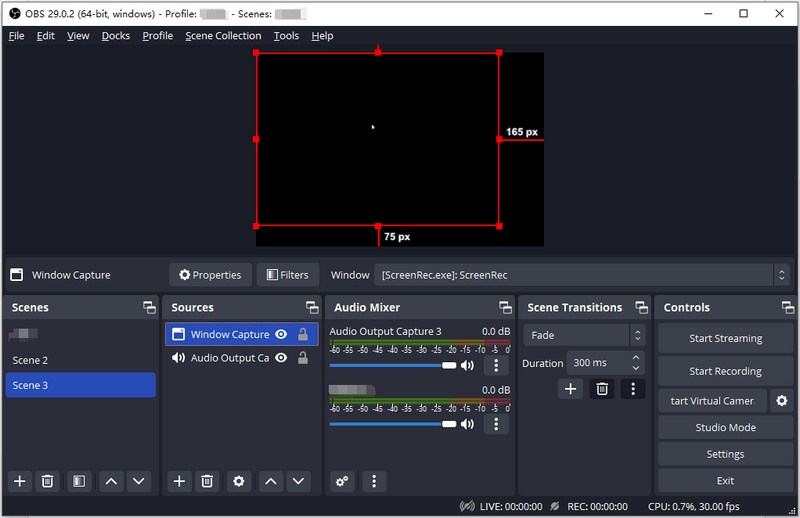
As a free and open-source software, OBS is available for both Mac and Windows users and is very popular among the recording solutions. It supports recording audio and video from almost any internal or external source, making it suitable for capturing system sounds and internal audio. However, if you want to record audio only, OBS might fail you. It doesn't support audio-only recording, and you must record video as well, and there's no option to disable the screen capture feature.
Best for: Users who are seeking for an economical option.
Worst for: Users who want to record audio only.
Follow the steps below to record sound on a Mac using OBS Studio:
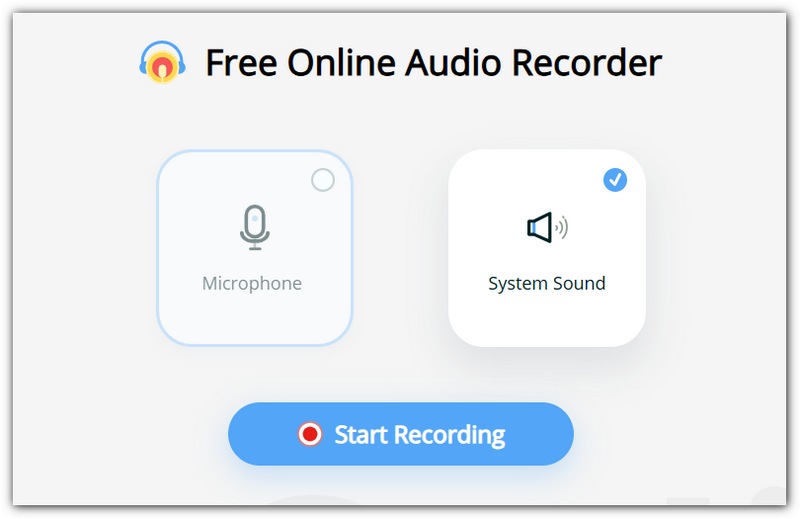
For Mac users seeking audio recording without downloads or installations, online audio recording tools offer a convenient alternative. Apowersoft Online Audio Recorder is a prime example, providing a user-friendly experience for recording system sounds, browser audio, or microphone input, all from the comfort of a web browser. But this online tool only allows you to record up to 1 hour, and you still need to download its desktop version if you want to record more. And as a simple option, it also offers a few features, which make it a bad option for advanced audio recording.
Best for: Record online easily without downloading third-party software.
Worst for: Record audio only or record more than 1 hour of audio.
Here are the steps to record system audio on Mac using Apowersoft Online Audio Recorder:
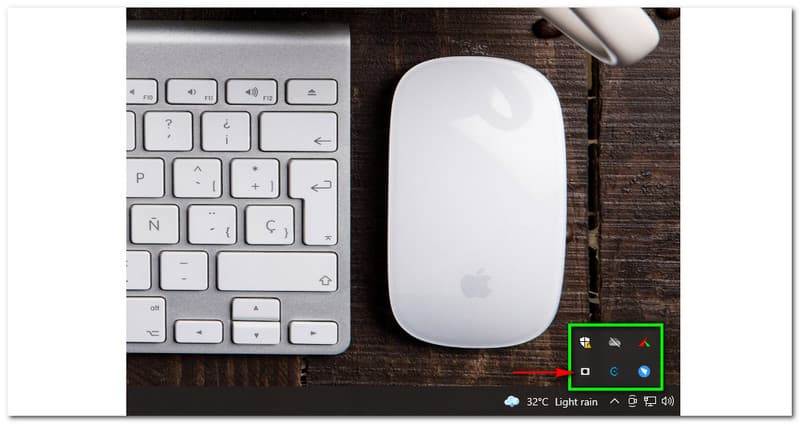
Recordit also offers a straightforward way to capture system audio on your Mac without needing to dive into complicated settings or installation guides. It’s lightweight, fast, and gets you recording without any hassle. You can use it to record internal audio like app sounds, system alerts, streaming audio, or Zoom calls. This screen recorder for Mac with internal audio can save recordings in commonly used formats for easy sharing or editing.
Best for: Short recordings on a low-end Mac computer.
Worst for: Record audio only.
Here are the steps to record internal audio on a Mac using Recordit:
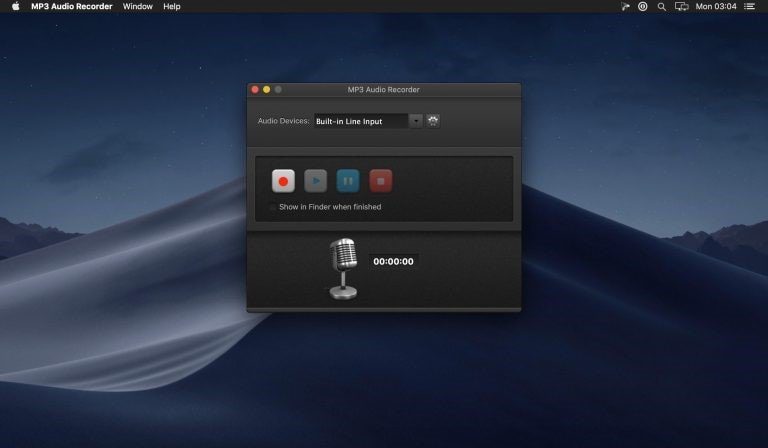
MP3 audio recorder is an internal audio recorder on Mac that captures audio and saves it in the MP3 format, which is a common and widely used audio file format. These recorders can be used to capture sound from microphones, internal sound sources like your computer's audio, or even streaming audio from the internet. They are often used for recording voice memos, music, interviews, or any other audio that needs to be saved and shared in a digital format.
Best for: Record system audio in MP3 format.
Worst for: Record audio and video simultaneously.
Follow the steps below to record sound on a Mac using MP3 Audio Recorder:
Can QuickTime record internal audio without plugins?
No. QuickTime cannot record system/internal audio on Mac by itself. You need a virtual audio driver (such as BlackHole or Loopback).
Is it illegal to record streaming audio?
It depends. Personal recording and listening can be acceptable. However, do not use the recordings for any commercial use, which violates the copyright law.
Can you screen record with system audio on Mac?
Yes. You can record Mac screen and system audio at the same time. Just run Aiseesoft Screen Recorder for Mac. Choose Video Recorder. Set the screen capture area and system audio recording. Later, you can click REC to record the Mac screen with system audio.
How to fix macOS Big Sur doesn't record internal audio?
If you want to make soundflower "work" in Big Sur, you can install soundflower for Mac in /Library/Extensions. Restart your Mac computer. After that, you can capture system audio on Mac. Or you can use other free audio routers alternative to soundflower.
Is there any soundflower alternative?
Yes. You can replace soundflower with Blackhole, Record It Audio Device, loopback audio, and more. Later, you can record Mac computer's audio with QuickTime successfully. For more Soundflower alternatives, you can read this article.
Conclusion
That's all you need to record system audio on macOS Sequoia, Ventura, Monterey, Big Sur, Catalina, Mojave, High Sierra, Sierra, etc. You can use Aiseesoft Screen Recorder to quickly record internal and external audio on Mac with multiple customization options. You can also install Soundflower for audio routing on Mac and run QuickTime Player, Audacity, and more to record internal audio on Mac. You can also rely on an online choice to record audio easily. But overall, I recommend Aiseesoft Screen Recorder best, which allows you to record audio with a scheduled plan and record sound at high quality in multiple audio formats like MP3, OGG, and more.
![]() 100% Secure. No Ads.
100% Secure. No Ads.
![]() 100% Secure. No Ads.
100% Secure. No Ads.
 Top 10 Audio Recorders in 2021 (Free/Paid)
Audio recorders are very convenient and easy to use. This article introduces to you the best 10 free/paid tools for PC/Mac/online for voice recording in 2021.
 5 Best Mac Screen Recording Software Brings Amazing Recording Experience
Want to find a good screen recorder for Mac? We provide you the top 5 screen recording software. You can free download them and share to friends.
 MP3 Recorder to Record MP3 on Windows/Mac
Want to record audio video in MP3 for playing on Windows/Mac/iPhone/iPod/Android? Find Free MP3 recorder or online MP3 recorder in this post.
Record Audio
Best Audio Recorder Record Audio on Mac/PC Record Audio on iPhone Record Vonage Phone Calls Record Voice Greeting for Jive Record Voicemail on Nextiva Record Voice Recordings on Sansa Fuze Record System Audio Mac Record Internal Audio on Windows Free Online Mic Recorder Record Audio from Mac/PC/iPhone/Android
Aiseesoft Screen Recorder is the best screen recording software to capture any activity like online videos, webcam calls, game on Windows/Mac.
![]() 100% Secure. No Ads.
100% Secure. No Ads.
![]() 100% Secure. No Ads.
100% Secure. No Ads.
*Required field
*Please enter a valid email
