Best 8K Screen Recorder for PC
![]() 100% Secure. No Ads.
100% Secure. No Ads.
![]() 100% Secure. No Ads.
100% Secure. No Ads.
If you’ve ever scrolled through YouTube or TikTok and wondered how people manage to show their faces in a little bubble while recording their computer screen, you’re in the right place. Whether you’re a high schooler trying to explain a complex math problem for a class project, or a gamer wanting to start a reaction channel, knowing how to screen record Mac with camera is basically a superpower.
In this guide, we will break down the best 3 ways to record Mac screen with webcam simultaneously, so you don’t have to go through the phone-balanced-on-books phase of your life.
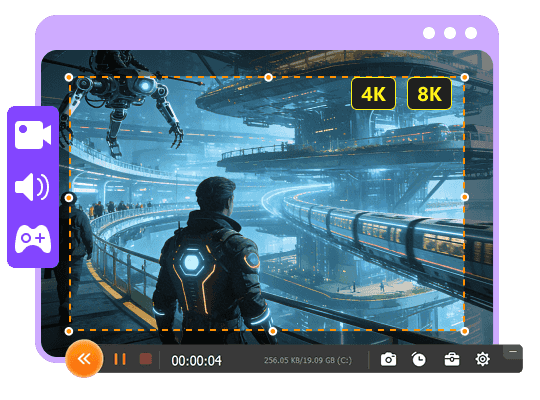
If you’re looking for the most set it and forget it method, Aiseesoft Screen Recorder is usually where I point people. It is a versatile all-in-one tool designed to capture your desktop activity and webcam feed simultaneously with professional ease. This software allows you to overlay a webcam window anywhere on your screen, making it a perfect choice for creating engaging tutorials, gameplay videos, or business presentations. It provides flexible audio management, letting you record system sounds and microphone input at the same time with advanced noise-cancellation features. During recording, you can use built-in drawing tools to add real-time annotations like arrows, text, and shapes to highlight important details. The program supports high-resolution output up to 4K and offers basic editing features like trimming to polish your video before saving. Overall, it serves as a reliable, user-friendly solution for Mac users who need a seamless way to record their screen and face at once.
Check the detailed steps below to capture Mac screen with webcam in Aiseesoft Screen Recorder:
Free download and install the software from the following buttons and get it running on your MacBook or iMac.
![]() 100% Secure. No Ads.
100% Secure. No Ads.
![]() 100% Secure. No Ads.
100% Secure. No Ads.
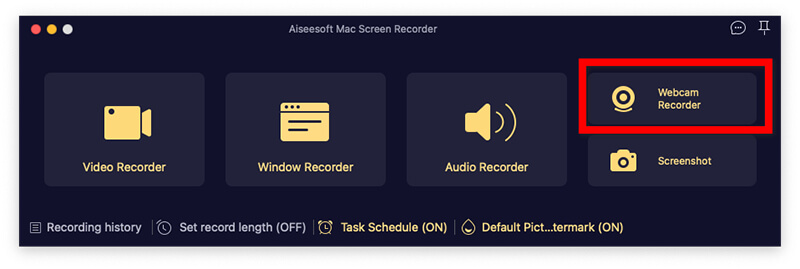
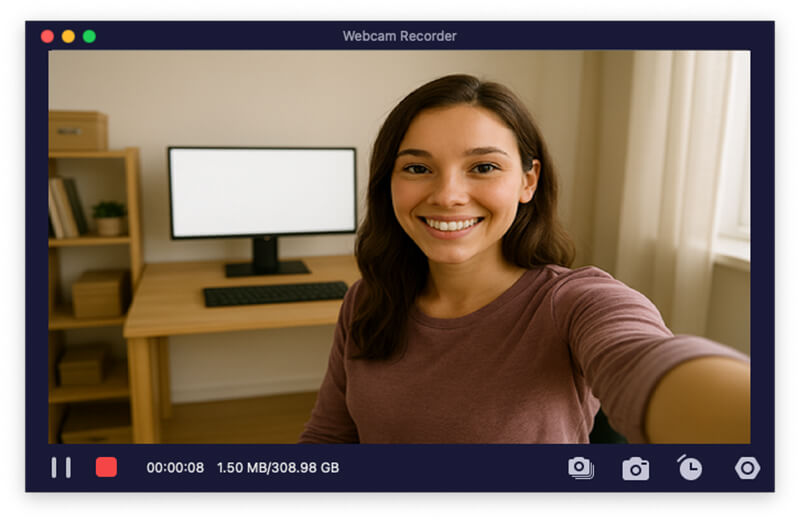
Once you open the app, you’ll see several options. Click on Webcam Recorder. You’ll see a preview of your face appear. You can drag this preview window to any corner of the screen.
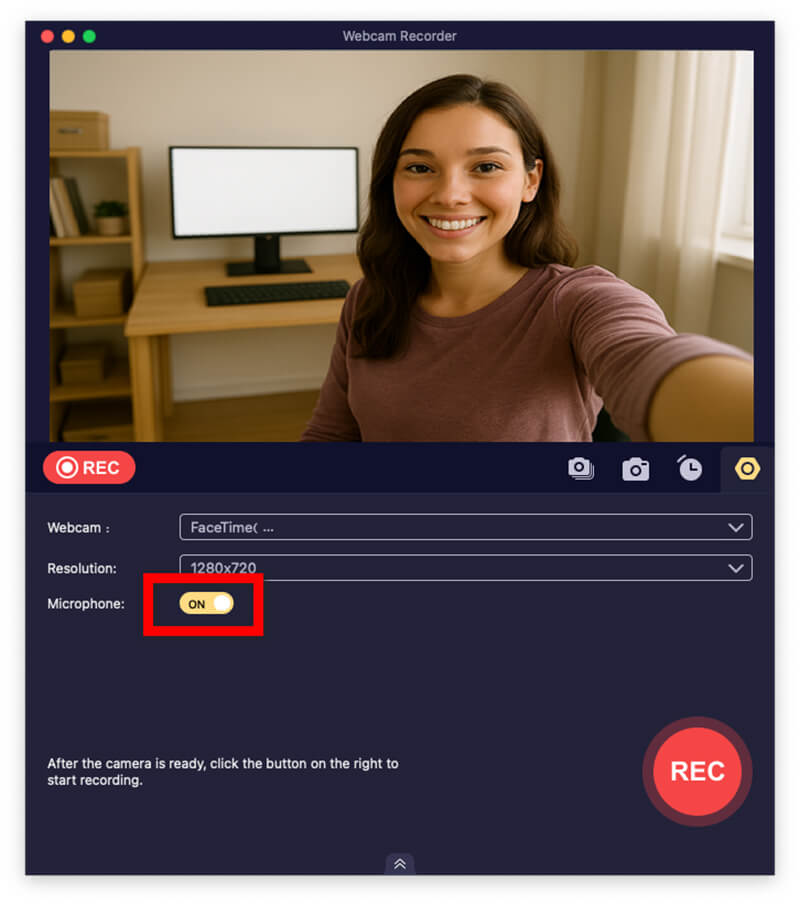
Ensure System Sound is on (if you want to record what’s happening on the Mac) and Microphone is on (to record your voice).
Click that big orange REC button. You’ll get a 3-second countdown to fix your hair, and then you’re live!
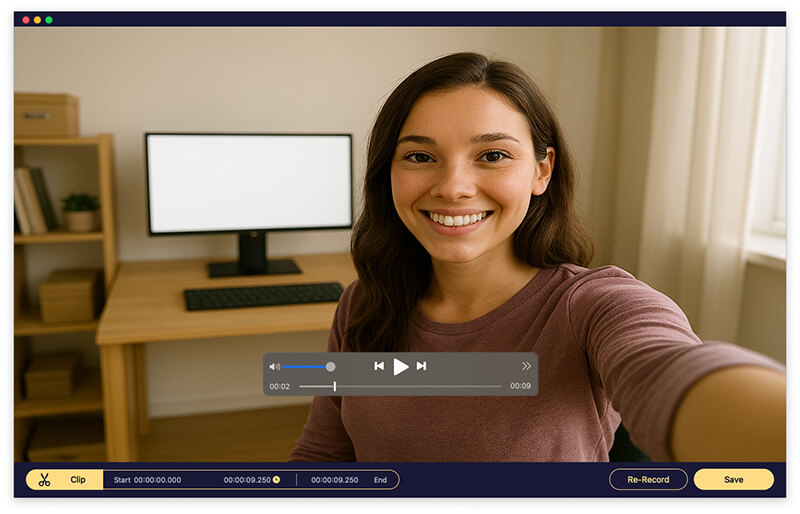
When you’re done, click the stop button. Aiseesoft lets you preview the webcam recording, besides, it gives you the option to edit the recording file like, trim the beginning and end right there before you save it.
In my experience using Aiseesoft for a semester-long project, the screenshot tool was definitely my favorite feature. While I was recording, I could take continuous snapshots of my screen in real-time, which allowed me to save my favorite moments. However, the limitation is that the free version has a recording time limit and adds a watermark. If you’re serious about content creation, you’ll eventually want the paid version, but for a one-off project, the trial is a great way to see if it fits your workflow.
Most people don’t realize that the software they use to watch movies, QuickTime Player, is actually a secret recording studio. It’s already installed on your Mac, which makes it the best I need to record this right now for free option. However, figuring out how to record video on a Mac with a camera using QuickTime requires a little hack because, by default, QuickTime wants to do either a screen recording or a camera recording, not both. But don't worry, I’ve got the workaround.
Here are the detailed steps of capturing Mac screen with webcam:
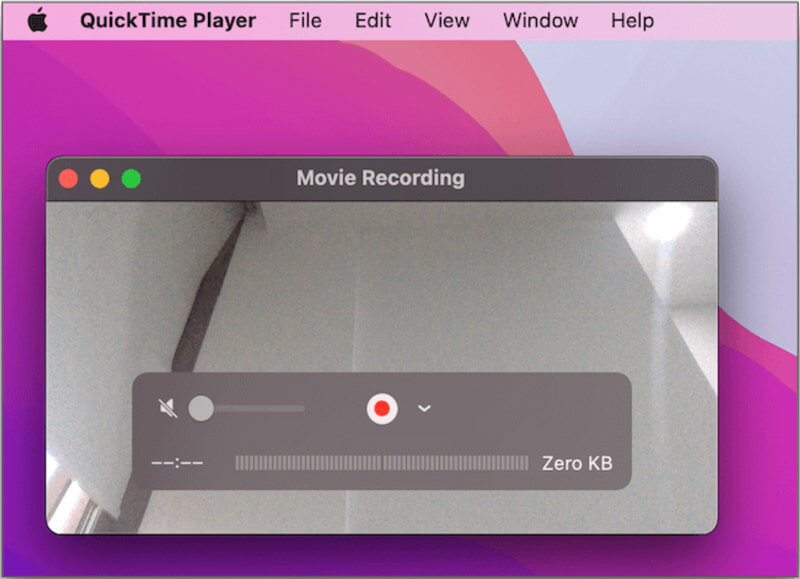
Find QuickTime in your Applications folder or via Spotlight.
Go to File > New Movie Recording. This will open your webcam.
This is the secret step! Go to the menu bar and click View > Float on Top. This ensures your face stays visible even when you click on other windows.
Resize the camera window and move it to a corner.
Now, go to File > New Screen Recording.
Choose to record the whole screen.
Click the small arrow next to the record button to ensure your microphone is selected.

Hit the Record button. QuickTime is now capturing the screen, which includes the floating window of your face!
I love QuickTime because it’s free and doesn't require any weird downloads. It’s Apple-clean. However, the limitations are real. Firstly, it doesn’t record Internal Audio (like a YouTube video playing on your screen) very easily without a third-party driver like BlackHole. Also, the file sizes can be absolutely massive because QuickTime records in a very high bitrate. I once recorded a 10-minute presentation and the file was almost 2GB! It’s great for quick clips, but be prepared for some huge files.
If you want to be a YouTuber or a Twitch streamer, you need to learn OBS (Open Broadcaster Software). It’s free, open-source, and incredibly powerful. Learning how to screen record on Mac with audio and camera via OBS feels like stepping into a professional TV control room. You can add overlays, Record Live TV snippets for commentary, and even use green screens. It’s the gold standard, but it does have a bit of a learning curve.
Check the following detailed steps of using OBS to record Mac screen with webcam:
Download it for macOS and give it the necessary permissions in your System Settings.
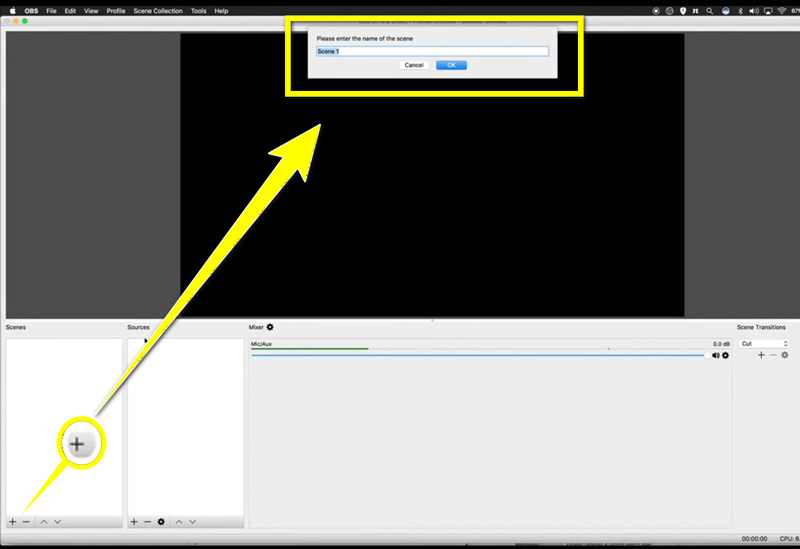
Click the + under Scenes and name it Tutorial.
Under Sources, click + and select macOS Screen Capture.
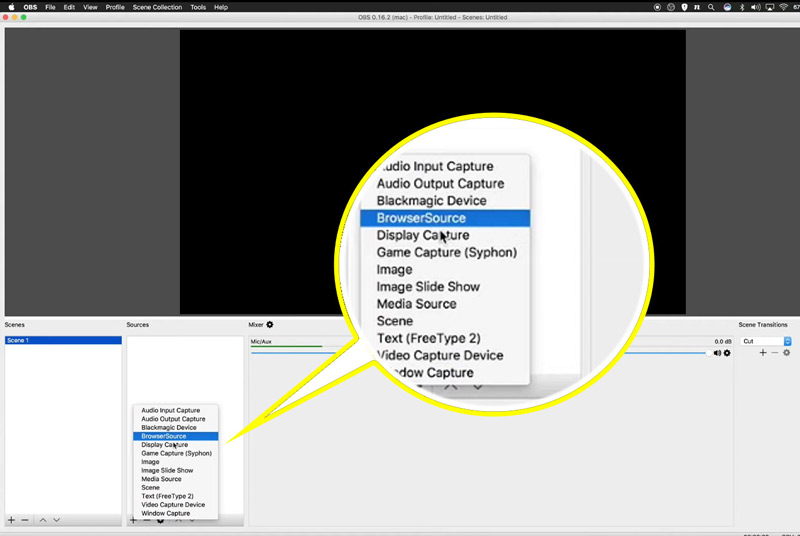
Click + again and select Video Capture Device. Select your FaceTime HD Camera.
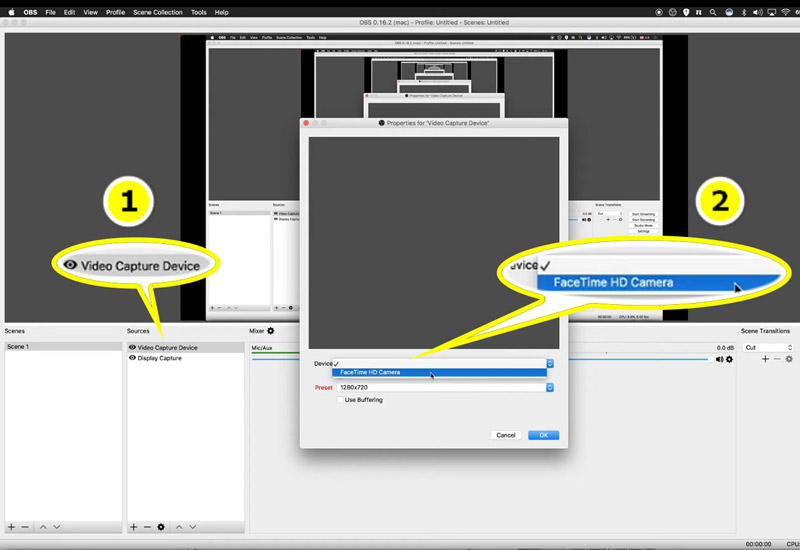
Your camera should be above the screen capture in the list. Resize your camera box by dragging the corners.
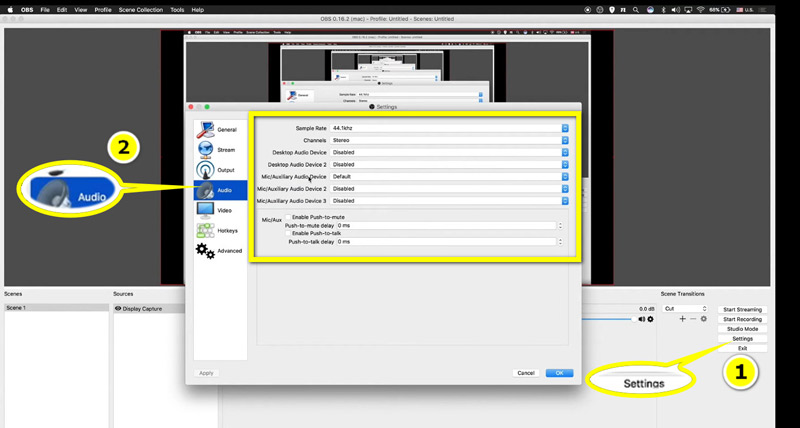
Check the Audio Mixer to see your mic moving. If it’s not, go to Settings > Audio to select your microphone.
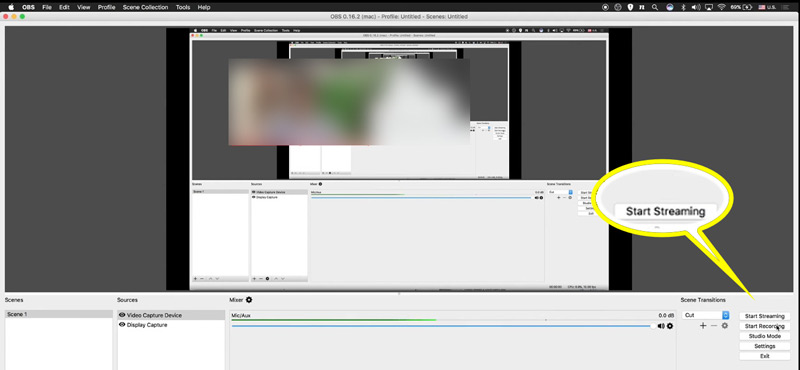
Click the Start Recording button in the bottom right corner to record Mac screen with webcam.
OBS is my go-to for anything complex. The best like is definitely the customization. I love that I can have a Starting Soon screen and then switch to my screen+camera layout with a hotkey. It makes me feel like a pro. The limitation? It can be overwhelming. The first time I opened it, I felt like I was trying to fly a space shuttle. It also uses a fair amount of CPU, so if you’re using an older MacBook Air, it might get a little laggy.
Q: Can I record live TV on my Mac using these methods?
A: Technically, yes. If you can play it in a browser, you can record live TV or capture Mac screen for all scenes by using any of the screen recorders mentioned above. However, be careful with copyright laws—don't go redistributing copyrighted content!
Q: Why is there no sound when I record with QuickTime?
A: QuickTime doesn't record system audio by default to prevent feedback loops. You’ll need a virtual audio driver like Loopback or BlackHole to route the Mac’s internal sound into the recording.
Q: How do I make my camera bubble a circle instead of a square?
A: OBS is the best for this. You can apply an Image Mask filter to your camera source. Aiseesoft also has built-in shapes for your webcam overlay.
Q: Does screen recording slow down my Mac?
A: It can. If you’re using a high-end tool like OBS on an older Mac, try closing unnecessary tabs in Chrome to free up RAM.
Conclusion
Recording your Mac screen with your camera doesn’t have to be a tech nightmare. If you want something easy and powerful, Aiseesoft Screen Recorder is your best bet. If you’re on a budget and need something right now, QuickTime is your best friend. And if you’re looking to become the next big streamer, start learning OBS.
The most important thing is to just start. Your first video might be a little awkward (mine definitely was!), but the more you practice how to record with the Mac camera and screen, the more natural it will feel. So, pick a tool, tidy up your desk, and hit that record button.
 10 Best Webcam Recorders to Capture Webcam Video [2025 Updated]
How to record webcam videos? This post lists 8 best webcam video recorders (online/Windows/Mac), and the step-by-step guide to help you capture webcam videos.
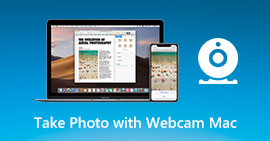 2 Quick Methods to Take Photo with Webcam on Mac
How to take a still picture on MacBook Pro with webcam? This post shows you default and professional methods to take webcam pictures on Mac.
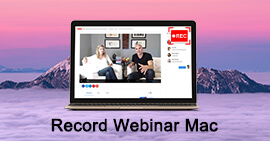 Webinar Recorder - How to Record Webinar on Mac or PC
Want to record a Webinar on Mac with QuickTime Player? Don't know which Webinar recorder you should use? This post shows you the best way to capture Webinar video on Mac and Windows computer.

Aiseesoft Screen Recorder is the best screen recording software to capture any activity like online videos, webcam calls, game on Windows/Mac.
![]() 100% Secure. No Ads.
100% Secure. No Ads.
![]() 100% Secure. No Ads.
100% Secure. No Ads.
*Required field
*Please enter a valid email
