Compression artifacts are one of the most prevalent problems impacting video quality, and they appear as blocky pixelation, blurriness, or annoying distortions. Compression artifacts most frequently occur when videos are compressed excessively to conserve storage space. The result is a video that no longer appears professional. In this article, we’ll explore what video compression artifacts are, along with their common causes and examples. More importantly, we’ll walk through effective methods to remove compression artifacts video using trusted tools like Aiseesoft VidHex, Adobe Premiere Pro, DaVinci Resolve, and HandBrake. Finally, we’ll share practical tips to help you avoid compression artifacts in the future, ensuring your videos stay sharp, clear, and high-quality, whether you’re editing on Windows, Mac, or online.

Video compression artifacts are defects in appearance that occur when a video is compressed excessively, resulting in a significant reduction in quality. Artifacts can often be seen, appearing as blocky pixels, blurred edges, color banding, or even odd distortions, which overall lower the video quality. For example, you might notice blockiness in fast-action scenes, smudged details in low-light videos, or fuzzy text after uploading clips to social media.
The main cause of these artifacts is aggressive video compression. When a file size is reduced to save storage space or speed up streaming, certain visual data is discarded. Now, while this allows you to share or upload videos more easily, it does sacrifice clarity. And it can be exacerbated by other factors, such as using outdated codecs, being edited and exported multiple times, or being set to a low bitrate.
Dealing with compression artifacts in video can be challenging, but several reliable tools are available to help restore smoothness and clarity. Whether you are using professional editing software or free options, each method achieves its desired results in somewhat different ways by reducing blockiness, blurring, or other distortions caused by heavy compression. In this section, we will guide you through four popular options: Aiseesoft VidHex, Adobe Premiere Pro, DaVinci Resolve, and HandBrake, so that you can specify the best option that meets your needs and skill level.
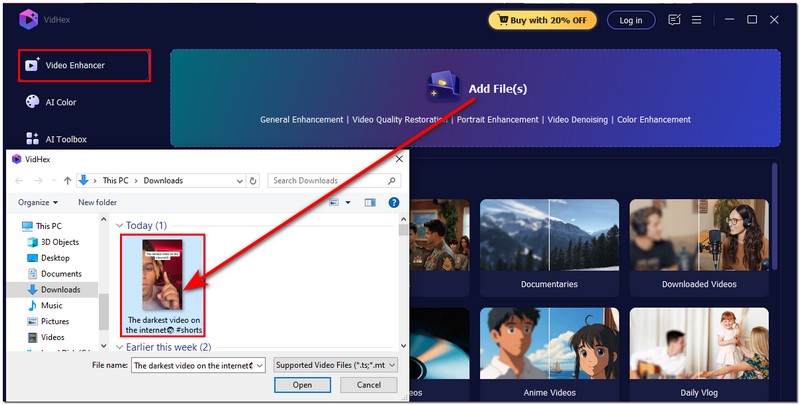
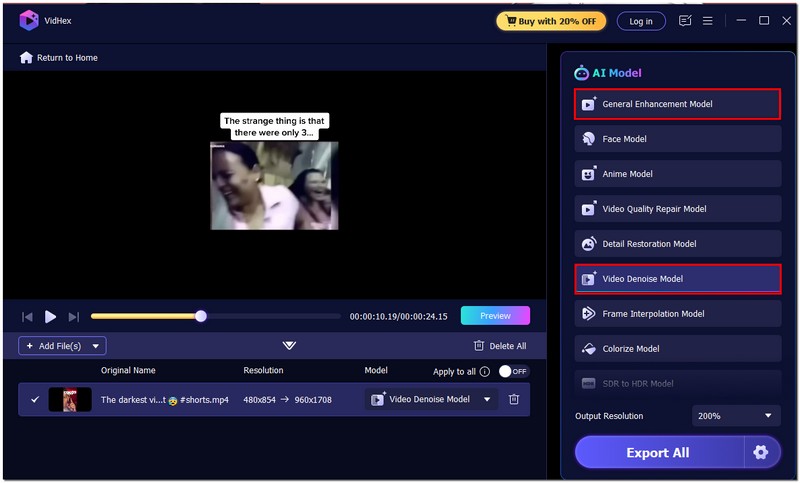
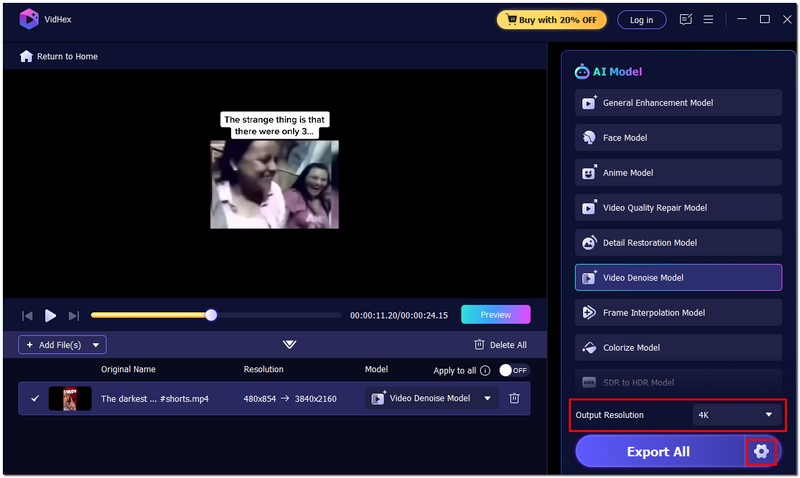
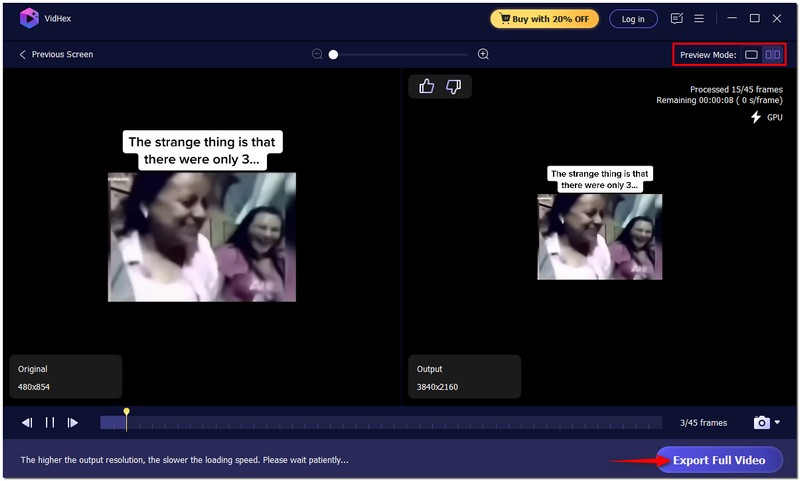
Aiseesoft VidHex is one of the most reliable tools for fixing common video issues, including video compression artifact problems. Designed with both beginners and professionals in mind, this software provides an advanced AI-powered enhancement feature that helps restore sharpness, reduce noise, and smooth out blocky or blurry frames caused by heavy compression.

117,882Downloads
![]() 100% Secure. No Ads.
100% Secure. No Ads.
![]() 100% Secure. No Ads.
100% Secure. No Ads.
Detailed Steps to use Aiseesoft VidHex
Why Choose It?
Aiseesoft VidHex is unique in that it offers a powerful enhancement based on AI while remaining user-friendly. Unlike manual editing software, it doesn't require advanced skills to fix compression issues. VidHex does most of that for you; it is perfect for users who want quick, professional results and do not want to invest much time learning how to use a product.
Adobe Premiere Pro is a popular, professional-grade video editing software used in the media and film industries. While it’s best known for advanced editing features, it’s also powerful when it comes to reducing or fixing video compression artifacts examples, such as blockiness, blurriness, and banding. With its effects and filters, you can apply precise adjustments to restore detail and enhance video quality.
Steps to Remove Compression Artifacts from Video via Adobe Premiere Pro
Editor’s Verdict
Premiere Pro allows full access to video corrections, including professional filters and aspect ratios that target various types of compression artifact issues. It is particularly well-suited for high-quality projects. If you simply want a quick fix for infrequent artifact issues, the software may not be the preferred solution for you due to the nature of the software (subscription-based) and the complexity for the new user.
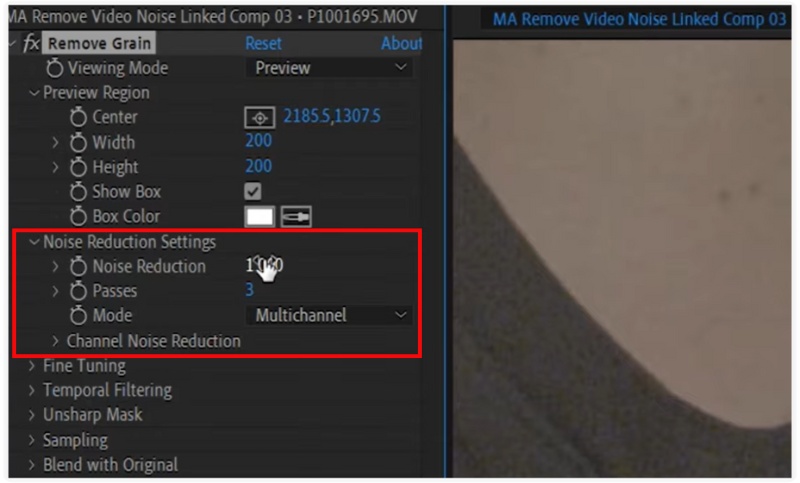
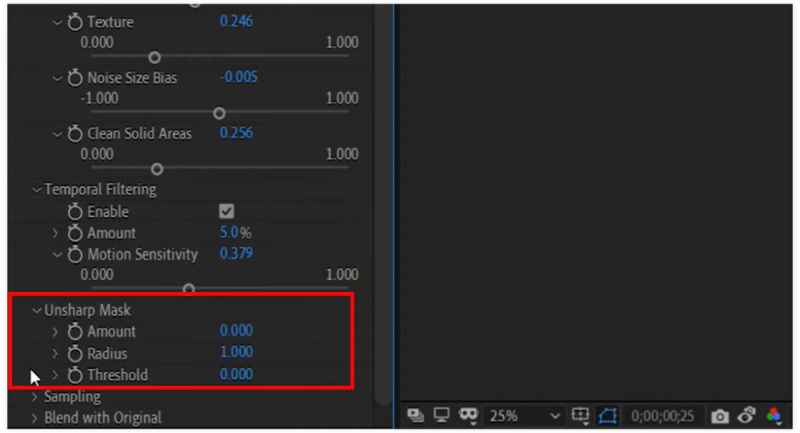
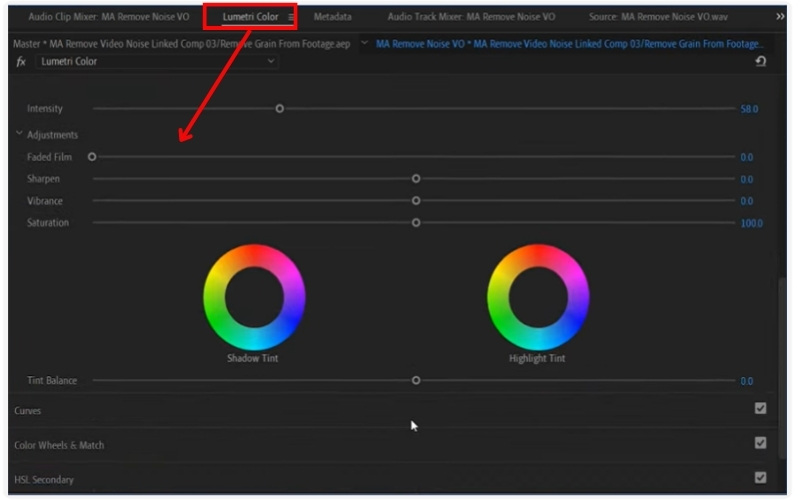
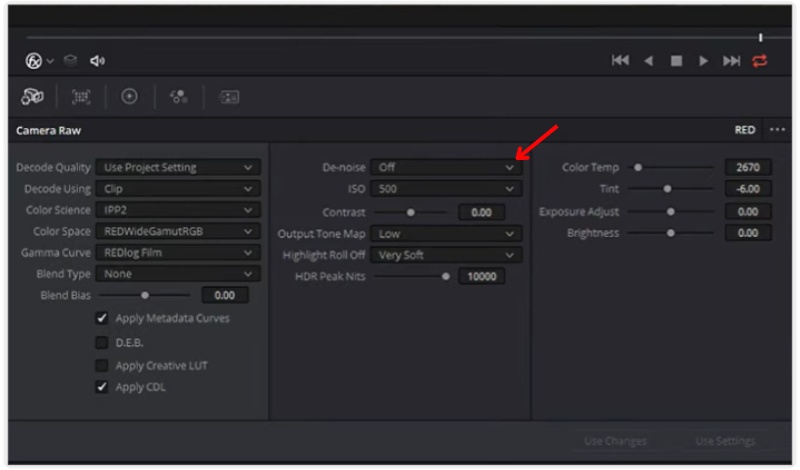
DaVinci Resolve is another professional editing tool at an advanced level. Known for its sophisticated color grading and video restoration tools, Davinci Resolve is very popular in the movie industry. Furthermore, DaVinci can also improve compression issues such as blocking, noise, and dull colors. With video tools such as noise reduction, sharpening, and color correction, video with compression can be enhanced to gain a more polished and cinematic look. Here are the following steps to use DaVinci Resolve to remove compression artifacts.
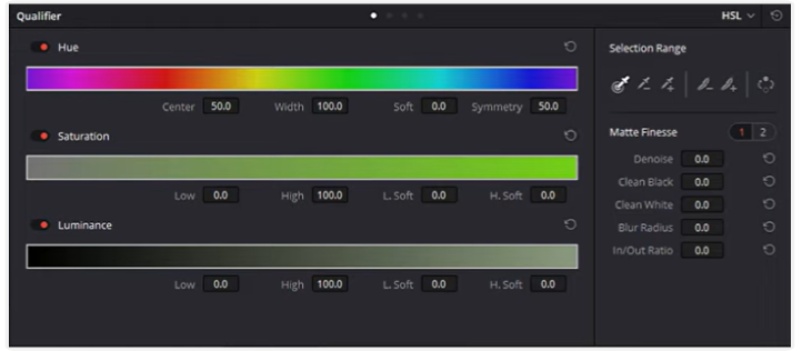
Editor’s Verdict
DaVinci Resolve is free to use and offers an advanced, powerful free version with a number of noise reduction tools and color grading features, providing professional-quality restoration. The majority of noise reduction tools are only available in the Studio version, and the user interface may be intimidating to new users. It also needs a relatively powerful computer to achieve sustained quality performance. However, if you want to seek for an intelligent tool that can produce a significant noise reduction effect, I still recommend you try AI video denoiser.
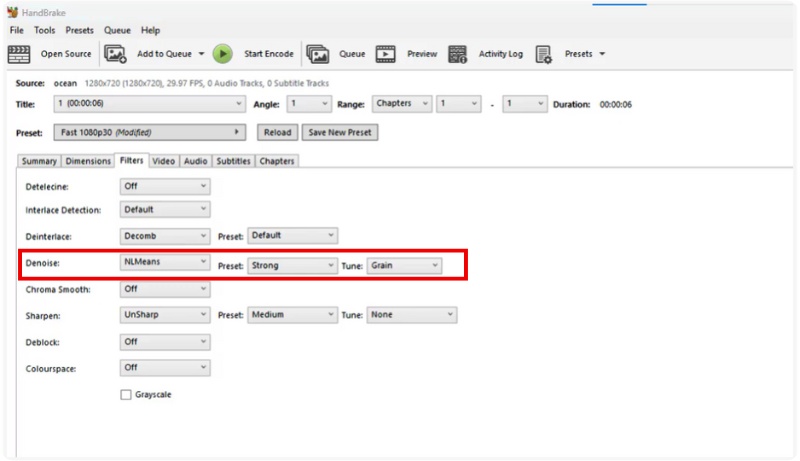
HandBrake is a popular, free, and open-source program for compressing and converting video files. While it does not possess some of the more advanced AI tools of a professional editor, it offers a simple way to alleviate visible compression issues by letting you re-encode those videos and use better settings. By changing the bitrate, codec, and filters, users can reduce blockiness, noise, or banding. HandBrake upscaling is a reasonable choice for someone looking for a simple, lightweight, and free solution to improve their video quality.
Here are the complete steps to remove compression artifacts with HandBrake
Editor’s Verdict
100% free, lightweight, and works on Windows, Mac, and Linux. Good for basic fixes and reducing compression, with a straightforward, steep learning curve. Lacks the advanced enhancement tools of professional editors, so that improvements may be limited. Processing can also be slower depending on your chosen settings.
Correcting compression problems later can be overly complicated. Therefore, the best option is to avoid them initially. If you set up your workflow correctly, you can create videos that are sharp and clear without compromising storage and playback usability. Below are useful considerations:
1. Use the Right Export Settings
When saving or exporting video, avoid high compression. Use a reasonable bitrate, one that is high enough to keep detail in your video, but not too large. A suitable range for most online platforms is between 8 and 12 Mbps for 1080p resolution, or 15 and 25 Mbps for 4 K resolution.
2. Pick Efficient Codecs
Compared to older codecs like H.264, modern codecs such as AV1 or H.265 (HEVC) offer improved compression efficiency, producing higher quality at smaller file sizes.
3. Avoid Re-encoding Multiple Times
Each time a video is compressed, it loses more detail. Always try to export from your source file instead of editing and re-saving already compressed videos.
4. Keep Resolution and Frame Rate Consistent
Don’t upscale a low-resolution video to a higher resolution. It won’t actually improve quality and can emphasize artifacts. Whenever possible, maintain the frame rate and resolution at which you recorded the video.
5. Record at the Highest Possible Quality
Use the best settings your device can support when recording if you're doing it yourself. A less obvious loss occurs after compression when the source video has more detail.
6. Use Platform-Optimized Settings
Before uploading, confirm the recommended export settings for YouTube, Vimeo, or your preferred social media platform. As the platform applies its own compression, adhering to these recommendations can help your video look its best.
Why do compression artifacts appear in videos?
They usually happen when a video’s bitrate is too low, the file is compressed multiple times, or the export settings don’t match the original quality.
How can I prevent compression artifacts in future videos?
Use the correct export settings, avoid unnecessary recompression, record in the highest possible quality, and stick to efficient codecs like H.265 or AV1.
Is there a difference between compression artifacts in video and images?
Indeed. Pixelation and color noise are common examples of image artifacts. They are comparable in videos, but they also contain distortions brought on by motion.
Conclusion
There are useful tools and techniques to rectify video compression artifacts. You can remove those distortions and restore clarity through a professional software suite or a new user-friendly app. Ultimately, it is best to preserve the sharpness of the video by preventing artifacts in the first place through the use of the appropriate format or setting.
 Topaz DeNoise AI Review and Alternatives for Noise Reduction
Is Topaz DeNoise AI free? Is Topaz DeNoise discontinued? Which is better, Topaz DeNoise or Adobe Lightroom? Check the detailed review of the Topaz DeNoise AI.
 Top 5 Background Noise Removal Tools for Mobiles and Computers [2025]
Looking for apps to remove background noise from videos or audio? Now turn to this post with the 5 best picks on your Mac, Windows, iOS and Android devices.
 7 Best AI Video Denoiser Tools for Grain and Noise Reduction
What is the best noise and flicker reduction tool? How to reduce noise with Topaz Video AI? This post shares 7 AI video denoiser tools for you to reduce noise.

VidHex is an AI-powered video enhancer that upscales, denoises, colorizes stabilizes, and improves video quality in 1 click.
![]() 100% Secure. No Ads.
100% Secure. No Ads.
![]() 100% Secure. No Ads.
100% Secure. No Ads.
*Required field
*Please enter a valid email
