
Video Converter Ultimate
![]() 100% Secure. No Ads.
100% Secure. No Ads.
![]() 100% Secure. No Ads.
100% Secure. No Ads.
Contents
You will come across situations where certain portions of the videos need an extra boost of sharpness in terms of resolution. This is where I find myself on more occasions than not, and instead of moving elsewhere for my needs, I thought I'd give Adobe’s Premiere Pro the ultimate test in improving quality and sharpness.
This tutorial shows how to upscale videos in Premiere Pro by using a variety of in-house techniques and tools. You will also learn which technique works best in practical situations and some quick tips for obtaining clearer footage.
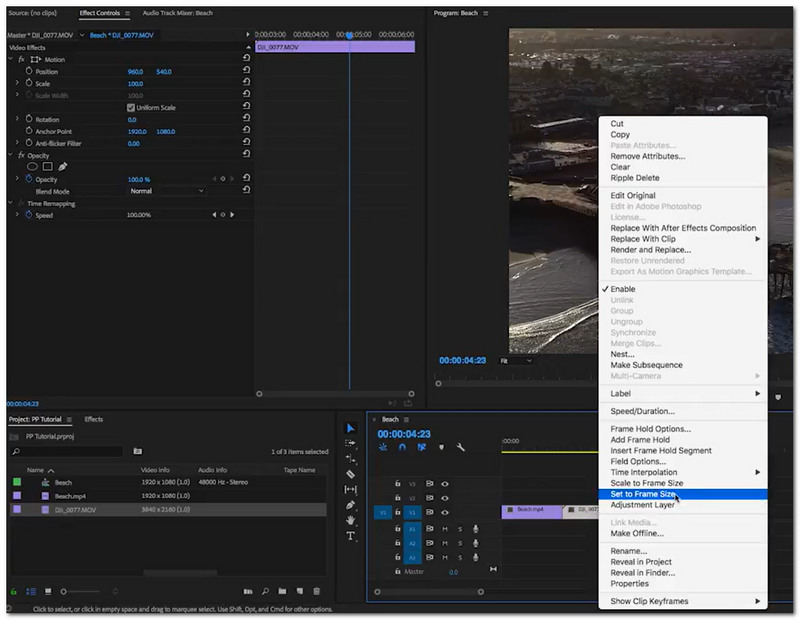
Using Set to Frame Size and Scale to Frame Size is probably one of the simplest methods of making your video conform to a higher-resolution timeline in Premiere Pro. However, while these two options seem almost identical, they operate differently, and this may lead to different results regarding your final video quality.
Here’s a clear comparison to help you understand the difference between the two options in Adobe Premiere Pro:
| Feature | Set to Frame Size | Scale to Frame Size |
| How it works | Adjusts scale to fit sequence without changing original resolution | Resizes the clip by altering its resolution |
| Image Quality | Better quality (non-destructive) | Can reduce quality |
| Flexibility | Editable and adjustable anytime | Less flexible after scaling |
| Best Use | Recommended for upscaling workflows | Basic resizing only |
| Performance | Slightly heavier but more accurate | Faster but less precise |
Pros
Cons
For retaining quality while resizing video, use Set to Frame Size. Can you upscale video in Premiere Pro? Yes, it can be done, but techniques tend to just resize rather than enhance the resolution.
One easy way to enhance the quality of a video in Adobe Premiere Pro is to turn on the Maximum Render Quality option. While it won't create new details out of thin air, it will assist in making the scaled footage look cleaner and sharper.


Pros
Cons
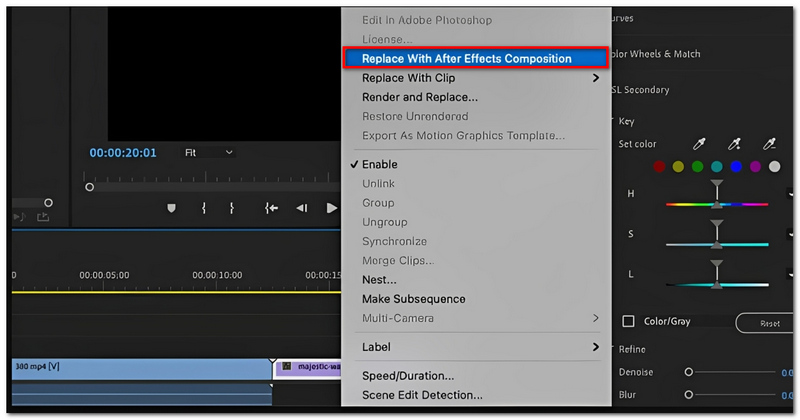
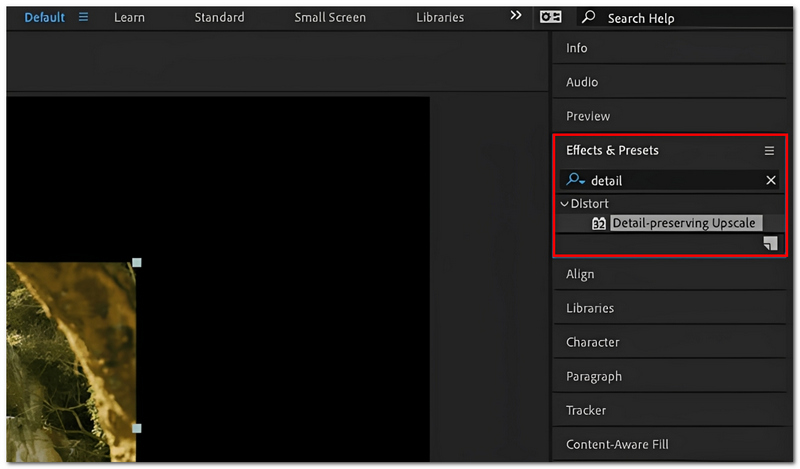
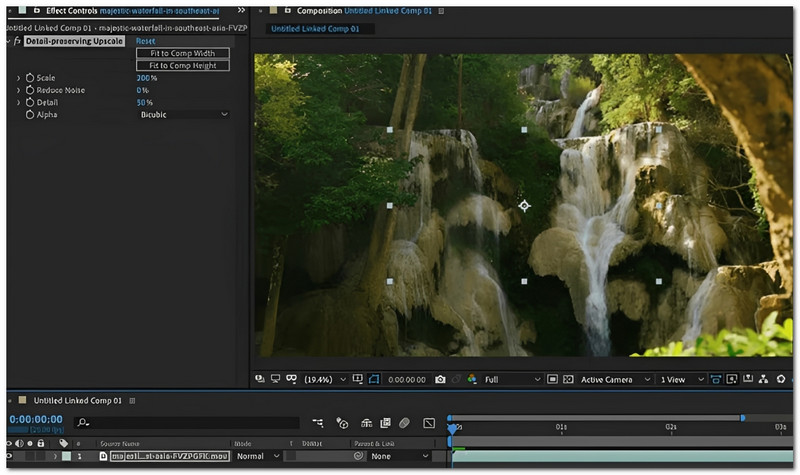
Want AI-style upscaling? This is one of the best methods inside the Adobe ecosystem. If you link Premiere Pro and Adobe After Effects, you can access the Detail-Preserving Upscale effect that will recover details in a smarter way than simple resizing.
Pros
Cons
How to AI upscale video in Premiere Pro? Using this method is the most direct and closest way of doing it within the software, as it improves details in a more smart way than usual. However, it still cannot be compared with the strength of specialized AI video upscalers.
If you prefer to avoid installing additional plug-ins, then you can use the capabilities available in Adobe Premiere Pro. It is not artificial intelligence-based, but if it is used correctly, then it can improve the quality of your material.
Adobe Premiere Pro CC Native Upscaling
This software offers some built-in scaling and rendering options, which are aimed at cleaning up the footage:
Pros
Cons
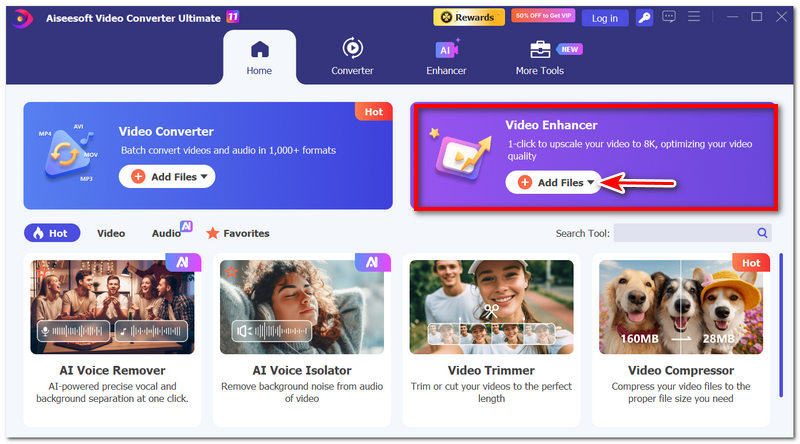
If you want a much simpler and lighter option compared to Adobe Premiere Pro, especially for working with video conversion, basic editing, and final touch by AI, then Aiseesoft Video Converter Ultimate remains a credible all-rounder (multi-function) tool in the market at present. While Premiere Pro is a very feature-rich, professional program, Aiseesoft is all about quick editing, changing video formats, and using artificial intelligence to enhance videos, which could be very suitable for newbies, content creators, and marketers.

Downloads
![]() 100% Secure. No Ads.
100% Secure. No Ads.
![]() 100% Secure. No Ads.
100% Secure. No Ads.
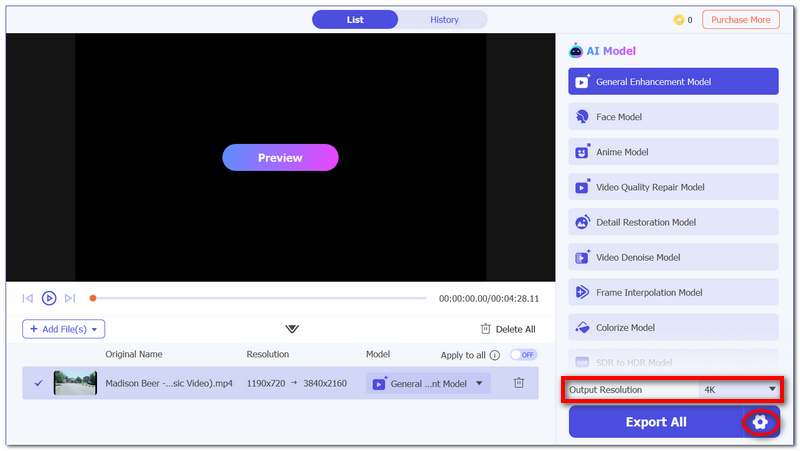
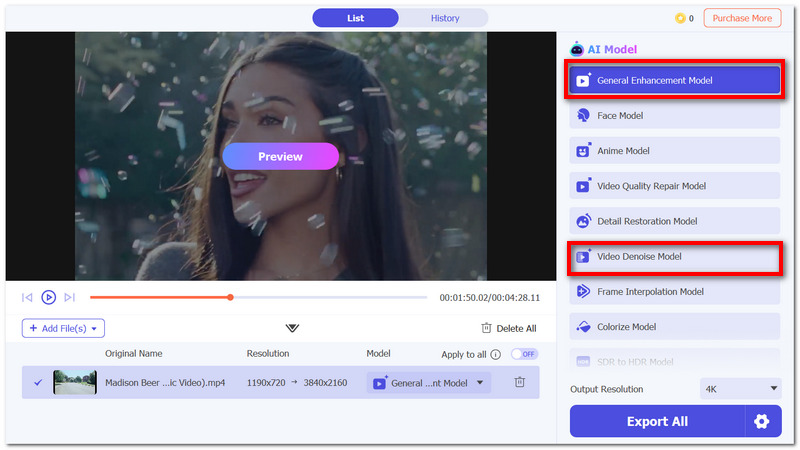
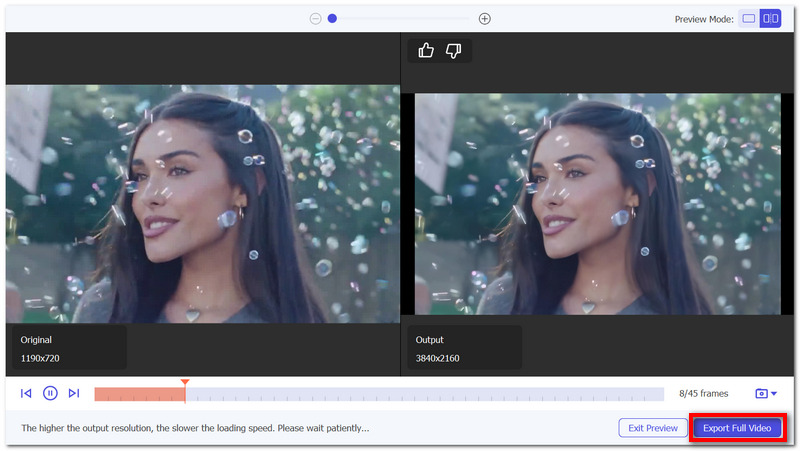
How to Use Aiseesoft Video Converter Ultimate
Why does my upscaled video look blurry in Premiere Pro?
The cause in most cases is the low resolution or the heavy compression of the original footage. If you enlarge the footage, the pixels will be stretched, and the detail will not be enhanced.
Is it better to upscale before or after editing in Premiere Pro?
It is usually better to do the editing first and then upscale at the export stage. This way, all your effects and changes are done before the final rendering.
Can nested sequences improve upscaling results?
Only a little. Nesting is a great way to keep things tidy when you are scaling or applying effects, but it doesn't enhance the actual quality of the image or the sharpness.
Conclusion
By upscaling a video in Premiere Pro, you are essentially raising the resolution. However, this does not generate new details, so the outcome might seem a bit soft or fuzzy, particularly when dealing with low-quality source material. Upscaling is good enough for simple usage, but not when you want a highly refined output.
AI technologies, on the other hand, are a much better option if you want to get good results. Mastering the art of how to AI upscale video in Premiere Pro is one of the ways through which you can take video quality to a level higher than just rescaling.
 Tips: How to Fix Adobe Premiere Pro Not Playing Videos
You are just about to preview a video. But all of a sudden, Adobe Premiere Pro is not playing the video. To fix the issues, here are 7 solutions you can use.
 Causes and Fixes for Adobe Premiere Choppy and Glitchy Video
After spending hours editing a project, Adobe Premiere becomes choppy and glitchy, giving you a hard time previewing it. There are still ways to fix it!
 Learn to Reduce Noise and Denoise Videos in Premiere Pro
Does Premiere Pro have a DeNoise function? How do you remove noise from a grainy video in Premiere? Check the guide on how to denoise videos in Premiere Pro.
Video Converter Ultimate is excellent video converter, editor and enhancer to convert, enhance and edit videos and music in 1000 formats and more.
![]() 100% Secure. No Ads.
100% Secure. No Ads.
![]() 100% Secure. No Ads.
100% Secure. No Ads.
*Required field
*Please enter a valid email
