Mac Recovery Partition, we also call it macOS Recovery, is part of the built-in recovery system of your Mac running in OS X 10.7 Lion and newer. It can help you to restore from Time Machine, reinstall macOS, get help online, repair or erase a hard disk, and more.
"How do I reinstall Mac from Recovery Partition?"
"How do I create a Recovery Partition for High Sierra?"
"Mac partition recovery mode is not working."
The more questions you can find from Apple Discussion.
Here, we gather the full guide to use Recovery Partition on Mac, including boot and fix it.

A macOS Recovery Partition is a hidden section of your Mac’s hard drive that includes essential recovery tools for diagnosing and repairing your system. It lets you:
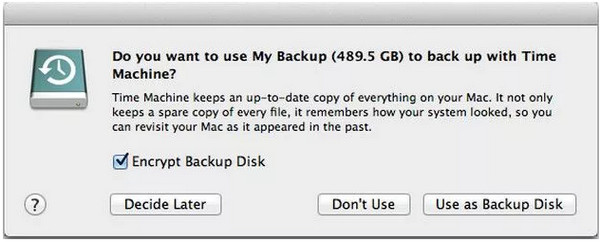
1) Restore From Time Machine Backup
If you have made a backup of your system, then you could restore your Mac from Time Machine in this way. One thing you may notice is that the restore is the whole data restore to replace all existing data on your Mac. To some extent, Time Machine restore is to Mac what iCloud/iTunes restore is to iPhone/iPad/iPod.
2) Reinstall macOS (or Reinstall OS X)
This option will help you to download and reinstall the Mac operating system. The reinstallation version of macOS depends on the key combination you used during startup. Before you do it, do not forget backup Mac to protect your important data.
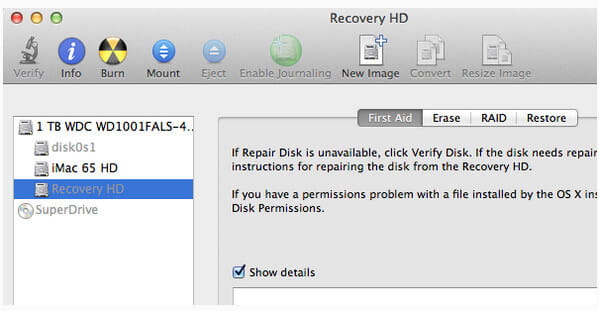
3) Disk Utility
Disk Utility function enables you to repair and erase a hard disk. These additional utilities are available from the Utilities menu in the menu bar: Moreover, such additional utilities are also accessible from the Utilities menu, as Firmware Password Utility, Startup Security Utility, Network Utility, and Terminal. If you regret the boot of the Recovery Partition, just quit it. Choose "Restart" or "Shut Down" from the Apple menu.
4) Get Help Online
This option allows you to browse Apple’s support site for help (useful if macOS won't boot). It will direct you to visit Apple's support website by opening your browser. However, browser plug-ins and extensions are disabled.
To find out if your Mac has a recovery partition, there are two methods:
As mentioned above, Recovery Partition on Mac is created for helping you to restore data, erase hard disk and reinstall macOS. No matter what you want to do, you should reboot Recovery Partition on Mac firstly.
Note: Newer and some older Mac computers will automatically try to start up from macOS Recovery over the Internet, when unable to start up from the built-in recovery system. Then you will see a spinning globe, instead of Apple logo.

Then it gives you 4 options, Restore From Time Machine Backup, Reinstall macOS, Get Help Online, and Disk Utility.
After entering into Recovery Partition, let's see how it works now.
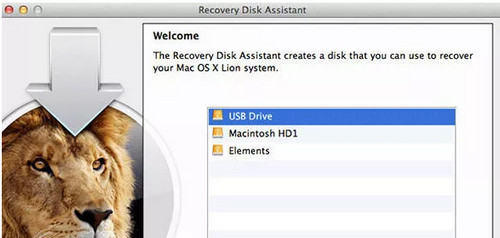
Generally speaking, you do not need to download Recovery Partition, because it is the built-in since OS X 10.7 Lion, when Apple stopped selling boxed copies of its operating systems. However, for one reason or another, you may need to create a one on Mac for backup with USB flash drive.
Here are the steps.
For example, for creating macOS High Sierra, just use the following codec:
sudo /Applications/Install\ macOS\ High\ Sierra.app/Contents/Resources/createinstallmedia --volume /Volumes/Untitled --applicationpath /Applications/Install\ macOS\ High\ Sierra.app --nointeraction
Then it will wipe out your flash drive firstly, and then turn it into a bootable installer.
Wait a second, and you will complete the whole process.
If you have created a backup of the latest macOS installer, and want to free up about 600 MB of disk space on your Mac, then deleting Recovery Partition will be an idea.
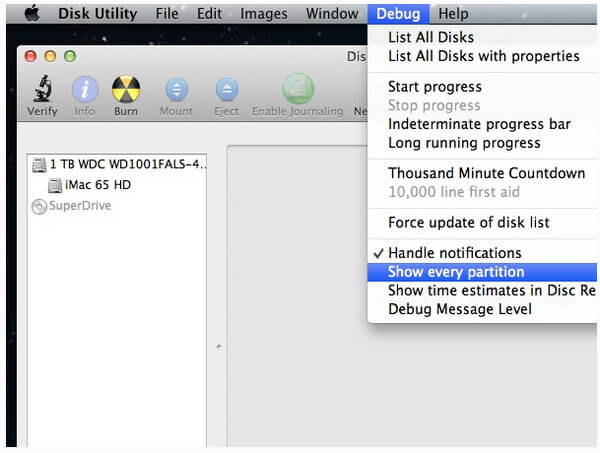
defaults write com.apple.DiskUtility DUDebugMenuEnabled 1
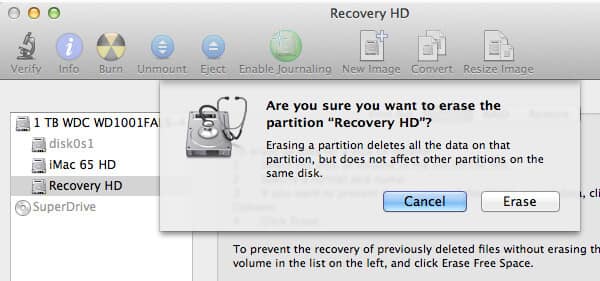
Then a conformation dialogue will pop up, and you just need to read it and confirm the action to delete it.
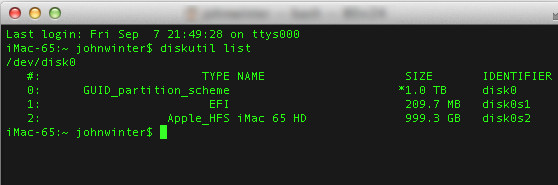
Go to Terminal app and enter the following command:
diskutil list
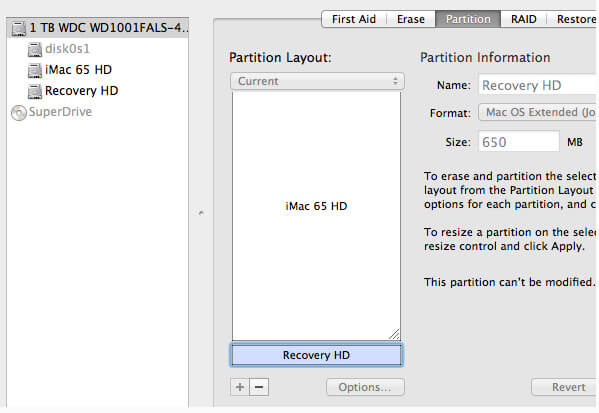
Then you will see it has been deleted from your Mac.
For exiting Debug menu, you just need to type the following command into Terminal app:
defaults write com.apple.DiskUtility DUDebugMenuEnabled 0
Then just closing Terminal and Disk Utility is the last step.
The recovery partition might seem like a hidden, technical part of your Mac - but for many users, it can be the key to retrieving some of their most treasured memories and important files. So when you realize that your data has disappeared, it's natural to feel overwhelmed.
But don’t worry—recovery is still possible.
To safely retrieve your files, like an accidentally deleted recovery partition on Mac, you need a reliable and professional-grade tool that won’t put your device at further risk. Aiseesoft Data Recovery is one of the most trusted solutions for this purpose.
For avoiding the forcible data overwritten for all, we recommend Aiseesoft Mac Data Recovery.
It is the data recovery software for Mac users, to recover deleted or lost photos, videos, audio, documents, and other data, whether your Mac is crashed, emptied trash, unexpectedly operations, or partition deleted, virus attack, even other accidents. Moreover, it lets you recover overwritten, unsaved, permanntly deleted files on Mac easily.
135,451 Downloads
Note: For Mac running Mac OS X El Capitan or later, you need to disable System Integrity Protection firstly for using some software, like Mac Data Recovery on your Mac to acquire some permission to scan it.
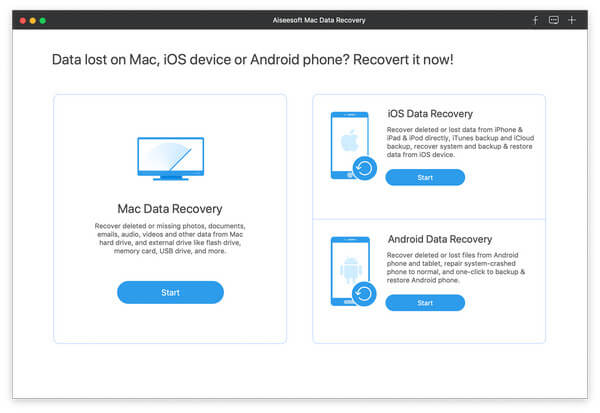
Free download Mac Data Recovery on your computer, install and run it immediately.
Click "Mac Data Recovery".
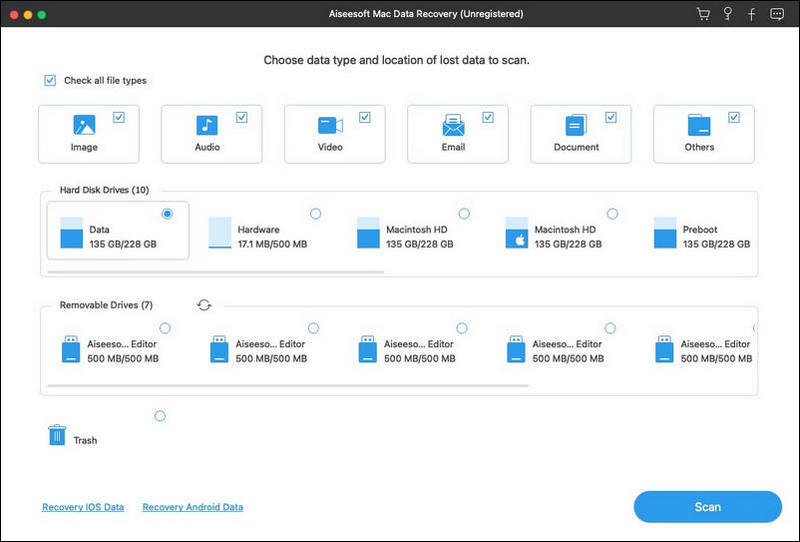
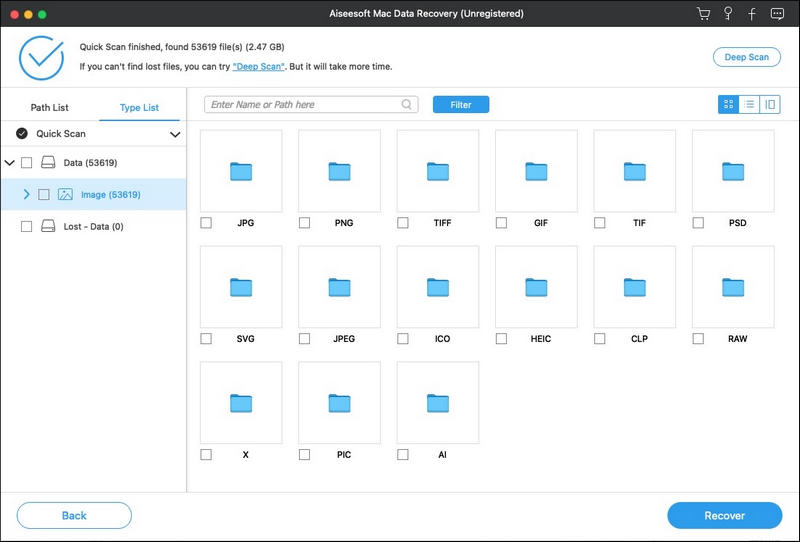
After launching, you need to checkmark the data types and disk drive for scanning in the main interface.
As for data type, you are able to scan images, audio, video, email, documents and other data.
As for the drive, you need to tick your Mac drive.
Moreover, this software also lets you scan the external drive on your Mac, like camera card, flash drive card, and more.
Click "Scan" to start a quick scan on your Mac.
After the scan is complete, you will find all your data types listed in the result. From the left pane, you can see the data types, click it to view the data details in the right window and click "Recover" to extract the lost or deleted data to your Mac.
Recovery Partition is very important for Mac users. However, once you find Command + R not working, and you can boot into startup, you should know how to fix it.
Here are the some basic solutions.
If you can connect your Mac online, you can try Internet Recovery to fix the issue.
Get the details to use Internet Recovery Mac.
As mentioned above, Time Machine can help you restore Mac exactly.
If you have created the Recovery Partition, then here you are gaining another one opportunity to fix this problem by using the USB flash drive copy.
This is the last solution we can suggest. However, reinstalling macOS will erase all content and data on Mac currently. So you should think twice.
Conclusion
This page mainly talks about what the Recovery Partition is on Mac, and how to create, delete, and recover it. If you don’t know how to find it, you can use the terminal to check its existence. You can also learn how to boot a Mac in recovery partition and fix problems you might encounter when macOS restores the recovery partition on a Mac that is not working in this comprehensive guide. If you still have more questions about Mac’s recovery partition, you can leave a comment below.
 2021 Updated Partition Recovery Guide and Software (Video Tutorial Supported)
You can get the easiest way here to get partition recovery on Windows 10/8/8.1/7 and Mac, and get another 5 alternatives to the partition recovery software.
 Best RAW Partition Recovery to Recover Data from RAW
Face the RAW partition error and don't know how to change RAW partition to NTFS or recover files from RAW? This post will the best way to recover files from RAW partition with RAW Partition Recovery.
 3 Effective Ways to Delete Partition on Mac and Free Up Space
When you go for another partition for Mac, you can learn 3 ways to delete the previous partition on Mac completely and free up more storage space.

Aiseesoft Screen Recorder is the best screen recording software to capture any activity like online videos, webcam calls, game on Windows/Mac.
![]() 100% Secure. No Ads.
100% Secure. No Ads.
![]() 100% Secure. No Ads.
100% Secure. No Ads.
*Required field
*Please enter a valid email
