"After updating to iOS 13/14, I cannot sign into iCloud and restore my backup, but only get the alert said there was an error connecting to Apple ID server. What should I do?"
When you need to log into iCloud with your Apple ID, App Store or iTunes on your iPhone, it is frustrating to get the verification failed alert. The error means that your Apple device does not allow you to connect to iCloud verification server, even if you enter the correct user name and password. Just learn more about the 8 fast and verified solutions from the article.
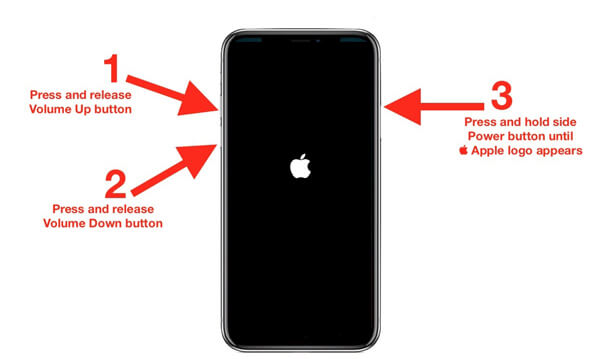
Force restart of your iPhone enables you to clean the cache and settings, which can solve some simple problems, such as the Apple ID verification failed error. Just learn more details about the process as below.
For iPhone X/8 or later: Quickly press and release the "Volume Up" button, and do the same to the "Volume Down" button. Then press the "Side" button until you see the Apple logo.
For iPhone 7: Hold down both "Side" and "Volume Down" buttons for 10 seconds. Release them when Apple logo pops up.
For iPhone 6s and earlier: Keep pressing the "Home" and "Side" button until the Apple logo shows up.
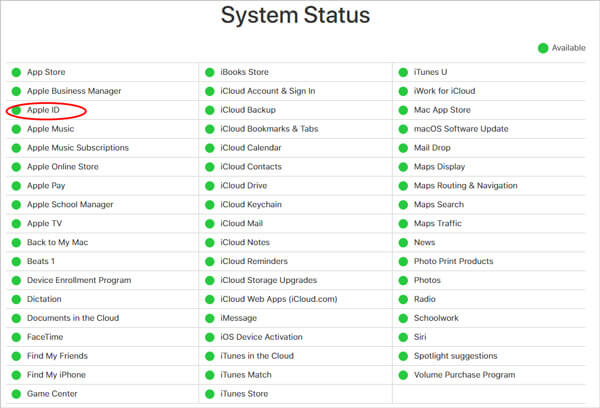
Of course, when there is something wrong happens on Apple's servers, the Apple verification failed error will show up. So, you should check the status of Apple servers.
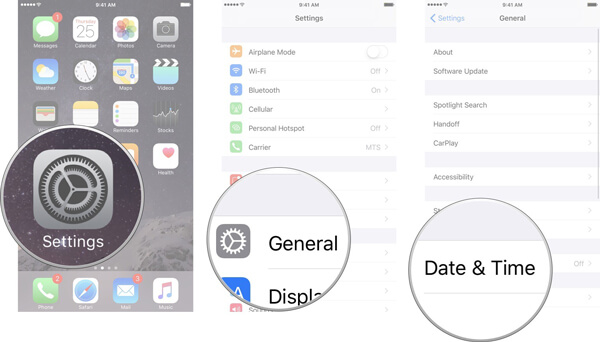
Make sure the Time and Date set correctly on your iPhone if you encounter the Apple verification failed error. When you are moving between different countries, the Time difference might cause the problem.
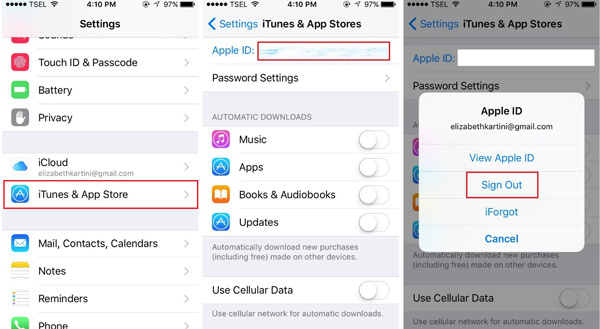
Another way to fix the Apple ID verification failed error is to sign out your iTunes and App Store.
Or, you can change an Apple ID and sign in to iTunes for checking the problem
The poor Internet connection may trigger the error connecting to Apple ID server. In such case, you should switch to a Wi-Fi network and check your router. If you are using a VPN or Hotspot on your iPhone, you also need to turn the option off.
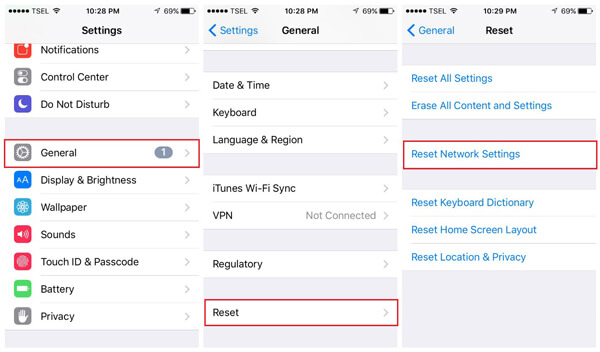
If the network is still not working on your iPhone, which lead to the verification failed error, you have to reset your network settings. Here is the detailed process as below.
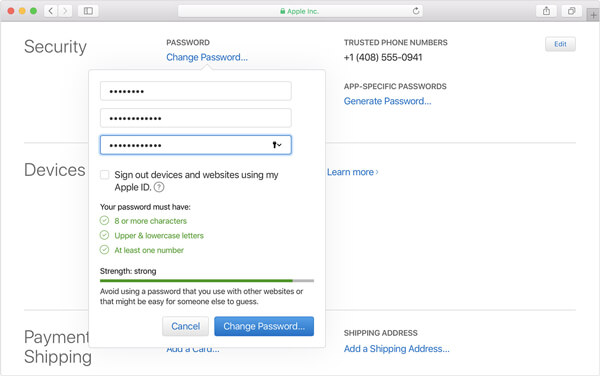
Apple verification failed error might also be related to the outdated password, you can have another check or even reset the password of iCloud to find whether it works.
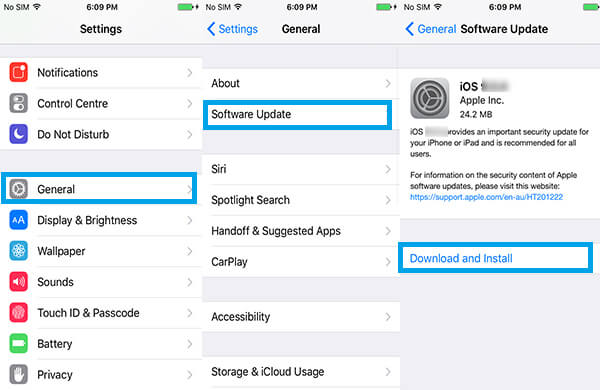
The last but not least method to fix the Apple verification failed error is to update your iOS version. The latest iOS always includes some updates for the known errors.
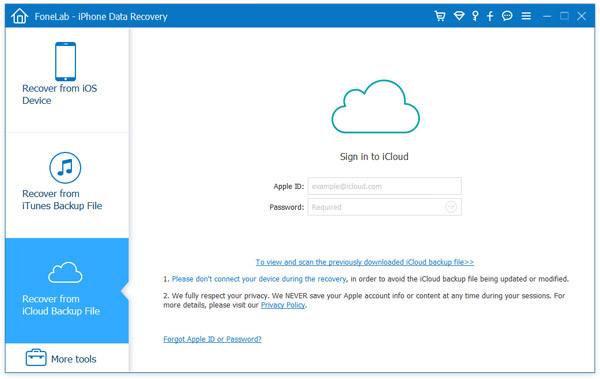
What should you do if Apple verification failed persists, is there a method to recover the files from iCloud directly? In order to retrieve the files from iCloud backup with ease, FoneLab iPhone Data Recovery enables you to retrieve the iCloud backup without your iOS device.
Downloads
![]() 100% Secure. No Ads.
100% Secure. No Ads.
![]() 100% Secure. No Ads.
100% Secure. No Ads.
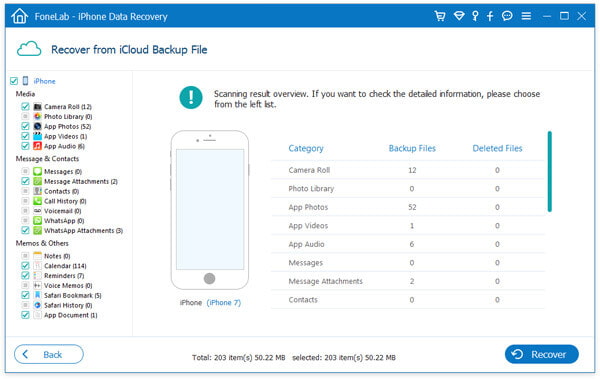
Note: To recover photos from iCloud backup, for example, go to the Photos tab from the left side and view your photos on the right panel.
Conclusion
Based on the sharing above, you should understand what you can do when you encounter the message said there was an error connecting to the Apple ID server on your iPhone. As you can see, fixing this problem is not as difficult as you thought. Even though the error persists, you can access your iCloud backup files with Aiseesoft iPhone Data Recovery. It is not only easy to use, but also able to preview and recover iCloud backup without the iPhone.
 How to Clear iCloud Storage by Deleting Unwanted Files
How to clear iCloud storage space when iCloud storage is full? This article tells you how to manage iCloud storage and clear up unnecessary documents in iCloud storage.
 Tips and Tracks about iCloud Backup for Android
Want to get iCloud Backup for Android devices? Here are some useful ways to sync contents from iCloud Backup to Android.
 5 Ways to Bypass iCloud Activation Lock in 2026 (Free & Paid)
Locked out of your iPhone? Discover 5 proven methods to bypass the iCloud Activation Lock, including official Apple Method, and Aiseesoft iPhone Unlocker.
The best iPhone data recovery software ever, allowing users to safely recover lost iPhone/iPad/iPod data from iOS device, iTunes/iCloud backup.
![]() 100% Secure. No Ads.
100% Secure. No Ads.
![]() 100% Secure. No Ads.
100% Secure. No Ads.
*Required field
*Please enter a valid email
