Video Converter Ultimate
![]() 100% Secure. No Ads.
100% Secure. No Ads.
![]() 100% Secure. No Ads.
100% Secure. No Ads.
I’ve had moments where I opened my Google Photos backup expecting crystal-clear memories, only to find them looking soft, pixelated, or just not the same as the original. Why are my Google Photos blurry? Don’t worry, we will tackle that later on.
Here, we propose an explanation of the problem and then a very deep, detailed, and technical look. First, we discuss how media files get their quality downgraded unknowingly by the user with backup settings such as Storage Saver, syncing delays, and device space optimization features. Then, solutions with step-by-step guides on how to enhance the quality of blurry videos using video enhancement tools will be presented. And finally, some questions that may come up will be answered, along with tips that will help you prevent losing the quality of your media files in the future. You will not only learn the causes of a problem with media quality but also the ways of preserving the high quality of your photos and videos.
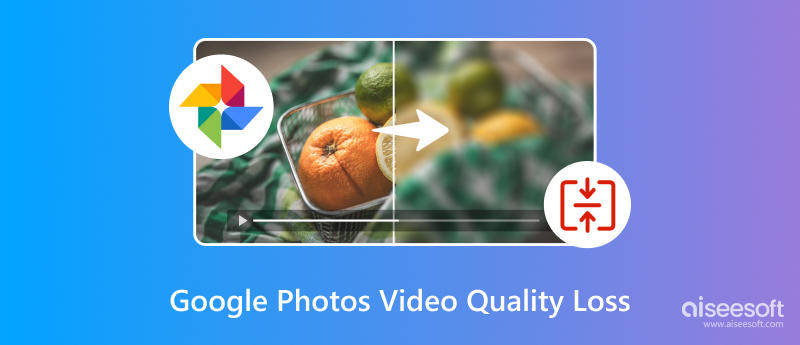
Before fixing the issue, it’s important to understand what’s causing it in the first place. From my experience, blurry photos or videos in Google Photos usually aren’t random. They’re often the result of specific settings or conditions during backup and viewing. If you’re noticing Google Photos video quality loss, chances are one of the following factors is affecting your media.
One of the most common reasons your photos or videos lose clarity is the backup quality setting you choose in Google Photos. By default, many users enable Storage Savers, previously called High Quality, to save cloud space, but this comes with a trade-off.
When Storage Saver is turned on, Google Photos automatically compresses your files during upload. This means:
Because of this compression, fine details can be lost, and your media may appear softer, pixelated, or slightly blurry compared to the original file on your device.
From my perspective, this is usually the primary reason people realize a decline in quality, particularly when they compare their original videos with the ones kept in the cloud. Storage Saver is excellent for creating more space, but it's not the best choice if you intend to retain your media in the full original resolution. To prevent this problem going forward, changing to the Original Quality backup mode is your safest bet, as your files are preserved without any form of compression.
Another reason your photos or videos may look unclear is not that they’ve lost quality, but because they haven’t fully loaded yet. When your internet connection is slow or syncing is incomplete, Google Photos often displays a low-resolution preview (thumbnail) instead of the original file.
This is especially common when:
In these cases, what you’re seeing is just a temporary version. Once the connection improves or syncing finishes, the app will load the full-resolution image or video automatically.
Such a problem seems to be quite common, according to my observations. This is the reason why Google photos are blurry on the iPhone is a thing. Usually, iOS devices decide to display the quick previews only to save data or accelerate the loading speed. You should try waiting for a few moments, refreshing the application, or even changing the wifi to a stronger one. These three things do fix the problem in most cases without delay. Therefore, don't jump to the conclusion that your pictures are degraded permanently, but check first if the photos have been properly synchronized and loaded fully. If it doesn’t work, you might still need to seek solutions to make a picture clearer on iPhone.
Some smartphones come with built-in storage optimization or “space saver” features that automatically reduce the size of photos and videos stored on your device. While this helps free up space, it can also make your media appear lower in quality when viewed locally.
Here’s how it affects your files:
This is one of the reasons why users often experience Google Photos videos as blurry, even though the original file is still high quality in the cloud. It’s simply the device showing a space-saving version instead of downloading the full file.
As per my experience, this is one of the most common reasons why it happens on phones that don't have a lot of free memory left or when the optimization settings are turned on by default. So, to solve the problem, maybe you'll need to get back the original file or change the storage settings on your phone so that higher-quality versions are saved on your device.
In short, the blur isn’t always permanent. It’s often just a result of how your device manages storage.
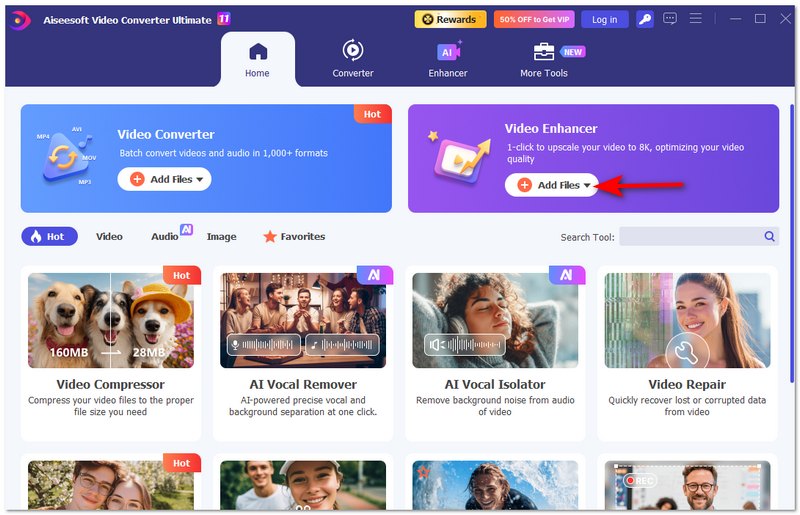
If you are seeing your videos blurry in Google Photos, you still have the opportunity to make them better. I think a dependable video enhancement software can really save the day by sharpening and clarifying the video. Among others, Aiseesoft Video Converter Ultimate is the one that I would recommend. It is a multi-purpose video enhancement software package which, aside from just upgrading the quality of a video. Instead of being content with your blurry video clips, you can use this software to increase the definition, make the video less noisy, and enhance the details to a great extent so that the videos can be almost as good as the originals.

Downloads
![]() 100% Secure. No Ads.
100% Secure. No Ads.
![]() 100% Secure. No Ads.
100% Secure. No Ads.
Steps to Fix Blurry Videos
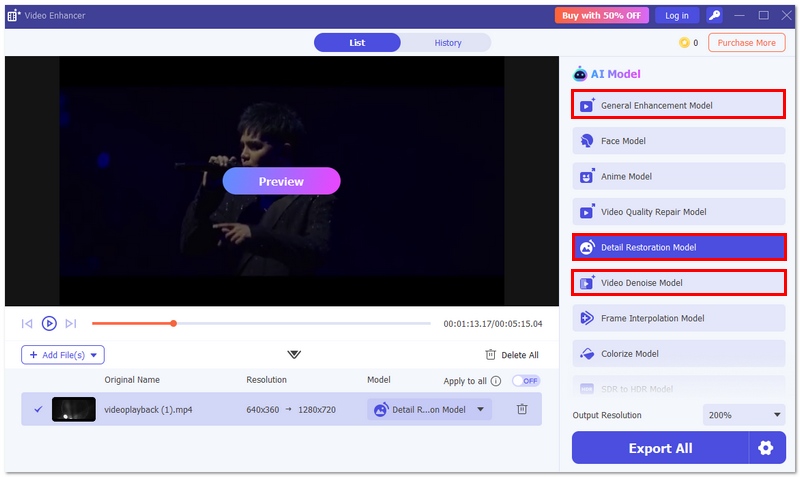
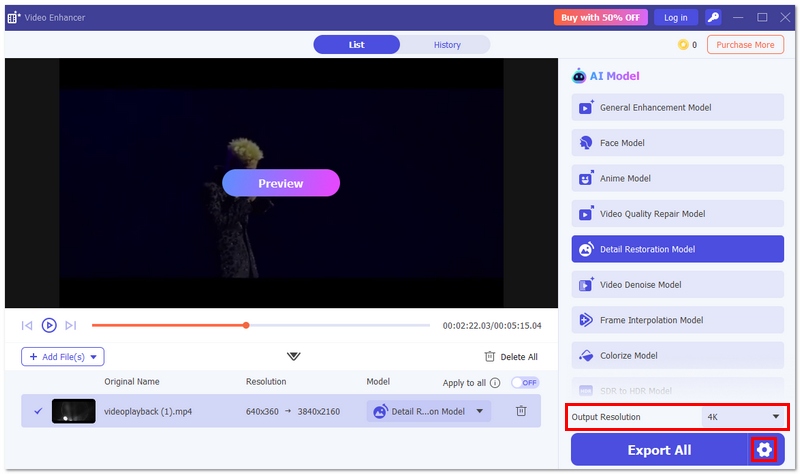
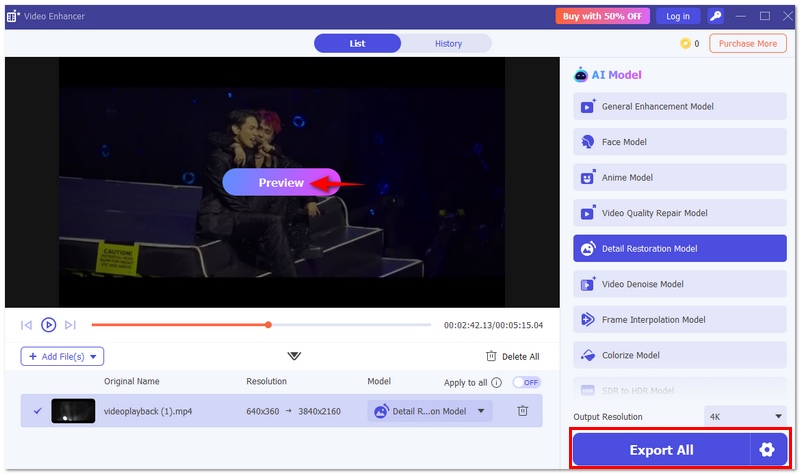
By following these steps, you can turn blurry videos into clearer, more watchable content—even if they were affected by compression or syncing issues in Google Photos.
Why do shared Google Photos videos look more blurry?
Google usually applies a higher level of compression to your video sharing, after which the video is streamed through a very fast mode. This will, in most cases, result in a lower quality video for the viewers.
Is there a difference between viewing on the app vs browser?
Yes, the mobile app sometimes displays low-quality previews only, while the desktop browser can get higher resolution images faster and display them.
Does Google Photos support true 4K video playback?
Yes, but only if the video was uploaded in Original Quality and your device and internet connection support 4K playback.
Conclusion
Generally, the reason behind Google Photos video quality loss shows up in the backup settings, syncing delays, or even device storage optimizations. One has to figure out these aspects to get to the root of the problem, why the videos turn out blurry, and what is the right way to correct them. If one changes backup quality, makes sure that the net connection is good, and converts old files with the help of Aiseesoft Video Converter Ultimate, one can get the sharpness back and even watch with much finer details.
 Google Photos Recovery Within and After 60 Days
Can I retrieve all my deleted Google Photos? How do you recover deleted photos from Google Photos? Check and learn several proven Google Photos recovery ways.
 How to Delete All Photos from Google Photos: Backup & Recovery Tips
Discover how to delete all photos from Google Photos across Android, iOS, and a computer. Uncover tips and utilize tools to restore deleted photos.
 Google Photos Backup: Get Free and Auto Backup with Google Photos
How to use Google Photos backup to do Android photos backup automatically to Google Drive? Read this post and learn things about Google photos auto backup and more.
Video Converter Ultimate is excellent video converter, editor and enhancer to convert, enhance and edit videos and music in 1000 formats and more.
![]() 100% Secure. No Ads.
100% Secure. No Ads.
![]() 100% Secure. No Ads.
100% Secure. No Ads.
*Required field
*Please enter a valid email
