Note
If the recovery partition is damaged, you can boot into Mac OS Internet recovery mode instead.
Hello there, I bought a used MacBook Pro. It's hard disk was erased and it has a Windows 7 system installed already. No macOS X system. So how can I restore it to the default OS system or install an OS X or make a recovery to do it?
If you have no idea how to reinstall a macOS X operating system, then you just come to the right place. This article introduces how to boot Mac into recovery mode step by step. Moreover, you can also get solutions if Mac recovery mode not working. Now, let's start to read and learn more about recovery mode on Mac.
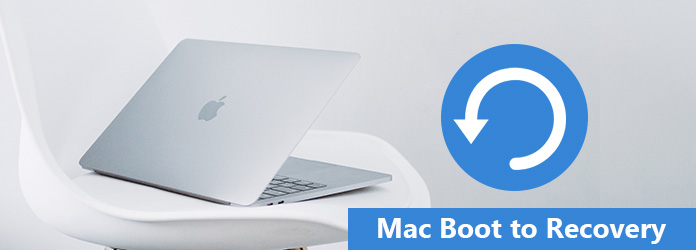
It is the built-in feature of your Mac. You can get several options to repair, reboot or reinstall Mac operating system in emergency manually. When you fail to recover Mac, then you can boot Mac into recovery mode to solve the problem.
Moreover, it is also supported to get online help or install the last version of macOS X on your Mac computer. When you get the "macOS Utilities" window, there are 4 options displaying in its main interface. Each of them contains different functions.
Note
If the recovery partition is damaged, you can boot into Mac OS Internet recovery mode instead.
When you restart your Mac, you can hold and press certain Mac startup key combinations immediately. To be more specific, once you hear the chime sound, it means you can get Mac boot to recovery mode successfully. Do not release those keys on your keyboard until the specific function occur.
| Press and hold during startup on Mac | Main functions |
|---|---|
| Shift | Boot into Mac safe mode |
| Option/Alt | Restart with Mac startup manager |
| N | Start up from NetBoot server |
| D | Enter into Apple hardware test or Apple diagnostics utility |
| C | Boot with CD, DVD or USB |
| Command & R | Install the latest macOS X version you had installed on your Mac before |
| Option & Command & R | Upgrade the latest macOS X operating system that is compatible with your Mac |
| Shift & Option & Command & R | Install the version of macOS X that came with your Mac |
Step 1 Restart your Mac
Choose the Apple icon the on top left corner of your screen. Click "Restart…" from its drop-down menu. Well, if you do not turn on your computer, you can press the Power icon instead.
Step 2 Press with Mac startup key combinations
Hold and press "Command" and "R" keys quickly. Do not release them until you see the Apple logo or spinning globe appear. Well, if you see the latter icon, it means your Mac fail to reboot with the built-in recovery system. So it tries to boot into Mac Internet Recovery mode. Of course, you can try other Mac boot options in different situations.
Step 3 Boot Mac into recovery mode
You will receive a popping-up window with the name of "macOS Utilities". Choose the second "Reinstall macOS" option. As a result, you can boot Mac to recovery mode. Moreover, you can also choose other available options to get Mac recovery mode disk utilities and other features.

Don't miss: How to boot Mac from USB drive.
What if your Mac won't boot into recovery mode? Many people complain that the Mac just stuck on the spinning globe or blank screen. Well, calm down and try the following tips to fix Mac recovery mode not working issue.
For people who report the Internet recovery Mac not working problem, it is also important to check the speed and safety of the Internet connection.
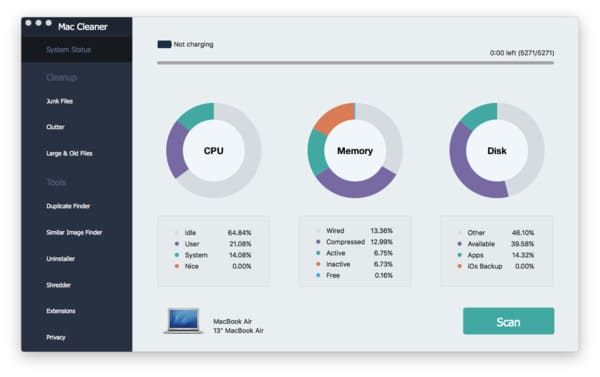
Do you want to delete some files that others cannot recover them anymore? If you want to sell your old Mac computer on eBay or just give it to your friend, you had better delete some private information permanently. During this time, you can try Aiseesoft Mac Cleaner. It is an easy-to-use and powerful tool that can help you delete any file selectively. What's more, you can use it to monitor the Mac performance automatically.
Step 1 Launch Mac Cleaner
Free download and install Mac Cleaner on your Mac computer. Then launch this program and locate the default "System Status" page. If you want to check the current condition of your Mac, then you can click "Scan" button below.
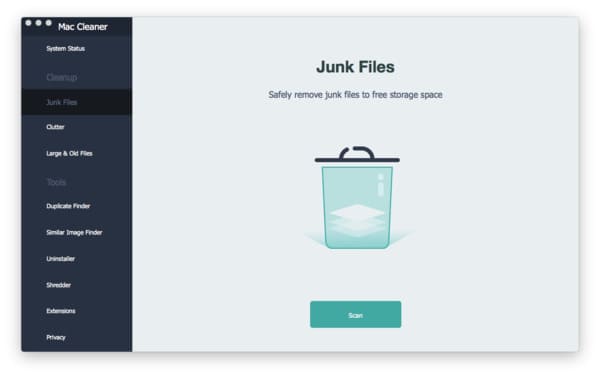
Step 2 Scan for junk files
Choose the feature you need under "Cleanup" and "Tools" categories in the left panel. This article will take "Junk Files" for an example. Click it and then choose "Scan" option at the bottom.
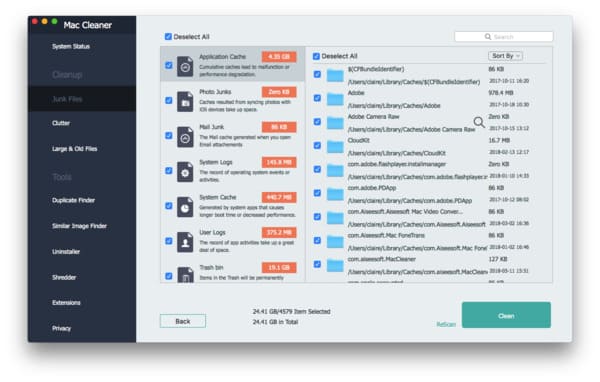
Step 3 Delete the selected junk files safely
Choose "Review" when the scanning process finishes. Later, you can see all junk files in different categories. Choose the certain one and open one folder to select which unwanted file you want to remove. At last, choose "Clean" on the lower right corner of the screen to end up.
At last but not least, no matter you want to get Mac boot into recovery or free up more Mac storage space, you had better back up important documents and files in advance. Otherwise, it is hard to get them back, seriously.

June 25, 2018 05:18 / Posted by Amanda Brown to Recover Mac Data
 How to Recover Data from a Failed SSD
Are you facing the SSD failure situation and looking for the best way to restore your lost data? Learn to make SSD data recovering here.
 How to Convert AVCHD Video to WMV
Convert AVCHD video to WMV – Guide about how to convert AVCHD video to WMV format with AVCHD to WMV Converter. Free download AVCHD Video Converter to convert AVCHD to WMV.
![How to Recover Sticky Notes [All Solutions]](/images/more-reading/recover-sticky-notes-s.jpg) How to Recover Sticky Notes [All Solutions]
How to Recover Sticky Notes [All Solutions]
What is Microsoft Sticky Notes? How to recover deleted or lost Sticky Notes files? You can find the best data recovery here to back up and rescue your Sticky Notes.
