As for iOS 11, it brings many useful features, especially for iOS 11 screen recording. To be more specific, all Apple smart phones running iOS 11 allows users to record screen video with audio for free. Yes, you can screen record on iPhone 8, iPhone 8 Plus and iPhone X through iOS 11, too.
Thus, you can capture all activities on your iOS device easily by screen recording. For instance, you can record a tutorial to show others how to use a new program.
It is also supported to record your iPhone screen. In another word, you can screencast all video and audio files for further usages.
From this article, you can get 2 easy ways to screen record in iOS 11 with or without a computer.
Now, let's read together to figure out how to record iOS 11 screen step by step.

Record Screen iOS 11
If it is the first time you screen record iPhone, you need to enable the iOS 11 screen recording feature first. Thus, next time you want to record your iPhone's display, you can trigger this function quickly.
Step 1 Enable iOS 11 screen recording feature
Open "Settings" app on your iOS device. Choose "Control Center" from the list. Later, head to the "Customize Controls" section. Tap the green add icon before "Screen Recording" to add it to Control enter. As a result, you can get a red minus icon near "Screen Recording" instead. Do not tap it unless you want to disable iOS 11 screen recording.
Step 2 Tap the screen recording button
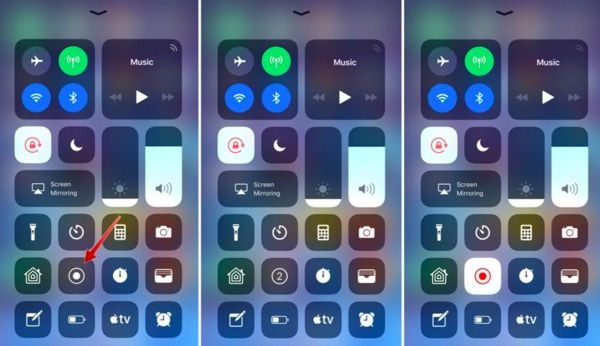
Swipe from the button of your iPhone or iPad screen. You can see the newly-added screen recording icon near the lower left corner. Tap this icon to start recording iOS 11 screen.
Step 3 Screen Record with sound iOS 11
You will be prompted whether to screen record in iOS 11 with sound. To be more specific, you can enable or disable the "Microphone Audio" option at the bottom. If the microphone button turns red, it indicates that the screen video is captured with audio. Later, choose "Start Recording" on the screen.
Step 4 Stop screen recording in iOS 11
After the 3-second countdown, your screen activity will be captured. When you want to stop recording, you can head to the Control Center. Tap the red icon to stop recording in iOS 11.
Your recorded screen video will be stored to Camera Roll by default. Thus, you can open "Photos" app to access the screen recording file. Later, you can email this video as usual or transfer videos from iPhone to your PC for playing or further editing.
What if the iOS 11 screen recording feature not working? Is there any alternative way to capture screen video from iPhone?
Of course, you can mirror your iPhone screen to computer for screen recording. During this time, Aiseesoft Screen Recorder can be your first choice.
You can record streaming video, gameplay, tutorial, Skype call and all on-screen activities in high resolution.
Moreover, the screen recorder software allows you to take screenshots while recording iOS 11 video. Compared with the default iOS 11 screen recording feature, you can get much editing filters during and after the process.
Because of its intuitive interface, even beginners can record screen video and screenshot quickly. Well, you can record other digital device's display with Aiseesoft Screen Recorder, too. Thus, if you fail to screen record on iPhone iOS 11, you can mirror iOS screen to get a new solution.
If you want to screen record in iOS 11 Apple device, you need to mirror the display to your computer first. There are many screen mirror apps you can head to. Compared with common ones, AirPlay is a good choice for you. It is totally free and easy to use.
Step 1 Locate the Control Center
Turn on your iPhone or iPad. You need to make sure the two devices connect to the same Wi-Fi network. That matters a lot. Later, swipe up from the bottom on your iOS device, you can access the Control Center. For iPhone X users, you need to swipe down from the top right corner instead.
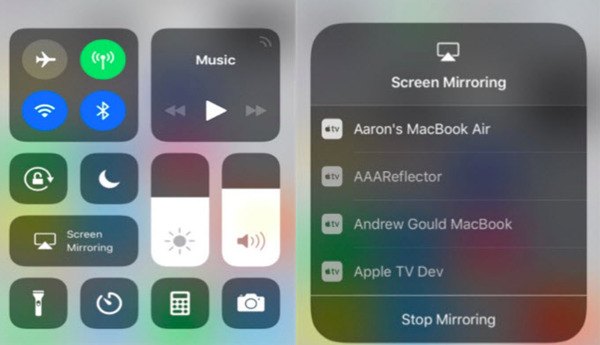
Step 2 Mirror iOS 11 screen with AirPlay
Since you are using iOS 11 version, you can get an option with the name of "Screen Mirroring". Tap this icon to see all available devices. Now choose your computer's name or Apple TV in the list. You may need to enter the passcode to move on. Sooner, you can see the mirrored iPhone screen on your computer.
Tips
1. It's OK if you encounter short delays while mirroring iPhone screen with AirPlay. However, if it takes a long time, then you need to check the Wi-Fi connection or speed first. Switch off other digital devices that use the same wireless connection.
2. Some users complain that the iPhone screen is not mirrored entirely. There is just a square image with black bars contained. Well, the different resolution causes this problem mainly.
Now, you need to screen record iOS 11 on computer with Aiseesoft Screen Recorder. You can record iPhone screen video with no time limitation.
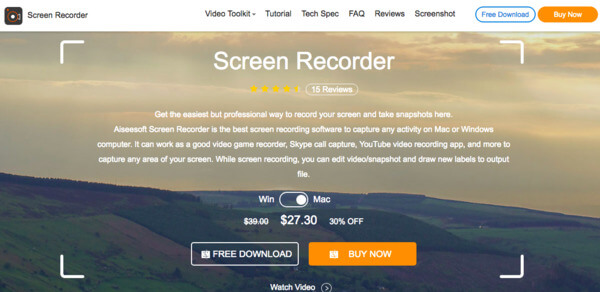
Step 1 Run Screen Recorder
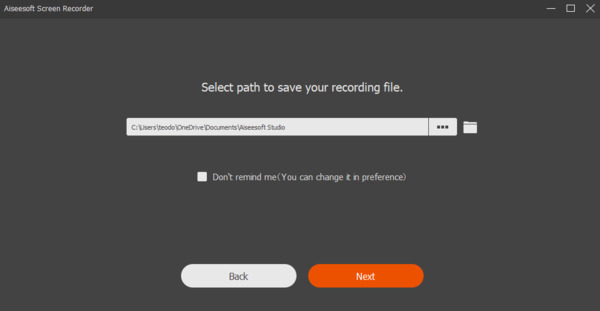
Free download and install Aiseesoft Screen Recorder on your Windows or Mac computer. You can head to its official site to get the latest version. When you launch Screen Recorder after the installation, you can choose "Video Recorder" to enter its screen recording section.
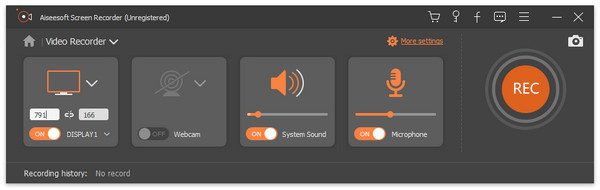
Step 2 Record your iPhone screen
Set the screen recording area freely with your mouse. Choose whether to record video with system sound or microphone. Just set the audio source you want to record. Trigger the certain on-off option to the "On" state.
After all preparations, click the "REC" icon to start screen recording iOS 11 on your computer.
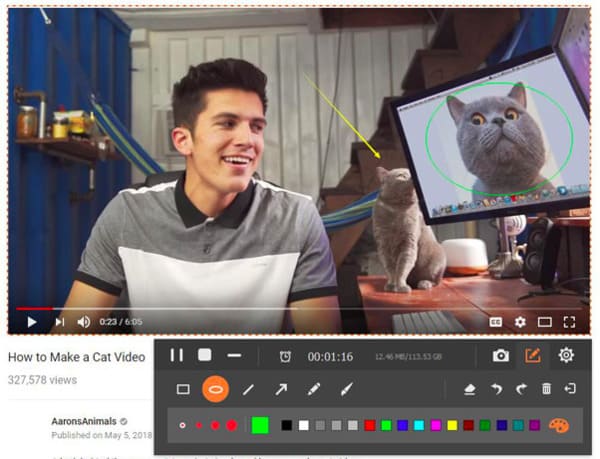
Step 3 Take a snapshot while recording (optional)
You can take a screenshot during or after screen recording freely. If you want to screenshot while recording, you can draw the area directly. The moment you release the mouse, the captured screenshot will be stored to the default destination folder automatically.
In addition, you can add text, cursor, watermark, circle and other stickers on the screenshot, too.
Step 4 Export your recorded iOS screen video
Screen Recorder allows you to pause, resume and stop the whole iPhone screen recording process with no time limitation. Thus, you can record several video clips together.
When the iOS 11 screen recording ends, you can get a preview window. Check the recorded video and apply video effects if necessary. At last, you can share or save the video recording file.
Note: Well, the default video output format is MP4, and MP3 is the default output audio format. As for the screenshot format, PNG is the default choice. If you want to change the output settings, you can click the "Settings" option on the top right corner to get various choices. It is also supported to adjust hotkey preferences and other personal settings.
It is true that you can capture iPhone or iPad screen by using above two methods. Then here comes the question, which one is a better choice for recording iPhone or iPad screen? In another word, in which case should you run Aiseesoft Screen Recorder?
To solve this problem, you can get the detailed comparison from the following paragraphs.
| Screen record in iOS 11 | Record iPhone/iPad screen with Aiseesoft Screen Recorder | |
|---|---|---|
| Price | Free | Paid (Free trial) |
| Compatibility | iPhone, iPad and iPod touch with iOS 11 version (Without computer) | Windows/Mac (Support all iOS versions, including iOS 12.) |
| Video editing | X | √ (Add arrow, text, line, rectangle, ellipse, etc.) |
| System audio recording | X | √ |
| Pause and resume the iOS screen recording | X | √ |
| Add external audio track and subtitle | X | √ |
| Share the recorded video directly | X | √ |
| Output video format | MP4 | MP4, WMV, MOV, AVI, GIF, TS, etc. |
Here are some conclusions after comparing from the above table. You can also regard it as a battle between iOS 11 screen recording and Aiseesoft Screen Recorder. Both two solutions are good. You can choose the certain one based on your real demand. Well, the followings are disadvantages of screen recording in iOS 11. Just read and check.
Though you can screen record iOS 11 without computer for free, you cannot get much screen recording and editing tools. You have to turn to other video editors for help.
The default iOS screen recording feature does not work on all iOS versions. If you want to record screen on iOS 10 and before, you should use a screen recorder app to solve the problem.
When you record iPhone screen in iOS 11, you cannot pause the video for further recording. There is only a "Stop" icon provided from the iOS 11 screen recording feature. Fortunately, Aiseesoft Screen Recorder allows users to screen record iOS 11 with no time limitation. You can also set a timer to record screen in a fixed period smartly.
Your recorded iPhone screen video will be saved to Photos by default. Thus, you need to head to Photos on iPhone to find your recorded video file first. What's more, iOS 11 screen recording lack preferences for output format, quality and other settings.
All in all, you can get more choices from Aiseesoft Screen Recorder. That's all for how to screen record in iOS 11 with or without computer. If you have any suggestion or question, just feel free to contact us or leave messages in the comments below. We are glad to help you solve any problem whenever you need.

September 03, 2018 08:00 / Posted by Andrew Miller to Record Video
 Android Screen Mirroring & Mirror Android to TV/PC/Mac
What is Android screen mirroring? How to mirror Android screen to PC/TV/Mac? This post will show you how to use Chromecast, Rokku, Amazon Fire TV, Miracast, and Xbox One/360 to do it.
 The Simplest Way to Use AllShare Cast to Mirror Samsung Screen
What is AllShare Cast? How to use AllShare Cast dongle to mirror screen on Samsung Galaxy S3/S4/S5/S6? Get the details here to use AllShare Cast to mirror your photos and videos.
 Best 9 iPhone Recorder Apps to Capture iPhone Screen
How to record screen iPhone? This article introduces you the best 9 iPhone Screen Recorder Apps to record iPhone screen on Windows/Mac or iOS devices.
