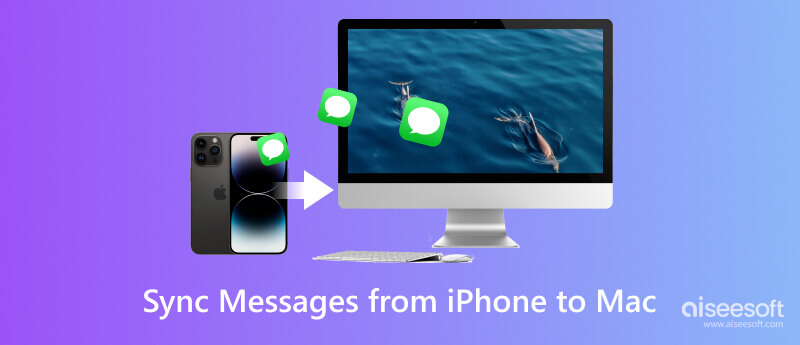
Syncing iPhone messages is a useful way to enable you to seamlessly access all important messages across multiple Apple devices. Whether you want to keep your conversations in sync between your iPhone, iPad, or Mac, this guide will provide step-by-step instructions.
| Scenario | Best Method | Limits |
| Sync messages to any device or backup them | FoneTrans | Paid software |
| Sync message from iPhone to Mac | iCloud Sync | Only 5GB space is free. Sometimes it doesn’t work fluently. Users cannot preview/print messages in .excel or .html format on computer. |
| Sync message from iPhone to iPad | iCloud Sync | Only 5GB space is free. Sometimes it doesn’t work fluently. Users cannot preview/print messages in .excel or .html format on computer. |
| Sync message from old iPhone to new iPhone | iTunes Backup | It will cover existing data, only suitable to sync on the new device. |
Many third-party apps help you transfer messages and other data from your iPhone to another Apple device. Aiseesoft FoneTrans is a famous and easy-to-use iOS data transfer that can help you transfer your iOS files between iPhone, iPad, Mac, Windows, and iTunes. All commonly-used data types, including messages, pictures, videos, songs, contacts, calendars, and notes, are supported. Compared with iTunes or iCloud syncing features, it offers more flexibility and additional features.

Downloads
FoneTrans - Sync iPhone Messages
![]() 100% Secure. No Ads.
100% Secure. No Ads.
![]() 100% Secure. No Ads.
100% Secure. No Ads.
If you want to sync messages from your iPhone to an iPad or another iPhone, you should connect the device to your computer.
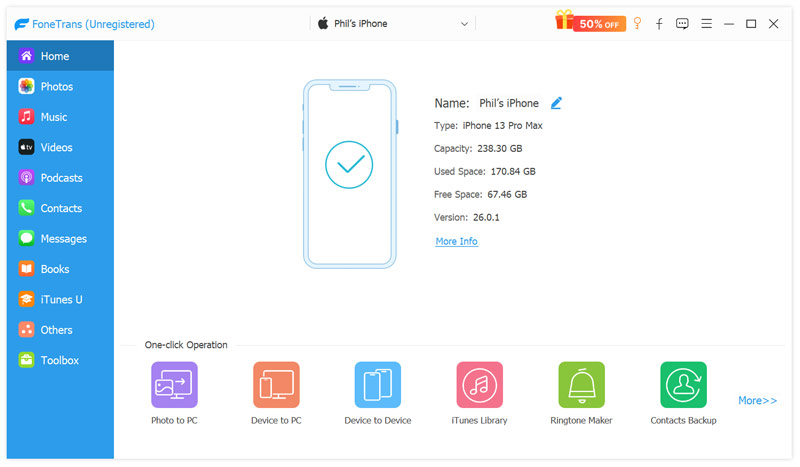
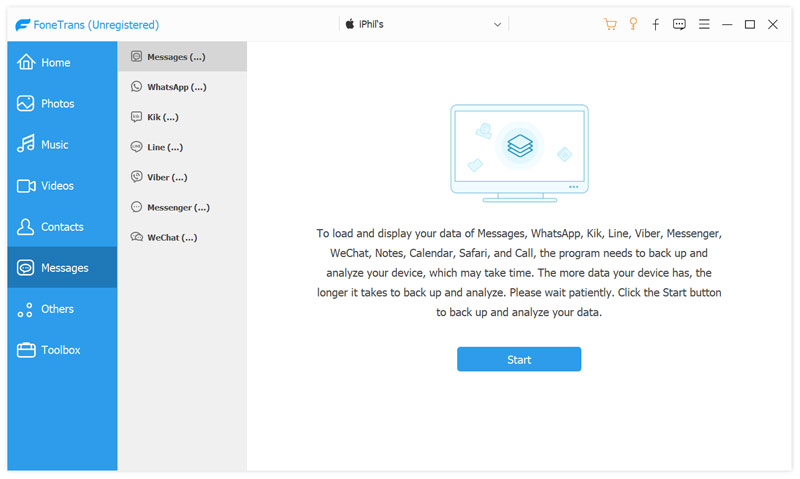
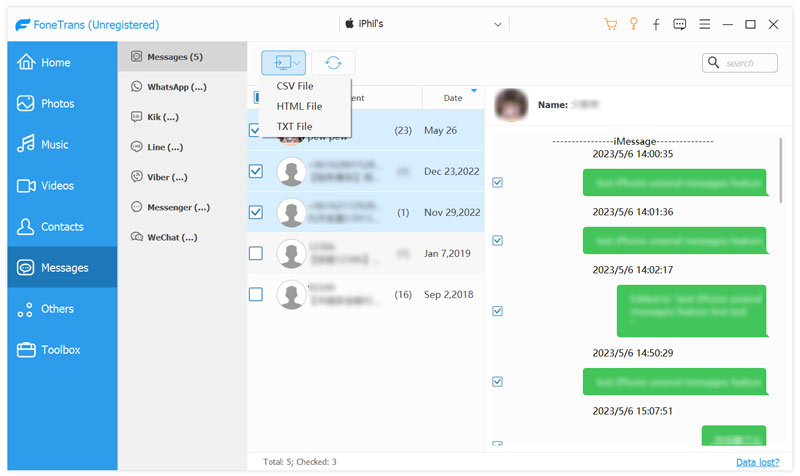
Click Messages to check all messages on your iPhone. You should back up your iPhone data for the first sync to analyze them. Click Start Backup to begin the backup.
Syncing iPhone messages to your Mac through iCloud is a convenient way to have all your messages accessible across multiple Apple devices. This part will guide you to transfer your iPhone messages to a Mac with iCloud. You can also use iCloud to sync messages from iPhone to an iPad or a new iPhone with ease.
Note: If you enable Messages in iCloud, messages will not be included in regular iCloud full disk backups. This means that if you accidentally delete a text message on your phone, the cloud will also synchronize the deletion, which makes restoration is hard.
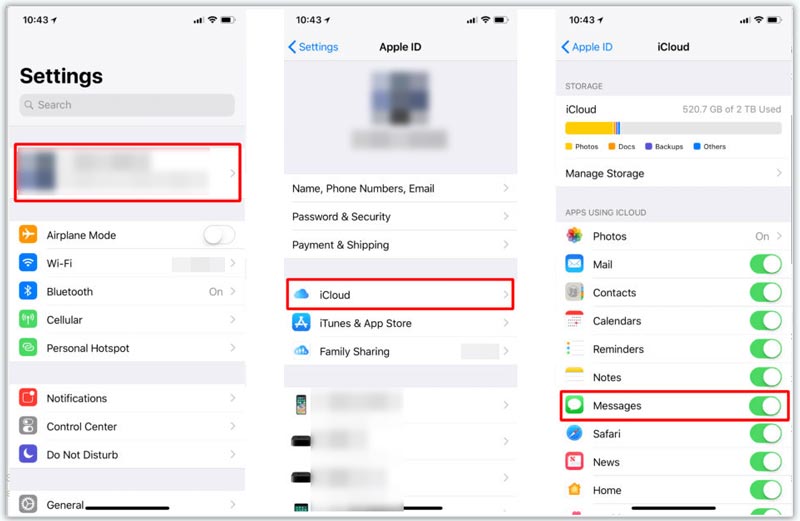
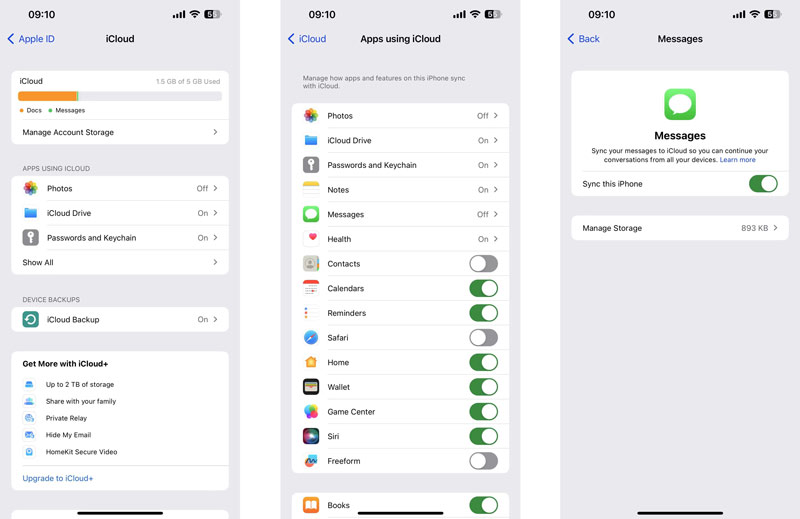
Go to Settings and tap your name to access your Apple ID settings. Choose iCloud and tap Messages. Or, tap Show All and then scroll down to enable the Messages in iCloud. When you enter the main Messages in iCloud interface, turn on Use on this iPhone.
Wait for the Messages to finish syncing with iCloud. This might take some time, depending on the size of your messages.

Remember that the syncing process prioritizes newer messages, so it may take a while for older conversations to appear on your Mac. You should regularly back up your iPhone and Mac to avoid any possible data loss. If you are facing any issues with syncing, ensure that both your iPhone and Mac are connected to the same iCloud account.
With similar steps, you can handily transfer your iPhone SMS and iMessage conversations to your iPad through iCloud. With the iCloud sync feature enabled, you can seamlessly view and reply to your messages from your iPad without switching between devices.
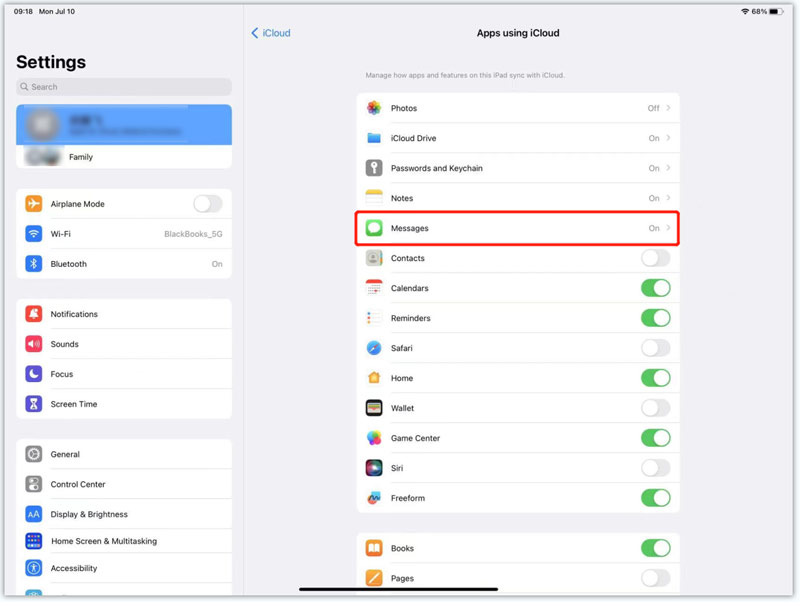
Please note that this process will only sync your messages, not other data like photos, videos, or apps. Also, it's important to have enough storage on both devices and a stable internet connection for the sync to work smoothly.
Another method to sync iPhone messages involves using iTunes to back up your iPhone and restoring it on another Apple device. This iTunes syncing process will replace the existing data on your iPhone. So you’d better transfer your iPhone messages to a new iPhone using this method. Click here to learn more details about how to iTunes Backup.
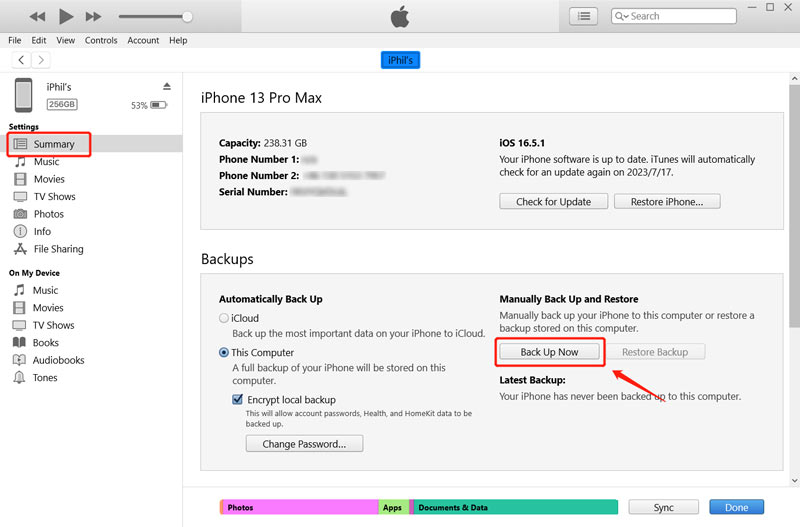
From the list of available backups, select the newly-created backup. Ensure to choose the backup that contains your messages and click Restore. iTunes will now restore your new iPhone using the selected backup.
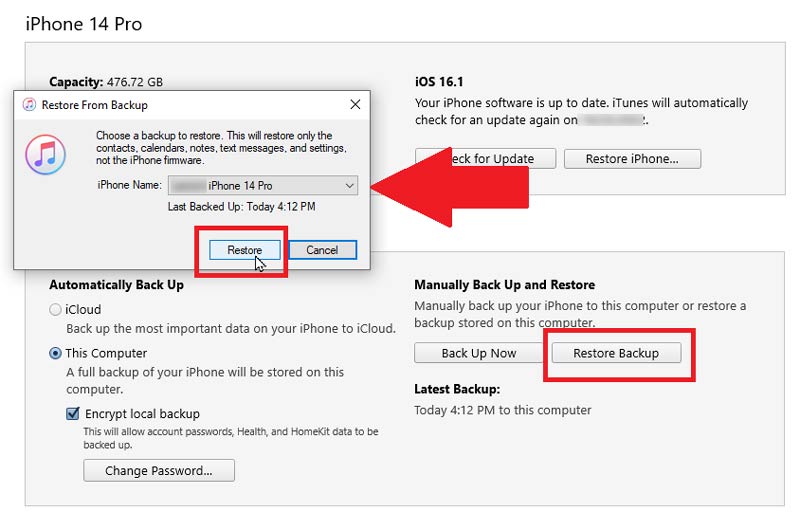
After the setup, open the Messages app on your new iPhone and verify that all your messages and associated attachments have been successfully transferred.
When your iPhone message cannot be synced, you can check the following things one by one.
• Check if the Apple ID is consistent.
• Check if the “Send and Receive” address is selected.
• Check if iCloud space is full.
How can I back up my iPhone messages to my Mac using Finder?
If your Mac runs macOS Catalina or later, you can back up and restore your iPhone messages using Finder. Connect your iPhone to your Mac and open Finder. Select the iPhone device from the locations section on the left panel. Help Finder to recognize your iPhone by clicking Trust. Choose to back up your iPhone data to this Mac, then click the Back Up Now button.
How do you download iCloud messages on your Mac?
After syncing iPhone messages to iCloud, all these messages should be synced to your Mac. You can open the Messages app to check them. Go to the iCloud website, sign in to your Apple account, then click the Messages button to access your iCloud Messages. Choose the conversation you want to download and press Command + A to select all the messages. Right-click on the selected messages and choose Copy from the context menu. You can create a new document in a text editor application like TextEdit or Pages, paste iCloud messages, click File in the menu bar, and select Save. You can download your iCloud messages in a desired file format like TEX or RTF.
How to transfer text messages from my iPhone to Android?
You can back up your iPhone messages to iCloud, navigate to the iCloud website, sign in to your account, then download them to your computer. You can easily transfer these iPhone text messages to your Android phone. Also, you can rely on the popular iPhone-to-Android data transfer, MobieSync, to directly copy text messages from your iPhone to an Android device.
Can I sync iPhone messages to a Windows PC?
Yes, but iTunes and iCloud cannot help you. Since Windows does not have a built-in iMessage app, you need professional third-party syncing tools, like FoneTrans, which can sync iPhone messages, photos, videos, music, and more to a Windows computer.
Will syncing messages delete them from my old phone?
No, syncing will not delete your messages. Syncing is a process of mirroring. When you sync your iPhone to another device, the messages are simply being copied, pasted, and displayed on a second screen.
Conclusion
Syncing iPhone messages is a convenient way to stay connected and access conversations on all your Apple devices. Whether you use iCloud, iTunes, or a third-party transfer app, this guide has provided the necessary steps and knowledge to seamlessly sync your iPhone messages.
 iMessages on Mac | Enable iPhone Messages on Your Mac with Ease
How to get messages on Mac? Can I restore iMessages and iPhone data on your computer? You can find solutions to get iMessage on your Mac and a bonus tool.
 Restore Message with iCloud & Effective Tools [Solved]
What happens if you accidentally delete important messages on iOS devices? Can you restore iMessages from iCloud? This post will guide you through this problem.
 Useful Methods to Fix How to Recover iOS Deleted Messages
Want to see and recover deleted messages from iPad/iPod/iPhone? Here we will provide 4 highly feasible methods to assist you. Read and explore with us.
Transfer data from iPhone/iPad/iPod to your computer or reversely.
![]() 100% Secure. No Ads.
100% Secure. No Ads.
![]() 100% Secure. No Ads.
100% Secure. No Ads.
*Required field
*Please enter a valid email
