
Best for: Windows users who want a quick, free, and built-in solution without installing additional software.
What is the best way to transfer photos from iPad to computer?
For backup, editing, or other purposes, you often need to move your iPad photos to a Windows PC or Mac. Surely, you may prefer not to use the Finder/iTunes sync method. Then, how do you handle these pictures from vacations, screenshots of important information, or snapshots of daily life?
This guide walks you through four efficient methods, whether you are on Windows or Mac. You can compare them and select a preferred one to copy iPad photos to a computer without losing quality.
Before diving into the step-by-step instructions, here is a quick comparison of the four main transfer tools at a glance. I tested every method below on an iPad Pro running iPadOS 26.
| Transfer/Method | Platform | Transfer Speed | Batch Selection Support |
| Windows Photos App | Windows | Fast (USB-dependent) | Yes |
| Aiseesoft FoneEase | Windows | Fast (USB-dependent) | Yes |
| iCloud Photos | Mac & Windows | Varies (Wi-Fi dependent) | Yes (automatic sync) |
| Mac Finder (Photos app) | Mac | Fast (USB-dependent) | Yes |
If you need to transfer photos from your iPad to a Windows computer, pay attention to this section. As a Windows user, you often have two solid paths. One is the Photos app, which is built into the operating system. The other is a third-party tool that gives you more control over photo transfer and management.
You can use the Photos app on your Windows computer to transfer your iPad photos. It lets you freely select which pictures you want to move.
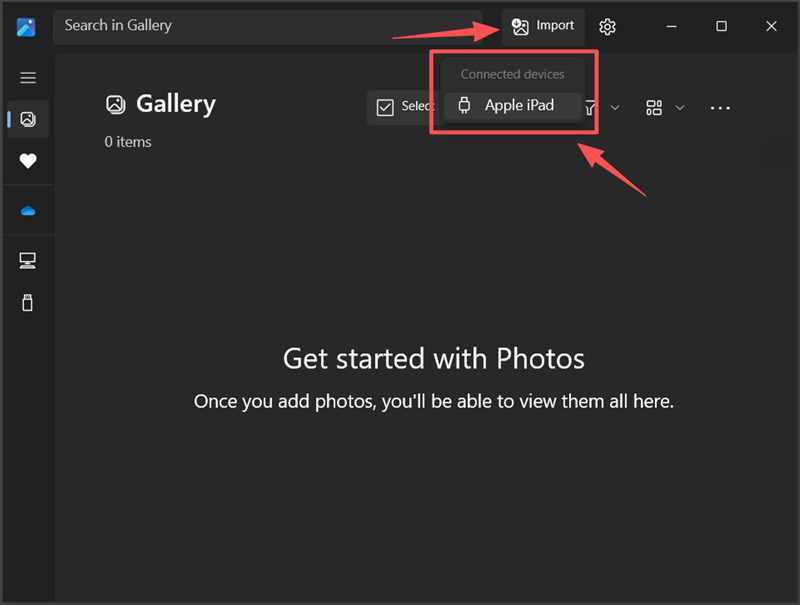
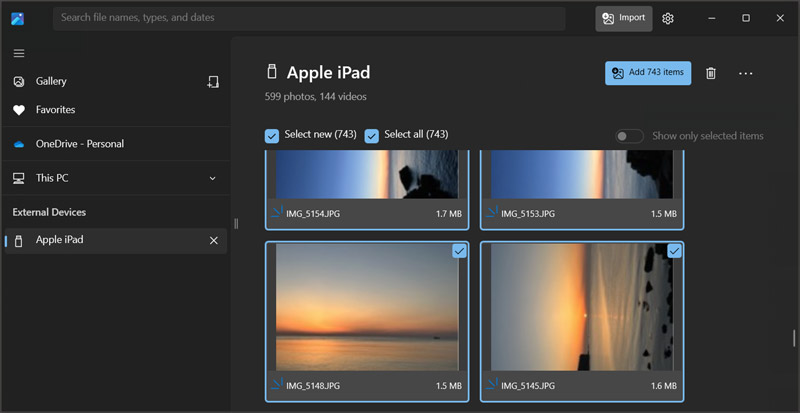
Best for: Windows users who want a quick, free, and built-in solution without installing additional software.
If you want full control of your iPad library management and photo transfer, such as organizing albums, deleting unwanted photos in batches, or converting HEIC files to JPEG, Aiseesoft FoneEase is a powerful alternative. It lets you freely transfer selected photos or albums from your iPad to a computer.
 100% Secure. No Ads.
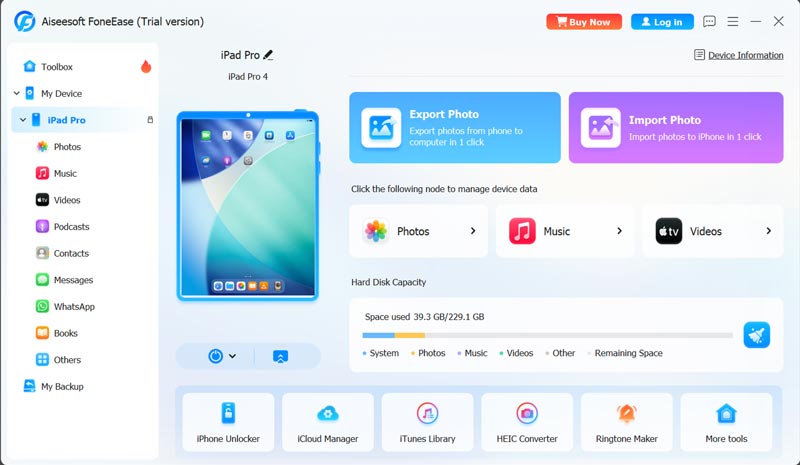
As you can see, it shows a dedicated Export Photo option on the main interface. You can select it directly to move your iPad photos to the computer.
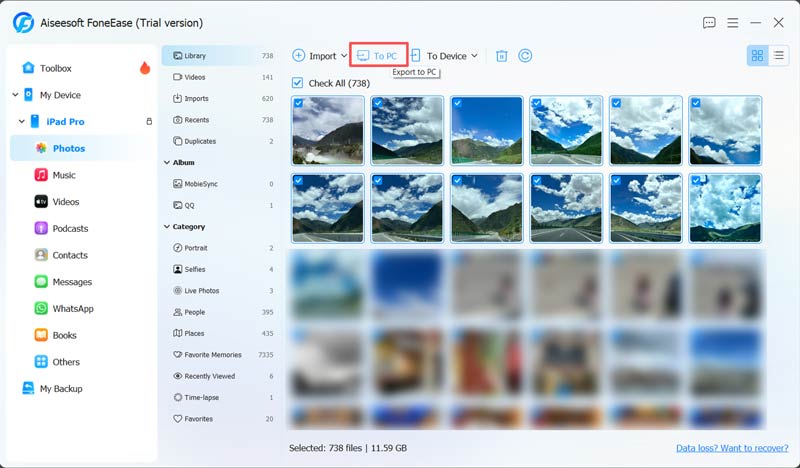
If you want to sync photos from your computer to your iPad, click the Import button and then open the folder from the pop-up window.
Beyond transfer, FoneEase also offers photo management features like creating albums, deleting large photos and videos to free up space, and moving photos between albums. It can also convert HEIC to JPG during the transfer.
Best for: Users with large, album-organized libraries who want to maintain structure. It is also useful if you need to export only screenshots or only camera photos.
If you are using a Mac and want to transfer your iPad photos to it, you also have two primary methods. You can choose wireless sync via iCloud Photos or a wired import through Finder.
If you prefer a wireless way to sync your iPad photos, iCloud Photos is a convenient option. Once enabled, every photo you take on your iPad will automatically upload to iCloud and become available on your Mac, iPhone, and even PC. The trade-off is storage: you need enough iCloud space for the originals.
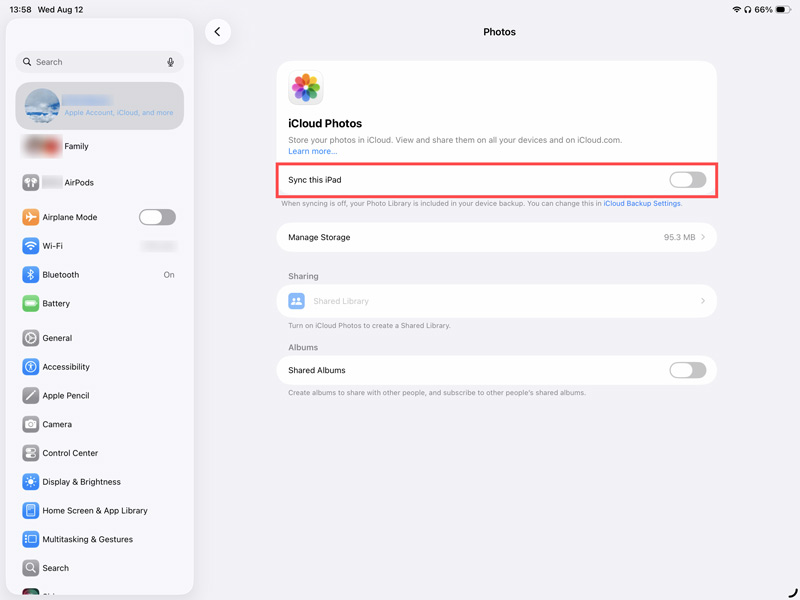
On your iPad, go to Settings > [Apple ID Name] > iCloud > Photos, and toggle on Sync this iPad.
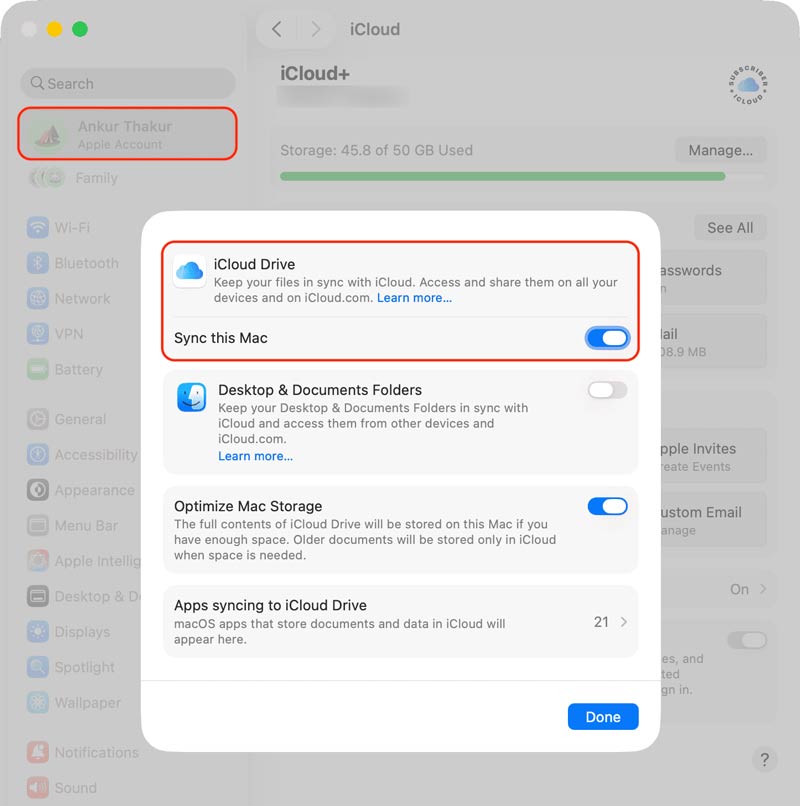
On your Mac, go to System Settings and click Apple ID > iCloud > Photos and enable the same sync.
Ensure both devices are connected to Wi-Fi. Your photos will automatically sync to your Mac’s Photos app. Large libraries may take hours to fully sync over Wi-Fi, especially if you are uploading from the iPad for the first time.
Best for: Users who want automatic, wireless photo synchronization across all Apple devices and have enough iCloud storage.
You may also need:
For Mac users running macOS Catalina or later, the Finder app has replaced iTunes for device management and offers a straightforward way to import photos via USB cable.
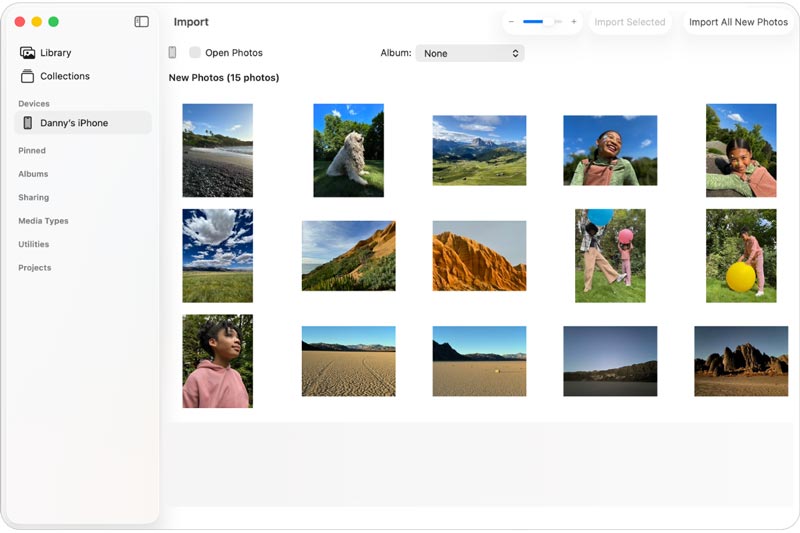
Best for: Users who want a fast, reliable transfer from iPad to Mac without relying on cloud sync.
Question 1. What is the fastest way to transfer a large number of photos?
A wired USB connection is often faster than wireless methods, as it is not affected by Wi-Fi speed. You can use the Photos app or FoneEase with a USB cable to get the best possible transfer speeds.
Question 2. Can I transfer iPad photos wirelessly to a Windows PC without iCloud?
Yes. Some third-party transfer apps like Aiseesoft FoneEase offer a wireless transfer mode. It lets you transfer iPad photos and other files to your PC without iCloud. If you are dealing with a large number of high-quality pictures, a cable is still faster and more reliable.
Question 3. Will transferring photos from my iPad to a computer delete them from the iPad?
No. Transferring photos from my iPad to a computer does not affect the originals. Standard import methods only copy files. If you want to free up storage, you must manually delete photos after confirming they are safely transferred on your computer.
Question 4. Will my photos lose quality after being transferred?
No. When you transfer your iPad photos via a USB cable using the Photos app, Finder, or the introduced FoneEase, the original full-resolution images are transferred. The transfer won’t degrade or compress your photo quality. If you export photos with iCloud Photos, make sure you choose to keep full-resolution originals.
Conclusion
When you want to transfer photos from iPad to computer, you can compare the four methods above and then select the one you want to start the transition. As a Windows user, you can start with the built-in Photos app. If you need more control and want to manage other files, try using Aiseesoft FoneEase. If you need a fast, one-time migration to a Mac, the Finder method is unbeatable. If you have subscribed to iCloud+ and have enough storage for the photo sync, iCloud Photos is the obvious choice.
 4 Easy Ways to Transfer Photos from iPhone to PC
How to transfer photos from iPhone to Windows PC? This article will show you best ways working on iPhone 17 to PC (Windows 11/10/8/7 included) transfer.
 Google Photos Not Backing Up: How to Save and Recover Your Photos
Struggling with Google Photos Not Backing Up? Discover why it happens, how to fix it easily, and how to recover your photos safely using the best tool.
 How to Sync iPhone to iPad Easily Using Proven Methods
How to sync an iPhone to an iPad easily? This guide shows proven methods to sync messages, contacts, photos, and other data safely.
 Leave your comment and join our discussion
Aiseesoft FoneEase is a data transfer and management tool that lets you seamlessly move, back up, and manage various data between iOS, Android, and computers without resetting your phone or relying on iTunes.
100% Secure. No Ads.

*Required field
*Please enter a valid email
