
Best for: Single clips under 2GB, quick transfers, and anyone who wants to transfer iPhone videos wirelessly.
You often need to transfer videos from iPhone to Mac for editing, backup, and other needs. For these large 4K or 1080p HD videos, what is the most efficient method to move or copy them? Surely you don’t want to wait too long for the transfer. What’s more, how to extract video from an iPhone to a Mac without losing quality?
This guide shares five standard methods to send your iPhone videos to your Mac, including built-in routes and third-party tools. You can compare them and select a desired way to transfer your videos with ease.
I tested all five methods below with several 300MB-2GB 4K clips shot on an iPhone 15 Pro Max to see which ones suit different needs. Here’s what I found.
| Transfer Tool | Wired or Wireless? | File Size Limit | Original Quality Preserved? | Ease of Use |
| AirDrop | Wireless | No official limit, but large files may stall | Yes | ★★★★★ |
| Mac FoneTrans | Wired | No limit | Yes | ★★★★☆ |
| Image Capture | Wired | No limit | Yes | ★★★☆☆ |
| Photos App | Wired | No limit | Yes | ★★★★★ |
| iCloud Drive | Wireless | Depends on iCloud storage plan | Yes | ★★★★☆ |
This section covers five proven methods to get your videos from your iPhone to your Mac without sacrificing quality.
Best for: Single clips under 2GB, quick transfers, and anyone who wants to transfer iPhone videos wirelessly.
AirDrop uses peer-to-peer Wi-Fi and Bluetooth to move files directly between Apple devices. It provides a convenient way to transfer videos from your iPhone to your Mac smoothly. Also, you can AirDrop videos from your Mac to an iPhone or iPad with ease.
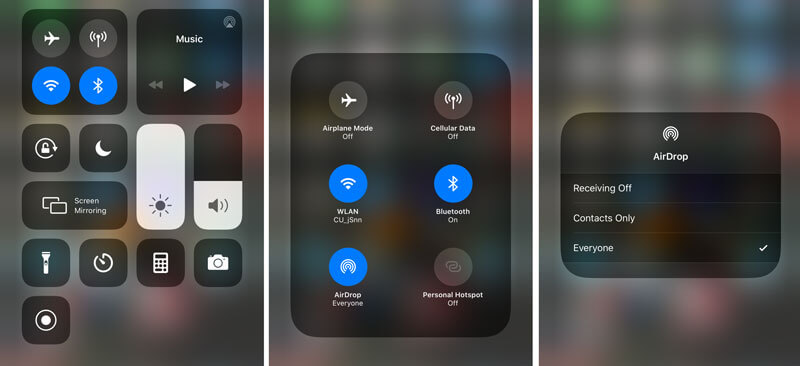
On your iPhone, open Control Center and tap the AirDrop icon to turn it on. You can select “Everyone” or “Contacts Only” as you like.
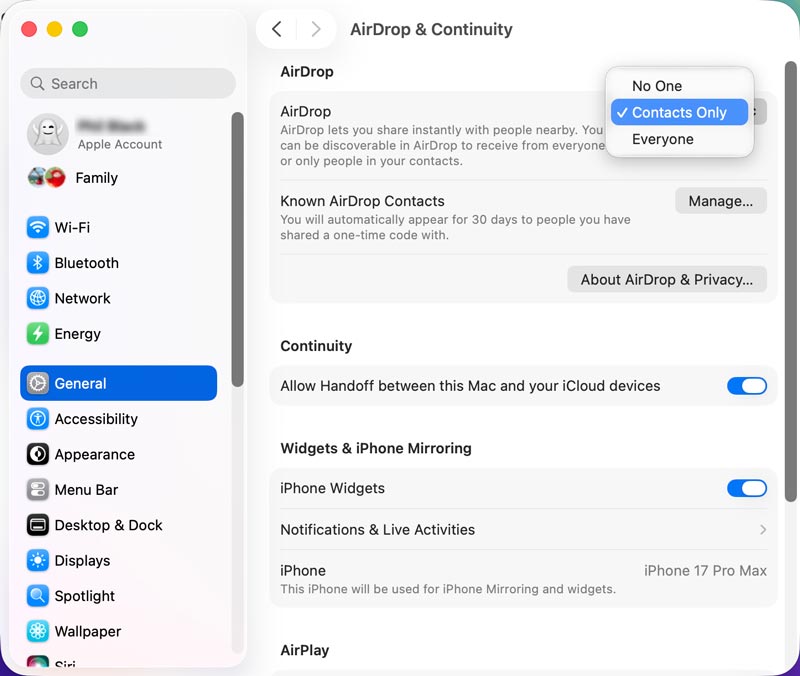
On your Mac, go to System Settings > General > AirDrop & Continuity and set AirDrop to “Everyone” or “Contacts Only”. Also, ensure Bluetooth and Wi-Fi are enabled on both devices.
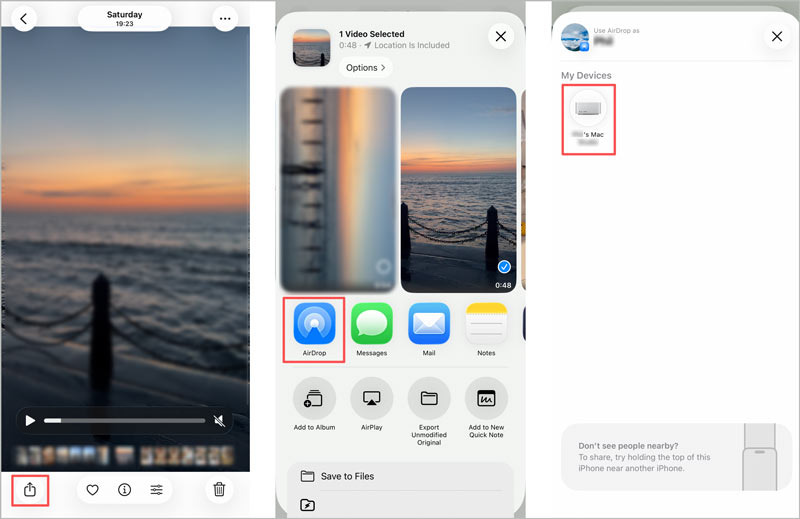
When you need to send videos from iPhone to Mac, open the Photos app on your phone and select the target video you want to move. Tap the Share button, choose your Mac’s name from the AirDrop row. The video will be transferred to your Mac’s Downloads folder by default. Sometimes, you need to manually accept the incoming video file on your Mac.
Best for: Most Apple users who need to handle all types of files and transfer dozens of videos at once.
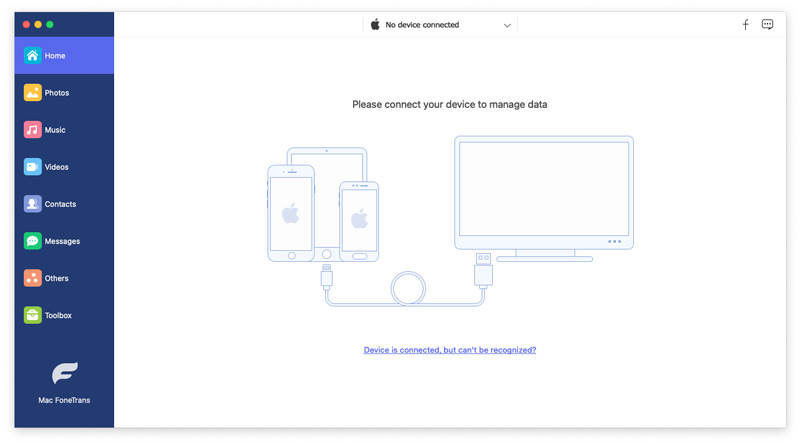
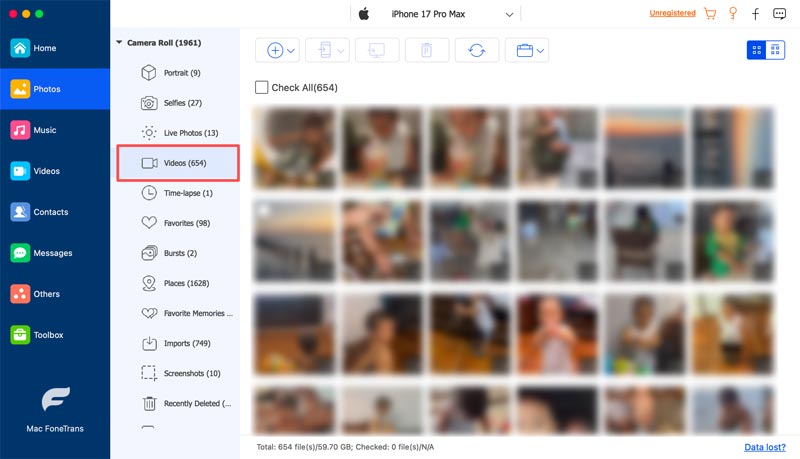
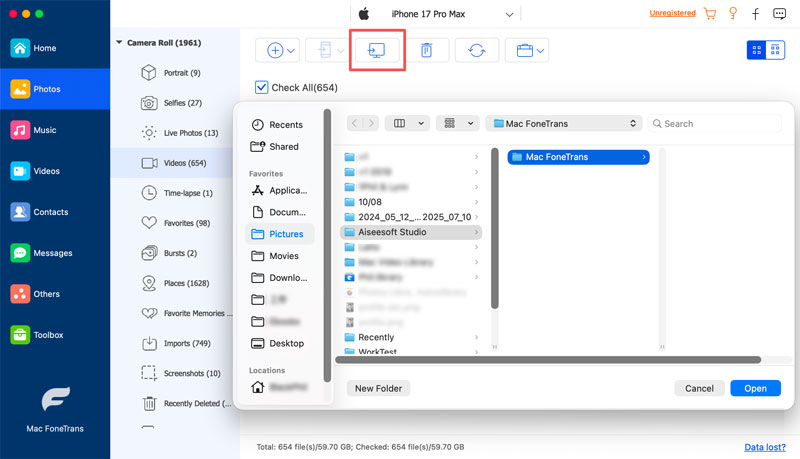
If you often need to transfer large videos, or you want to selectively copy different types of iPhone data to your Mac for backup, Aiseesoft Mac FoneTrans is an ideal choice. The software connects your iPhone to your Mac via USB and lets you browse, select, and copy various files, including videos and photos in bulk. It delivers a fast transfer speed, with no compression concerns. Another big advantage is that, unlike iTunes, FoneTrans won’t overwrite your last backup. It copies only the files you select.
 100% Secure. No Ads.
100% Secure. No Ads.
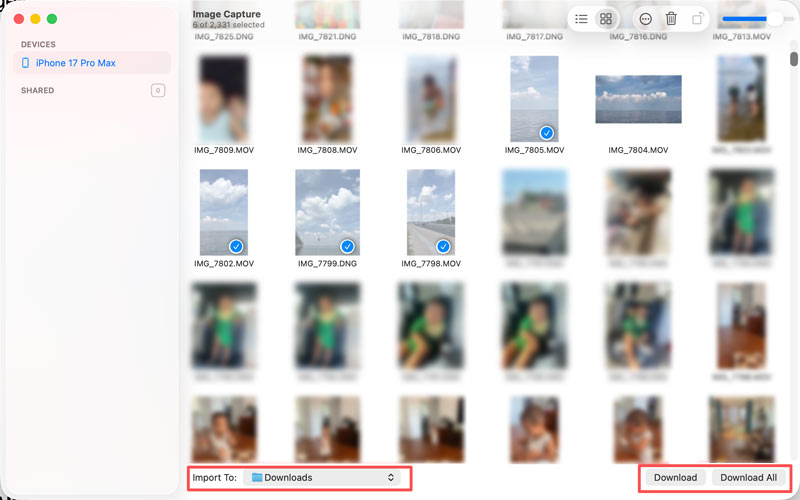
Best for: Quick transfers with no third-party software, especially when AirDrop fails to transfer large video files from iPhone to Mac.
Image Capture is a built-in Mac utility that many users overlook. It is buried in your Applications folder and does not try to sync or convert your media. It allows you to import videos from a connected device directly to your Mac without syncing anything to iCloud.
You May Also Need:


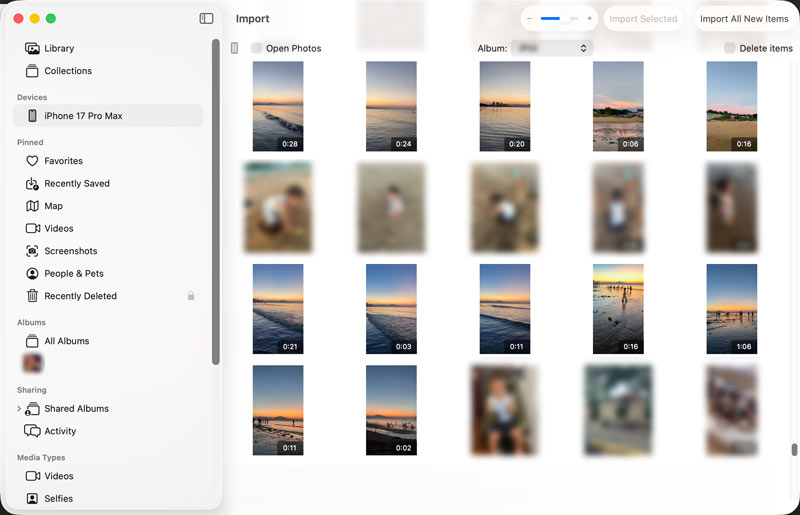
Best for: Users who want a built-in tool on their Mac to manage and transfer iPhone videos and photos.
The Photos app is Apple’s official solution for importing media from iPhones and iPads. When you connect your iOS device via USB, Photos displays an Import screen with all the photos and videos on your connected device. It is straightforward, requires no third-party software, and preserves original quality.
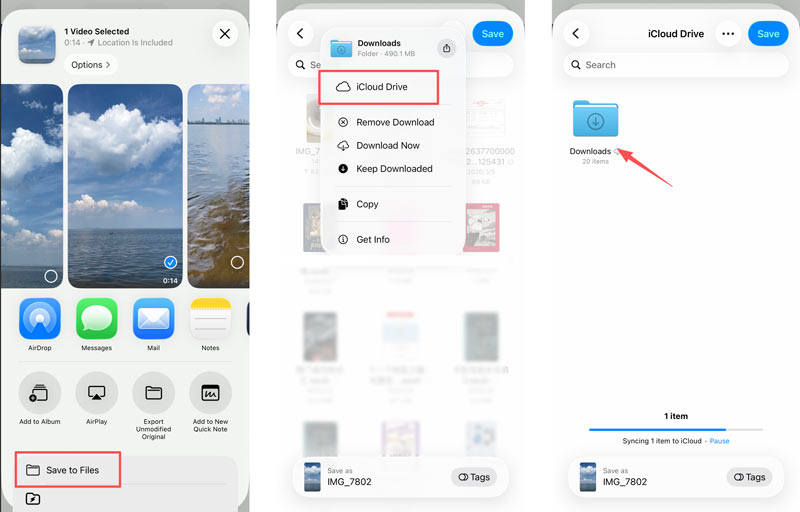
Best for: Users who prefer syncing iPhone videos automatically available across all your Apple devices.
iCloud Drive syncs files across all your Apple devices automatically. When you upload a video from your iPhone, it becomes available on your Mac quickly. Once Photos in iCloud is enabled, new videos captured on your iPhone will automatically appear on your Mac moments later. However, you need enough iCloud storage to make the transfer.
Question 1. Why does my iPhone video look worse after transferring to my Mac?
The video quality loss issue always comes down to one of two things: iCloud Photos optimization or the HEVC format. If your Mac runs an outdated macOS and your iPhone video is captured in HEVC, the playback may appear washed out or stutter. Check and ensure your Mac runs a recent version of macOS that supports HEVC natively. Besides, you should transfer your iPhone video with a method that preserves the original container, such as AirDrop or FoneTrans.
Question 2. Can I send videos from iPhone to Mac without a cable?
Yes. AirDrop and iCloud Drive both work entirely over Wi-Fi. AirDrop is the better choice for large files because it doesn’t rely on your internet upload speed. iCloud Drive depends on your upload bandwidth; a 4K clip may take a frustratingly long time on a slow connection.
Question 3. Does AirDrop have a file size limit for large 4K videos?
No, AirDrop has no official file size limit. However, it is mainly used to quickly share small clips between Apple devices. In my practice, transfers over 2 GB can often stall or drop if the Wi-Fi connection is unstable or the devices drift out of range.
Question 4. Does AirDrop compress videos?
No, AirDrop transfers files in their original quality with no quality loss or compression. However, as mentioned, very large files may take a long time or stall due to connection issues.
Conclusion
Five methods are provided to help you transfer videos from iPhone to Mac. You can select a desired method depending on your situation. Generally, for one or several small video clips, you can start with AirDrop. If you have already subscribed to iCloud + and have enough storage, iCloud Drive is a good choice to sync new iPhone videos to associated devices. If you often need to transfer videos and photos between your Mac and iOS devices, a dedicated transfer tool like Mac FoneTrans will save you time.
 How to Transfer Files from iPad to Mac With or Without iTunes
How to transfer files from iPad to Mac without iTunes? Can I copy iPad data to Mac using Bluetooth? What is the best iPad to Mac transfer? This post shares 5 iPad to Mac transfer tools to help you move files from iPhone or iPad to your Mac.
 Top 5 iPhone to Mac Transfers for iOS Data Migration Quickly
Cannot use iTunes to back up iPhone anymore? This article identifies and shares top 5 best apps to transfer data from iPhone to Mac or vice versa easily.
 How to Recover Deleted Files on Mac: 7 Ways [Updated]
How to recover deleted files on Mac? Can you recover Trash on the Mac after emptying it? This guide will show you 7 solutions to achieve them effortlessly.
 Leave your comment and join our discussion
Transfer data from iPhone/iPad/iPod to your computer or reversely.
100% Secure. No Ads.
100% Secure. No Ads.

*Required field
*Please enter a valid email
