Image Capture is the built-in program that allows users to transfer photos from digital camera, scanner or iOS device to iMac. As the easy photo transfer software, many users prefer Image Capture to iTunes or iCloud.
However, where is Image Capture on Mac? How to use it?
That's what we shall uncover in this post.
Keep reading and get the details.

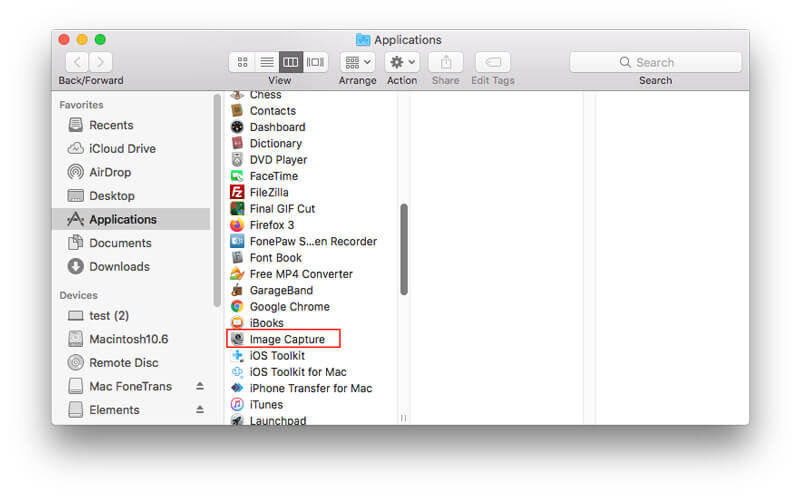
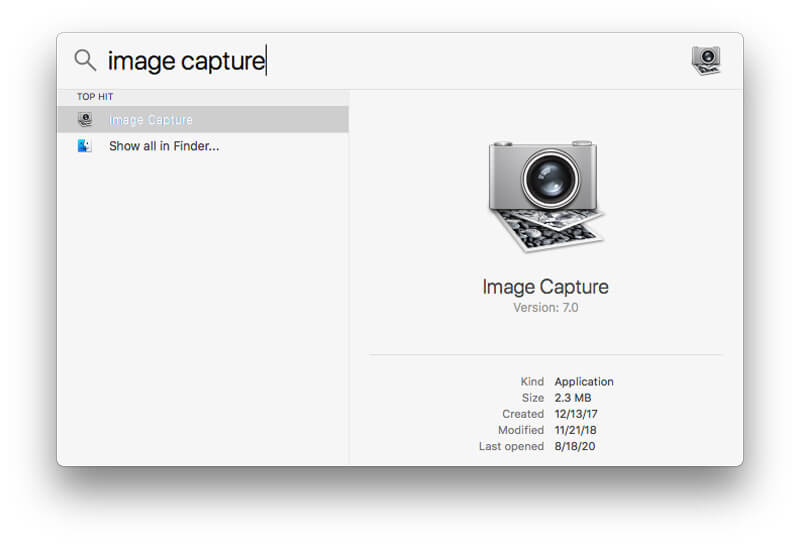
Unlike iPhoto, Image Capture cannot open automatically when you connect your camera or device. You can follow 3 ways below to find where is Image Capture.

After finding Image Capture, you can use this app to manage your images on iMac easily. There are 3 main features of Image Capture, transfer photos, scan images and take screenshots.
Now, let's break down it into details.
Image Capture can help you import photos from cameras, iOS devices and iPad devices to iMac for backup or space free-up.

For remove items from the device after transferring them to your iMac, you should select Delete after import.
For deleting specific photos from iPhone, you can check it here.
Image Capture can be used to scan images after connecting a scanner to your Mac.
Then you can scan your images.
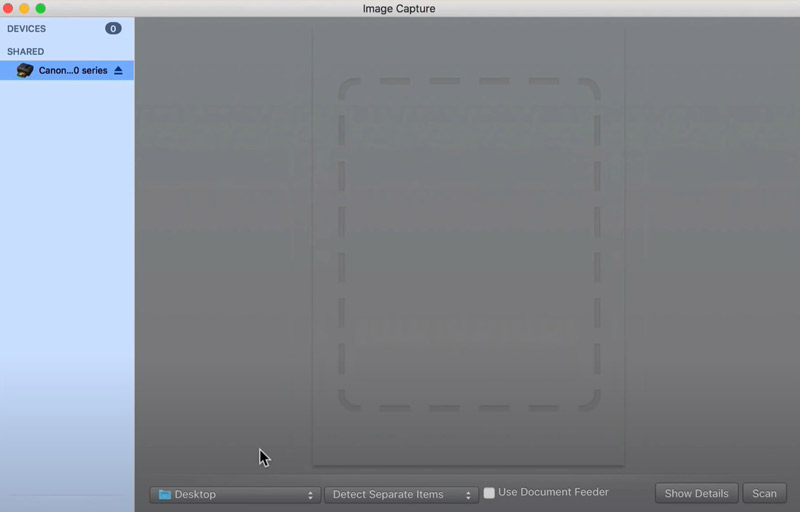
With the compatible camera connected to your iMac, Image Capture can also take pictures and save to your iMac.
After that you can set such preferences for taking pictures as Manual, Automatically every, Download new images to, and Delete after downloading.
Image Capture can be enabled via settings to automatically transfer images from your device to iMac whenever they are connected.
However, Image Capture is not showing or working when you connect your device into iMac. For fixing it, you should make sure you have done the settings correctly.
Click Show device settings if you don't see that pop-up menu.
For more solutions to fix Image Capture not detecting device, you can check it in details here.
Image Capture becomes many users' option to transfer photos from iPhone and iPad to iMac. However, it is not intelligent enough to manage your iOS photos on Mac.
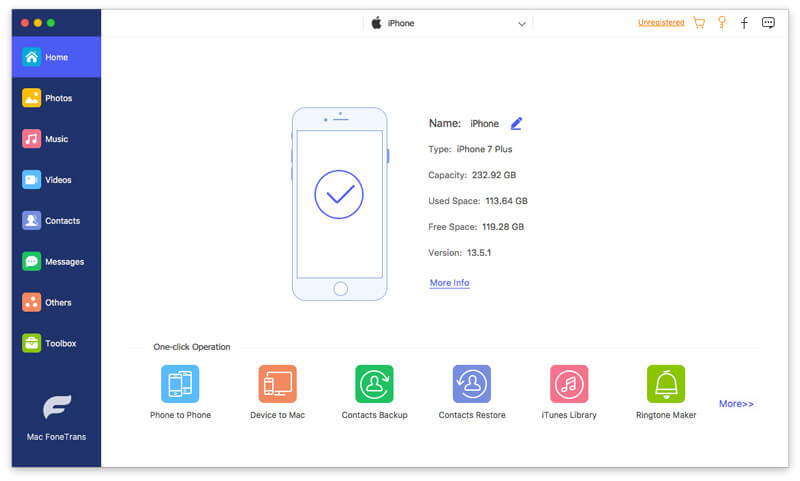
Here another photo manager software for iPhone and iPad is recommended, Aiseesoft FoneTrans.
FoneTrans is the data transfer and management tool for iPhone iPad and iPod on Windows and Mac. It can handle photos, videos, music, contacts, messages and other data (notes, calendars, notes, Safari, etc.) on Mac at ease. Besides, you can use this software to transfer data among computer, iTunes and iOS device.

Downloads
![]() 100% Secure. No Ads.
100% Secure. No Ads.
![]() 100% Secure. No Ads.
100% Secure. No Ads.
You can save yourself the frustration by using the best Image Capture alternative below.
![]() 100% Secure. No Ads.
100% Secure. No Ads.
![]() 100% Secure. No Ads.
100% Secure. No Ads.
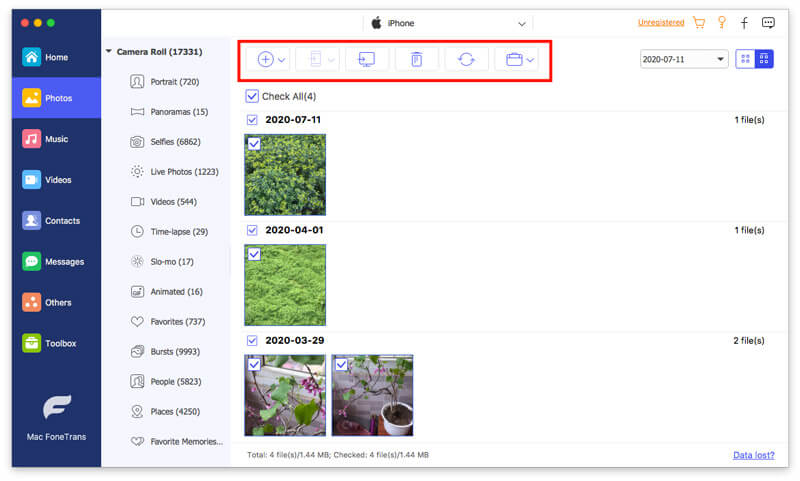
Launch this program immediately after installation and connect your iPhone to computer with the USB cable.

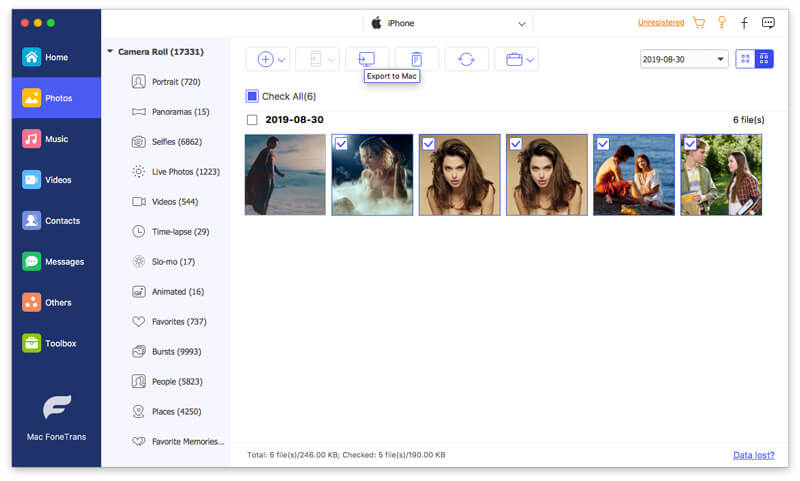
In addition, you are allowed to add photos from iMac to iPhone/iPad by clicking the add button. The Delete button will erase the selected photos from iPhone directly. Besides, you can create a new album and move photos from one album to the other album, etc.
For finding the replacement of Image Capture to take a screenshot on Mac, you should jump it here.
Which is better, Image Capture VS Photos?
Photos is the photo organizer and transfer app while Image Capture is the combination of image manager to transfer photos, take and scan picture. If you are seeking for the image transfer software, Photos app will be better. However, if you need more functions, Image Capture is the smart decision.
Where is the captured picture via Image Capture?
The screenshot you taken in Image Capture will be saved to the desktop by default.
Why does iPhone take so long to import photos?
The transferring speed depends on the image numbers you move. You can take fewer images to transfer from iPhone to Mac via Image Capture. Besides, Aiseesoft FoneTrans is the quick data transfer software, which carries 10X faster than Image Capture to transfer the images.
Conclusion
Image Capture is the free built-in tool on Mac to help you transfer, take and scan images. Someone cannot find it easily. This page shows 3 ways to find and open Image Capture and how to use it. Apart from that, you can use the alternative to Image Capture to transfer photos between iPhone/iPad and Mac computer.
Have you this page solved your problem?
Image, Photos or FoneTrans, which one do you pick up?
Let me know by leaving your comments below.
 3 Easy Ways to Hide/Lock Photos on Mac to Keep Photos Private
This article introduces the detailed steps to hide photos on Mac with or without password. You can use the Photos app, FileVault or professional Photo Vault software to keep photos private.
 Top 3 Ways to Back up Photos on Mac
In this article, we will show you how to back up photos on your Mac in 3 ways. You will know that you can back up photos on your Mac to Google Photos, iCloud Photo Library, or an external drive.
 Best Replacements for iPhoto
iPhoto sucks for some reasons. We will list best iPhoto replacements in this post.
Screenshot Troubleshooting
Image Capture Cannot Detect iPhone Where is Image Capture on Imac Image Capture not Working Screenshot Cant be Saved Mac where-do-screenshots-go-on-windows Where Are Screenshots Saved on Android
The best iOS Transfer software to manage and transfer iOS files from iPhone/iPad/iPod to your computer or reversely without running iTunes.
![]() 100% Secure. No Ads.
100% Secure. No Ads.
![]() 100% Secure. No Ads.
100% Secure. No Ads.
*Required field
*Please enter a valid email
