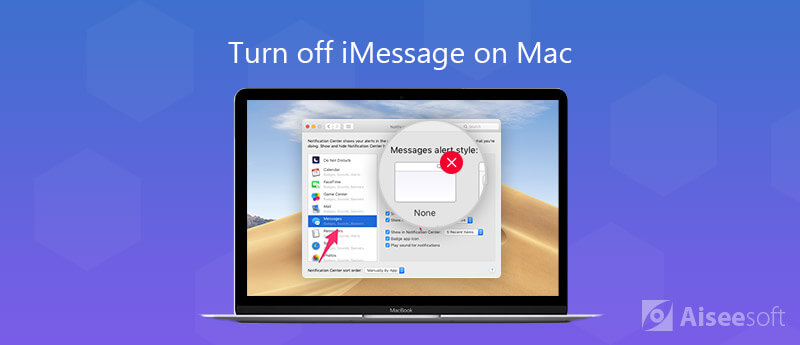
When you use the same Apple ID for both iPhone and MacBook Pro, you might feel annoyed to receive the notifications of iMessage on your MacBook Pro. How to turn off iMessage on your Mac? Especially the MacBook Pro is used for business purpose only in your office.
Whether you need to disable the iMessage on your Mac completely, turn off the iMessage temporarily, just need to disable the iMessage notification, or even clean up the iMessage files on Mac, you can learn more details from the ultimate guide from the article.
Just as mentioned above, iMessage notification is related to Apple ID. If you do not want to receive any notification of iMessage on your Mac, you can disable the Apple ID to turn off iMessage on Mac permanently. Learn more details about the process as below.
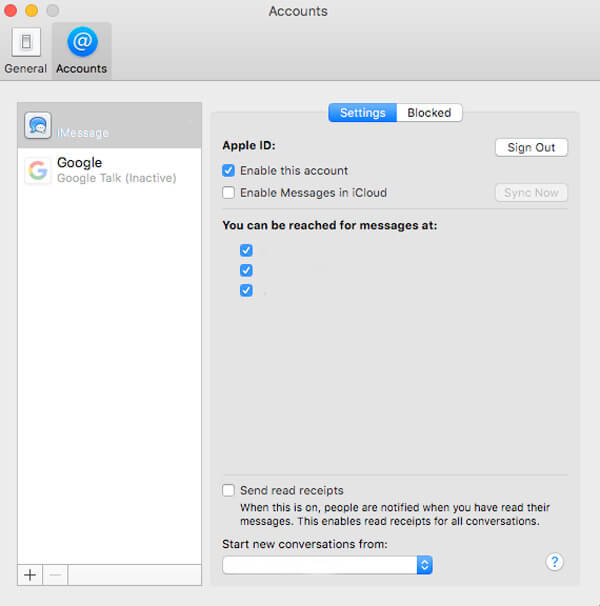
Note: You can re-login the Apple ID to get the notification again to sync iMessages from iPhone to Mac. Even if you reverse by re-enabling into your account, you can only receive the new iMessage instead.
When you are annoyed with the irritating "Ping", you can mute the iMessage tone or change the notification to fix the problem. It is another temporary method to turn off iMessage tone on Mac. Here is the process you should know as below. (iMessage out of order?)

If you just need to avoid interruption notifications from iMessage during the meeting, you can just turn off the notification to disable iMessage on Mac as a temporarily solution. Of course, you can retain the ability to use the Messages whenever you want with ease.
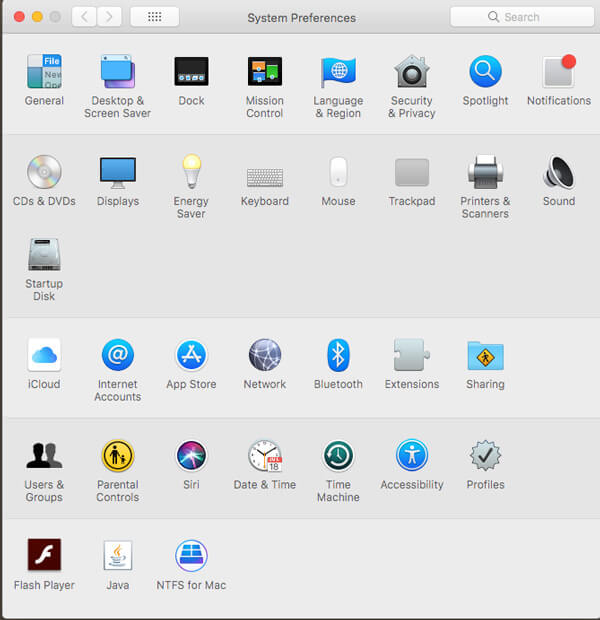
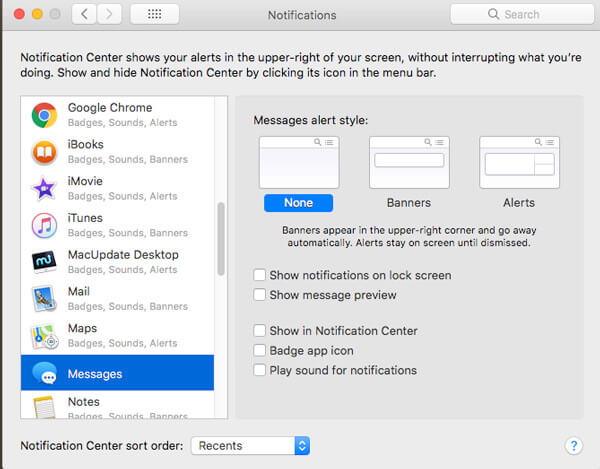
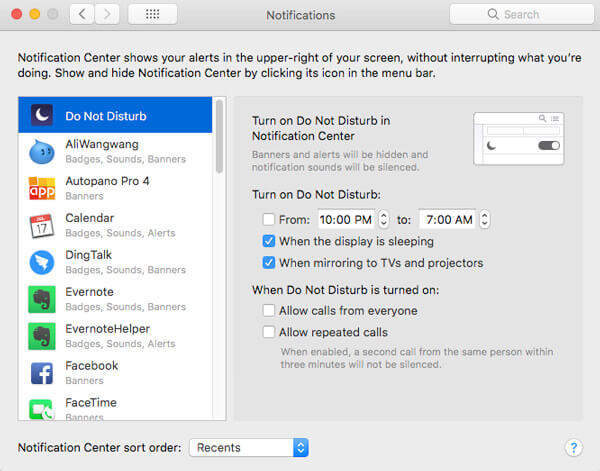
In order to disable the iMessage notification on Mac temporarily for a period of time, you only need to enable the "Do Not Disturb" mode. When you need to keep the Mac from displaying any iMessage pop-ups for the remainder of the day, you can follow the steps as below.
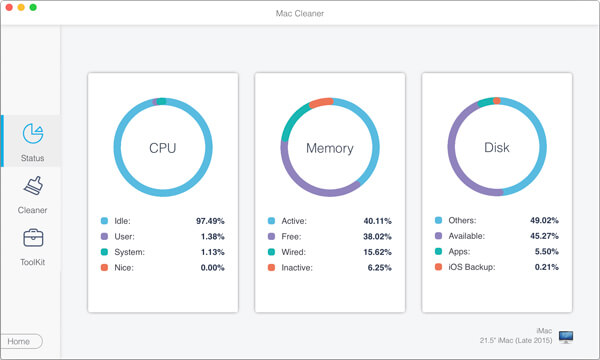
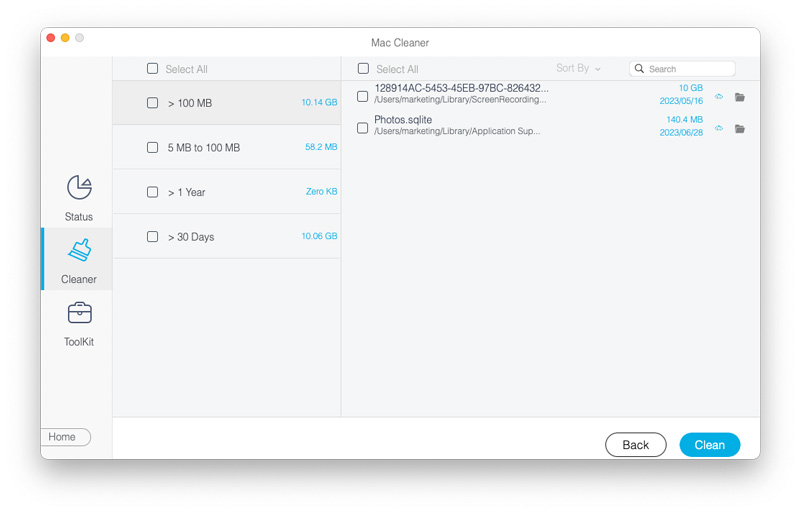
Once you have already disabled iMessage on Mac, what should you do if you need to clean up the iMessage files? If you need to remove the iMessage files completely from your Mac, Aiseesoft Mac Cleaner is the professional Mac management tool to remove iMessage files, shred files, old and large files, delete duplicated images and more.

Downloads
![]() 100% Secure. No Ads.
100% Secure. No Ads.
Conclusion
When you need to disable or turn off iMessages on Mac, you can learn more about the methods from the article. Whether you need to block the notification for a period of time, or even completely disable the message on Mac, you can learn more details from the article now.
 How to Fix the iMessage Waiting for Activation Problem
If you get an error message suggesting that iMessage on your iPhone fails to activate, we offer several ways to fix iMessage activation error and use the free message service.
 How to Transfer/Backup iMessages and SMS from iPhone to Mac
How to download iMessage history on Mac? You can learn 2 ways here transfer iMessages, SMS and MMS from iPhone XS/XR/X/8/7/6/5/4, etc. to Mac Pro, mini, Air, etc. in this article.
 [Solved] How to Fix iMessages Not Saying Delivered
Your iMessages not saying delivered successfully? Or iMessages delivery suffers from error? Fix the issues of iMessages delivered in this page.
iPhone Messaging
iPhone Not Receiving or Sending Texts Text Messages Not Sending iMessage Not Sending iMessages Not Saying Delivered Disable iMessage on Mac Delete iMessages Apps Fix iMessage Activation Error Fix iMessages Out of Order on iPhone
Mac Cleaner is a professional Mac management tool to remove junk files, clutter, large/old files, delete duplicate files and monitor your Mac performance.
![]() 100% Secure. No Ads.
100% Secure. No Ads.
*Required field
*Please enter a valid email
