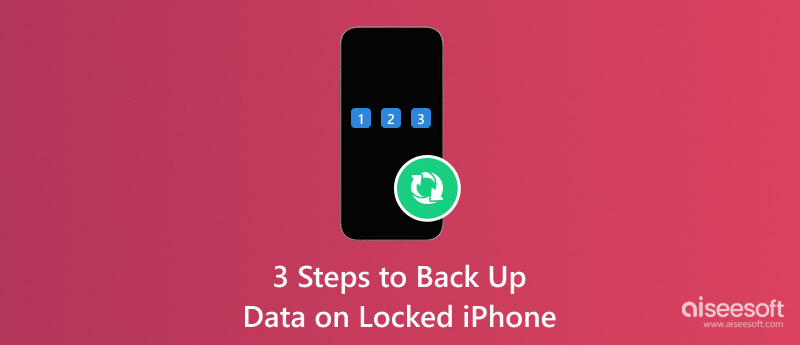
Just think about it, losing your iPhone passcode is the last thing you want, of course, but what if you happen to have such a device full of important photos, messages, the contacts of your loved ones, and so on? The very thought of the whole thing makes you helpless and desperate. When the time comes to reset their locked iPhone, users mostly want to know if they can back up a locked iPhone so as not to lose all their data. In fact, there are certain cases when you will not necessarily lose your data. Depending on your previous settings and device status, there are ways to help you secure your files before performing a reset. If your iPhone is not locked and you want to back up your data normally, follow the steps in “Back up iPhone contacts to PC.” Keep reading to discover what you can and cannot do when your iPhone is locked and how to avoid permanent data loss.
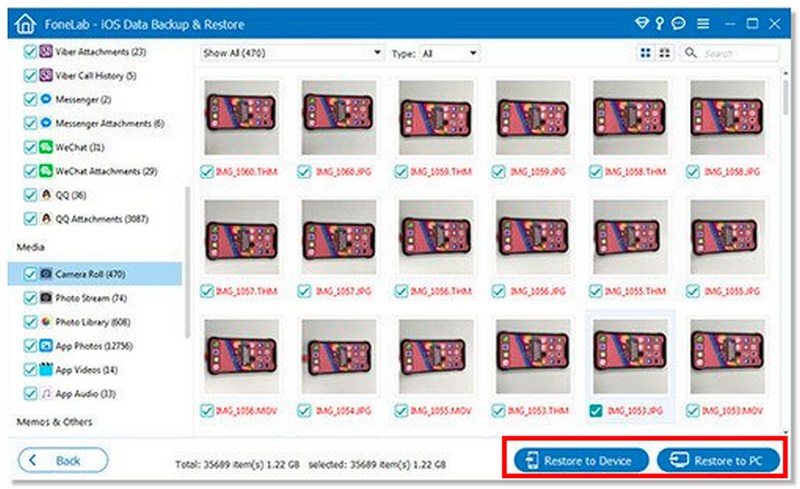
If your iPhone is locked and you’re worried about losing important files, backing up your data should be your first step before resetting the device. In some cases, especially if your iPhone was previously connected and trusted on a computer, you may still be able to create a backup. If you’re wondering how to back up a locked iPhone quickly and safely, Aiseesoft iOS Data Backup and Restore provides a simple and secure solution.

105,489 Downloads
Aiseesoft iOS Data Backup & Restore - Best iPhone Backup Too
![]() 100% Secure. No Ads.
100% Secure. No Ads.
![]() 100% Secure. No Ads.
100% Secure. No Ads.

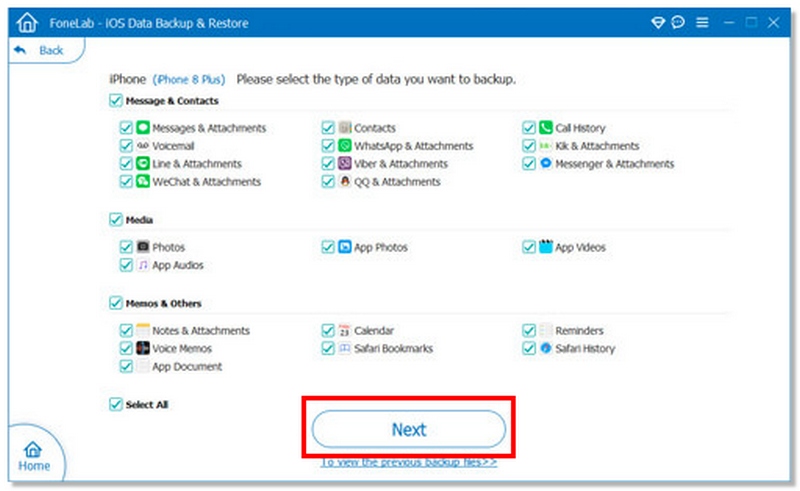

| Category | Supported Data Types |
| Contacts & Communication | Contacts, Messages (SMS/iMessage), WhatsApp, Call History |
| Notes & Productivity | Notes, Reminders, Calendar, Safari Bookmarks, Safari History |
| App Data | WhatsApp Attachments, Message Attachments, App Photos, App Videos, App Documents |
| Media Files | Camera Roll, Photo Library, Photo Stream, Videos, Voice Memos |
| Attachments | Voicemail, Message Attachments, WhatsApp Attachments |
| Other Data | Safari Data, App Documents, Application Media Files |
If you previously synced your iPhone with a computer, you may still be able to back it up using iTunes even if the device is currently locked. However, this method only works if the iPhone was already trusted on that computer. Otherwise, iTunes will require you to unlock the device first.
For Windows users and older macOS versions, backup is done through iTunes. For macOS Catalina and later, Apple replaced iTunes with Finder, but the process is very similar.
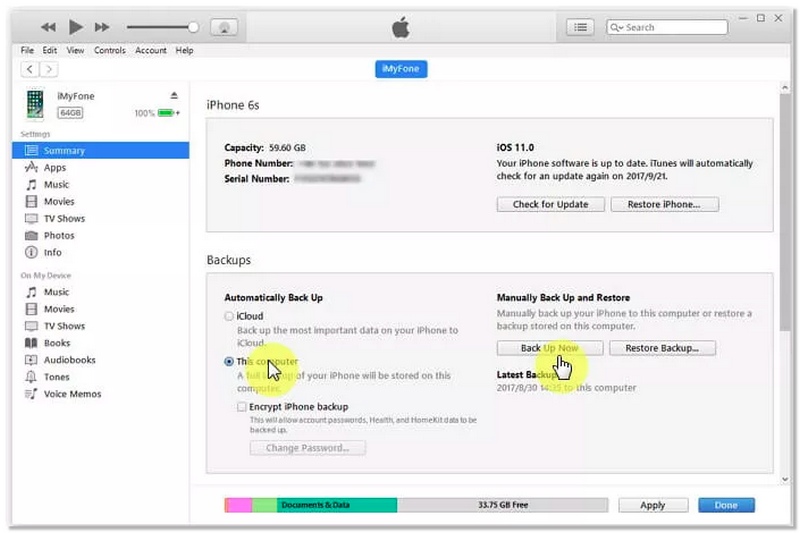
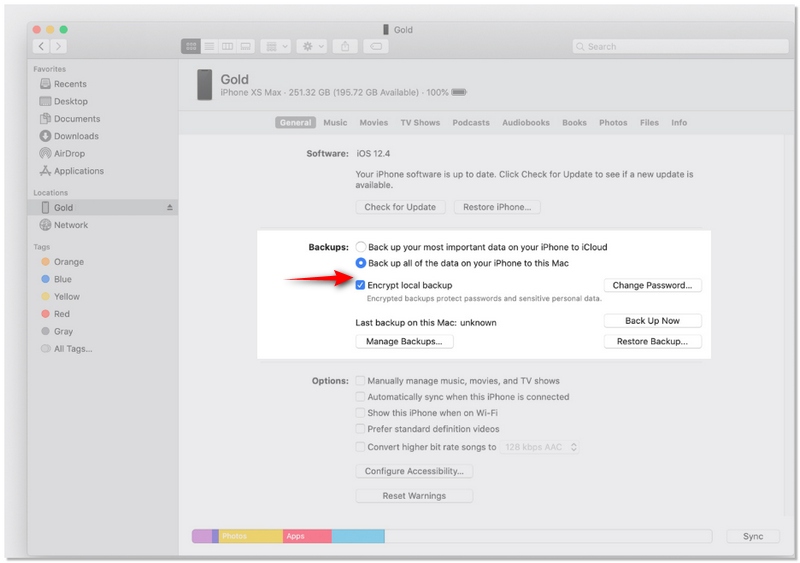
• This method only works if the iPhone was previously trusted on that computer.
• If the computer was never trusted, you must first unlock the iPhone, which may not be possible if you forgot the passcode.
• If iTunes or Finder cannot detect the device, consider using the Aiseesoft iOS Data Backup and Restore tool instead.
![]() 100% Secure. No Ads.
100% Secure. No Ads.
![]() 100% Secure. No Ads.
100% Secure. No Ads.
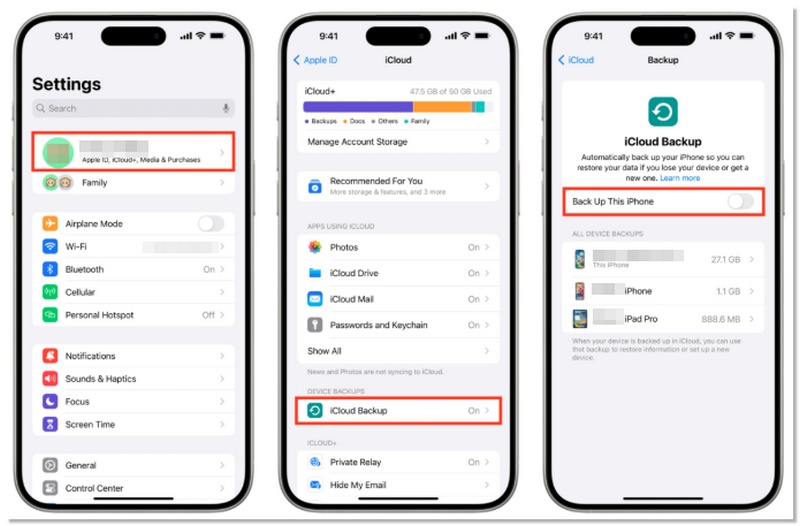
Backing up your iPhone is crucial, especially if your device is locked and you want to save your data before proceeding. Fortunately, if your iPhone is linked to your Apple ID and has iCloud Backup enabled, you can back up your data without unlocking it. This method ensures your photos, contacts, messages, and app data remain safe.
Note: Some locked iPhones may require you to enter the passcode for manual backup.
Can a disabled iPhone be unlocked?
No. You can't unlock a disabled iPhone. But you can use Finder, iTunes, iCloud or Recovery Mode to erase your iPhone. Then recover your iPhone data with an iTunes backup or iCloud backup.
Can I reset my iPhone while it's disabled?
Yes. You can use iTunes to reset a disable iPhone and restore the data from a recent backup. Or you can reset the disabled iPhone from Apple's Find My iPhone web page.
How do I see if my iPhone is unlocked?
You can go to Settings > Cellular > Cellular Data. If there is an option for Cellular Data Options, then your iPhone is probably unlocked.
Conclusion
Dealing with a locked iPhone can be stressful, but now you know how to back up a locked iPhone safely. From my experience, Aiseesoft iOS Data Backup and Restore is the easiest and most reliable method. iTunes works well if you’ve synced before, and iCloud can back up your data automatically if it is enabled. Regardless of the approach you take, the most important thing is to take prompt action to protect your sensitive information before attempting to unlock your device.
 Forgot iPhone Passcode? How to Unlock iPhone Passcode
What to do when you forgot iPhone passcode? Read this post and learn four simple methods to unlock a disabled or locked iPhone 16/15/14/13/12/11/XS/XR/X/8/7/6.
 7 Ways to Unlock iPhone Without Passcode (2025 Works) - 100% Success
Locked out of your iPhone or forgot your passcode? We tested 7 ways to unlock iPhone without passcode in 2025. Compare success rates, speed, data loss & best options.
 How to Remove Apple ID from iPhone? Check 4 Methods Here
Want to remove Apple ID from stolen or locked iPhone? Read this post to delete your Apple ID account on iPhone or iPad without password.
Backup iPhone Data
Backup iPhone Text Messages Backup iPhone Photos Backup iPhone Contacts Backup iPhone Music Backup iPhone WhatsApp Messages Backup iPhone Voice Memos Backup iPhone Data Before Upgrade
Your best choice to back up data from iPhone/iPad/iPod to Windows/Mac and restore from iOS data backup to iOS device/computer safely and efficiently.
![]() 100% Secure. No Ads.
100% Secure. No Ads.
![]() 100% Secure. No Ads.
100% Secure. No Ads.
*Required field
*Please enter a valid email
