Maybe you have taken or saved lots of pictures with your iPhone. You cherish them and want to transfer photos from iPhone to computer, an external hard drive or some other safer places. In this guide, we will recommend you several plans to back up iPhone photos to computer, iCloud and iTunes. Each plan has its own merits.
Moving your photos from iPhone to computer is the safest way to keep them. You will never worry about losing them as long as your computer works well. And you can store lots of pictures as your computer allows. In addition, you can also edit them with certain image editor.
For Mac users, you can use Image Capture, a built-in application program in Mac, or iPhoto, a photo application developed by Apple Inc to upload your photos from iPhone to Mac. You only need to connect your iPhone to Mac and launch Image Capture or iPhoto App, and then follow the prompts in the process of backing up.
For PC users, you should download and install iTunes for Winows on your PC first. Then connect your iPhone to PC with a USB cable and click "Trust on your iPhone". After a minute, your iPhone will be recognized and show up in your PC's file explorer. Then click the device icon and find a file named DCIM, double click DCIM and photos you have taken with iPhone will be shown. At this time, just copy the pictures you want to back up and then put them into the planned places on your PC. However, there is a disadvantage that you can only move photos or pictures taken with iPhone and the downloaded photos and images from screenshots could not be transfered to your PC. While a third-party tool may help you.
Whether you use Mac or PC, an iPhone Photo Transfer tool – iPhone Photo Transfer, has the ability to transfer your photos from iPhone to computer and make a backup of them on your computer or other storage devices.
Step 1Download and install FoneTrans to your PC or Mac
Step 2Connect your iPhone to computer via USB cable

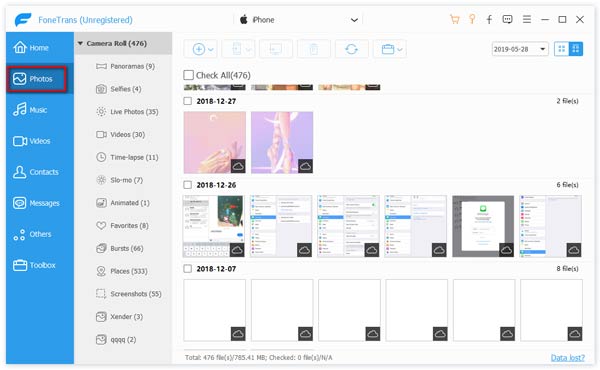
Step 3Click Photos at the left side of interface
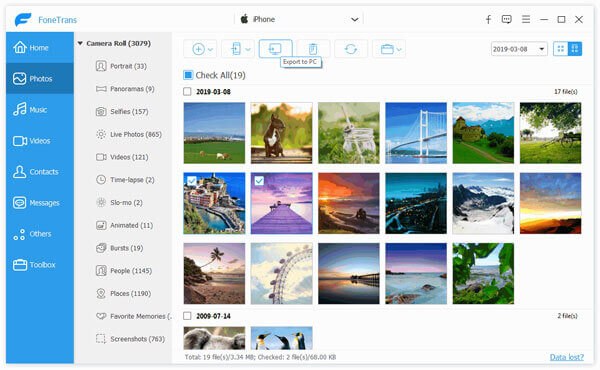
Step 4Click the photos album in the interface, choose the folders of photos you want to export and click the Export to button in the upper column to move pictures from iPhone to computer.
Pros
1. This program also lets you manage your photos on your iPhone like deleting photos, build new album to calssify your photos on iPhone.
2. After backing up photos form iPhone to computer, you can view the photos indetails on computer.
Cons
1. The free version of this program also lets you export limited number of photos from iPhone to PC.

Nowadays, iCloud storage space is cheaper than before and more and more iPhone users choose to back up their photos, contacts, music, video on iDevice to iCloud. In my view, iCloud backup is the most convenient way to back up photo on iPhone. Once backed up onto iCloud, all photos can be accessed and recovered from any iOS device at any time. iCloud can automatically or manually back up your iPhone pictures as long as your iPhone is turned on, locked and connected to internet.
Transfer photos from iPhone to iCloud automatically
On your iOS 8 device or later: Tap Settings > iCloud > Turn on Photos > Backup > Turn on iCloud Backup.
On your iOS 7 device or earlier: Tap Settings > iCloud > Turn on Photo Stream > Storage & Backup > Turn on iCloud Backup.
Transfer photos from iPhone to iCloud manually
On your iOS 8 device or later: Tap Settings > iCloud > Turn on Photos > Backup > Tap Back Up Now.
On your iOS 7 device or earlier: Tap Settings > iCloud > Turn on Photo Stream > Storage & Backup > Tap Back Up Now.
In this way, you did backup your photos to iCloud. But you need to download iCloud panel control to save the photos from iCloud Photo Stream to computer.
This is a method that allows you to restore your backup from iTunes more easily and more efficiently. Open iTunes > Connect your iPhone to computer > Click the iPhone icon in the upper left corner of the interface > Choose "This computer" under Automatically Back Up or choose "Back Up Now" to manually back up iPhone > Click the Apply button in the lower right corner of the interface.
The above three plans are also applied to backup other data on iPhone, like contacts, messages, music, etc. Learn here to back up notes on iPhone.
However, if you want to use iTunes to move your photos on your iPhone, iTunes backup will erase the whole data on your iPhone. Learn here to restore photos from iTunes.

December 11, 2020 07:28 / Updated by Louisa White to Back up iOS Data
 How to Sync iPhone to New Computer without Losing Data
Following this article to learn how to sync iPhone to new computer.
 How to Back Up iPhone Text Messages and iMessages to Computer
Three ways are showed here to back up iPhone text messages.
 How to Transfer Photos Pcitures from iPhone to iPhone/iPad with The Easiest Way
To transfer iPhone photos from iPhone to another iPhone or iPad, you need an iPhone photo transfer software. After transferring, you can share your photos more conveniently.
