
Aiseesoft Screen Recorder
![]() 100% Secure. No Ads.
100% Secure. No Ads.
![]() 100% Secure. No Ads.
100% Secure. No Ads.
How are screen recordings saved on Mac?
It is common to find that Mac screen recordings are missing after stopping them. You are not taken to the default save location automatically. So, where are screen recordings saved on a Mac?
If you don’t know where macOS stores these captures, you are in the right place. This guide explains the default save locations for Mac screen recording, how to change them, and how to troubleshoot related issues. Moreover, a great screen recorder is introduced to guarantee you never lose a capture again.

When you stop a screen recording on your Mac only to have it seemingly disappear, you should navigate to the default save location to find it. The first section tells you where screen recordings are saved on a Mac by default.
Mac offers two built-in methods for screen recording: the Screenshot Toolbar and the QuickTime Player. You can press Shift + Command + 5 or open QuickTime to start capturing your Mac screen.
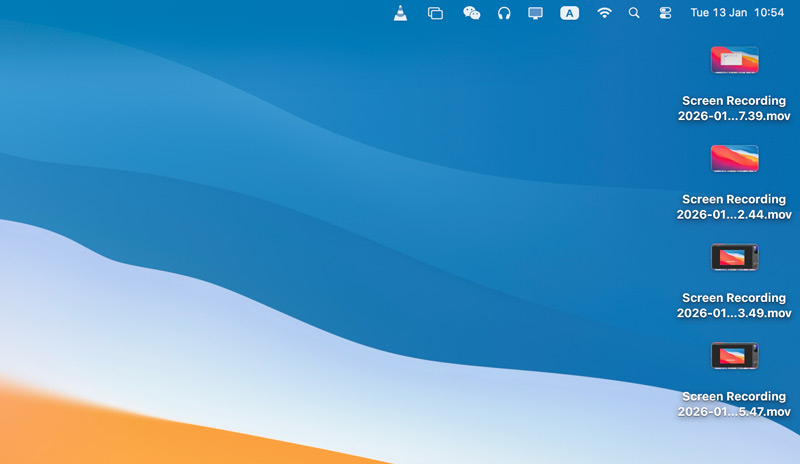
Generally, their default save location is your Desktop. After recording, check the top right part of the desktop screen to find a small thumbnail preview.
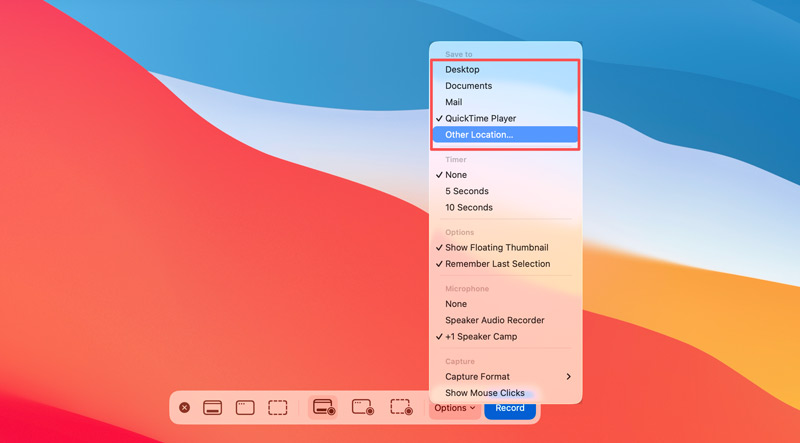
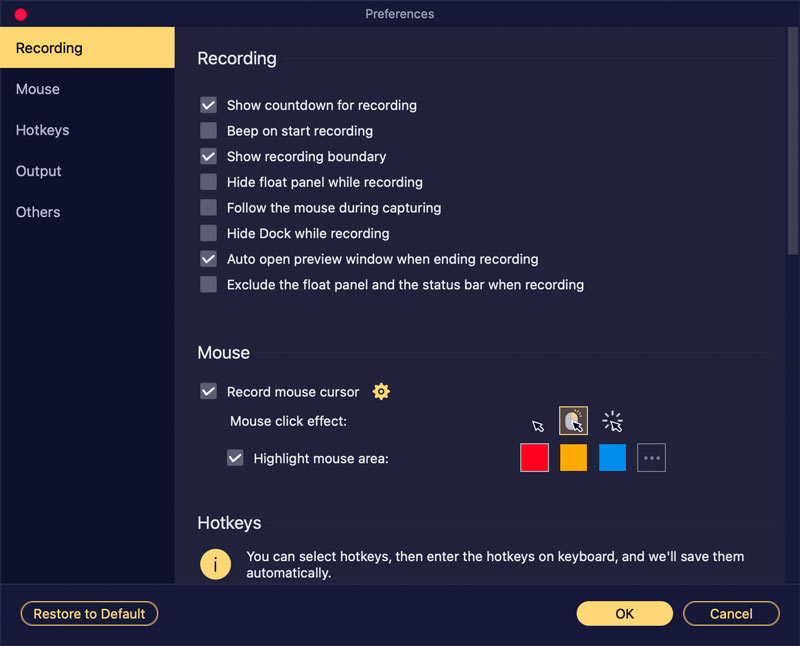
If you prefer to change the save location for your Mac screen recordings, you can simply customize it from the Options menu.
If your Mac runs a relatively new macOS, whether you capture screen using the Screenshot Toolbar or the QuickTime Player, you will access the same toolbar with the Options.
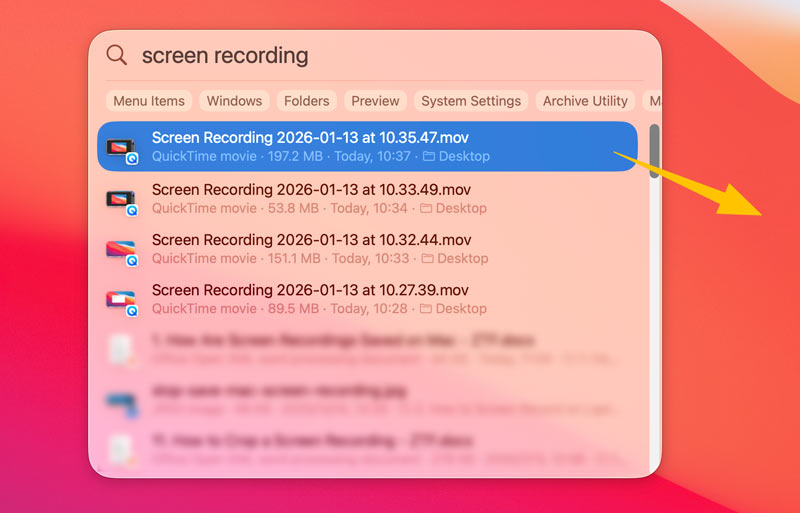
If your Mac screen recording is not where you expected, you can rely on Finder’s search feature to locate it. Type “Screen Recording” to quickly find your captured files. Besides, you can search for recently modified .mov files.
When the screen recording is missing on your Mac, you can also press Command + Space to open Spotlight and then type part of the likely filename, such as “Screen Recording,” to find it from the results.
Sometimes, you may find the screen recording file in Trash. It is possible you accidentally dragged the recorded video or pressed Command + Delete while managing other files on the Desktop.
If you use QuickTime to capture the screen on an old Mac, the screen recording may not be saved automatically. You must manually save the captured file to a preferred folder. If you closed the preview/playback window without saving, the file is almost lost. You should update macOS to the latest version and try re-recording your Mac screen. Check whether QuickTime Player can automatically save your recording files. If not, you should always save immediately after stopping.
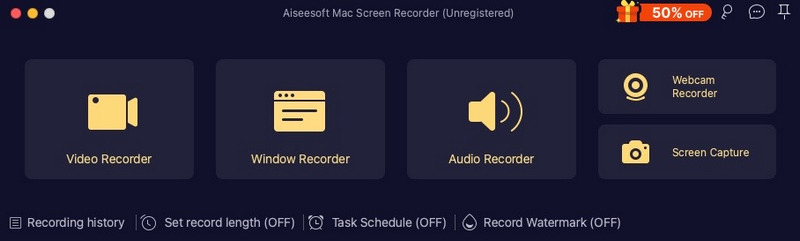
While Apple’s built-in screen recording tools are capable and convenient, they also come with limitations—for instance, some older versions of QuickTime lack auto-save. What’s more, they cannot capture system audio and do not offer advanced options, such as annotation or editing. If you often record screens for different tasks, a dedicated screen recording tool like Aiseesoft Screen Recorder is the ultimate solution.
![]() 100% Secure. No Ads.
100% Secure. No Ads.
![]() 100% Secure. No Ads.
100% Secure. No Ads.
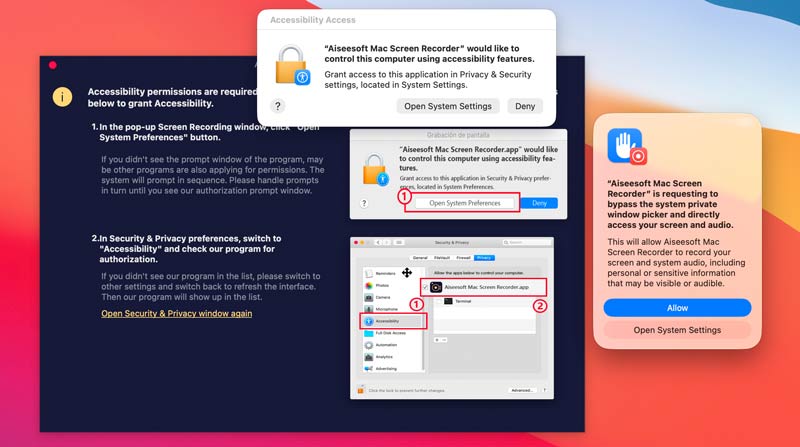
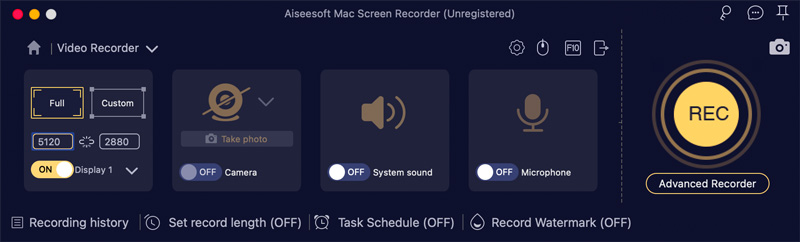
This recommended screen recording tool lets you capture screens on both Mac and Windows devices. Ensure you have the correct version for your system, then launch it.
For the first time, you should customize the relevant system settings and allow this application to access your screen and audio.
Why isn’t my screen recording showing up on my Mac?
The issue of Mac screen recordings not appearing can be caused by different reasons, such as a missed save location or system permission problems. First, verify the correct save location. Moreover, ensure the screen recorder has the necessary permissions to start recording. Sometimes, you need to reboot your Mac or update macOS to fix the issue.
What is the best free screen recorder for Mac?
You should always select the best free screen recorder based on your goal and specific needs. You can start with the built-in Screenshot Toolbar on your Mac. Check whether it fits your recording needs. If you are unsatisfied with the built-in recorder and want more advanced options and professional controls, consider using OBS Studio, a reputable alternative. It is a powerful free tool, but requires time to learn. If you often need to capture your Mac screen for sharing and collaboration, turn to the popular Loom. It is ideal for work communication.
Does Mac allow system sound recording?
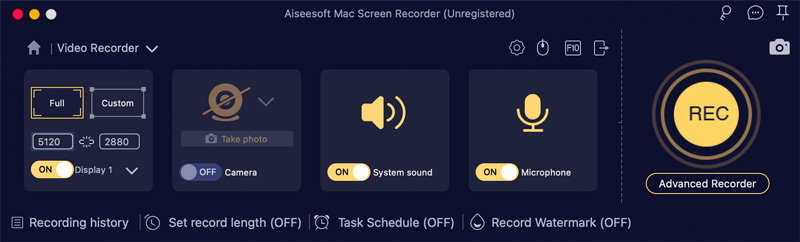
Apple’s built-in recording tools, like the Screenshot Toolbar and QuickTime Player, cannot record internal system audio. They are only allowed to capture audio from your microphone. To record system sound, you need third-party software like Aiseesoft Screen Recorder.
Conclusion
Knowing where screen recordings are saved on your Mac is reasonably necessary. Whether you use the Screenshot Toolbar, QuickTime Player, or a third-party screen recorder for Mac, you surely want to locate the captured file directly and perform other operations. To avoid losing any captures and to streamline the workflow, a dedicated tool is often the definitive solution.
 Full Review on What is OBS Screen Recorder & Best Alternatives
Unlock OBS Screen Recorder's full potential with our step-by-step review and usage guide. Start recording effortlessly and efficiently today for professional content creation.
 10 Best GIF Screen Capture Tools to Record Screen to GIFs
Is there a free GIF creator that makes animated GIFs from screen capture? This post shares 10 GIF screen capture tools to record your screen and create GIFs.
 3 Easy Ways to Record Audio on iPhone with No Quality Loss
Need to record audio, music, meeting, lecture, class and more on your iPhone? You are at the right place since this guide will tell you three ways to do the job.

Aiseesoft Screen Recorder is the best screen recording software to capture any activity like online videos, webcam calls, game on Windows/Mac.
![]() 100% Secure. No Ads.
100% Secure. No Ads.
![]() 100% Secure. No Ads.
100% Secure. No Ads.
*Required field
*Please enter a valid email
