Many MacBook users expect clear, high-definition video from their built-in cameras. After all, a lot of us use our MacBook cameras for video calls, online meetings, and content creation, and it seems perfectly reasonable to expect that you'll produce professional-looking video with your laptop's built-in camera. However, if you're like me, you may notice that your camera feed is fuzzy, pixelated, or often has digital noise. It usually leads to the question of why is my MacBook camera so grainy? Unfortunately, the answer is not straightforward! There are several reasons why your MacBook's camera may produce grainy video. In this article, we will cover the most common reasons why your MacBook camera produces grainy video. We will offer some simple, step-by-step fixes that you can implement right away, and we will also provide a desktop solution to enhance your video quality if the built-in MacBook camera does not meet our requirements. We hope you will find some of these tips useful for a cleaner and sharper video experience!
If you’ve ever thought Why is my MacBook Air camera so grainy, the issue usually comes down to a mix of hardware limitations and environmental factors. Below are the most common reasons:
1. Poor Lighting Conditions
The MacBook camera struggles in low light. Without sufficient brightness, the camera compensates by increasing sensitivity (ISO), which introduces digital noise and makes the video appear grainy.
2. Hardware Limitations
Many MacBook Air and even some Pro models still use 720p or 1080p webcams. Compared to modern external webcams, the built-in camera has a smaller sensor that doesn’t capture as much detail, resulting in fuzziness.
3. Dirty or Smudged Camera Lens
Fingerprints, dust, or dirt on the camera lens can block light and cause the image to blur. Even a tiny smudge can reduce clarity and create a dull, noisy video output.
4. Software or App Settings
Some video conferencing apps automatically lower camera quality to save bandwidth. If your internet speed is unstable, apps like Zoom or Teams may reduce resolution, making the video appear grainy.
5. Outdated macOS or Camera Drivers
Old system software may prevent the camera from working at its best. Updates often include performance improvements, so skipping them could affect video clarity.
6. Weak Internet Connection
A lagging or unstable connection forces video apps to compress video more aggressively. This compression introduces artifacts and makes the image look noisier than it actually is.
Now that we’ve identified the reasons behind a grainy camera, let’s move on to the solutions. Many MacBook users ask, Why is my MacBook Pro camera so grainy even in normal conditions? The good news is that you can often fix the pixelated grainy video with simple adjustments and best practices. Here are effective ways to fix it:
Good lighting is key to avoiding a MacBook camera grainy look. Since MacBook webcams struggle in dim light, proper lighting makes a big difference.
Tip: Warm light often looks more flattering than cool white light.
Even a tiny smudge or dust particle can make the video appear blurry or grainy.
Tip: Avoid alcohol-based cleaners that could damage the lens coating.
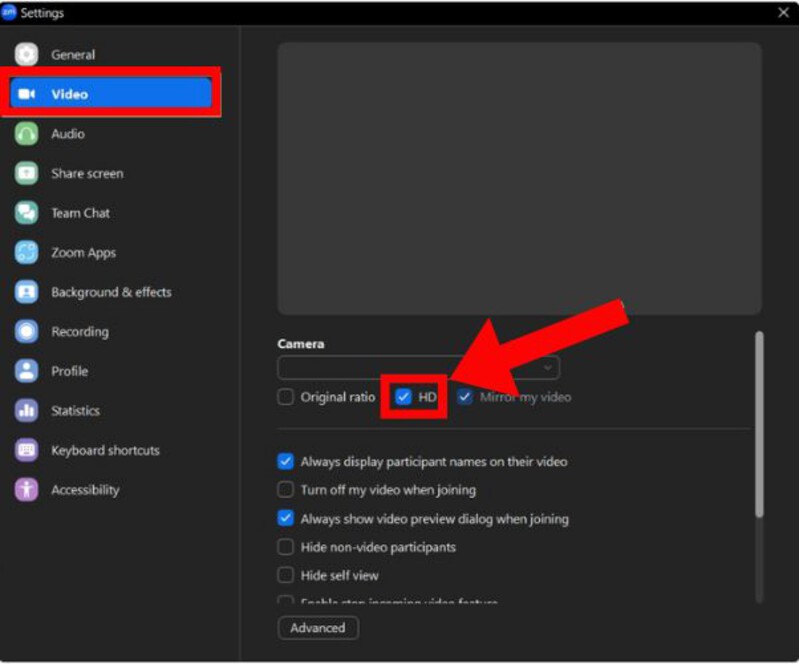
Sometimes the grainy camera MacBook Pro problem isn’t caused by the hardware itself, but by the video app you’re using. Many apps automatically reduce video quality to save bandwidth, which can make your camera feed look blurry or noisy. Adjusting these settings can instantly improve your image quality.
Adjust Settings in Zoom:
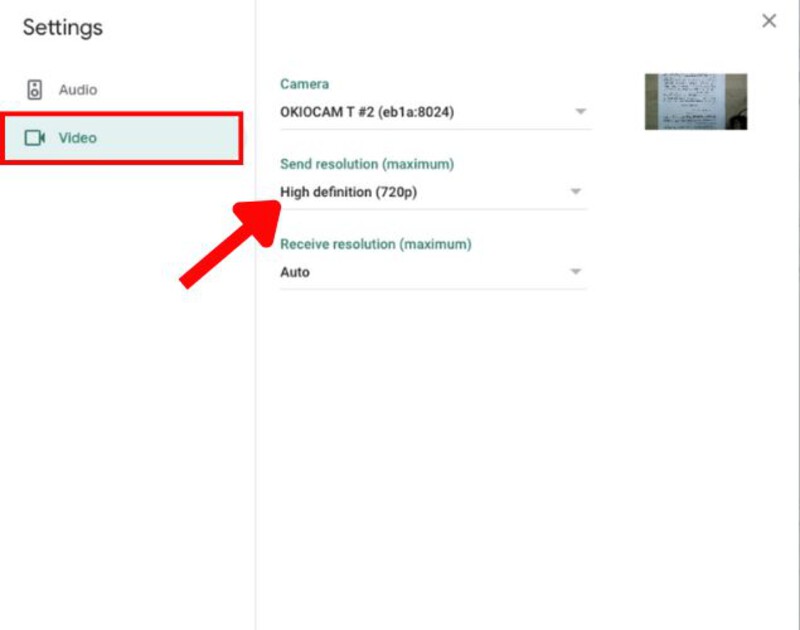
Adjust Settings in Microsoft Teams / Google Meet:
Tip: If your internet connection is weak, these apps may still downgrade video automatically. Using a stable, high-speed Wi-Fi connection helps maintain HD quality.
Outdated software can limit camera performance.
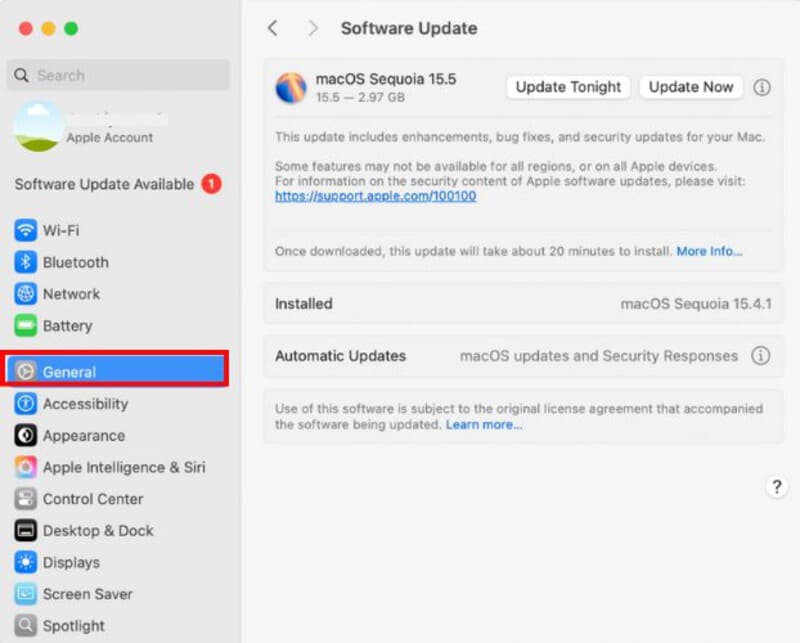
Tip: Updates often improve compatibility with the MacBook camera hardware.
Sometimes, the camera itself is fine, but your video looks grainy due to poor internet speed.
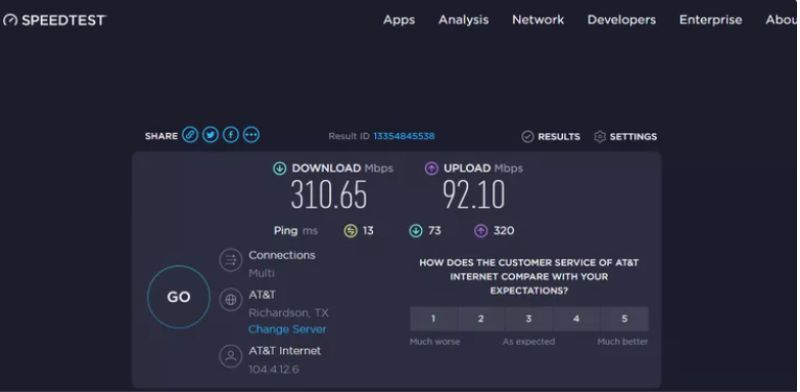
Tip: Disconnect other devices that might be hogging bandwidth.
Where and how you place your MacBook affects video clarity.
A slow MacBook can process video poorly, making it grainy or choppy.
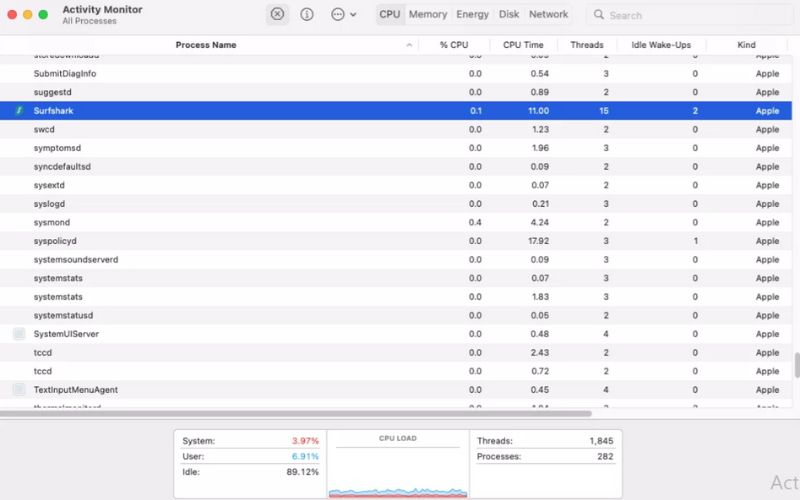
Tip: Restarting your MacBook before an important call clears memory and improves performance.
With these detailed steps, your readers can fix grainy camera issues, whether they’re using a MacBook Air or MacBook Pro.
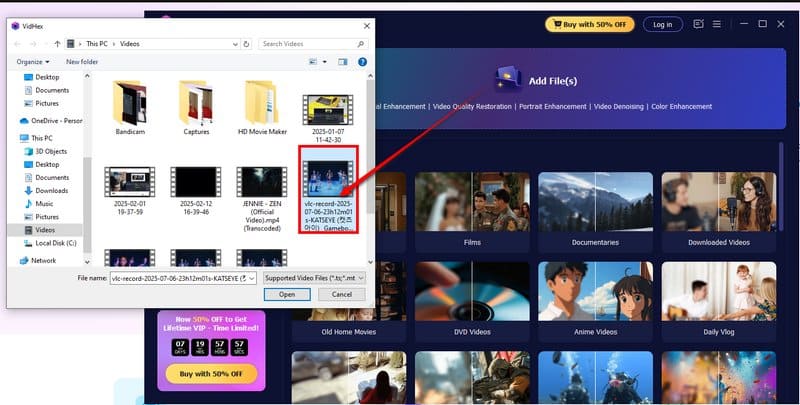
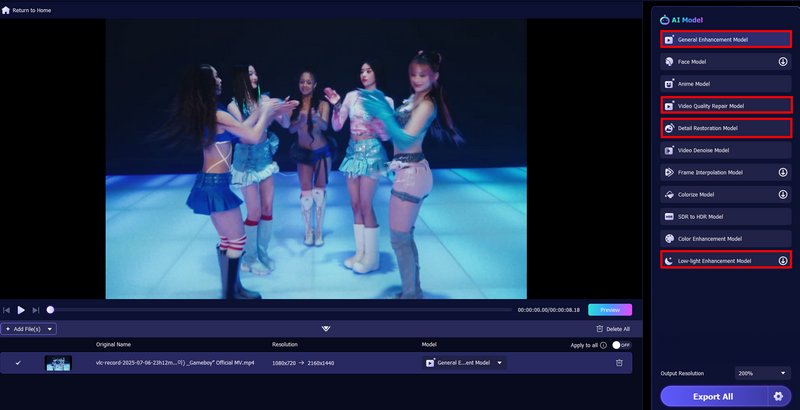
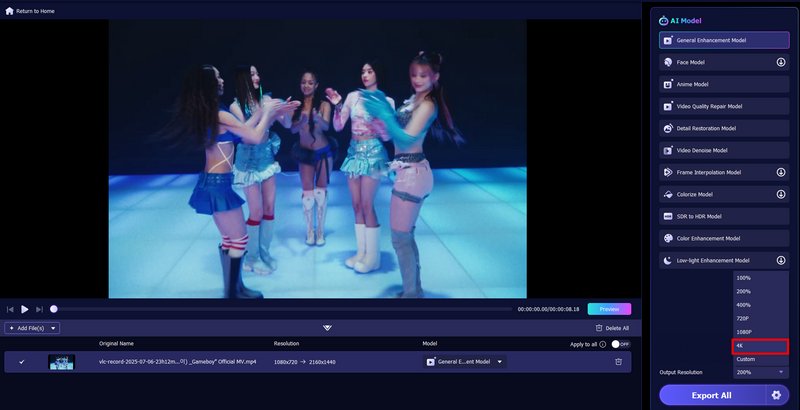
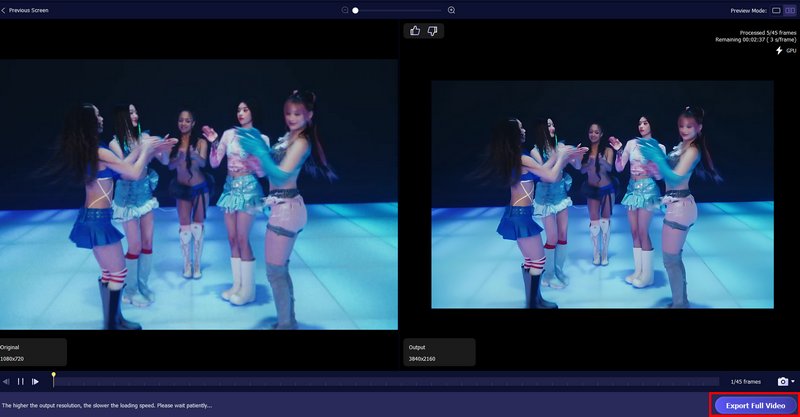
Even with all the fixes we’ve covered, your MacBook camera video may still appear less than perfect, especially in poor lighting or with older hardware. VidHex Video Enhancer might be the solution. It’s designed to take your recorded or saved videos and transform them into clearer, sharper visuals by reducing noise, enhancing details, and even upscaling resolution.

117,882Downloads
![]() 100% Secure. No Ads.
100% Secure. No Ads.
![]() 100% Secure. No Ads.
100% Secure. No Ads.
How to Enhance Grainy MacBook Camera Videos with VidHex
Why is my MacBook camera grainy?
A grainy MacBook camera is usually caused by poor lighting, small sensors, dirty lenses, bandwidth limits in video apps, or older 720p hardware, making videos look less sharp.
Why is my MacBook Air camera so grainy compared to newer models?
Older MacBook Air models only have 720p webcams, which naturally look less sharp. Newer models (like those with M1/M2 chips) feature 1080p cameras with better low-light processing, so the difference is noticeable.
How do I make my MacBook camera less grainy?
Improve your lighting setup, adjust app video settings (enable HD if available), clean the lens, and ensure you have a stable internet connection. For older MacBooks, you can also use an external webcam or enhance your video with a AI video enhancer.
Conclusion
If the camera on your MacBook appears a little grainy, it's likely due to poor lighting, subpar webcam hardware, or app settings in your video call app that have lowered the resolution to the lowest (144p) setting. But during your next video call, you can improve clarity by adjusting your lighting, cleaning the webcam lens, checking video app settings, and keeping macOS up to date. For older devices, especially if you’ve been wondering why is my MacBook Air camera so grainy, using software like Aiseesoft VidHex can further enhance video quality and make your calls or recordings look sharper.
 Top 10 Best Camera APPs for Android Users to Take Photos with
Your Android can work as the professional digital camera does, once you choose and download following 10 best camera apps for Android tablets.
 Get Affordable Action Cameras Alternative to GoPro
Come here and get your best GoPro alternative with an affordable price. Moreover, you can see the GoPro comparison chart to find your most budget GoPro camera.
 Learn to Resolve the Card Cannot Be Accessed Error in Canon
Why does my Canon camera say memory card error? Why is the brand-new SD card not working on the camera? Read to resolve the card cannot be accessed from Canon.

VidHex is an AI-powered video enhancer that upscales, denoises, colorizes stabilizes, and improves video quality in 1 click.
![]() 100% Secure. No Ads.
100% Secure. No Ads.
![]() 100% Secure. No Ads.
100% Secure. No Ads.
*Required field
*Please enter a valid email
