Video Converter Ultimate
![]() 100% Secure. No Ads.
100% Secure. No Ads.
![]() 100% Secure. No Ads.
100% Secure. No Ads.
DaVinci Resolve is widely recognized as a professional-grade video editing program trusted by filmmakers, content creators, and video editors around the world. However, shaky footage is still a common issue, especially when shooting handheld videos, action scenes, travel clips, or concert recordings. This is where the Davinci Resolve stabilize video feature becomes extremely useful. With built-in stabilization tools available on different pages of the software, you can quickly smooth out unwanted camera movements and improve the overall viewing experience. In this article, you will learn practical methods to stabilize shaky clips in DaVinci Resolve, along with a quicker alternative solution for achieving smoother and more professional-looking videos.
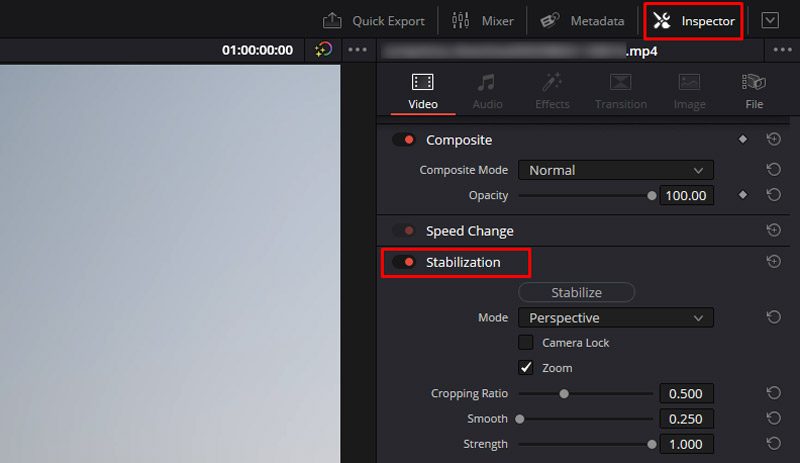
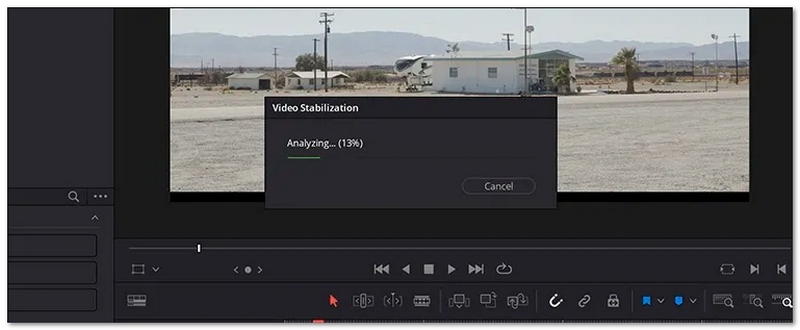
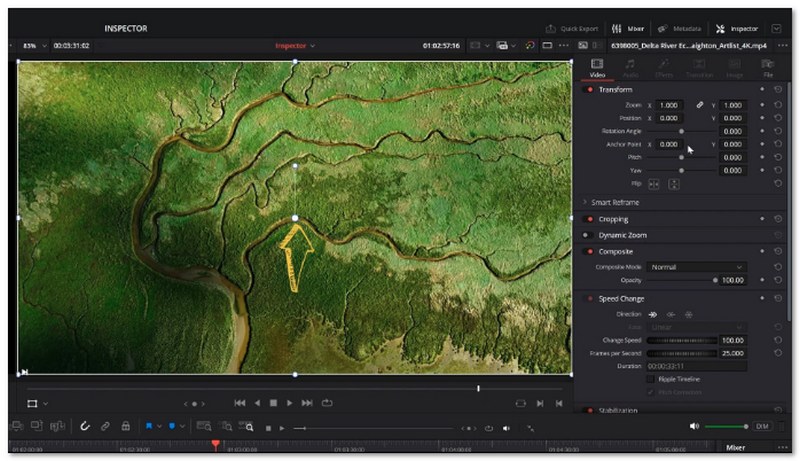
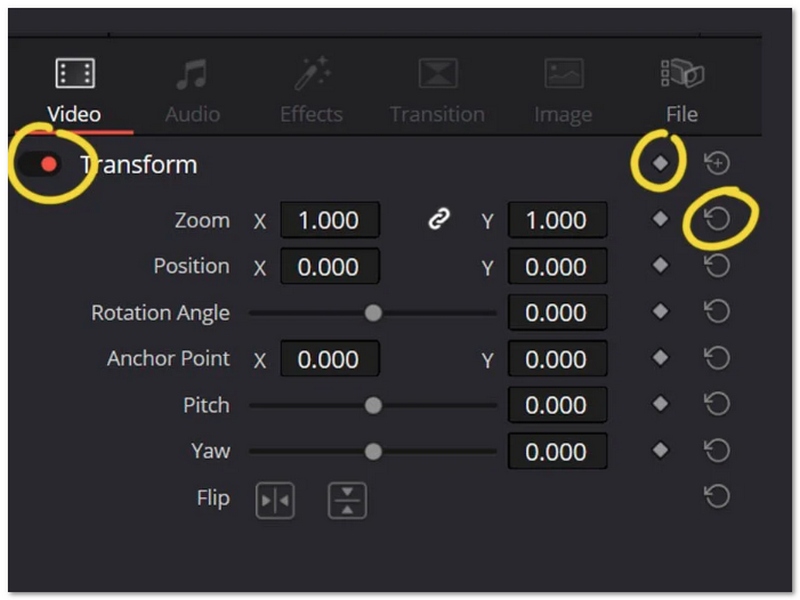
One of the simplest ways to repair shaky video in DaVinci Resolve is by using the built-in stabilization feature in the Edit Page Inspector. This approach is very easy for beginners and suits particularly handheld videos, travel footage, vlogs, and standard cinematic shots. With just a few clicks, the software analyzes camera motion and automatically smooths out unwanted shakes while maintaining natural movement. If you are new to video editing or looking for a quick solution, this approach is a great starting point in this DaVinci Resolve 19 Stabilize Guide.
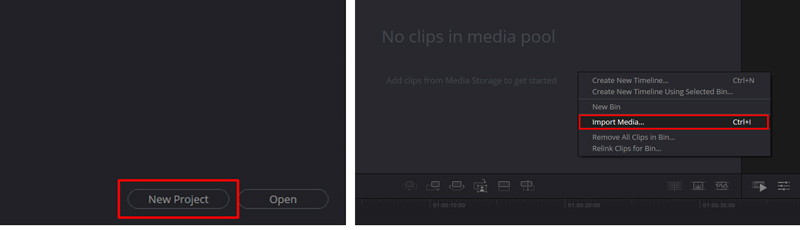
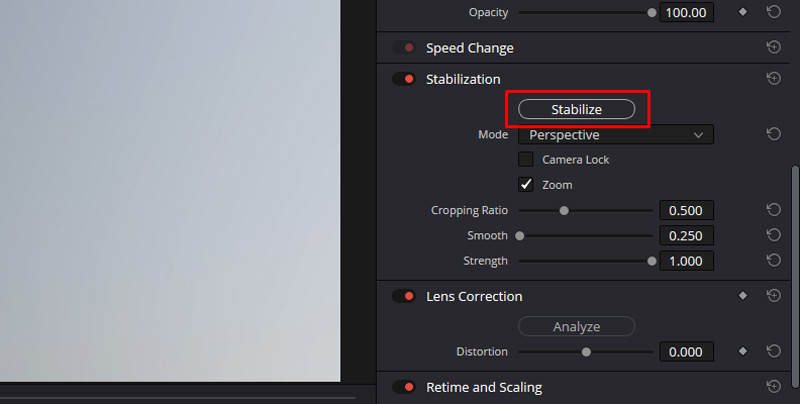
Without using sophisticated editing pages, this technique offers a quick and efficient solution to lessen camera wobble.
One other very effective method to stabilize shaky video is through the Color Page Tracker feature in DaVinci Resolve. While the Edit Page workflow is simpler, the Color Page one allows for more detailed stabilization adjustments. It works best for clips featuring intricate movements, very fast camera operations, or films that need exact modifying. The software tracks each frame's movement to generate more visually appealing and flawless outcomes. Knowing the DaVinci Resolve Edit Page vs Color Page Stabilization distinction will assist you in determining which workflow suits your editing preferences and desired control level.
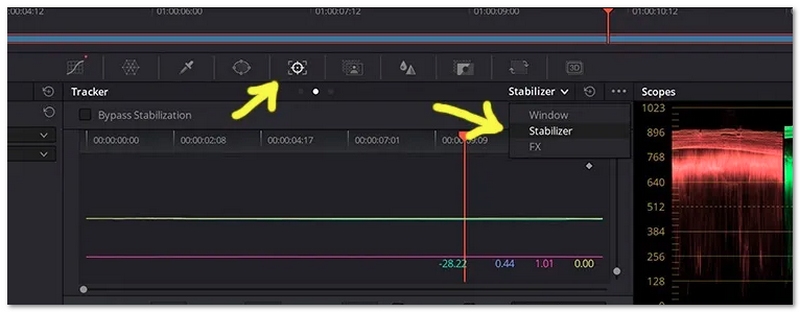
This method offers greater flexibility and is commonly used by editors who want more control over stabilization quality.
If you shoot videos on your action cams, drones, or smartphone capable of recording motion data, you can use Gyro Stabilization in DaVinci Resolve. This modern function relies on the gyroscope metadata embedded in your camera to understand the movement and make a more lifelike stabilization with great precision. Compared to other video smoothers, this method can deliver smoother results with less image cropping and distortion. Learning how to use DaVinci Resolve Gyro Stabilization is especially helpful for fast-moving scenes such as sports, travel videos, or handheld cinematic shots.
This method is ideal for creators who want professional stabilization results while maintaining more of the original frame.
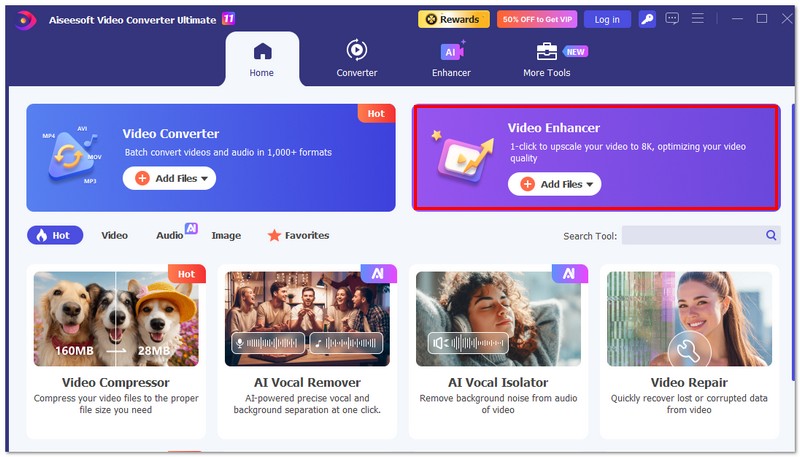
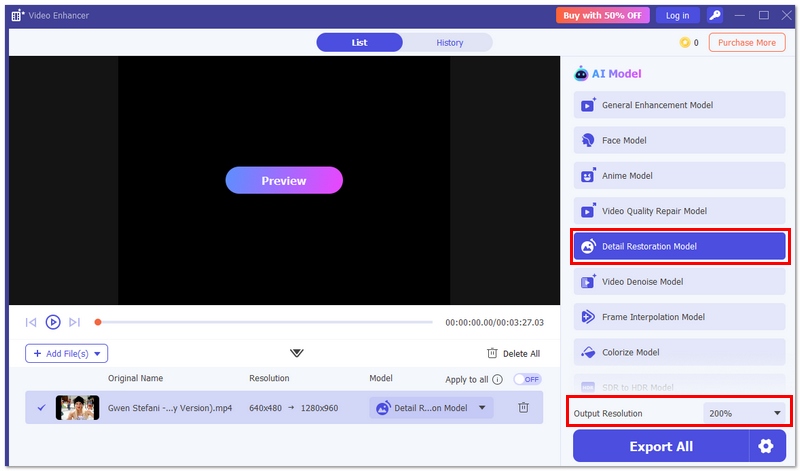
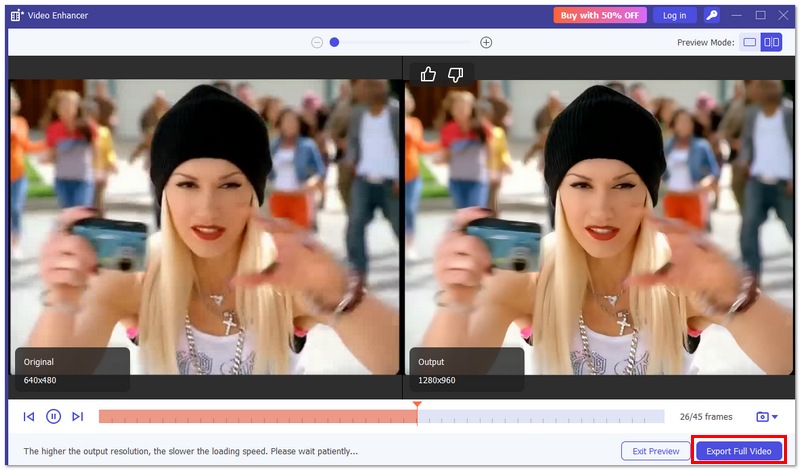
Though DaVinci Resolve does have strong stabilizing options, the pair of tools, beginners, or even intermediate ones, may prefer a quick and simple solution. Aiseesoft Video Converter Ultimate is a good way to solve the problem of shaky videos in a simple and efficient manner without having to deal with difficult editing panels. With the video enhancer feature available, your camera shakes will be reduced, your video will become clearer, and the overall viewing quality of the video will be improved in just a few clicks. Hence, it is a very convenient tool for vloggers, travelers, social media content creators, or anyone else who wants quick, professional-looking results.
Downloads
![]() 100%
Secure. No Ads.
100%
Secure. No Ads.
![]() 100%
Secure. No Ads.
100%
Secure. No Ads.
This method is ideal for users who want to stabilize videos quickly without spending too much time learning advanced editing workflows.
| Features | DaVinci Resolve | Aiseesoft Video Converter Ultimate |
| Ease of Use | Medium to Advanced (steeper learning curve) | Very Easy (beginner-friendly interface) |
| Stabilization Methods | Multiple options (Edit Page, Color Page Tracker, Gyro Stabilization) | AI-based automatic stabilization |
| Control Over Settings | High level of manual control and customization | Limited but simple automatic optimization |
| Processing Speed | Depends on project complexity and hardware | Fast stabilization with GPU acceleration |
| Batch Stabilization | Not ideal for batch video stabilization | Supports batch processing |
| Additional Editing Tools | Professional video editing suite (color grading, effects, timeline editing) | Basic editing tools (trim, crop, rotate, filters) |
| Output Format Support | Wide support but requires export setup | Supports 1000+ video and audio formats |
| Best For | Professional editors, filmmakers, and advanced users | Beginners, vloggers, social media creators |
| Cropping Control | Advanced cropping and motion smoothing control | Automatic cropping adjustment |
| Learning Curve | Steep | Very Low |
| Overall Stabilization Workflow | Powerful but time-consuming | Quick and efficient |
What are Davinci stabilization modes?
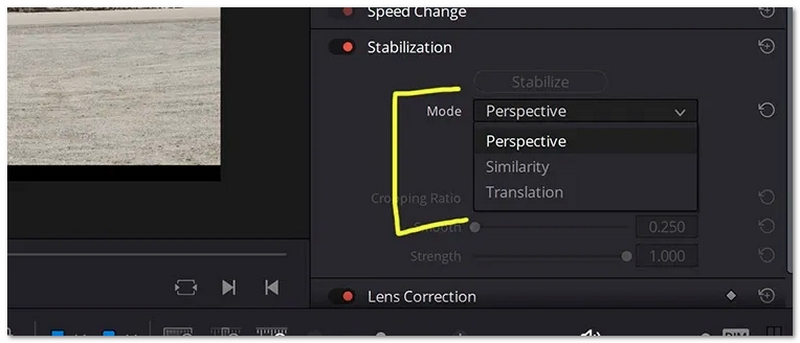
As mentioned above, Davinci Resolve provides you with three stabilization modes to make your videos less shaky. These three modes are Perspective, Similarity, and Translation.
Perspective is the default stabilization mode to stabilize a video while maintaining perspective. It allows you to use pan, tilt, zoom, and rotation. The Similarity mode also lets you use pan, tilt, zoom, and rotation analysis. However, it may generate unwanted motion artifacts during the video stabilization process. Translation only enables you to use pan and tilt analysis. This mode is mainly used for shaky videos with minimal side-to-side movement.
How do I stop my DaVinci Resolve camera from shaking?
DaVinci Resolve can’t help you stop your camera from shaking within it. However, you can use it to effectively stabilize shaky footage by following the guide above.
Does DaVinci Resolve free have image stabilization?
Yes, the Free version of DaVinci Resolve also carries the stabilization function. It allows you to reduce camera shake in your footage with ease. You can use these three stabilization modes to effectively make your video more stable. Moreover, DaVinci Resolve Free lets you freely customize various settings, such as Camera Lock, Smooth, Zoom, Cropping Ratio, and more. You can adjust them for better stabilization results.
Conclusion
After reading this article, I hope you can learn how to stabilize your shaky footage in DaVinci Resolve. If you often edit videos and prefer high-quality creations, you can download the latest version of DaVinci Resolve and start a free trial. However, if you only need to quickly reduce camera shake and stabilize a video, the introduced Aiseesoft Video Converter Ultimate can be a better choice.
 2024 Top 10 Free Video Editing Software for Mac Review
What is the best free editing software for Mac? This article gathres the 10 best free video editors for Mac for begginers and professionals, including iMovie, Lightworks, Avidemux, etc.
 Top 3 Ways to Combine MP4 Files on Mac without Quality Loss
Have some MP4 files and want to join them together on MacBook? Here are three approaches to combine MP4 files on Mac without damaging video or audio quality.
 How to Upscale Video Resolution to HD/4K with Ease
Want to enhance the quality of your video? Feel the video resolution is too low? This post will guide you on how to upscale your video to a higher resolution with a few simple steps.

Video Converter Ultimate is excellent video converter, editor and enhancer to convert, enhance and edit videos and music in 1000 formats and more.
![]() 100% Secure. No Ads.
100% Secure. No Ads.
![]() 100% Secure. No Ads.
100% Secure. No Ads.
*Required field
*Please enter a valid email
