When you change a clip’s speed (like slowing it down to 50%), you should select the correct interpolation method to avoid jarring, unwatchable stutters.
This article will guide you in learning Time Interpolation in Premiere Pro, explaining what it is, how to use its three main options, and how to select the right one to ensure your footage remains smooth and professional.
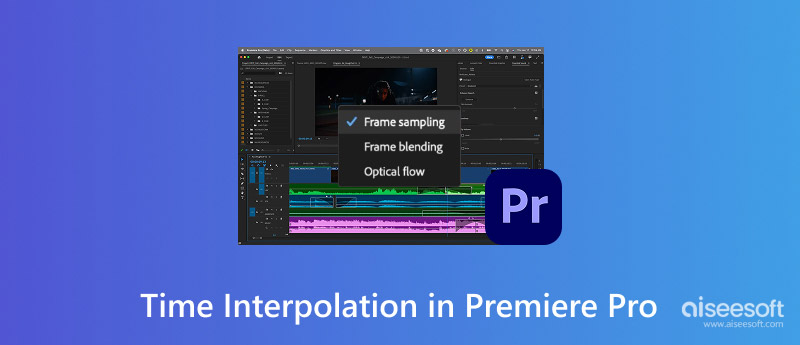
Time Interpolation in Premiere Pro is mainly used to change your clip’s playing speed. It can manage existing ones and create new frames for desired results. Time Interpolation contains three options: Frame Sampling, Frame Blending, and Optical Flow. They offer different approaches to managing frames and producing varying levels of smoothness.

Premiere Pro’s Time Interpolation is mainly designed to avoid a jarring, slideshow-like effect. When you slow down a video, it can generate new frames to ensure a smooth and continuous motion. Conversely, when you speed up the clip, it will remove or blend frames to create the faster motion.
| Interpolation Method | How It Works | Ideal For (Best Use Case) | Performance & Visual Result | Weakness/Drawback |
| Frame Sampling | Repeats or deletes existing frames to fit the desired speed | Quick exports where render speed is the priority Real-time previews |
Fastest render speed Often produces a jerky or less fluid effect, especially in slow motion |
TDoes not create new visual information Outputs the lowest quality The motion is not fluid |
| Frame Blending | Repeats frames but also creates new frames Blends adjacent ones for a smoother transition |
Creates an intentional motion blur effect in fast motion | Fine render speed Produces smoother motion than Frame Sampling Quality is a balance between Frame Sampling and Optical Flow |
May generate a visible ghosting or double-image effect Interpolation results are often unnatural |
| Optical Flow | Analyzes the motion of pixels between frames and generates new intermediate frames | High-quality slow-motion effects Works best with stable shots and clear subjects |
Render speed is slow, but generally produces the best results | Long render and export times May produce artifacts when handle complex motion or fine details |
As mentioned, when you edit a video and change its playback speed to create smooth slow-motion or fast-motion effects, you can rely on the Time Interpolation feature in Premiere Pro. The process is relatively straightforward. All you need to do is select the correct method based on the type of speed change you want.
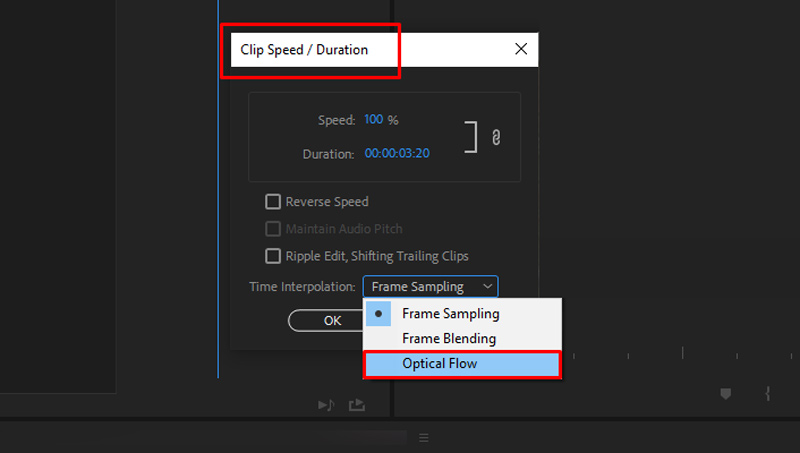
Generally, you are advised to choose the Optical Flow mode. It can often deliver better and cleaner results than the others. Before exporting, you should always render the section and create a preview file. To get a desired result, you also need to use Time Remapping and other advanced features.
Premiere Pro is an industry-standard video editing tool primarily designed for professionals. It requires a steep learning curve to access its main functions. Most casual users may find it complex to navigate through multiple menus, access target options, and use them correctly. Moreover, this Adobe product is expensive. If you just want to make a clip smoother or create slow motion, Premiere Pro is not a good choice.
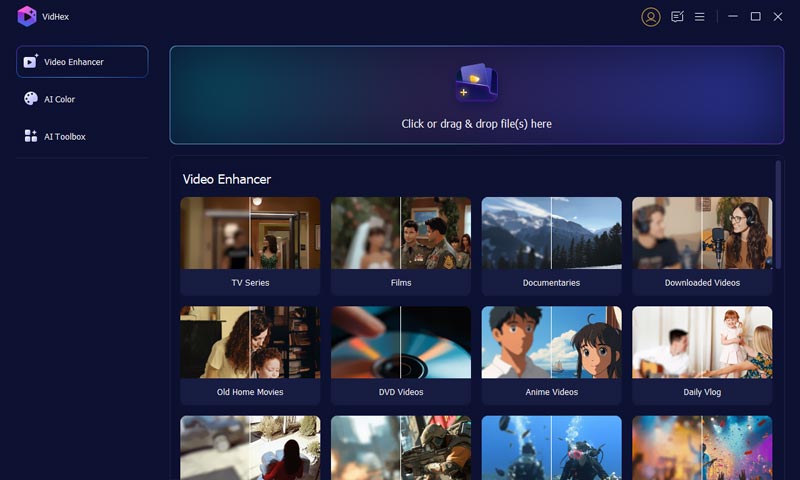
This part introduces you to a great Premiere Pro alternative, VidHex, for AI frame interpolation. As a dedicated video enhancement software, it provides multiple powerful AI models for various tasks, such as upscaling resolution, restoring old footage, stabilizing shaky clips, interpolating frames to create slow-motion videos, and more.
![]() 100% Secure. No Ads.
100% Secure. No Ads.
![]() 100% Secure. No Ads.
100% Secure. No Ads.
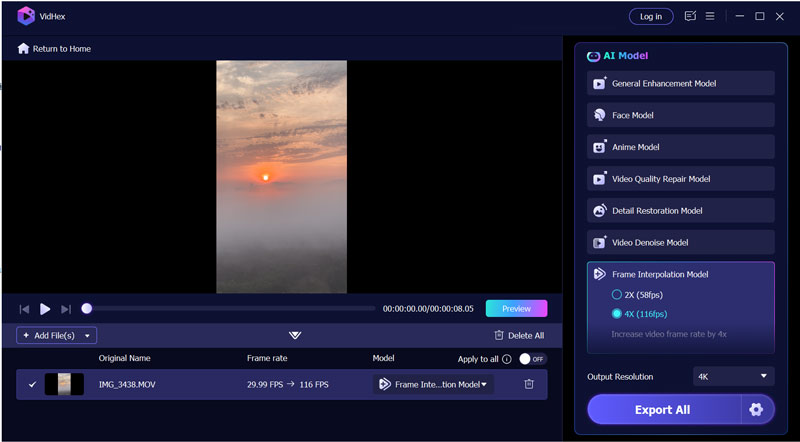
VidHex’s AI uses advanced deep learning technology to understand what natural motion should be. Better than a pure algorithm like Optical Flow, it often generates higher-quality results. It guarantees a smoother, more natural-looking slow-motion effect.
For most casual users who want high-quality slow motion without the complexity and high cost of professional software, VidHex is a highly recommended choice.
Question 1. Can Premiere Pro interpolate 24fps to 120fps?
Yes, Premiere Pro can technically interpolate 24fps footage to 120fps. However, the final quality and smoothness of the result are not guaranteed. The time interpolation depends on the specific methods you use and the nature of the source file. As mentioned, you can select its Frame Sampling, Frame Blending, or Optical Flow to increase frame rates. Compared to the two other options, Optical Flow may produce better results.
Question 2. How do I stretch the timeline in Premiere Pro?
To stretch the timeline of your video in Premiere Pro and make fine details easier to see, simply drag the slider at the top-right corner of your timeline panel. Drag the slider to the left to zoom out and right to zoom in.
If you mean to stretch clips on the timeline, use the Rate Stretch Tool. You can find and choose it from the toolbar. Move your cursor to select the clip in the time. Then, drag the edge to stretch the clip freely.
Question 3. Why does the Premiere Pro interpolation result look distorted sometimes?
Optical Flow is an AI interpolation feature in Premiere Pro that uses an advanced algorithm to create new frames based on the surrounding data. It analyzes the motion of pixels from one frame to the next. Then, it will generate possible ones by “guessing”. The distortions may occur when the analysis fails or is dealing with complex tasks. In fact, these kinds of issues occur in almost all current AI models.
Conclusion
This article has mainly talked about Time Interpolation in Premiere Pro. You can learn the three primary methods and related information. While this Adobe software is a powerful workshop, VidHex is a specialized enhancement tool for the specific job of frame interpolation. If you don’t have an Adobe Creative Cloud membership, you are generally not recommended to purchase Premiere Pro for only interpolation needs.
 HandBrake Upscale to Enhance Your Video Quality
Can HandBrake upscale videos and increase quality? Does HandBrake dimensions allow upscaling? This post tells how to improve quality with HandBrake upscale.
 A Simple Guide to Remastering Videos and Enhancing Quality
Can AI help me remaster a pixelated video with enhanced quality? How to remaster a low-quality video captured by my old iPhone? Learn to remaster your videos.
 Top 7 AI Video Denoisers to Clean and Enhance Your Videos
What is the best noise and flicker reduction tool? How to reduce noise with Topaz Video AI? This post shares 7 AI video denoiser tools for you to reduce noise.

VidHex is an AI-powered video enhancer that upscales, denoises, colorizes stabilizes, and improves video quality in 1 click.
![]() 100% Secure. No Ads.
100% Secure. No Ads.
![]() 100% Secure. No Ads.
100% Secure. No Ads.
*Required field
*Please enter a valid email
