Are you searching for a way to recover emptied Trash on Mac?
The Trash or Bin on your Mac stores your deleted data if you want to restore them when you accidentally erase some valuable files. However, many users like to empty the Trash as soon as they delete some items, especially while managing all types of data to free up storage space. Are you facing the same situation and need to undelete files from Trash? Just keep reading to learn how to undelete Mac Trash.

Before telling you specific steps to undelete Mac Trash, I would like to talk about the main differences between deleting and emptying Trash.
After you delete a file or folder on your Mac, it will be moved to the Trash or Bin. All the deleted files will be stored there until you manually empty the Trash. The Trash data can be retrieved with ease.
Generally, after emptying the Trash on a Mac, all files and folders within it are considered permanently deleted. You can’t simply get them back without using dedicated data recovery software. Your deleting operation is like putting items in a temporary holding area. However, emptying the Trash is like permanently erasing it.
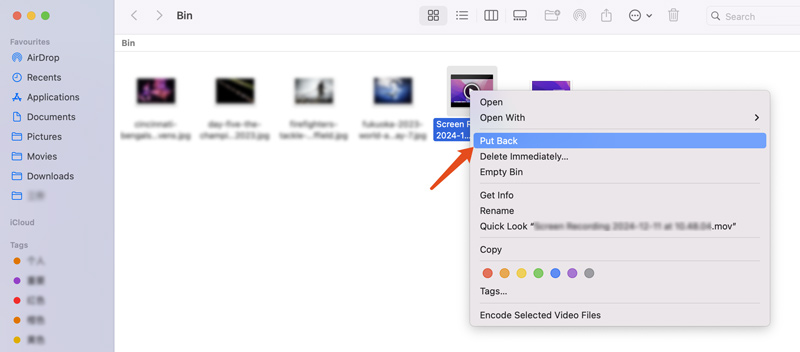
As I mentioned above, you can easily recover deleted files from the Trash on a Mac before emptying it. Usually, you can locate the Bin or Trash of your Mac on the Dock. Click its icon to access all your deleted files. Select the items you want to restore, right-click on the selection, and then choose the Put Back option. Within a few clicks, you can handily undelete data from your Mac Trash.
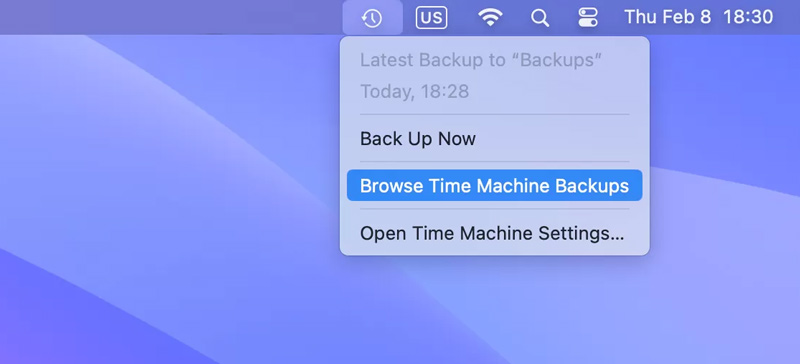
If you have Time Machine set up and have a backup that contains these deleted files you want to recover, you can easily start the Mac data recovery using Time Machine. Open the Time Machine app from the Launchpad or your Applications folder. Connect your backup disk to this Mac, and then check your backups in the pop-up Time Machine window. Also, you can click the Time Machine menu and choose the Browse Time Machine Backups option.
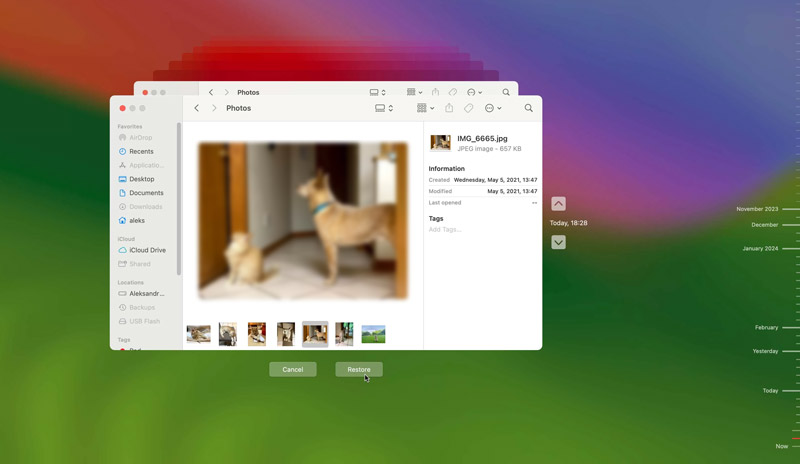
Use the timeline to navigate to a point in time before you delete these important files. When you locate the deleted file, simply click the Restore button.
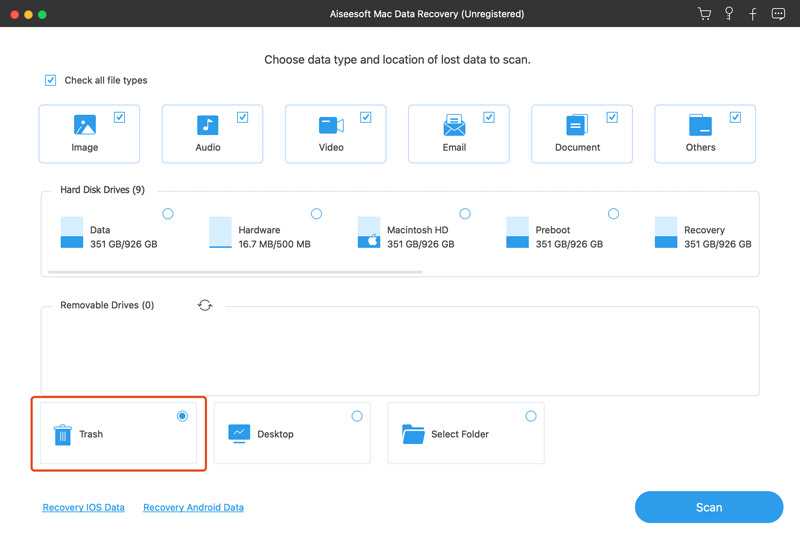
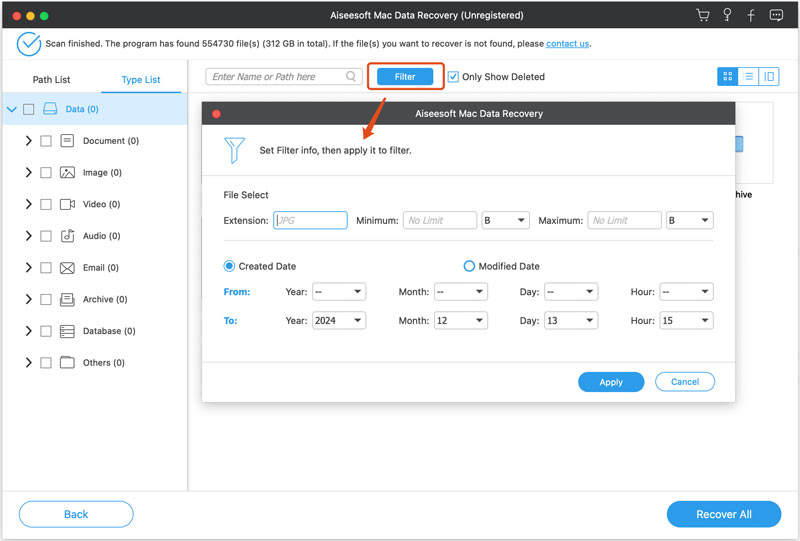
Have you accidentally emptied your Mac’s Trash and realized you deleted something important? If you don’t have a backup file, you must rely on some reliable Mac data recovery tools to restore these permanently erased data. Here, you can try using the powerful Aiseesoft Mac Data Recovery to undelete files from the Trash on your Mac. This reputable recovery software can restore various commonly used data types, such as photos, videos, documents, emails, and others.
![]() 100% Secure. No Ads.
100% Secure. No Ads.
![]() 100% Secure. No Ads.
100% Secure. No Ads.

Question 1. Does emptying Trash on a Mac permanently delete files?
Yes, emptying the Trash on a Mac will permanently delete all the files and folders it contains. Once you empty the Trash, those deleted files are no longer recoverable with built-in tools or features. When you need to restore them, you have to rely on specialized data recovery software. After you remove items from your Mac’s Trash Can, they will be overwritten by newly created data steadily. Once overwritten, there is no way to retrieve these deleted Mac files afterward.
Question 2. Does the Trash or Bin on Macs automatically delete?
By default, the Trash or Bin on your Mac computer does not automatically delete files. All your deleted items will remain in the Trash until you manually empty them. However, there is a built-in feature for you to set your Mac to empty the Trash after 30 days automatically. To turn on this automatic erasing feature, you can open a Finder window, click the Finder menu, choose Settings from its dropdown, go to the Advanced tab, and then check the box next to Remove items from the Trash after 30 days.
Question 3. Why can’t I find Trash on my Mac?
Generally, you can easily see the Trash icon on the right-hand side of the Dock. When you want to manage deleted files or empty the Trash, click the icon to access its folder. If you can’t locate Trash or Bin on the bottom Dock, open the Finder app, click the top Go menu, choose Go to Folder, and then type Trash. Besides, you can press Command + Shift + G to display the Go to Folder window. If you still can’t find the Trash on your Mac, try restarting your Mac to check if the Trash icon is back in the Dock.
Conclusion
After reading this article, I hope you can easily undelete Mac Trash and find deleted files. Once you notice some important files are deleted, you should attempt recovery immediately. Relatively speaking, the sooner you start the recovery, the higher your chances of success will be.
 How to Restore from Time Machine [macOS Sonoma Included]
How to restore data from the time machine? Can you retrieve files without the time machine backup? This guide will lead you through all you want to know.
 Restore Your Mac from External Hard Drive Using 3 Methods
Can I restore my Mac from an external hard drive? How do you reinstall macOS using an external hard drive? Learn to restore a Mac from an external hard drive.
 [2025] 5 Best Tools to Recover Deleted Files on Mac
This post offers the top 5 Mac data recovery software to help you retrieve your important but lost data. Check it and discover the most appropriate one for you.
Recover Various Data
1. Free Data Recovery Software
2. Recover Deleted Files in Windows
3. Recover Deleted Files from Recycle Bin Windows
4. Recover Permanently Deleted Emails

Aiseesoft Data Recovery is the best data recovery software to recover deleted/lost photos, documents, emails, audio, videos, etc. from your PC/Mac.
![]() 100% Secure. No Ads.
100% Secure. No Ads.
![]() 100% Secure. No Ads.
100% Secure. No Ads.
*Required field
*Please enter a valid email
