
Best for: Most casual users who need to directly transfer all types of iOS files (photos, videos, messages, contacts, music, voice memos, app data, and more) without overwriting existing data.
Contents
Are you looking for the most reliable way to transfer files from iPhone to Mac?
It is a common, everyday need to copy data from an iPhone to a Mac. When your iOS device is running out of storage, or you want to make a copy on your computer to better protect some important files, such as documents, photos, or videos, you need a safe way to move them.
This guide shares five effective methods to transfer data from an iPhone to a Mac, using both built‑in and third‑party tools. You can select a preferred method for copying large files, system logs, and backups.
Unlike copying files from an Android phone to a Windows PC, transferring iOS data to a Mac is often not that straightforward. You need a built‑in tool, such as Finder or iTunes, to do that. What’s worse, the traditional standard Apple syncing way can be quite annoying for most users.
If you want to transfer all types of files with maximum control, speed, and reliability, a dedicated third‑party tool like Aiseesoft FoneTrans is usually the strongest option. The software is a specialized iOS data transfer and management tool designed to copy all commonly used files between your iPhone and your Mac. Moreover, FoneTrans lets you selectively choose what you want to transfer.
 100% Secure. No Ads.
100% Secure. No Ads.
Best for: Most casual users who need to directly transfer all types of iOS files (photos, videos, messages, contacts, music, voice memos, app data, and more) without overwriting existing data.
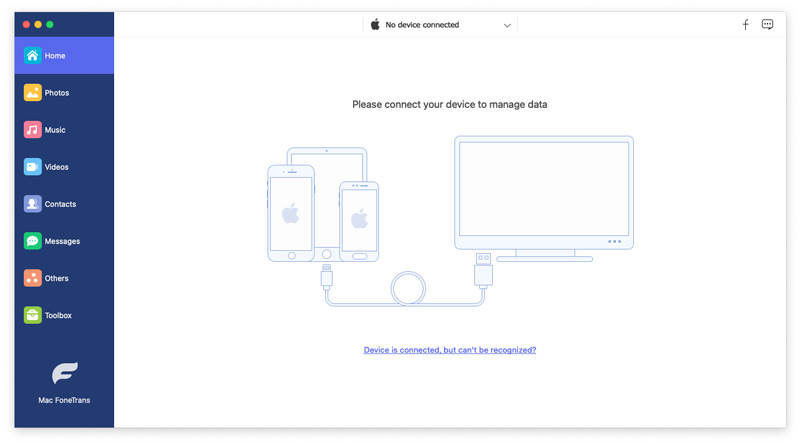
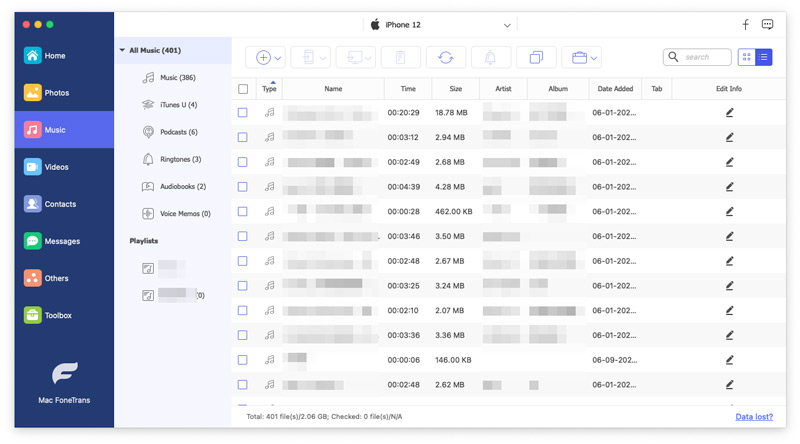
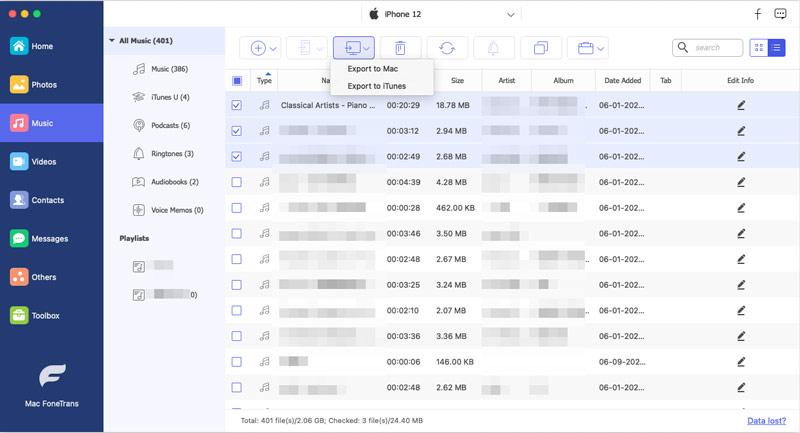
If you need to transfer files from your Mac to your iPhone, select the specific data type, then click the + button.
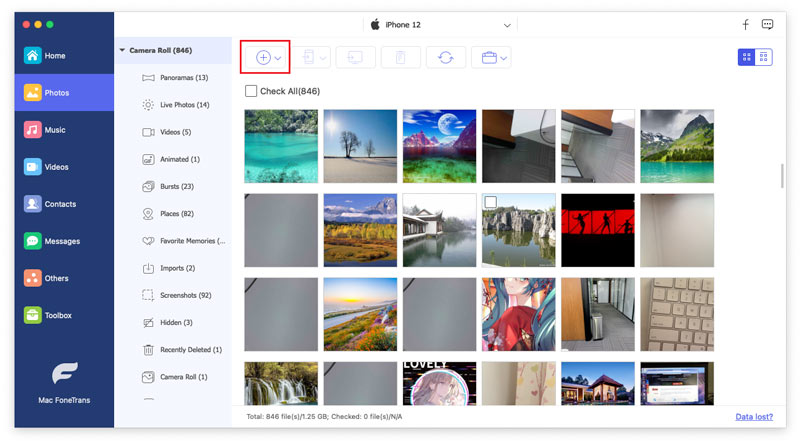
Supports All iOS File Types: It lets you seamlessly copy all frequently used iPhone or iPad files to your Mac.
No Overwriting: Unlike Apple syncing, FoneTrans won’t wipe or overwrite your existing iPhone data. Moreover, it allows you to transfer necessary iOS files selectively. You don’t need to handle all the data on your device.
Message Backup: The software can export important SMS, iMessages, and WhatsApp chats in your preferred format, such as HTML, TXT, or CSV.
Fast Transferring Speed: It can quickly complete your iPhone data transfer. This is quite convenient for users to handle large media files.
When dealing with large files like 4K videos, photos, and project files, in addition to the method above, you can use the built‑in method. Since macOS Catalina, Apple has replaced iTunes with Finder for device management. This section uses it as an example to show you the stable native method for transferring large files from an iPhone to a Mac.
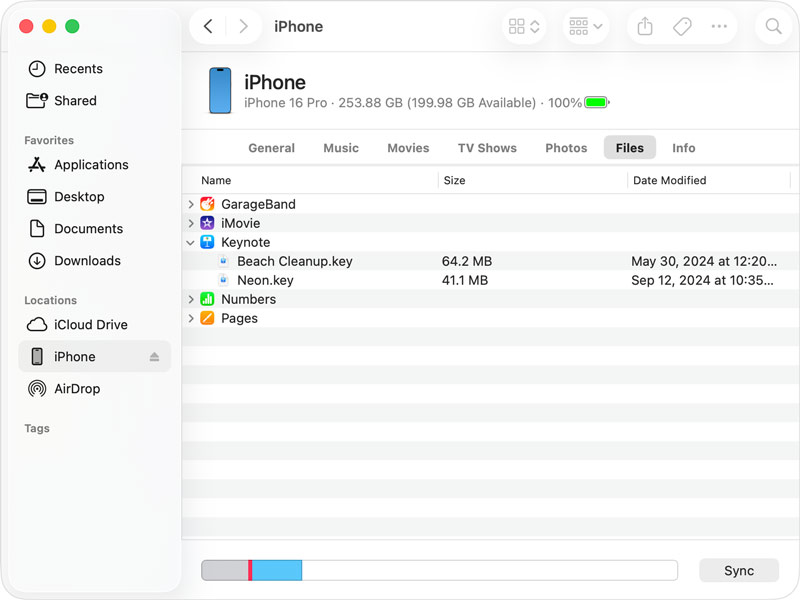
If you need to copy all your iPhone data to your Mac, navigate to the General tab and click the Back Up Now button to perform a full backup.
If you don’t have a cable to connect to, prefer a quick way to copy your iPhone data to a Mac wirelessly, or want your iOS files to sync seamlessly in the background, pay attention to the two methods in this section.
AirDrop is Apple’s default peer‑to‑peer Wi‑Fi and Bluetooth transfer tool. It is ideal for quickly sharing photos and videos between an iPhone and a Mac.
Ensure Wi‑Fi and Bluetooth are enabled on your iPhone and Mac. What’s more, you should check and set your AirDrop’s discoverability to Contacts Only or Everyone.
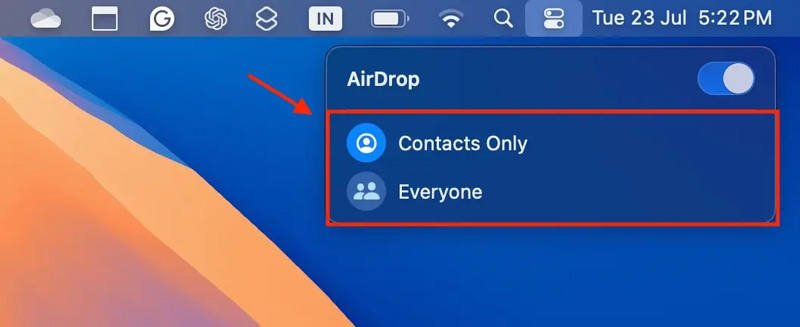
Locate the large files on your iPhone and select them. Tap the Share icon, then choose to transfer them to your Mac via AirDrop. Tap your Mac’s name when it appears in the AirDrop menu.
iCloud is integrated into both iPhone and Mac devices for syncing files wirelessly. Make sure it is enabled on both Apple devices.
Your iCloud should have enough storage to sync iOS files. Apple only gives 5GB of free iCloud storage. In most cases, you need to upgrade your iCloud+ plan to get more space, or use cloud alternatives like Google Drive or Dropbox.
In rare cases, you need to transfer technical system logs to troubleshoot some issues. You can rely on Mac’s Console app to do that.
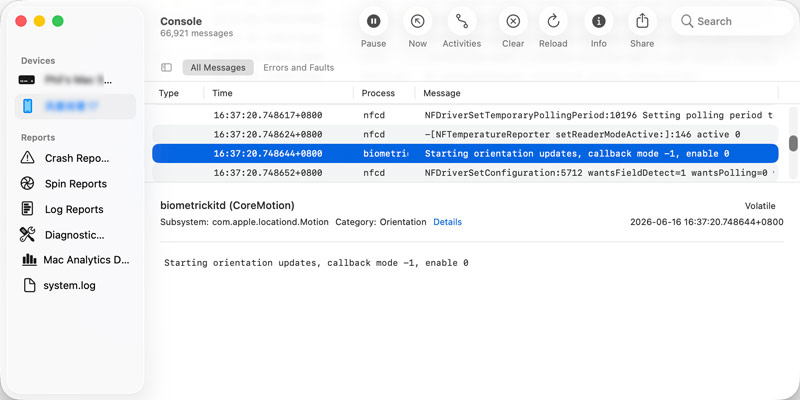
If you have Apple’s developer suite installed on your Mac, you can also use Xcode to view and save these files.
For various reasons, you may be unable to transfer files from your iPhone to your Mac. If you use AirDrop to copy iOS data, make sure both Apple devices have Wi‑Fi and Bluetooth turned on and close to each other. If you rely on iCloud sync to transfer files, you should connect both devices to a stable network. Temporarily turn off any VPN or firewall software.
If you use Finder/iTunes or a third‑party tool to transfer your iPhone files, check the cable first. You can try using another cable to make the physical connection. When you see the prompt, tap Trust and permit the related authority to access your iPhone data.
Where do AirDrop files go on my Mac?
By default, the files you AirDrop from your iPhone will be saved to your Mac’s Downloads folder. You can open Finder, click Downloads in the left sidebar to locate them. Generally, the folder will open automatically once the sharing process is complete.
How do I paste text from my iPhone to my Mac?
If you use a relatively newer iPhone and Mac, you can use Apple’s Universal Clipboard to paste copied text from your iPhone to your Mac directly. Once the text is copied to your iPhone, you can press Command + V on your Mac to paste it.
Is Aiseesoft FoneTrans safe to use?
Yes. FoneTrans is a reputable iOS data transfer tool that has been around for years. You should download it from the official Aiseesoft website. Moreover, it offers a free trial so you can test its capabilities and then make a purchase based on your needs.
Conclusion
This guide outlines five efficient methods for transferring files from an iPhone to a Mac. Whether you want to use built‑in Apple methods or prefer third‑party tools with maximum control, you can easily find the iPhone data transfer method you want. For everyday users who want a straightforward way to copy iPhone data to a Mac, a dedicated tool like Aiseesoft FoneTrans is often a good choice.
 Actionable Approaches to Effectively Find Large Files on Mac
How to find files based on file size on Mac? This concrete tutorial shows you how to find large files on Mac so that you can delete and manage them easily.
 How to Clear Other Storage on Mac When Other Storage Is Huge
Why other storage on Mac is so large? Find Mac other storage is huge and want to get rid of them? Learn 2 easy ways to check and clear other storage on Mac.
 How to AirDrop Mac iPhone to Share Files
This article introduces how to AirDrop from Mac to iPhone or vice versa with complete guide. There are also other useful tips provided for AirDrop troubleshooting.
 Leave your comment and join our discussion
Transfer data from iPhone/iPad/iPod to your computer or reversely.
100% Secure. No Ads.
100% Secure. No Ads.

*Required field
*Please enter a valid email
