
Best for: You want all your iMessages accessible on every Apple device — old iPhone, new iPhone, iPad, Mac — simultaneously.
Contents
“I just upgraded from my iPhone 14 to an iPhone 17 Pro, and I need to get my text messages — 20,000+ of them spanning 3 years — onto my new phone. I don't want to do a full iCloud restore because I don't want all the junk apps. Is there a way to transfer only messages?”
This is one of the most common questions we hear from iPhone upgraders. The short answer: yes, but the best method depends on your situation.
In this guide, we put 5 methods to transfer messages from iPhone to iPhone through real-world testing — timing each one, checking message integrity, and noting the gotchas. Here's what we found.
| Method | Selective? | Computer Needed? | Time (10K msgs) | Best For |
| iCloud Messages Sync | Yes (iMessage only) | No | Ongoing | Keeping messages in sync across devices |
| FoneEase | Yes | Yes | ~3 min | Selective message-only transfer |
| iPhone Quick Start | No | No | ~8 min | New iPhone wireless setup |
| iCloud Backup Restore | No (full) | No | ~25 min | Full device migration, new iPhone |
| iTunes/Finder Backup | No (full) | Yes | ~12 min | Fast wired full backup |
Best for: You want all your iMessages accessible on every Apple device — old iPhone, new iPhone, iPad, Mac — simultaneously.
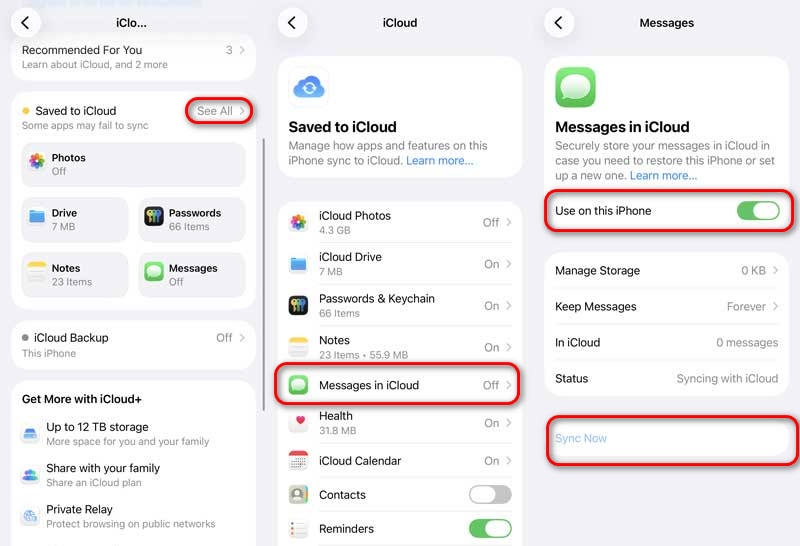
iCloud Messages syncs your iMessage conversations across all Apple devices that are signed in with the same Apple ID. It's not a one-time transfer—instead, it keeps your messages up to date on every device. Once you enable Messages in iCloud on your old iPhone and sign in with the same Apple ID on your new iPhone, your conversations will appear automatically.
How to transfer iMessage with iCloud:
PROS
CONS
Best for: You want to move only your text messages — no apps, no settings, no photos — to a new iPhone or to your computer for safekeeping.
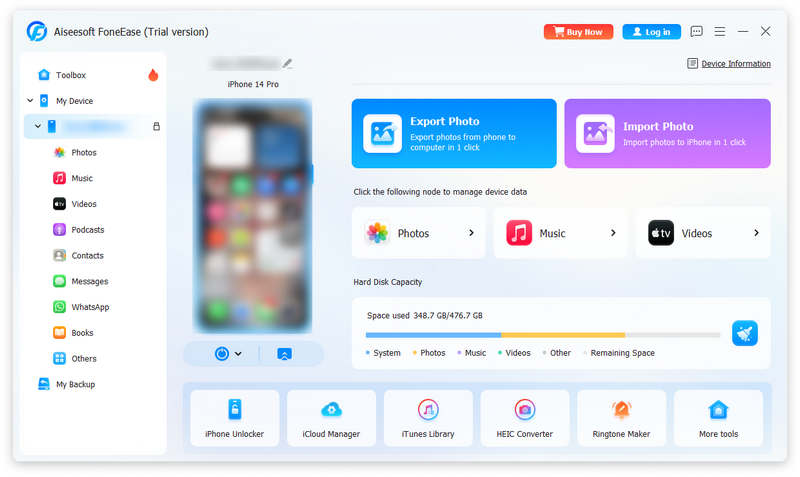
If you're like the user above and want a clean, selective transfer, FoneEase is the most straightforward tool we've tested. It lets you preview every text message on your old iPhone and export only what you need — no full backup required.
Step-by-step:
 100% Secure. No Ads.
PROS
CONS
Best for: You just bought a new iPhone and have both devices in hand. You don't mind transferring everything from your old phone.
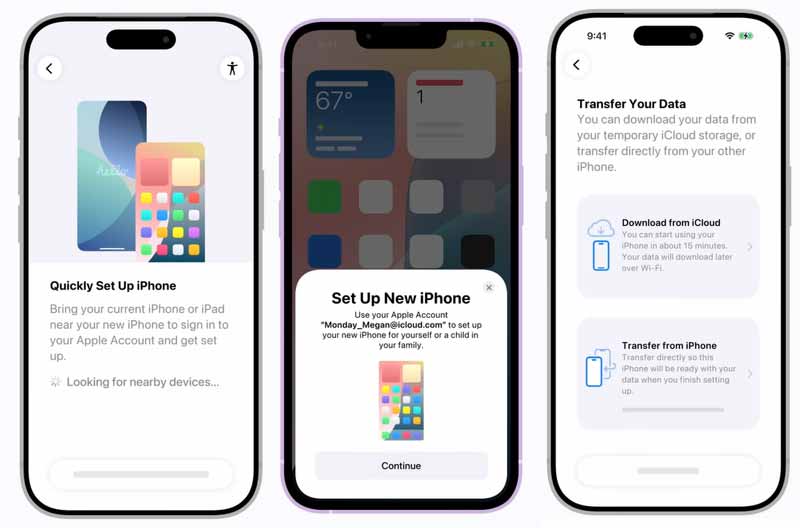
Quick Start has been built into iOS since version 12.4 and is Apple's recommended way to set up a new device. It transfers messages, photos, apps, settings, and everything else wirelessly.
How to Transfer Message Data to New iPhone:
PROS
CONS
Best for: Anyone who wants an easy wireless way to move everything to a new iPhone and has enough iCloud storage (or is willing to upgrade to a larger storage plan).
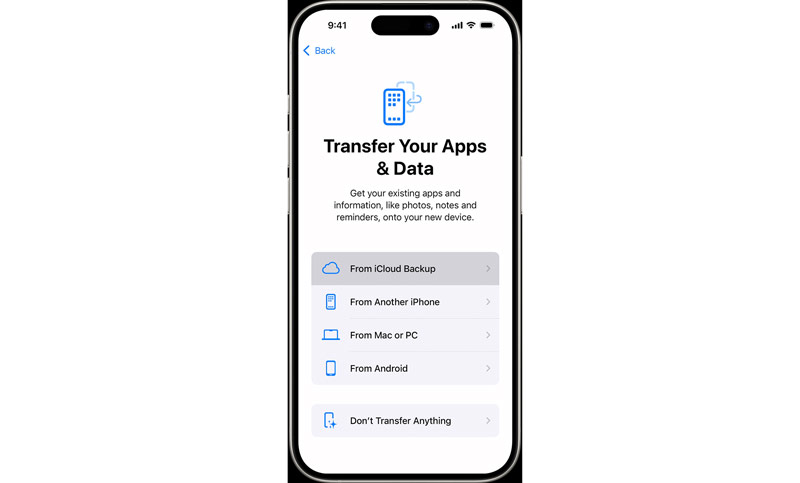
iCloud Backup is Apple's built-in backup service that automatically backs up your iPhone when it's charging, connected to Wi-Fi, and locked. When you set up a new iPhone, you can restore from your latest iCloud backup to bring back your messages, apps, settings, and other data without using a computer.
Step-by-step guide of transfer message with iCloud:
PROS
CONS
Best for: You prefer a wired, computer-based approach, or you want a fast full backup without relying on iCloud.
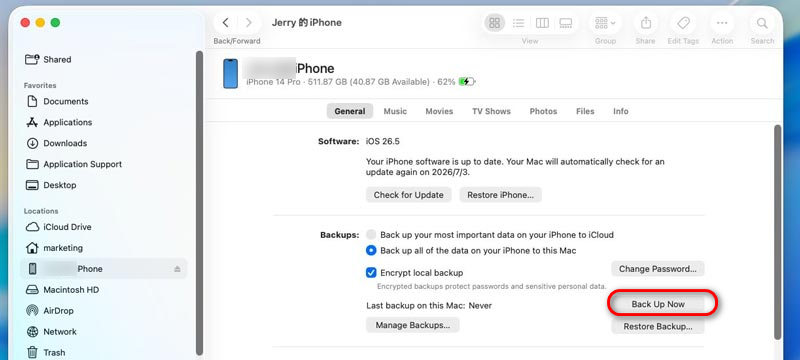
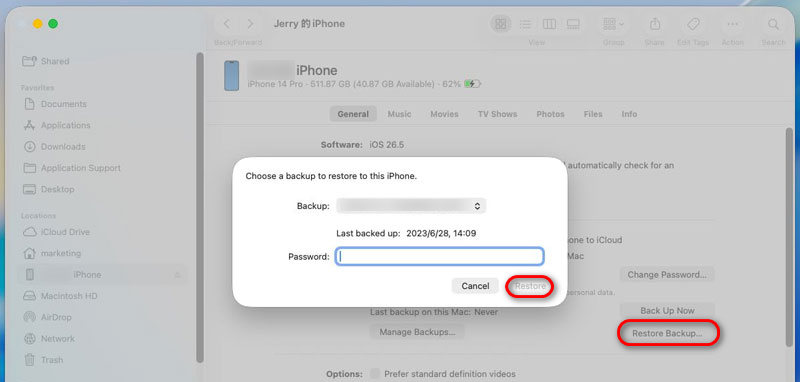
Before iCloud backup became mainstream, iTunes was the way to back up and restore iPhones. It's still one of the fastest methods, especially for large backups. On macOS Catalina or later, this is now handled by Finder.
Restore messages to new iPhone with iTunes/Finder:
PROS
CONS
Can I transfer only selected messages without restoring everything?
Yes. FoneEase is specifically designed for this. It's the only method that lets you preview and choose individual SMS or messages before transfer.
Does iPhone Quick Start transfer iMessages and SMS?
Yes. Quick Start transfers all messages (iMessage + SMS) along with every other type of data on your phone. It's a complete device mirror, not a selective tool.
Will my messages be deleted from the old iPhone after transfer?
No, not unless you erase the old phone. All the methods above copy your messages — they do not remove them from the source device.
Conclusion
There's no single best way to transfer messages from iPhone to iPhone — it depends entirely on your situation:
Want only your messages? Use FoneEase
Setting up a brand new iPhone? Quick Start is the easiest
Going full wireless? iCloud Backup
Already need messages synced everywhere? iCloud Messages Sync
Biggest, fastest backup? iTunes
Whichever method you choose, the answer is clear: you don't have to lose your message history when upgrading your iPhone.
 4 Easiest Methods to Transfer Data from iPhone to New iPhone
How to transfer data from an old iPhone to a new iPhone? Today, we will show you how to sync data to a new iPhone with 4 Easy methods.
 How to Transfer Photos from iPhone to iPhone
Want to move photos from old iPhone to new one? You can learn how to transfer photos from iPhone to iPhone/computer/Mac in this post.
 5 Easy Ways to Transfer Photos from iPhone to PC without iTunes
How to transfer photos from iPhone to Windows PC? This article will show you best ways on how to from iPhone X/8/7/6/5 to PC (Windows 10/8/7 included) with ease.
 Leave your comment and join our discussion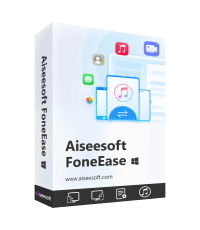
Aiseesoft FoneEase is a data transfer and management tool that lets you seamlessly move, back up, and manage various data between iOS, Android, and computers without resetting your phone or relying on iTunes.
100% Secure. No Ads.

*Required field
*Please enter a valid email
