Aiseesoft Screen Recorder
![]() 100% Secure. No Ads.
100% Secure. No Ads.
![]() 100% Secure. No Ads.
100% Secure. No Ads.
Reliance solely on handwritten notes to capture every piece of information often falls short. Whether you are a student trying to keep up with your professor or a professional needing an accurate record of a critical meeting, a lecture recorder is necessary.
When you search for the “best lecture recorder” or “lecture recording app”, you will get many recommendations, both hardware and software. What is the best way to record lectures?
This guide recommends 9 top contenders for you to select from, from powerful desktop software, convenient mobile apps, to dedicated hardware devices. Select the best lecture recorder based on your specific needs and ensure you will never miss a vital detail again.
Before diving into specific options, it is crucial to understand what makes a recorder “good” for lectures. When selecting a lecture recorder, the choice is often about the context of where you are learning. A student has very different needs from a professional or a journalist. Here are the key factors to consider:
| Software/Tool | Type | Best For | Key Highlights | Pricing | Platform |
| Sony ICD-UX570 | Hardware Voice Recorder | Reliable in-person voice capture | 20+ hour battery and quick charge, enhanced sound quality, stereo mic & VOR recording | Around $120 - 130 | Standalone Device |
| OM SYSTEM DM-720 | Hardware Voice Recorder | Academic Lectures | TRESMIC 3-microphone system, intelligent auto mode, transcription mode | Around $150 | Standalone Device |
| Zoom H1e Handy Recorder | Hardware Recorder | High-fidelity audio capture for creators | 32-bit float stereo recording, high-quality X/Y Mics, multi-device USB mic | Around $110 | Standalone Device |
| Aiseesoft Screen Recorder | Desktop Software | Comprehensive Lecture Capture | Exclusive audio-only mode, stable long-time recording, high-quality exports | Freemium $12.5/month | Windows/Mac |
| OBS Studio | Desktop Software | Advanced tech-savvy users | 100% free, multi-track audio, highly customizable scene settings | Free | Windows, macOS, Linux |
| ScreenPal | Desktop Software | Long-time online lecture recording | Hardware acceleration, scheduled recording, high compression file saving | Freemium Annual: $33.26/year | Windows |
| Otter.ai | Mobile/Web App | Real-time lecture transcription | Multi-meeting platform adaptation, instant voice-to-text conversion | Basic: Free Pro: $8.33/user/month | iOS, Android, Web |
| Notability | Mobile/Web App | Audio synchronized handwritten notes | Apple Pencil support, document marking, audio-note linkage | STARTER: Free PLUS: $7.99/monthly PRO: $20/monthly | iOS, iPadOS, macOS |
| AZ Screen Recorder | Mobile App | Long mobile lecture sessions | Dual audio capture, flexible parameter adjustment, reaction recording | $3.49/monthly | Android and iOS |
When to choose a dedicated lecture recorder?
If you are often far from the speaker and want to capture sounds clearly, a dedicated device is recommended. Compared to software, hardware recorders have specialized mic capsules designed to capture clear audio. Moreover, they are more stable and ideal for recording serious lectures, meetings, or interviews.
Sony ICD-UX570 Digital Voice Recorder is a popular choice for both students and professionals. The recorder is widely considered the gold standard for capturing lectures. It is designed to be incredibly thin and light. That ensures you can easily take it from your pocket or pencil case for quick capture.
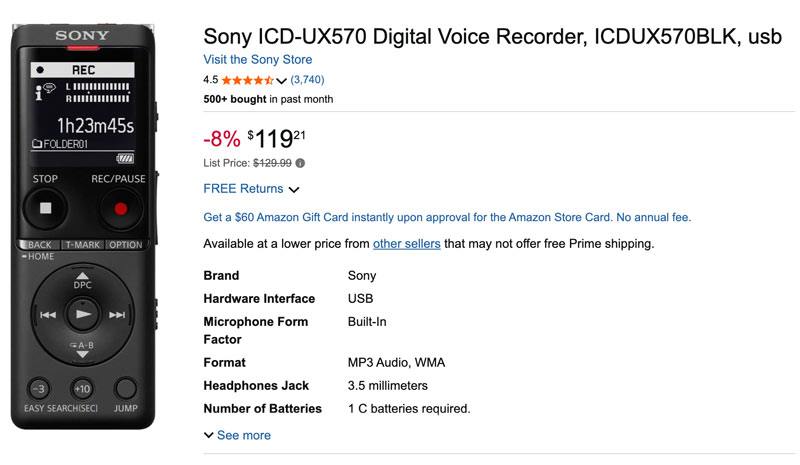
Microphone Quality: It features a high-sensitivity stereo microphone system to deliver enhanced sound quality. Moreover, this voice recorder offers different “scene select” modes. The specific lecture mode ensures that the microphone focuses on distant voices.
Battery Life and Storage: It offers up to 159 hours of MP3 recording or up to 5 hours & 20 minutes of high-quality Linear PCM recording. Sony ICD-UX570 has a built-in retractable USB connector for charging. Besides 4GB of included memory, it comes with a MicroSD card slot that allows for expandable storage.
Olympus DM-720 is another popular choice for recording lectures and meetings. It provides a reliable hardware solution for students and general users. The digital lecture recorder is known for its TRESMIC 3-microphone system. Compared to standard two-microphone recorders, it can offer superior depth and clarity by capturing a wide range of true-to-life sounds.
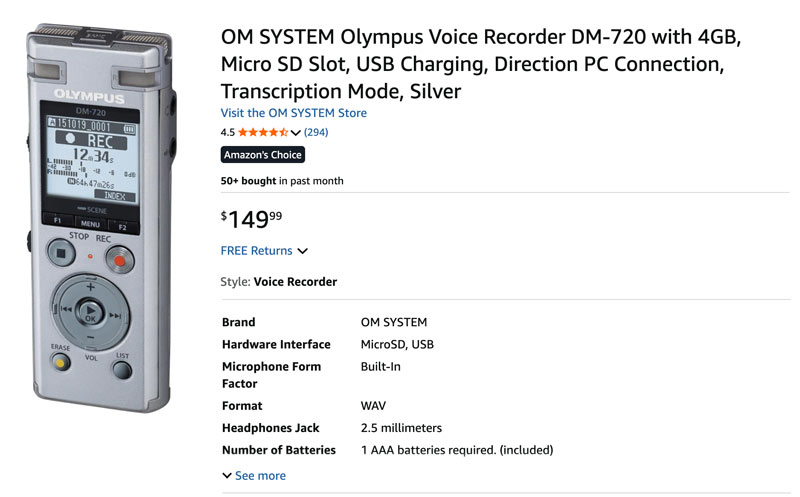
Microphone Quality: OM SYSTEM DM-720 is designed with the Tresmic system to ensure superior audio capture. As a lecture recorder, it guarantees the lecturer’s voice sounds natural and full.
Convenient Design and Storage: It is equipped with a retractable USB-A connector, allowing you to plug it directly into a laptop for charging and file transfer. The recorder comes with a 4GB memory storage and supports microSD expandable storage.
Zoom H1essential Stereo Handy Recorder can capture both quiet whispers and loud shouts with high quality. Its standout feature is 32-bit float recording. That ensures you can record clear audio even in a loud environment.
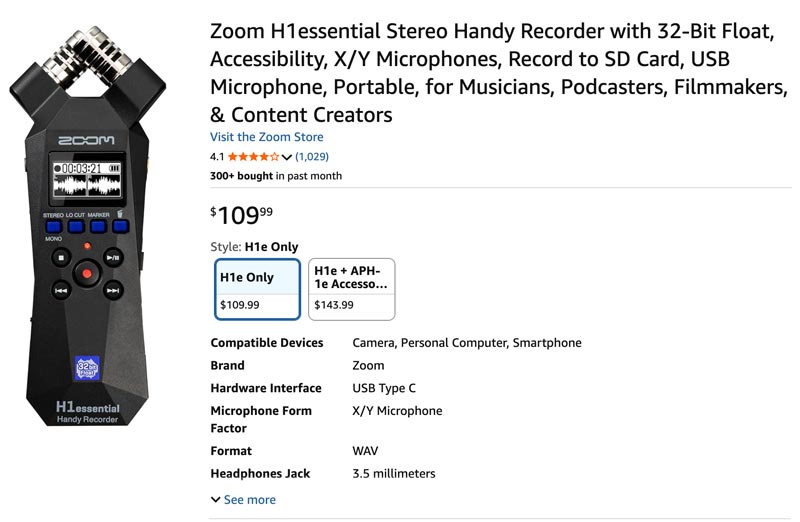
Microphone Quality: It utilizes an X/Y microphone to capture clean audio up to 120 dB SPL. The recorded audio quality is broadcast-grade, superior to most other standard voice recorders. Moreover, it can capture up to 96kHZ sample rate to an SD card.
Battery and Build: It runs on AAA batteries, providing about 10 hours of recording. The Zoom H1e recorder can be a USB microphone for your computer or phone through the USB-C port.
When to choose lecture recorder software?
If you need to record online lectures or meetings, a hardware device will easily result in poor sound quality. In that case, desktop software is a better choice. It captures the system audio directly from the internal system card. This ensures the perfect digital clarity.
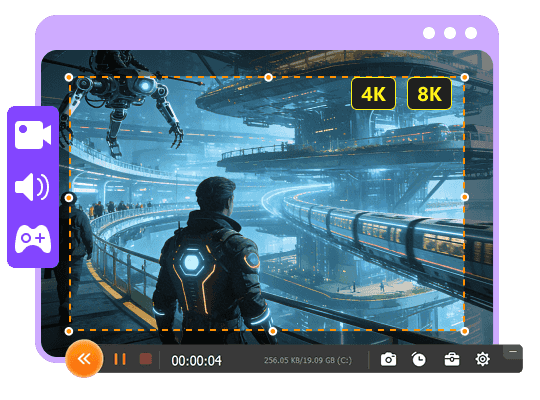
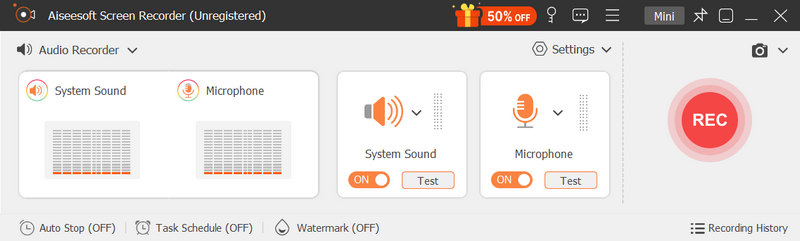
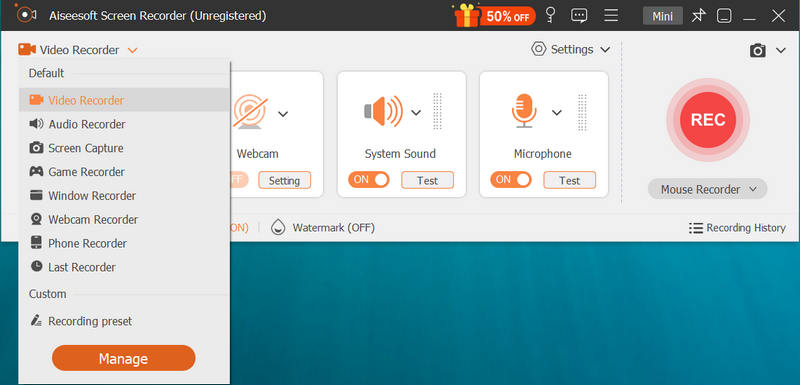
Aiseesoft Screen Recorder is a feature-rich video and audio recording software designed to capture anything on your desktop. While named as a screen recorder, it possesses powerful, dedicated voice/audio recording capabilities. That makes it ideal for capturing online lectures, meetings, and more without needing to record the video feed. As a lecture recorder, it can capture sound from system audio, microphone, and both.
![]() 100% Secure. No Ads.
100% Secure. No Ads.
![]() 100% Secure. No Ads.
100% Secure. No Ads.
Key Features:
Why Choose It?
Aiseesoft lecture recorder delivers power and ease of use. It is designed with an intuitive interface to ensure quick starts. Even as a beginner, you can handily capture high-quality lecture audio within several clicks. More importantly, it is known for its high performance and excellent stability. It enables you to record a several-hour lecture without worrying about software crashes or other issues.
Besides the audio recorder, it provides other tools for other necessary recording tasks. Whether you want to record lectures, online meetings, gameplay, or phone activities, Aiseesoft is a top-tier choice.
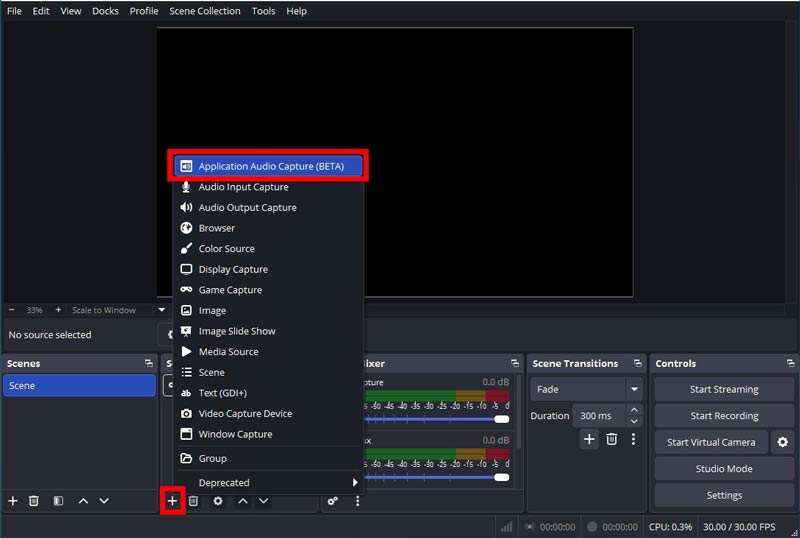
OBS Studio is one of the most popular free recording tools. This open-source recorder is widely used by professional streamers worldwide. It provides full customization control of the screen and audio recording. However, the incredibly powerful comes with a steeper learning curve.
Pros
Cons
Verdict:
OBS is a good choice for professionals or tech-savvy students who are willing to learn the software. It provides total control over the lecture recording. However, if you want to simply press a button and record, it may be too complex.
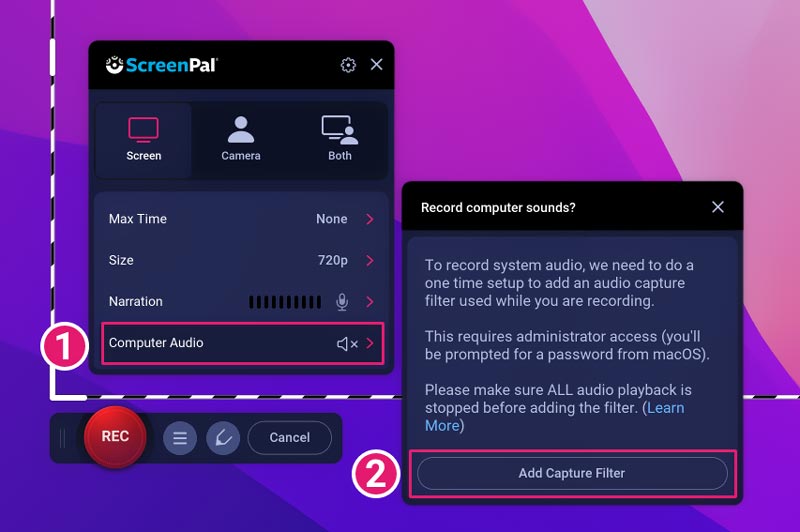
ScreenPal (formerly Screencast-O-Matic) is a popular all-in-one platform designed for audio/video recording, editing, and content hosting. It is widely used by students, educators, and professionals. As a lecture recorder, ScreenPal can record the internal sound from your computer and your voice from the microphone. Moreover, it has integrated several AI features, including auto-generated captions.
Pros
Cons
Verdict:
ScreenPal is great for users who need an all-in-one solution for lecture recording. It offers basic editing features to trim clips, add text overlays, highlights, and transitions. However, if you often need to record 3-hour sessions or require professional-grade audio recording/mixing, you might find the free version’s 15-minute limit too restrictive. What’s more, compared to other lecture recorders, its paid full version is a bit too basic.
When to choose a lecture recording app?
When you only want to take casual notes with your phone, mobile apps like Notability are powerful enough. You can start with the built-in “Voice Memo” or “Voice Recorder” app on your iPhone or Android phone to record lectures. Test their recording capabilities and check if they can handle your daily tasks.
Notability is a popular AI notes and PDF app that can record audio, take handwritten notes, annotate documents, and more. It is ideal for iPad users who use an Apple Pencil. As a lecture recording app, Notability lets you easily capture lectures and get instant audio transcripts.
Pros
Cons
Verdict:
For students and people who often take handwritten notes on an iPad, Notability is the ultimate tool for recording lectures. As an iOS user, you can freely download the app and start a trial. However, the lecture recorder app is not for Android.
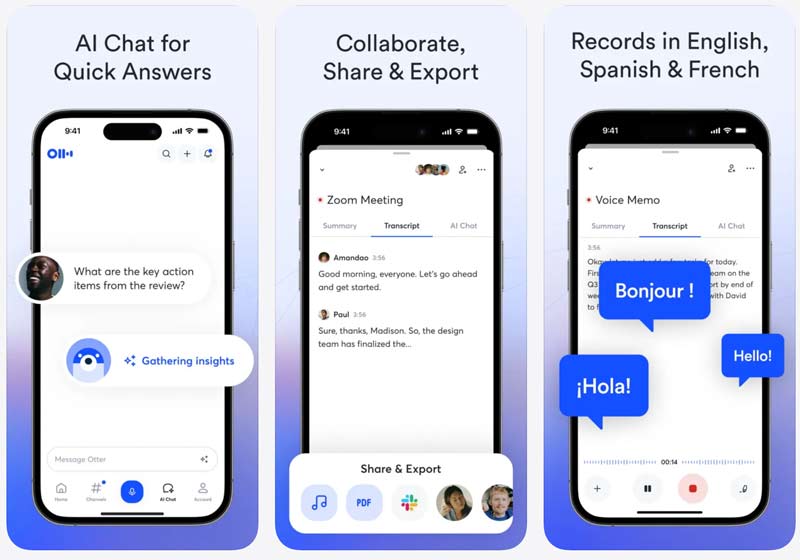
Otter.ai is mainly designed to turn meetings into summaries. As an AI-powered notetaker and audio recorder app, it is widely used by professionals for meetings and interviews. Besides recording lectures, the app can convert audio to usable text correctly.
Pros
Cons
Verdict:
Otter.ai is a good AI assistant app that can help you easily get automated meeting notes and summaries. If you want to have a searchable text version of a lecture or meeting, give the app a try.
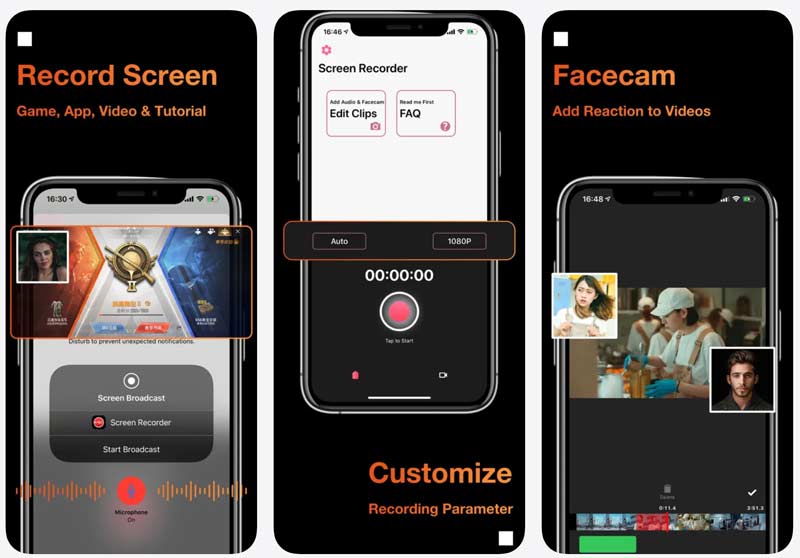
AZ Screen Recorder is a stable video and voice recording app for Android and iOS users. It lets you capture a lecture happening on your phone screen with ease.
Pros
Cons
Verdict:
AZ Screen Recorder provides a solid, stable choice for phone users who need to capture mobile-based lectures. However, its free version has features and export limits.
Question 1. What is the best way to record lectures for students?
As mentioned, you should select the “best” suitable lecture recorder based on your learning environment and specific goal. If the lecture is happening on your screen, you can use a recording app to capture system audio directly. If you use your phone or a tablet as your primary study tool, a lecture recording app can integrate captured audio with your written notes. However, if you often attend classes in person, you may need a dedicated voice recorder device.
Question 2. Can GoodNotes record lectures?
Yes, you can record lectures using the GoodNotes app. Download the app and start a free trial. Check if its audio recording capability suits your specific needs. The free version often limits recording time.
Question 3. Can I use ChatGPT to record lectures?
ChatGPT can help you turn raw transcripts into structured notes. Whether you use it on a laptop or a phone, you should record lectures first and then let ChatGPT do the transcription and analysis.
Conclusion
Many lecture recorders are available on the market. Your ideal choice depends heavily on your primary use case. As a casual user, you can start with a recording app or desktop software. However, for in-person classes or serious interviews, you should use a high-sensitivity microphone to capture sounds clearly.
![]() 100% Secure. No Ads.
100% Secure. No Ads.
![]() 100% Secure. No Ads.
100% Secure. No Ads.
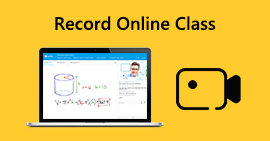 How to Record Online Classes at Home without Expensive Equipment
This is the easiest way to record online video lectures. You don't need to buy cameras or other expensive equipment. Actually, you can record lectures with screen recorder software on your computer quickly.
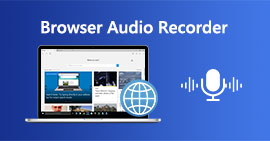 4 Best Ways to Record Audio from Browser (Online/Desktop/Extension)
How do I record audio from browsers, Chrome, IE, or Safari? What is the best browser audio recorder? Here are 4 great audio recorders to help you capture audio from a website.
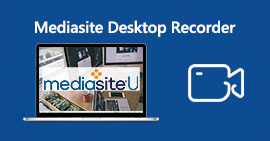 Mediasite Recorder Review and Best Mediasite Alternative
What is Mediasite? How do I download videos from Mediasite? How do I use Mediasite Desktop Recorder? This post gives you a detailed review of Mediasite Recorder and shares a great Mediasite alternative to record any activities on computer.
Record iPhone Screen
1.1 iOS Screen Recorder 1.2 Record iPhone Screen 1.3 View iPhone Screen 1.4 iPhone Screen Mirror
Aiseesoft Screen Recorder is the best screen recording software to capture online lectures, meetings, webcam calls and screen activities on Windows/Mac.
![]() 100% Secure. No Ads.
100% Secure. No Ads.
![]() 100% Secure. No Ads.
100% Secure. No Ads.
*Required field
*Please enter a valid email
