Aiseesoft Screen Recorder
![]() 100% Secure. No Ads.
100% Secure. No Ads.
![]() 100% Secure. No Ads.
100% Secure. No Ads.
The reasons why you want to record your computer screen vary, like a demo show, an error report, a video tutorial for business or entertainment, etc. Thus, there are also various ways of how to record screen with audio - capturing your screen with clear audio transforms confusion into clarity.
So keep on reading this guide, and get the easiest approach to capturing desktop screen, including video and audio on your computer.
Xbox Game Bar is also a built-in program for Windows OS. Follow the steps below to record your PC screen.
Nevertheless, the program is primarily designed only for game recording, which results in improper feature design for other types of recording. And for audio recording, users frequently report issues with Game Bar not recording microphone audio correctly, or the recorded voice sounding distorted or broken.
QuickTime is a built-in player software for Mac users. This program can also do screen recording with audio. You can check the following steps to use it for screen capture.
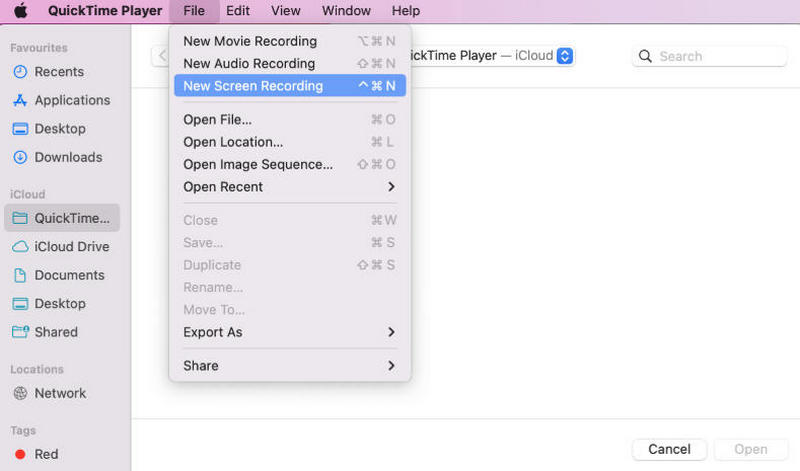
This program is a good choice for Mac screen record with audio; however, it can only record audio from your microphone without the system sound. In addition, QuickTime’s supported recording formats are limited.
Regardless of what you want to record on your desktop, you should obtain a screen recorder software first. For Mac users, they can benefit from QuickTime Player to record the screen. While Windows users can get the Xbox Game Bar for basic recording. Both of them have their limitations for not being an ideal recording tool.
Where there is a problem, there is a solution.
Aiseesoft Screen Recorder can be the perfect companion for Windows and macOS users. Screen Recorder is a professional screen capture software designed to help you record any screen on your desktop, including online videos, gameplay, webcam videos, and online meetings.
Downloads
![]() 100% Secure. No Ads.
100% Secure. No Ads.
![]() 100% Secure. No Ads.
100% Secure. No Ads.
Free download this software on your computer. It has the Windows and Mac version, get the exact version you need. Follow the onscreen instructions to install and run it.
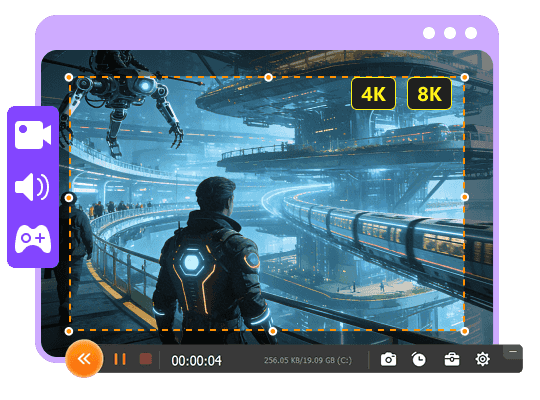
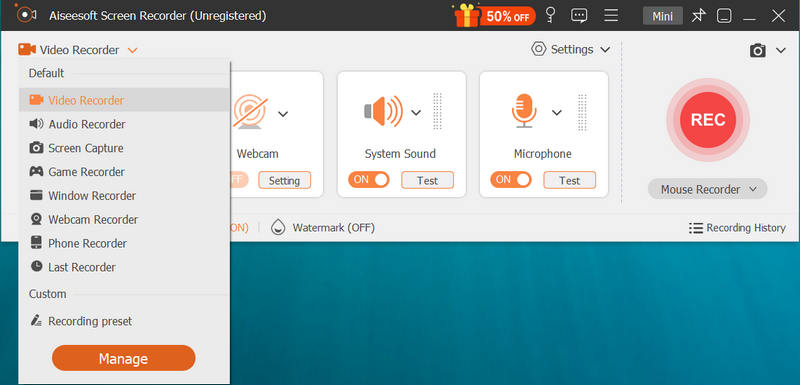
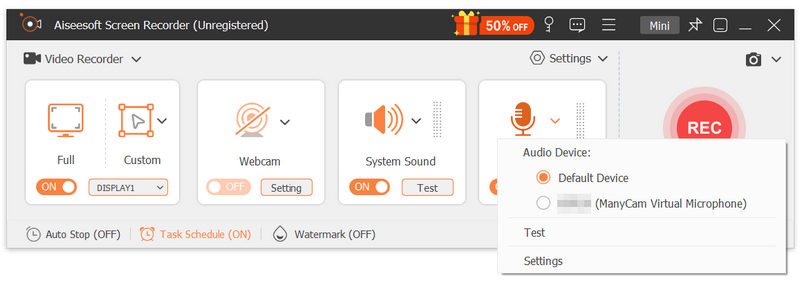
In the main interface, you can choose to record video with/without audio. You can also choose other recording modes from the drop-down button next to Video Recorder.
Now, you need to get the following settings before recording.
Recording area
It gives you several options to confirm the recording area.
Full/Custom > Full Screen: You could capture the whole screen via this option.
Custom > Select region/window: You are able to use the mouse the draw the rectangle area to decide the recording area. Or you can simply click the window you want to record.
1920×1080 (1080p): You could select the fixed region and drag the cursor to put the fixed frame where you want to record.

Whether you want to capture a certain window, or want to exclude some a window, the advanced recorder settings are suitable for you.
Around mouse: It means you can select a recording area, and then when you move your mouse, the recording area will also move and always center on your mouse.
Follow the mouse: It lets you change the recording area while you move the recording frame with your mouse.
Window Recorder: When you open the window, and use the function, it will record the window while you can open other windows to do other things. The only condition is that you should always keep the window open, not minimize or closed.
Exclude window and record: This function is very practical when you are making a video tutorial and do not show other unnecessary windows.
Recording audio
Here, this software supports audio recording from system sound and microphone. You can turn on/off both of them or either of them.
System Sound: When you want to record video with audio from the computer system, you should turn it on.
Microphone: When you want to keep the voice from microphone from yourself or around yourself, you should turn it on.
Besides, the audio drop-down option next to speaker and microphone allows you to optimize audio recording via the settings.
From microphone recording, you can enable "Microphone noise cancellation" and "Microphone enhancement" to improve audio recording and reduce audio recording echo efficiently. Moreover, you can select the speaker and microphone audio source to decide which audio you want to record. The volume mixer will let you adjust the application volume separately and quickly.
You can click the "Sound check" option to get detailed settings for those audio parameters.
While you wish to keep the online video call with your friends, like record the Skype chat, Omegle video call, you should turn both of them.
Preferences settings
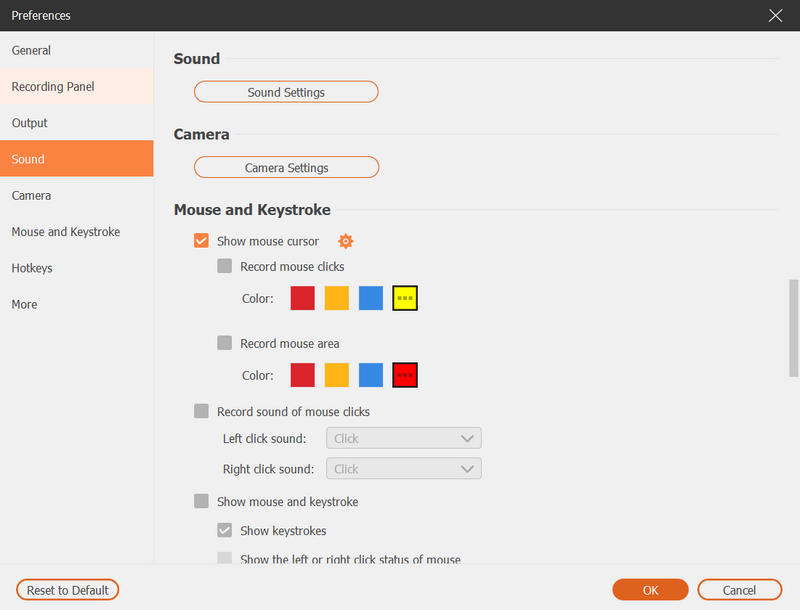
When you click "Record settings" in the main interface, you will be directed into the preferences settings, where you could set the recording, mouse, hotkeys, output and others.
Recording: Here you could show countdown before recording, hide float bar, desktop icons, etc.
Mouse: Show or hide mouse cursor and change the mouse click colors.
Hotkeys: You could set the hotkeys to stop, pause, and resume recording, snapshot, etc.
Output: Here you could adjust the recording location, snapshot format, video/audio format (MP4, MOV, F4V, AVI, TS, GIF, WMA, MP3, AAC, M4A, FLAC and Ogg, Opus), video/audio quality, etc.
More: Hardware acceleration, software updates, etc. are optional for you here.
Task Schedule
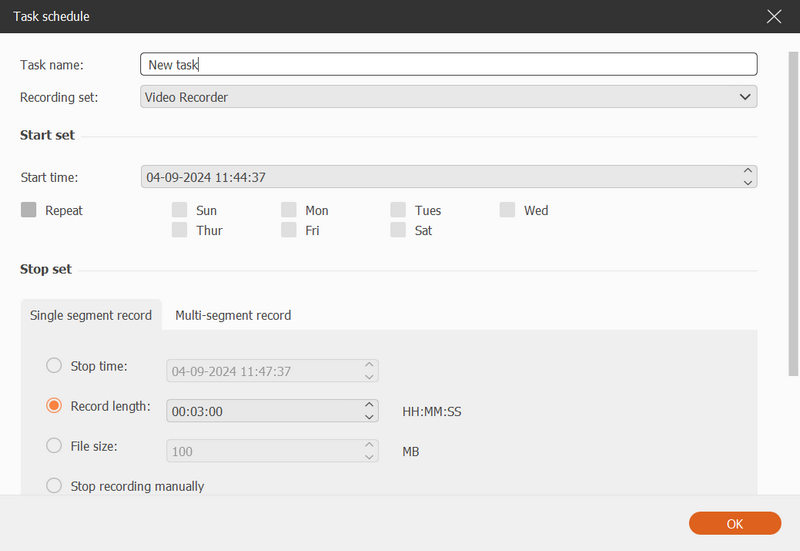
This option is like the alarm, which can let you set the task time and recording length to launch the preset task when you are not in front of your computer.
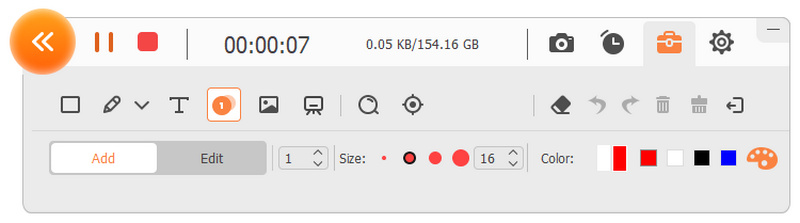
Now, all the things have been prepared well, and you just need to click "REC" button to start the screen recording. While recording, you could click edit button to draw, add caption, callout, blur, airbrush, etc.
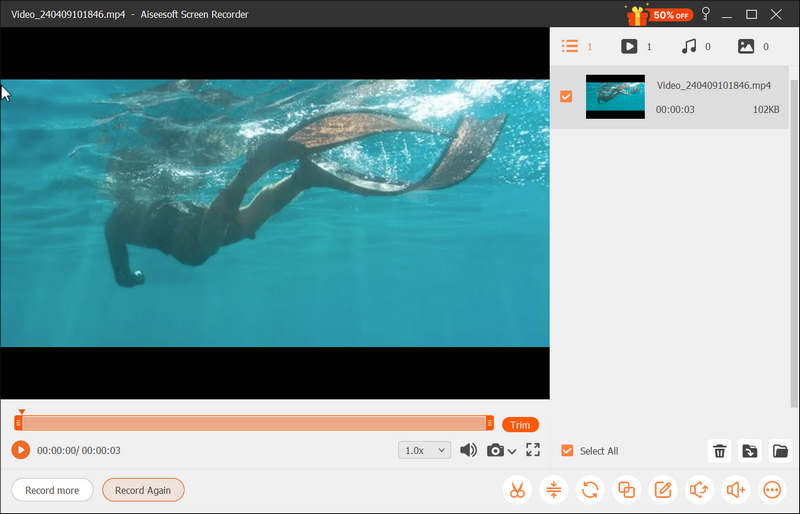
After you complete the recording, just click the stop button and preview the recording.
Here the trim feature is available for you to cut the unwanted recordings.
Click the "Export" button to save the recordings on your computer.
For capturing sound from online video or your own microphone, it comes to be easier.
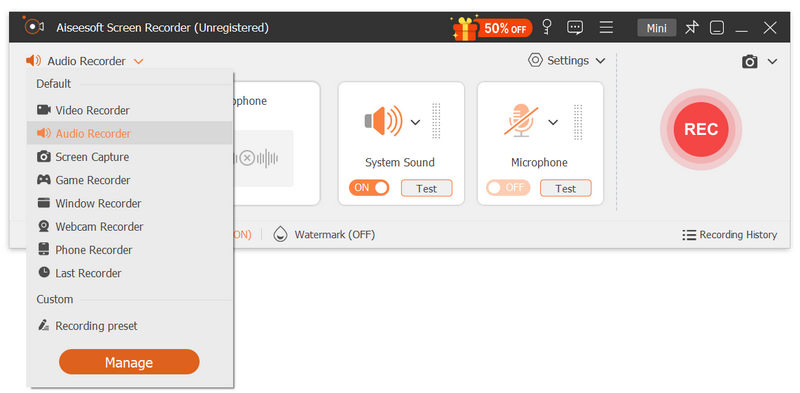
Still download and install this software on your computer. In the main interface, you need to click "Audio Recorder".
![]() 100% Secure. No Ads.
100% Secure. No Ads.
![]() 100% Secure. No Ads.
100% Secure. No Ads.
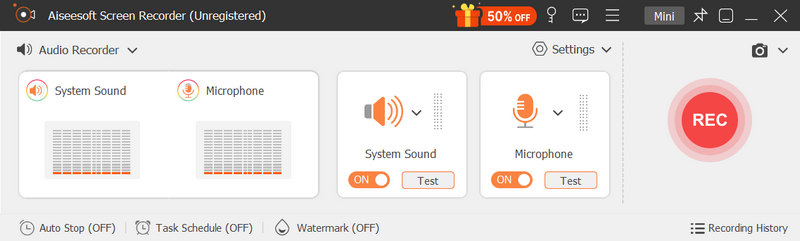
Here, you are given the easy audio settings. Similar to video recording, here you should turn on or off both microphone and system sound, or either of them.
Moreover, do not forget to set the preferences settings for output format, quality, etc.
If you want to record your voice from a microphone, just tick the options of "Microphone noise cancellation" and "Microphone enhancement" under the microphone drop-down option, which will reduce video noise and amplify audio to stop audio echo while recording.
Similar to recording video in part 1, you can also choose the audio source from speaker and microphone and open the "Volume Mixer" to adjust the speaker audio for individual applications.
For more detailed settings, you should click the "Sound Check" option.
Enable the audio you want to record are playing or speaking. Then click "REC" to start to record the screen audio.

After the audio recording is done, just click the stop button to preview the audio recordings. Moreover, it also lets you clip the audio recording, and save it on your computer.
The above steps are easy to follow to start a screen recording on your Windows 10/8/7 computer. If you are using Mac, QuickTime Player is easy to record a screen on Mac. Check the details here.
• Better pick up a USB microphone rather than your computer’s built-in microphone, for it records too much room noise and often sounds tinny.
• Place your microphone about 6-12 inches (15-30 cm) from your mouth for clear sound capture.
• Choose a quiet room available for recording.
• Do a test recording and observe the audio meters in your screen recording software before the official recording.
• Use an audio editor to denoise or do other enhancements for better audio quality.
Does Windows have a screen recorder?
Yes. Windows 10 has a native feature that lets you record video clips. Using Game DVR, you can record video game footage for sharing on YouTube or Twitch.
Can OBS record screen with video and audio?
Yes. Open Broadcaster Software Studio is a free and open source video streaming and recording program. You can use OBS to capture video and audio from your computer.
Does VLC capture screen with audio?
Yes. You can capture the screen with audio in VLC Media Player. Just go to Media > Open Capture Device, and select Desktop as the Capture mode. Then click Stream from the drop-down button at the bottom. Select Video - H.264 + MP3 (MP4) and click on Stream to start recording.
Conclusion
This page mainly talks bout the easiest way to record your computer screen with video and audio. Aiseesoft Screen Recorder is the best choice for beginners who want to get a good video recording. We share the tutorial step by step, and everybody can easily follow it.
![]() 100% Secure. No Ads.
100% Secure. No Ads.
![]() 100% Secure. No Ads.
100% Secure. No Ads.
 Top 10 Audio/Voice Recorder in 2025 [Online&Desktop]
Audio recorders are very convenient and easy to use. This article introduces to you the best 10 free/paid tools for PC/Mac/online for voice recording in 2021.
 17 Best Screen Recorders for PC [2025 All-rounded List]
This list explores the top 17 screen recording software on Windows 10/11. Features, pros & cons, recording quality, etc., all you want to know can be found here!
 Top 10 HD Audio Recorders Worth You to Own for Your Computer
We identify and provide reviews of the best HD audio recorder software and hardware for you to capture and make high quality music and audio files simply.
Screen Recorder for Desktop
1. Use Windows 10 Secret Screen Recorder 2. Best Screen Recorder for Windows 3. 10 Best Laptop Video Recorder 4. Ultimate ShareX Review and Alternatives 5. Free Screen Recorder 6. Best Minecraft Screen Recorder 7. 10 Best Free Screen Recorder without Watermark 8. Top 10 GIF Screen Capture Software
Aiseesoft Screen Recorder is the best screen recording software to capture any activity like online videos, webcam calls, game on Windows/Mac.
![]() 100% Secure. No Ads.
100% Secure. No Ads.
![]() 100% Secure. No Ads.
100% Secure. No Ads.
*Required field
*Please enter a valid email
