iTunes is a media management application for Mac and Windows. The application can help people import, play, display, copy and reformat all types of media files, including audio, video, images and e-books. iTunes can even consolidate all of these files into one folder quickly and completely, making them easy to be found and to be transferred between machines and devices. It works by making copies of media files on your hard drive and placing the copies into the "iTunes Media" folder, which is located in your Music folder by default.
When you make iTunes consolidate files in iTunes library, you will essentially want a program to group copies of all music on your computer into one iTunes music library folder. It means that iTunes will access to every song if they are stored on your computer. It also means that iTunes will locate all your music files on your computer and add it into one single library file for managing easily. But if you are using an operating system like Windows, you need manually set the iTunes library to make iTunes consolidate files. The operating details about how to consolidate iTunes libraries will slightly vary based on your operating system or version of iTunes. But the difference of instruction given below is slight.
Before you follow the ways below to consolidate your iTunes files, you had better back up your iPad, or iPhone/iPod data without iTunes for a case of data loss in consolidating files.
The steps below will display how to make iTunes consolidate files easily.
Step 1Open the iTunes
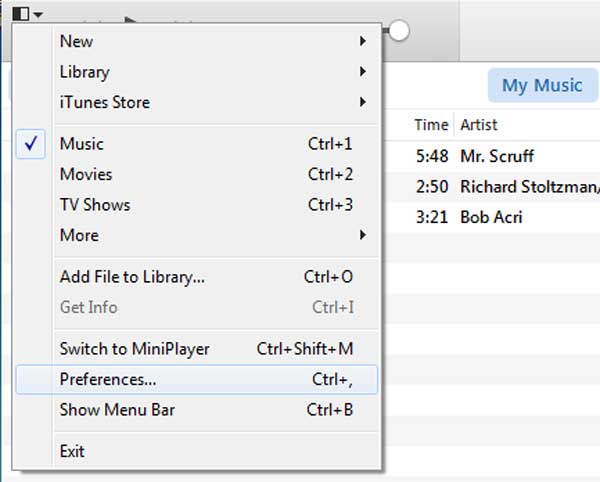
You should open iTunes first and access to the main iTunes pulldown menu from your menu bar.
Step 2Click the Preference
In this step, after clicking the "Preference", you can enter the "Preference" menu.
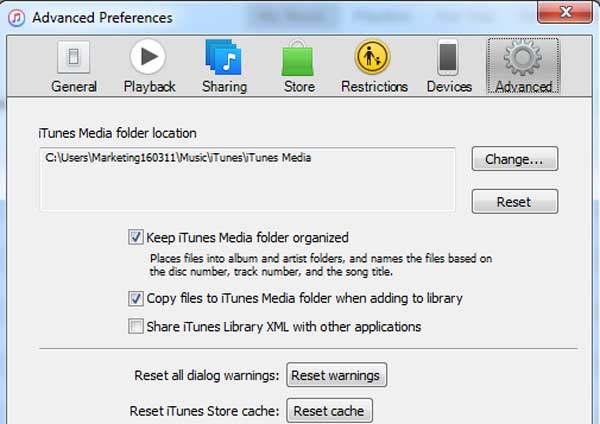
Step 3 Select the "Advanced" pane on the Preference menu
On the "Advanced" pane, you can click on the "Keep iTunes Music Folder Organized" and "Copy Files to iTunes Media folder when adding to library" option. In this step, you should make a check-mark in the box next to each option. If the boxes are already checked, just keep them.
Step 1Open iTunes and click "File"
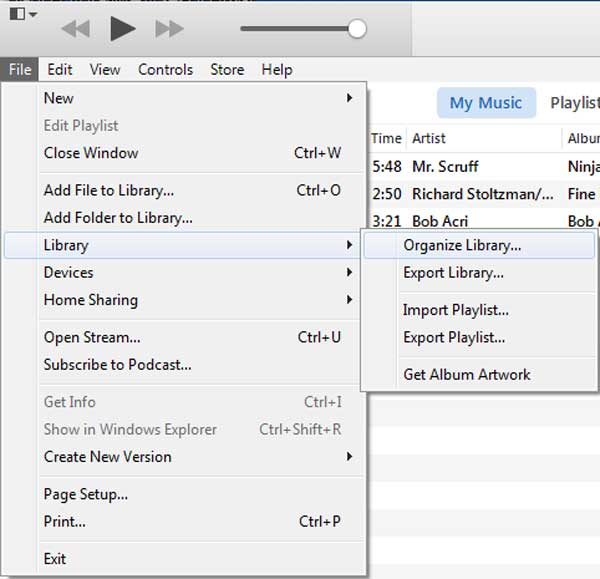
You should open iTunes and point to "File" pulldown menu from your iTunes dock. Here, if you can't find the "File", you can click "Show Menu Bar", which will display a more complete menu bar in your iTunes. At this time, you can click "File".
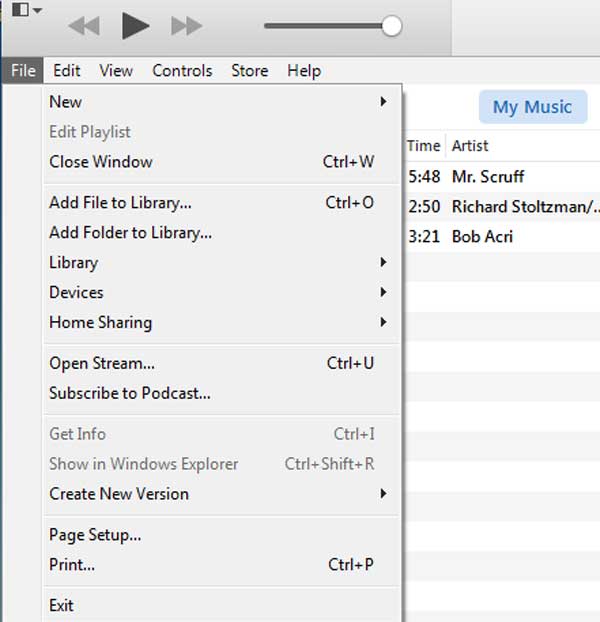
Step 2 Click the "Library"
After clicking the "Library" option, a menu with further options will appear to the side then you can choose "Organize Library".
 <
<Step 3 Select "Consolidate Library"
From the newly-opened "Organized Library" window, you will see two options "Consolidate files" and "Reorganize files in the folder iTunes Media". Just checkmark "Consolidate Library".
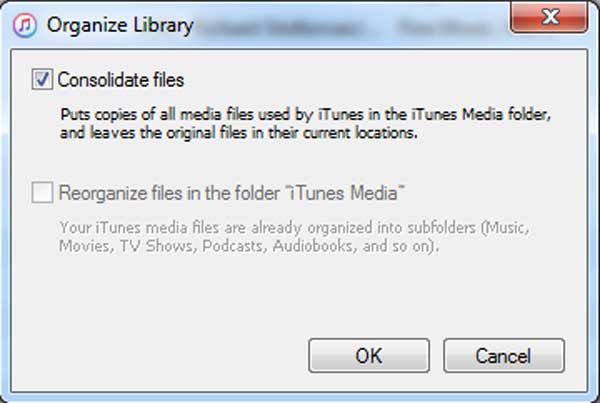
Step 4Click OK
After clicking OK, you have just made iTunes consolidate files in iTunes library. After consolidating iTunes files, you will be easy to transfer iTunes library file to external drive.
When making the iTunes consolidate files, iTunes will make copies of any iTunes Library files that weren't already in the consolidated folder. It doesn't move them. About the iTunes consolidate files duplicates, it is beneficial because you can still access your music through its old location, but if you have limited space available on your hard drive you may wish to delete the duplicates or make iTunes merge tracks of files.
Thankfully, in iTunes, there is a simple way that can help you easily delete duplicates. Make sure the Menu bar is displaying. You can click the dropdown box in the upper-left corner and go to "View" and find "Show Duplicate Items".

Before deleting the duplicates from the list, you should see if the same song may come from different albums, because you wouldn't like to delete a blistering song of a live album. To avoid such thing coming up, you can click the "Same Album" at the top of the list. Now, the list will show you the duplicates that are only in the same album.
Maybe you will find iTunes consolidate files not working. For example, in iTunes preference, you have made a series of settings, but after that, nothing happens. And you tried again, but it is the same result. Like such situations, your files may have been already consolidated.

June 14, 2018 10:50 / Updated by Louisa White to Transfer iOS Data
 Download all free on iTunes freely
Now, you have the chance to download and get free on iTunes easily, like free music, movies and more.
 How to Transfer Music from Mac to iPod
Here I will show you how to transfer music from Mac to iPod rapidly with Aiseesoft Mac FoneTrans.
 5 Ways to Rotate a Video on Windows 10/8/7 and Mac
How to rotate a video on Windows 10/8/7 and Mac? This post shows 5 best ways to help you easily rotate/flip a video on computer.
