It is absolutely sure that Apple iCloud brings us great convenience on backing up our iPhone, iPad and iPod. Also, it cooperates with Mac perfectly. However, for Windows PC users, they are often confused about how to use iCloud on Windows computer. They may ask: "Can I use iCloud on PC?"
Here we introduce you how to access iCloud on Windows computer – Download and set up iCloud control panel for Windows.
Install iCloud Control Panel
1Download iCloud control panel windows version
It is a pity that iCloud control for windows only supports Windows Vista SP2 and higher and Windows 10/8/7, not Windows XP.
2Install iCloud Control Panel on Windows PC
Follow the steps of installation, and make sure "Open the iCloud Control Panel", then click "Finish".
Tips: If iCloud control panel doesn't run automatically, please open it manually.
For Windows 8.1, go to "Start", and click the down arrow in the bottom left corner, find "iCloud" app.
For Windows 8, go to "Start", tap "iCloud".
For Windows 7, go to "Start" > "All Programs", and click "iCloud" > "iCloud".
3Sign in to iCloud
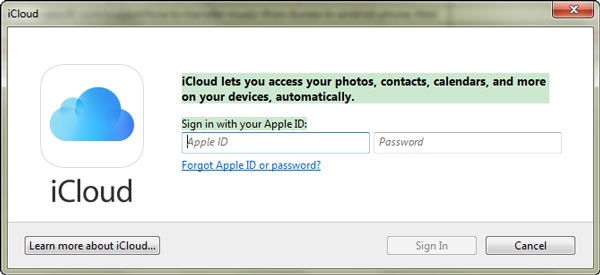
Input Apple ID and password, Click "Sign in" (forgot iCloud password?). After logging in, you can "Apply" your photos, contacts, bookmarks, etc. on iCloud control panel. And before application, you can choose to different photos and bookmarks to sync between your iOS devices and PC with this iCloud on Windows. (icloud photos not syncing?)
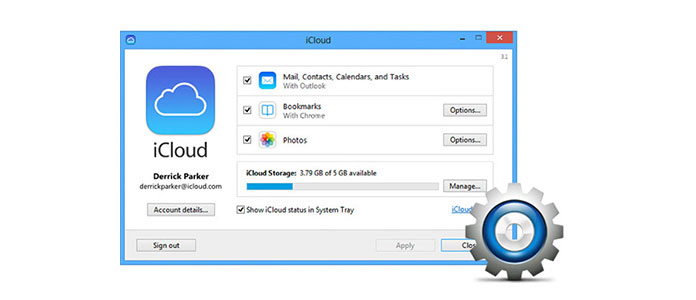
1Sync your Mail, Contacts, Calendars, Tasks, Bookmarks, and Photos.
With iCloud control panel, it is easy and quick to sync Mail, Contacts, Calendars, Tasks, Bookmarks, and Photos on your iPhone/iPad/iPod to Windows computer.
For photos, you can upload and store your PC photos to iCloud so that you can access them on all your iOS devices, also, for Photo Stream in your devices and iCloud Photo Sharing, it is convenient to sync them to your computer with iCloud control panel.
For Bookmarks, Internet Explorer, Firefox, Chrome and other browsers on your windows PC are optional for you to be synced with your Safari bookmarks.
Moreover, mail, calendars, tasks, bookmarks and photos can be synced with Outlook 2007 or later.
After you sync the contacts to iCloud, you could get contacts from iCloud.
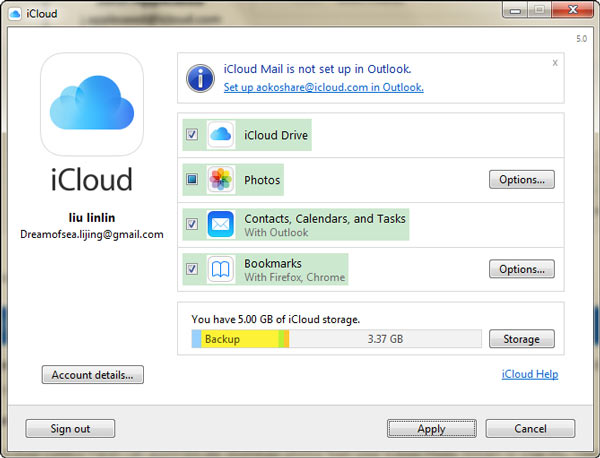
2Manage iCloud Storage
Click "Storage", you will see how much storage is available on your iCloud. And your backups, photos, notes, messages and other documents are taking occupying how much space on your iCloud.
iCloud only provides free 5Gb storage, so if you have piles of data on iCloud, you should learn to clear iCloud backup to free up more space.
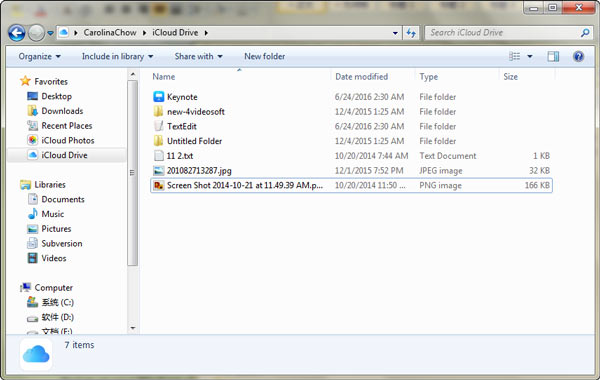
3Enter iCloud Drive to check your iOS devices data.
Once you turn on iCloud Drive, an iCloud Drive folder will be created in File Explorer. As long as you store files and documents in iCloud, these files will automatically download to the iCloud Drive folder in File Explorer.
See, it is so easy to use iCloud control panel to configure iCloud for Windows. Having iCloud for Windows, you are allowed to go syncing, transferring, managing and deleting data of your iOS devices on your Windows computer. But you can find that in this way, you can only view part data like photos, contacts, bookmark. For more data like messages, videos, music, you have to use Aiseesoft iPhone Data Recovery to help you download iCloud backup to PC.

June 14, 2018 11:05 / Updated by Louisa White to iCloud Tips
 How to access Photos in iCloud
Read this article to access iCloud photos with three ways.
 Erase iCloud Account from iPhone and iPad
If you want to delete your iCloud account from iPhone and iPad, you can read this post carefully and get the most suitable answer.
 How to Restore Your iPhone from iCloud Backup
This article can help you restore your iPhone from iCloud backup files. It can recover deleted iPhone files from iCloud backup.
