2023 marks the 15th anniversary of the iPhone and Apple has planned something big to celebrate, including the newest iPhone 15. With the new iPhone 15 releasing in mid-September this year, I'm sure that many people are getting quite excited. But before buying a new iPhone, you'd better backup iPhone first. After all, you can just throw your old iPhone away, but it is hard to get your data back.
The question is, how to backup iPhone with no space available? In this post, we would like to give you three solutions to backup iPhone 15/14/13/12/11/XS/XR/X/8/7 and restore to your iPhone 15.
Despite the accessible settings of built-in features on your iPhone, the limited storage space for backup iPhone contacts, photos or whatever you like with a paid would fail to meet your expectation. What's worse, to backup iPhone with broken screens, you may find no way out with any on-screen notifications on your iPhone.
With all needs considered, we sincerely suggest you take Aiseesoft iOS Data Backup & Restore program for a better experience.
Key features:
• Safely backup contacts/messages/email/photos/videos on iPhone with simple clicks.
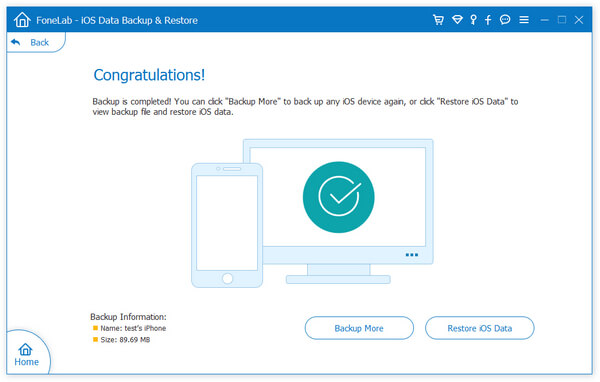
• Restore any data to iPhone from the backup file selectively.
• Preview data before iPhone backup and restore.
• Fully support all iPhone/iPad, including latest iPhone 8, iPhone 7, iPhone 7 Plus, iPhone 6s Plus, iPhone 6, iPhone 5s, iPhone 5, running iOS 18/17/16/15/14/13.
• Backup important data and information via USB cable link without disturbing broken iPhone screens.
![]() 100% Secure. No Ads.
100% Secure. No Ads.
![]() 100% Secure. No Ads.
100% Secure. No Ads.
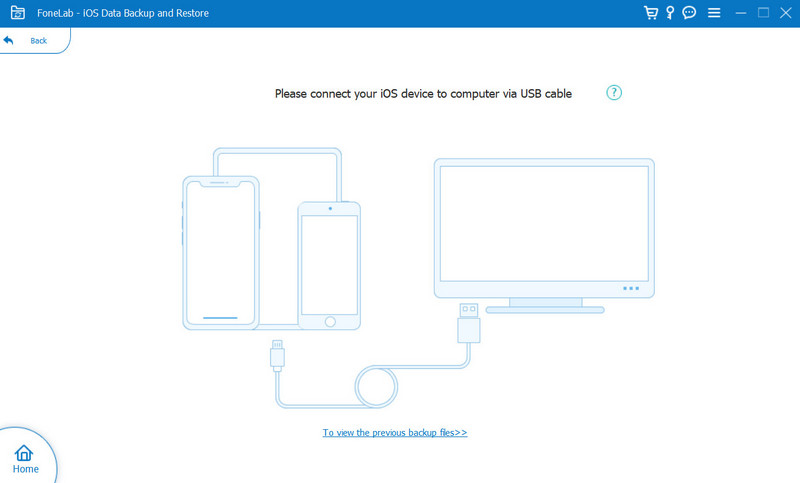
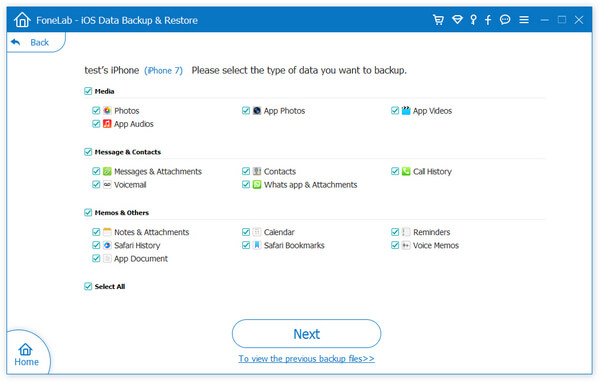
Wait until your iPhone was detected by the program automatically. Then click Start button and select the file type you want to backup. Here you can choose Photos, Messages, Call History, Contacts, Calendar, Notes, etc. for backup.
Note: You can also choose the default Standard backup option to Encrypted backup in order to protect private information.
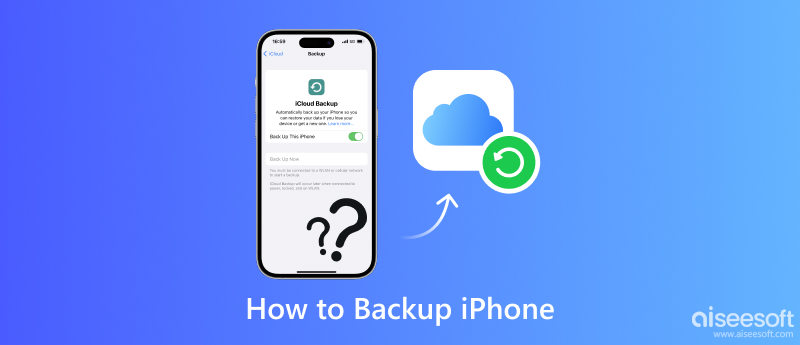
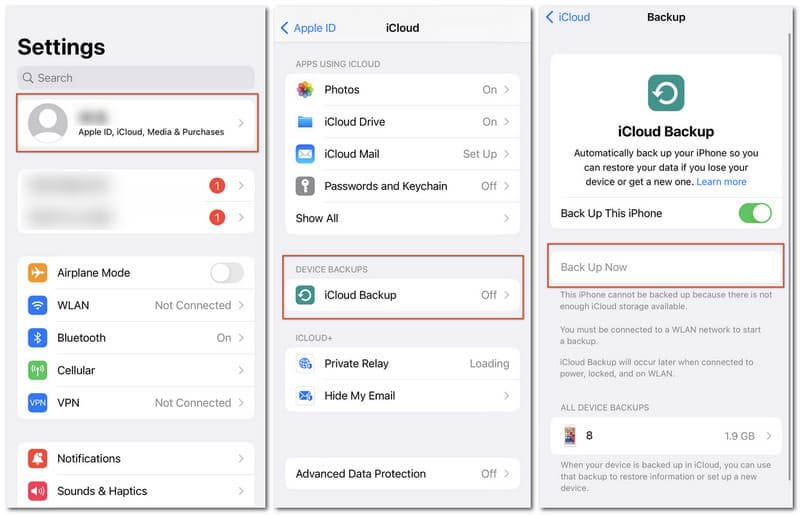
Using iCloud to backup your iPhone or iPad is a great idea. It allows you to backup photos and videos, settings, app data, iMessage, text messages, ringtones, etc. on iPhone or items purchased from iTunes. If anything happens to your phone or tablet, you will have a backup to access from anywhere with an internet connection. Plus, you can backup iPhone with iCloud automatically or manually.
Many consumers are more familiar with iTunes because this is what they use to buy apps, music, and books from the Apple Stores. If you don't want to store your iPhone backups in iCloud, you can store them locally on iTunes.
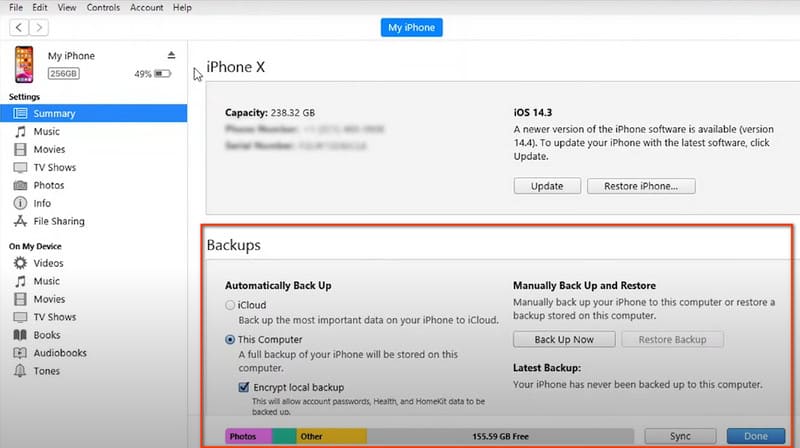
After you back up iPhone to iTunes, you could learn here to restore iPhone from iTunes backup.
1. How can I backup my iPhone without iCloud?
You can backup your iPhone data on your Mac/Windows using a professional tool-Aiseesoft iOS Data Backup & Restore, or open iTunes> Summary> Backups on your Mac to record any important information.
2. What happens if you don't backup your iPhone to iCloud?
Without backup and synchronizing your important data, photos or video files, you may experience irreversible information loss and hardly trace them back if you need these recordings.
3. Does iPhone backup include photos?
Aiseesoft iOS Data Backup & Restore will allow you to select media, message and contact, memes and any other information for backup as long as you like. But photos saved in iCloud or Camera Roll will not be backed up again in iCloud and iTunes respectively.
Conclusion
In this article, we have mainly shown you how to backup iPhone with iOS Backup tool, iTunes or iCloud. Still, there are many other tools that help you to backup iPhone, like Gmail, AirDrop, etc. Take Gmail as an example to try to backup your iPhone contacts to Gmail.
Still have more questions? Feel free to leave your comments down below.
 Android Backup - How to Back Up Any Data on Android
How to backup everything on Android? This article introduces Android Backup & Restore tool you can use for Android backup.
 How Do I Backup My iPhone to iCloud/iTunes/Computer in Four Ways
How to backup your iPhone? This tutorial will show you 4 ways to backup your iPhone X/8/7/6/5/4/3GS to iCloud, iTunes and computer in the simple steps.
 Everything About iPhone Update (iPhone 15, 14, 13, 12, 11, XS, etc.)
Want to know something about the new iPhone 11/iPhone 11 Pro/iPhone 11 Pro Max? Read this article and find the things you may interested in the next iPhone.

Your best choice to back up data from iPhone/iPad/iPod to Windows/Mac and restore from iOS data backup to iOS device/computer safely and efficiently.
![]() 100% Secure. No Ads.
100% Secure. No Ads.
![]() 100% Secure. No Ads.
100% Secure. No Ads.
*Required field
*Please enter a valid email
