DNS is short for Domain Name System. It is more like a phone book. Every time you open a new website, DNS will record the IP addresses automatically. Thus, you can open the recently visited pages quickly.
You may be unfamiliar with DNS server. But when there is too much DNS cache, the websites will load slowly or not working on Mac. The outdated DNS cache is useless. It is a good habit to clear DNS cache on Mac regularly. Thus, you can free up space for more up-to-date DNS cache.

It is Aiseesoft Mac Cleaner that can help you flush DNS cache and optimize Mac within clicks. There is no need to find DNS cache on Mac. The program can help you scan and delete unnecessary DNS cache on most popular Mac operating systems smartly. You can clear DNS cache, delete junk files, speed up Mac system, uninstall apps, encrypt private data and get more powerful features from the program.
When should you flush DNS cache with Aiseesoft Mac Cleaner? Here're some examples that you can flush DNS cache on Mac.
Mac Cleaner can flush DNS on Mac without deleting other files. Thus, you can feel free to flush local DNS cache with Aiseesoft Mac Cleaner.

Downloads
![]() 100% Secure. No Ads.
100% Secure. No Ads.
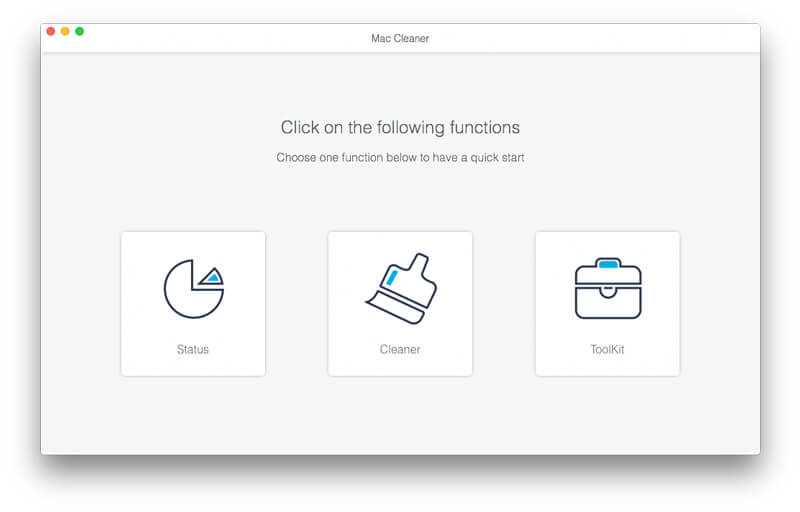
Step 1. Free download and install Aiseesoft Mac Cleaner. When you launch the program, choose ToolKit in the main interface.
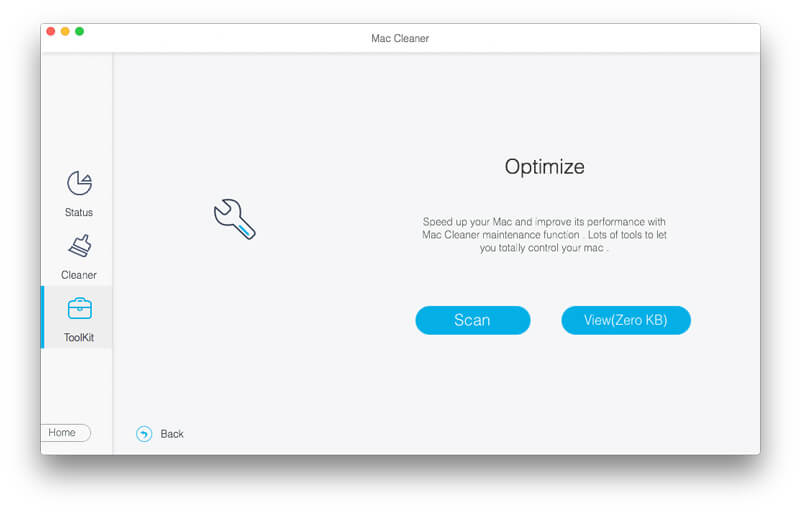
Step 2. Click Optimize to access this Mac Cleaner maintenance function. Click Scan to quickly scan DNS cache on Mac.
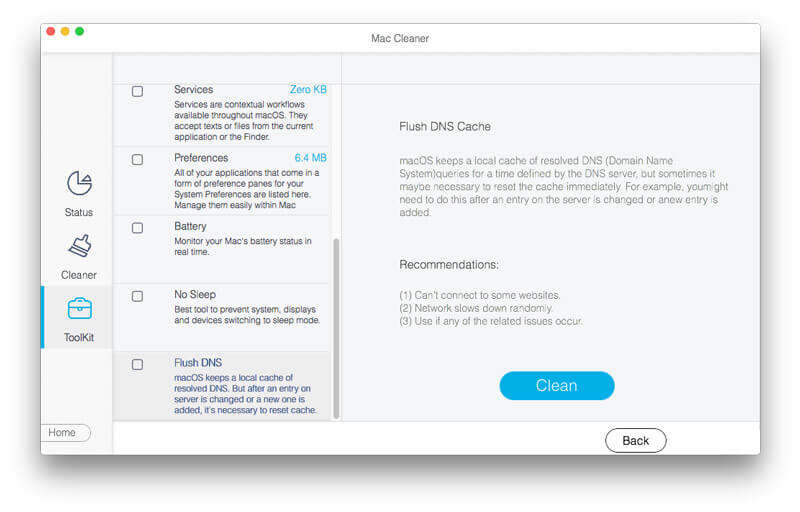
Step 3. Choose View to have a check. Scroll down the left pane. Click the Flush DNS option. You can get the local cache of resolved DNS on Mac.
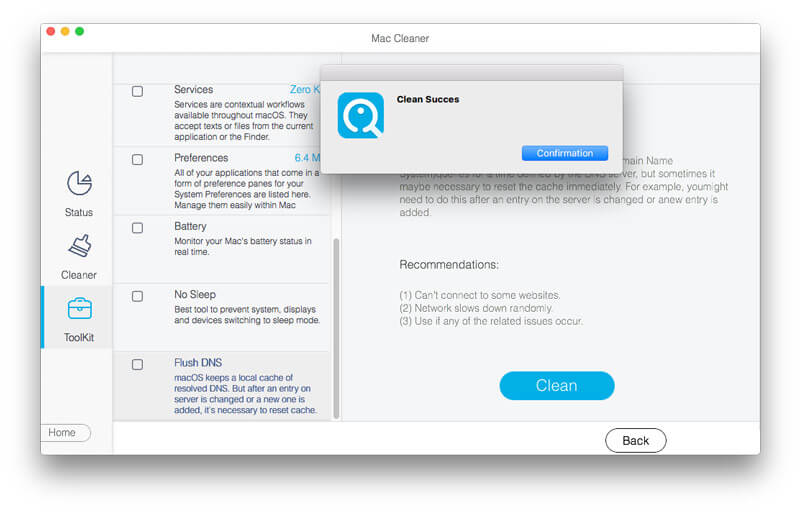
Step 4. When you click Clean, you will be required to enter the admin password to install a new helper tool. Just enter password and click Install Helper. Sooner, a notification pops up. Click Confirmation to flush DNS data on Mac and return everything back to the normal state.
You can also flush DNS cache on Mac with Terminal to resolve connectivity issues, DNS spoofing, slow browsing and other associated DNS issues. Compared with the one-click DNS cache cleaning tool, you need to do much work to clear DNS on Mac. Just read and choose your macOS flush DNS tutorial below.
Step 1. Open Mac Finder. Click Utilities in the Applications folder. Later, choose Terminal within the folder.
Step 2. Copy and paste sudo killall -HUP mDNSResponder; sleep 2; echo macOS DNS Cache Reset | say into the Terminal window.
Step 3. Press Return on your keyboard.
Step 4. Enter the password and press Return to confirm.
Step 5. You will be notified with macOS DNS cache reset. Exit Terminal to clear DNS cache in macOS High Sierra. (See how to delete an app on Mac)
Step 1. Open the Applications folder in Finder. Choose Terminal from the Utilities folder.
Step 2. Enter sudo killall -HUP mDNSResponder;say DNS cache has been flushed into the Terminal window.
Step 3. Press Return on Mac keyboard. Enter the password to confirm. Then press Return again.
Step 4. Once you flush DNS in macOS Sierra, you can hear an audio alert.
Note: You can copy and paste sudo killall -HUP mDNSResponder;sudo killall mDNSResponderHelper;sudo dscacheutil -flushcache;say to clear macOS Sierra DNS cache too.
Step 1. In Mac Finder, choose Applications, Utilities and Terminal in order.
Step 2. Copy and paste sudo dscacheutil -flushcache;sudo killall -HUP mDNSResponder;say cache flushed into Terminal.
Step 3. Press Return to run the Mac OS X flush DNS command line. Enter the password and press Return to move on.
Step 4. When you flush DNS on Mac OS X successfully, you can hear an audio alert. (You can also clear other cache on Mac.)
Note: To fully flush DNS cache in Mac OS X Yosemite 10.10/10.10.1/10.10.2/10.10.3, you should also clear Multicast DNS (MDNS) and Unicast DNS (NDNS). Here are the command lines you need to copy into Terminal too.
Clear MDNS cache: sudo discoveryutil mdnsflushcache
Clear NDNS cache: sudo discoveryutil udnsflushcaches
Or you can clear both MDNS and UDNS caches with sudo discoveryutil mdnsflushcache;sudo discoveryutil udnsflushcaches;say flushed
Which Mac DNS flushing way is easier? Obviously Mac Cleaner is the winner. You can get rid of confusing command lines to achieve the same result. Terminal is not a friendly program for beginners. You may delete system files and get Mac into trouble using wrong command lines by mistake.
Thus, it is recommended to flush DNS cache on Mac with Aiseesoft Mac Cleaner. You can complete the whole process to clear DNS in macOS and OS X within 3 minutes. What's more, you can clean Mac up and protect your privacy within the program too. It is worth to free download and have a try. Your Mac will run faster than before.
 How to Clear Cache on Mac (MacBook/iMac/Mac Pro/mini)
How to free up cache on Mac? Here are 3 ways to clear clear Safari/Chrome/Firefox cache manually, and get the shortcut to delete cache automatically on Macbook (Air/Pro), mini, etc.
 Mac Battery Not Charging? Here're 6 Proven Ways to Save Your Battery
This article explains the detailed steps to troubleshoot Mac battery not charging when plugged in. Thus, you can fix a MacBook that won't charge safely and easily here.
 2 Ways to Completely Uninstall Chrome on Mac (Delete Everything)
If you want to get rid of Google Chrome from now on, you just find the right post. Here're are the detailed steps to uninstall Chrome on Mac. You can remove all your Chrome related files in clicks.
Clear Cache
Clear Cache Android Clear App Cache on iPhone Clear Cache on iPad Clear Safari Cache on iPad Clear Cache on Mac Clear iPhone Cache Clear DNS Cache on Mac
Mac Cleaner is a professional Mac management tool to remove junk files, clutter, large/old files, delete duplicate files and monitor your Mac performance.
![]() 100% Secure. No Ads.
100% Secure. No Ads.
*Required field
*Please enter a valid email
