Note
If the "AutoPlay" window doesn't appear automatically, you can go to "Computer" and find your iPod under the "Portable Device". Then you are able to import photos from iPod to computer as expected.
If you have an iPod nano, iPod classic 5/6th, or iPod touch 4/5/6, then you can use iTunes sync feature to import photos from computer to iPod. And the supported image formats are PNG, JPG, JPEG, TIFF, PICT, GIF, etc. However, the syncing only works from iTunes to the iPod, not from iPod to iTunes or not from iPod to computer. If you want to know how to transfer photos from iPod to computer, this post is for you. Moving iPod photos could be helpful when your iPod or iPod touch has no enough space and you can move images to windows or Ma pc for backup purpose or sharing with others. Therefore, we will offer several useful methods to let you know how to transfer photos from iPod to computer. No matter you are using Windows or Mac computer, you can get what you want.

Before we show you other methods to transfer photos from iPod to computer, it is important to know that most of them only work in Camera Roll photos. If you have the need to export all iPod photos, including photos in Camera roll, panoramas, photo library and so on, you'd better use a third-party photo transfer tool. Here we highly recommend you FoneTrans, which is the most professional iOS data transfer tool that move all kinds of photos as well as files from iPod to computer with a few clicks.
Key features:
Now free download FoneTrans on your PC or Mac, and follow the steps we show you to selectively transfer photos from iPod to computer.
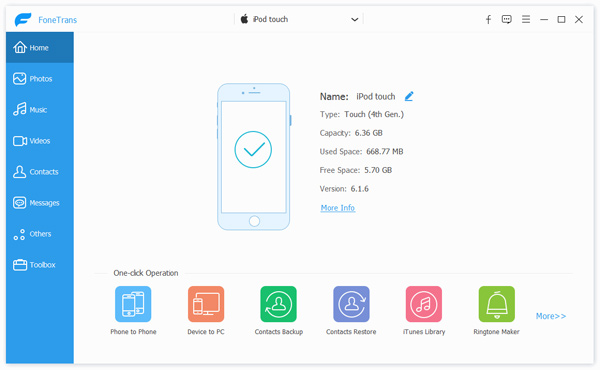
Step 1 Launch FoneTrans on your computer, connect your iPod via its USB cable. Then the program will quickly detect the device and show the main information in the interface.
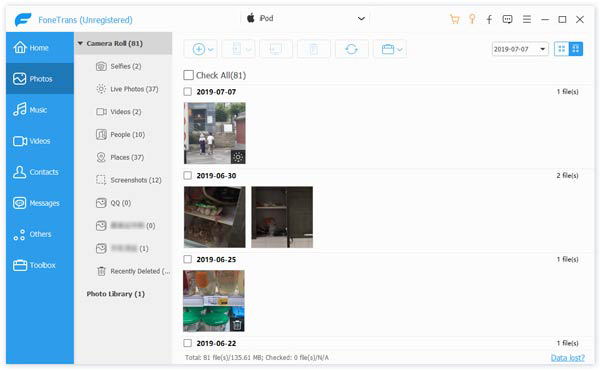
Step 2 All iPod data will be classified into categories on the left panel. Click Photos, and you can see several different image types from the Photos tab, such as Camera Roll, Panoramas, Videos, Photo Library, album, etc.
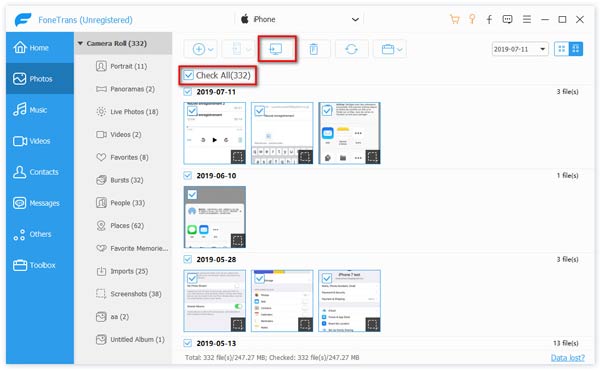
Here you are able to highlight one type, and then click the Export to button to transfer all photos from iPod to computer.For example, you can click the Camera Roll album, and then move the mouse to hit the Export to button, select the path, and finally OK to transfer iPod photos to computer.
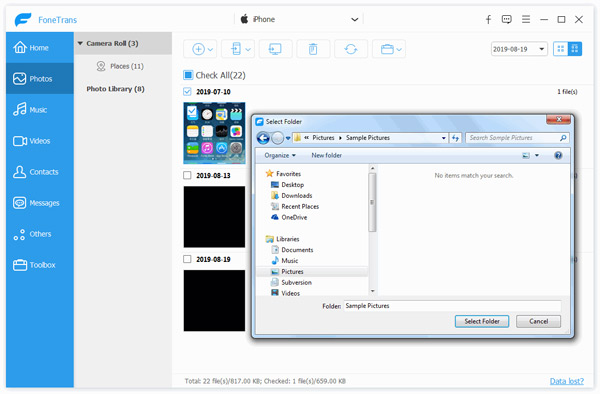
Step 3 You are also able to selectively transfer photos to computer. Double click one album, e.g. Camera Roll, and then choose the photos that you want to move out of iPod. Press Crtl and click to choose more photos. Then click the Export to button, choose the file path, and hit the OK button to comlete transferring iPod to computer.
Windows Explorer is useful on Windows 10/8/7/Vista/XP computer. It displays the hierarchical structure of files, folders and drives. With that, you can copy, move, rename, and search for files and folders on your iPod, including iPod photos. Windows Explorer offers AutoPlay to let you easily access iPod photos, then you can transfer iPod photos to Windows PC using this feature.
Step 1 Connect your iPod to PC via a USB cable and wait till the device is detected. (iPod is not detected? To know how to fix USB driver diabled.)
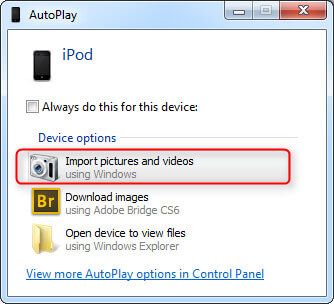
Step 2 Then tap on "Trust" notification on your iPod to finish the device connection. The AutoPlay window will automatically appear.
Step 3 Click Import Pictures and Videos button and enter DCIM folder. Then you can select iPod photos or folders and paste them to the desired location on your computer.
Note
If the "AutoPlay" window doesn't appear automatically, you can go to "Computer" and find your iPod under the "Portable Device". Then you are able to import photos from iPod to computer as expected.
If you're feeling adventurous, you can also use the Windows Photos app to import your photos. It can easily transfer your photos in bulk, and the app is very nice for looking at your pictures.
Step 1 Install iTunes - this ensures your computer can communicate with your iPhone or iPad even if you don't specifically use iTunes to transfer files.
Step 2 Plug in your iPhone or iPad with your Lightning to USB or 30-pin Dock to USB cable.
Step 3 Launch the Photos app from your desktop, Start menu, or taskbar.
Step 4 Click Import - it is located at the top right of the window.

Step 5 Click any photos you'd like to not import. They will all be imported by default.
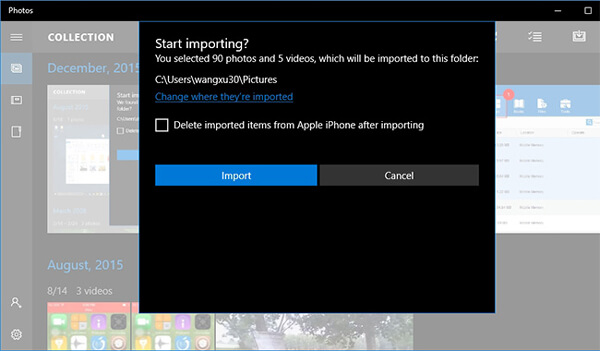
Step 6 Click Continue. Your photos will now be imported into the Photos app.
iPhoto is the widely-used tool specially designed for Mac or iOS users to manage your photos and pictures from Apple deives (iPod, iPad, iPhone, Mac). This program provides you an easy way to transfer photos from iPod to Mac computer. But this method only enables you to get photos stored on Camera Roll. If you want to transfer more than camera roll photos, FoneTrans recommended at the first part is highly recommended.
Step 1 Connect your iPod with Mac with its USB cable.
Step 2 Launch iPhoto app on Mac if it does not run automatically.
Step 3 Select the iPod photos that you want to transfer to Mac.
Step 4 Click "Import" to transfer photos from iPod to Mac computer. If you choose some of the photos, then click "Import Selected" to get photos off iPod to Mac.

If you are intended to transfer a few photos from iPod to computer, then you can use mail to transfer iPod photos.
Step 1 On your iPod, go Photos app > Hit "Albums".
Step 2 Choose the photos that you want to copy from iPod to computer > Hit the Share button on the left bottom corner.
Step 3 Choose Mail option > Input your email address and password > Click "Send" > Sign in your mail app in your Mac or Windows PC to receive and download iPod photos.

Tip
This method should be great when you want to transfer a few iPod phtos to Mac computer. If you have a large number of iPod photos, this way is much time-consuming. Make sure the Wi-Fi network works great.
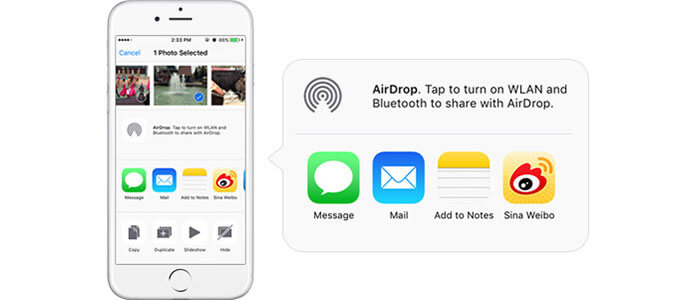
For Mac users, you can also use AirDrop to transfer iPod photos to computer. Before you use AirDrop to make iPod photos transfer, make sure that your iPod runs iOS 6 or later, and Mac runs OS X 10.5 or higher to use AirDrop.
Step 1 On your iPod, go to "AirDrop" and click "Contacts Only".
Step 2 On your Mac, click "Go" > "AirDrop". You will find that your iPod' s Apple ID shows in this interface.
Step 3 Choose the photo that you want to transfer, tap on the Share button, Choose more photos to transfer if you need > Find your Mac ID and click Send to send and transfer iPod photos to Mac.
Step 4 On your Mac, a notification will pop up and remind you of a file sent to you. You are able to open it to download the file and get iPod photos and pictures transferred from iPod to computer.
Tip
This method can only be used on Mac. If you are using a Windows computer, you should choose other ways.
Can you recover deleted photos from iPod?
Yes. With the help of Aiseesoft iPhone Data Recovery, you can recover the deleted photos from iPod. Connect your iPod to computer and launch this iPod data recovery tool, then click Start Scan to scan files on iPod. Select photos you want to retrieve and click Recover button to get them back.
How do you transfer photos from iPod to USB?
First, you need to connect your iPod to computer and plug the USB to the USB port. Then go to Control Panel > Tools > Folder Options on your computer. Select View tab and select Show hidden files, folders, and drives. Go to Computer and find iPod_Control folder, select photos here and move them to USB.
How to transfer music from iPod to computer?
If you want to transfer music from iPod to computer, you can rely on Aiseesoft FoneTrans. Free download and open FoneTrans on your computer. Connect your iPod to computer via USB cable. In the Music tab, you can choose the music you want to transfer, and click Export to PC to transfer music to your computer.
As you can see, no matter what model of iPod you are using, and no matter whether ou are using Windows or Mac computer, you can find a suitable way to transfer photos from iPod/iPod touch to computer after reading this post. Except moving photos from iPod to computer, FoneTrans also can help you transfer videos, music, contacts, etc. to computer and manage iOS data with ease.

May 29, 2020 15:35 / Updated by Louisa White to Transfer iOS Data
 With/Without iTunes You Can Also Transfer Music from iPad to Mac
This article shows you how to add music from iPad Pro/Air/mini to iTunes on Mac, and move songs from iPad to MacBook without iTunes freely.
 Best Ways for You to Backup Photos
ow to backup photos from Android phone or iPhone? This article will list useful solutions on Android and iPhone/iPad/iPod photos backup.
 How to Transfer Photos from iPhone to iPad
How to transfer pictures from iPhone to iPad? The article would introduce you 3 easiest ways to transfer iPhone photos to iPad directly.
