
Best For: Users who want all photos available on every Apple device automatically.
Looking at your photos on an iPad is a completely different experience. The larger display makes it easier to review, edit, and share. In this guide, we'll show you 4 practical ways to transfer photos from your iPhone to your iPad including Apple's built-in AirDrop and iCloud and Aiseesoft FoneEase. We'll explain how each method works, compare its advantages and drawbacks, and help you decide which one is best for your needs.

How We Tested These Methods
| Method | Transfer Speed | Internet Required? | Computer Required? | Photo Quality | Best For |
| iCloud Photos | Slow to Medium (Depends on Wi-Fi) | Yes | No | Full Resolution (with space-saving options) | Automatic, hands-off syncing of your entire library |
| AirDrop | Fast (Wireless peer-to-peer) | No | No | Full Resolution | Instantly sharing a few dozen photos without setup |
| FoneEase | Very Fast (Wired USB) | No | Yes | Full Resolution | Selective transfer of large batches/albums offline |
| Finder / iTunes | Medium to Fast | No | Yes | Full Resolution | Backing up to a PC/Mac and syncing folder-by-folder |
Best For: Users who want all photos available on every Apple device automatically.
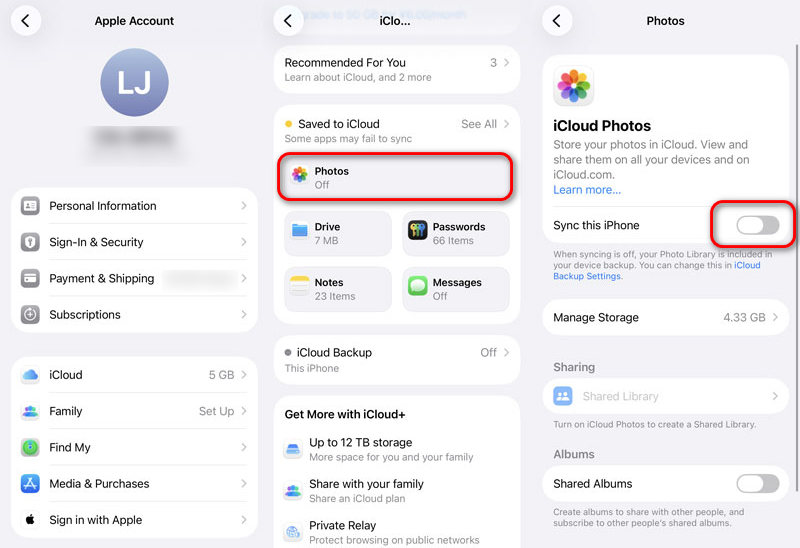
iCloud Photos is Apple's cloud-based sync solution. Once turned on, every photo you take on your iPhone appears on your iPad, Mac, and any other device signed into the same Apple ID — automatically, as long as you're connected to Wi-Fi.
How to transfer picture from iPhone to iPad with iCloud
PROS
CONS
Best For: Sending a handful of photos (or even a few hundred) right now, without any setup.
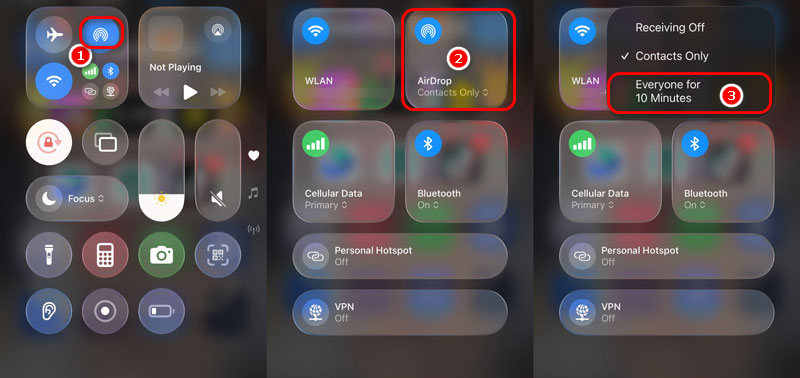
AirDrop is Apple's peer-to-peer file sharing feature. It creates a direct Wi-Fi + Bluetooth connection between two nearby Apple devices, making it the fastest way to send a batch of photos without cables, cloud uploads, or size limitations.
How to Use AirDrop to Transfer Pictures from iPhone to iPad
PROS
CONS
Best For: Users who need to transfer a large number of photos (or selective albums) without internet or cloud storage.
When the 100-photo AirDrop batch keeps failing, iCloud storage is full, it's time for a dedicated transfer tool.
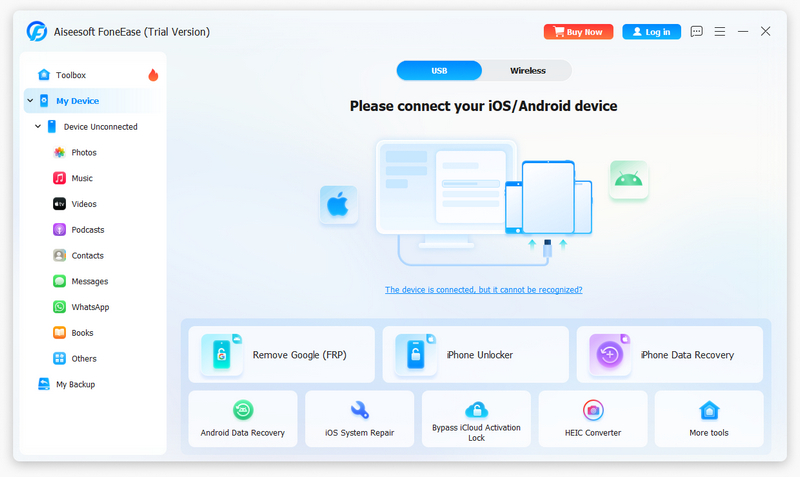
FoneEase is a professional iOS data manager for Windows and macOS. You connect both devices to the same computer via USB, browse the photo library on each device, and selectively move exactly what you want — at full resolution, no compression, no cloud uploads.
Moreover, FoneEase isn't just a photo mover. It's a complete device management suite that handles everything from unlocking a forgotten screen passcode to recovering deleted messages. Try it now!
 100% Secure. No Ads.
How to Transfer Photos from iPhone to iPad with Aiseesoft FoneEase

PROS
CONS
Best For: Users who want a full, encrypted backup of their photo library via computer.
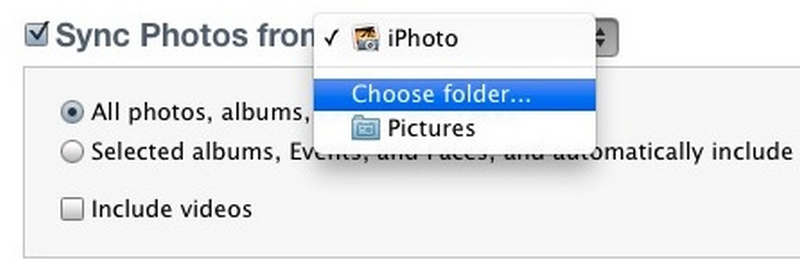
Before iCloud and AirDrop became the defaults, iTunes was the primary way to manage photos on an iPhone or iPad. On macOS Catalina and later, Apple replaced iTunes with Finder. If you're using a Windows PC or an older version of macOS, you'll still use iTunes. Both tools let you sync photos from your computer to your iPad.
How to Transfer Photos Using Finder / iTunes
PROS
CONS
Will transferring photos reduce their image quality?
No. All four methods in this guide transfer your photos in their original, full-resolution quality. However, if you use iCloud and have "Optimize iPad Storage" enabled on your iPad, it will store smaller versions to save space while keeping the full-resolution originals secure in the cloud.
Can I transfer photos from my iPhone to my iPad without Wi-Fi?
Yes, you can. AirDrop does not require an active internet connection or cellular data, as it establishes a direct peer-to-peer wireless connection. Alternatively, both FoneEase and Finder/iTunes work completely offline since they rely on a physical USB cable connection to your computer.
Why are my photos not syncing between my iPhone and iPad via iCloud?
If your photos aren't syncing, check the following:
Ensure both devices are signed into the exact same Apple ID.
Confirm that "Sync this iPhone/iPad" is enabled in your iCloud Photos settings on both devices.
Check if you have sufficient storage left in your iCloud account.
Make sure both devices are connected to stable Wi-Fi and are sufficiently charged.
Conclusion
The best way to transfer photos from your iPhone to your iPad depends on how many photos you have, the devices you're using, and how you prefer to manage your files.
If you want your photo library to stay in sync automatically, iCloud Photos is the easiest long-term solution. For quickly sending a few photos, AirDrop can work wirelessly easily. If you are working with large file, FoneEase gives you more control and can handle large transfers more efficiently.
 4 Easiest Methods to Transfer Data from iPhone to New iPhone
How to transfer data from an old iPhone to a new iPhone? Today, we will show you how to sync data to a new iPhone with 4 Easy methods.
 6 Ways to Transfer iPhone Videos to PC (Win 11/10 Included)
Want to transfer large or 4K videos from iPhone to PC? Learn 6 easy ways to copy videos via USB or wirelessly without iTunes or losing quality.
 Samsung iPhone Transfer: Simple Ways to Move Data Easily
Need a Samsung iPhone transfer? Discover how to move contacts, photos, and more from Samsung to iPhone using simple and reliable methods.
 Leave your comment and join our discussion
Aiseesoft FoneEase is a data transfer and management tool that lets you seamlessly move, back up, and manage various data between iOS, Android, and computers without resetting your phone or relying on iTunes.
100% Secure. No Ads.

*Required field
*Please enter a valid email
