What is iCloud photo sharing?
iCloud photo sharing is a feature of the Photos app on all Apple devices. It is not similar to iCloud photo library. Though they look quite similar. You can use iCloud photo sharing to share photos and videos among a wide range of people wirelessly.
How does iCloud photo sharing work?
You can create a shared album to put the photos and videos you want to share together. The invited iCloud users need to subscribe to the shared album. Moreover, you can also create a public website to share iCloud.com photos with non-Apple users.
What is iCloud photo sharing limit?
You can share no more than 5000 photos and videos via iCloud photo sharing. Otherwise, you need to delete some files to free up space.
Does iCloud photo sharing use phone storage?
No. The photos and videos in the shared album do not count extra storage space.
When you enable iCloud photo sharing, you can share images with up to 100 people in a group. To some degree, the shared album is encrypted. Only the invited people can add, delete and comment within the shared photo album. You can also send the iCloud photo sharing link to Android users.
To start with, update your iPhone to the latest OS. It is a good way to bypass iCloud photo sharing not uploading or working issues.
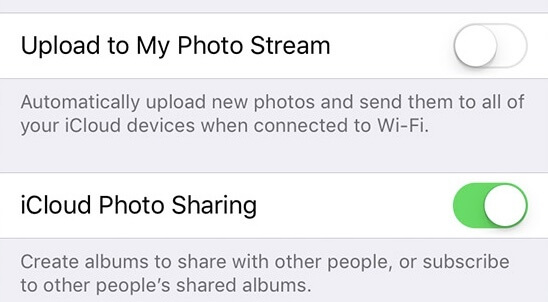
Step 1. Open the Settings app.
Step 2. Scroll down and choose "Photos" or "Photos & Camera" in the list.
Step 3. Switch on "iCloud Photo Sharing" to enable iCloud photo sharing on iPhone or iPad.
Step 1. Open the Settings app on your iPhone or iPad.
Step 2. Tap "Photos" or "Photos & Camera".
Step 3. Turn off "iCloud Photo Sharing". When the on-off option turns from green to blank, it means you just stop iCloud photo sharing successfully.

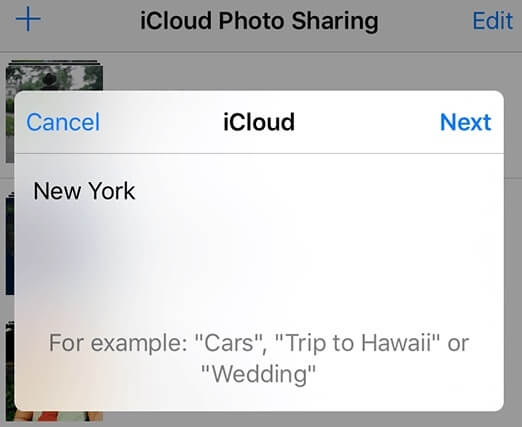
Step 1. Open the Photos app.
Step 2. Tap "Shared" at the bottom of your iOS device. Then tap "+" on the top left corner.
Step 3. Enter the name of your iCloud photo sharing album and tap "Next".
Step 4. Enter the iCloud contacts of your friends and families.
Step 5. Tap "Create" to create an iCloud shared album on iPhone.
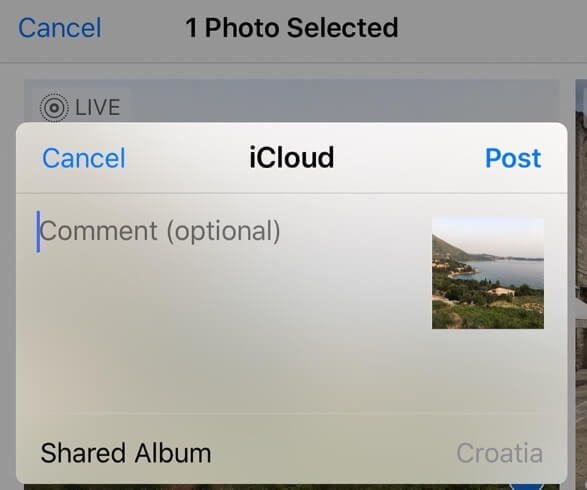
Step 1. Choose the shared photo album you created before in the Photos app.
Step 2. Tap "+" and select the photos you want to share. Later, tap "Done" on the top right corner.
Step 3. Add a comment for your shared iPhone photos.
Step 4. Tap "Post" to share photos on iCloud.
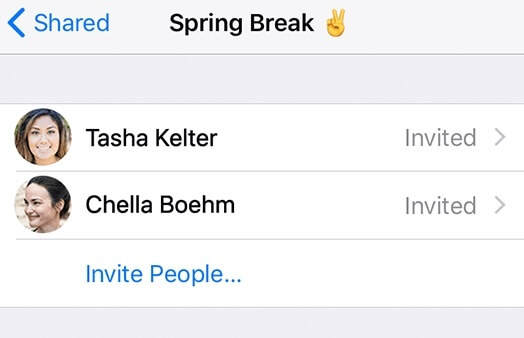
Step 1. Open the shared photo album.
Step 2. Go to the "People" section.
Step 3. Tap "Invite People" to add new subscribers.
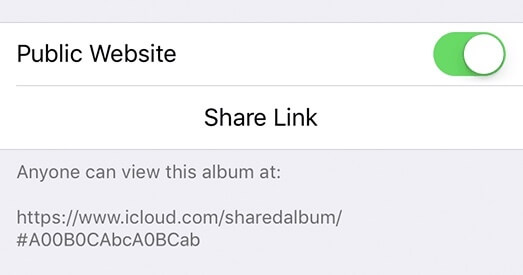
Step 1. Open the shared album you created before.
Step 2. Switch to the "People" section.
Step 3. Turn on "Public Website" and tap "Share Link" to generate an iCloud link.
Step 4. Send the link to access iCloud photo sharing via a web browser. Thus, others can view iCloud photos online through the link.
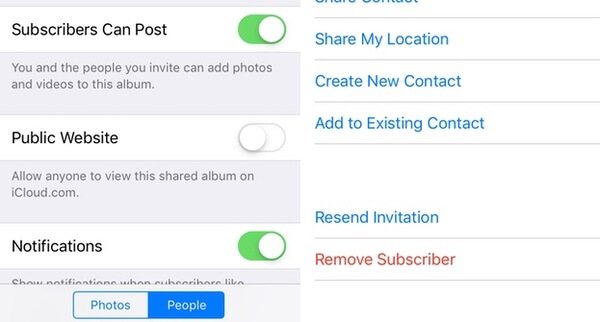
Step 1. Locate the "People" section within the shared album you want to make changes.
Step 2. Choose the subscriber you want to remove.
Step 3. Tap "Remove Subscriber" to remove someone from a shared album.
Step 4. Repeat the above 3 steps to manage subscribers to a shared album in iCloud.
Step 1. Open the shared album you like.
Step 2. Select an image.
Step 3. Tap "Like" on the bottom right corner to like a shared photo.
Step 4. Write something in the "Add a comment" section below.

Step 1. Make sure you have enabled iCloud photo sharing by Settings > Photos > Shared Albums.
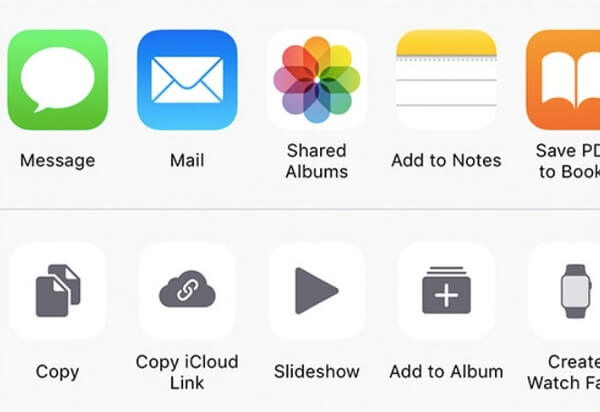
Step 2. Run the Photos app. Browse and select the photos you want to share.
Step 3. Tap "Share" on the bottom left corner.
Step 4. Tap "Shared Albums" and select which shared album you need.
Step 5. Choose "Post" to add photos to a shared album.
Step 1. Run the Photos app.
Step 2. Tap "Shared" to access all shared albums on iPhone.
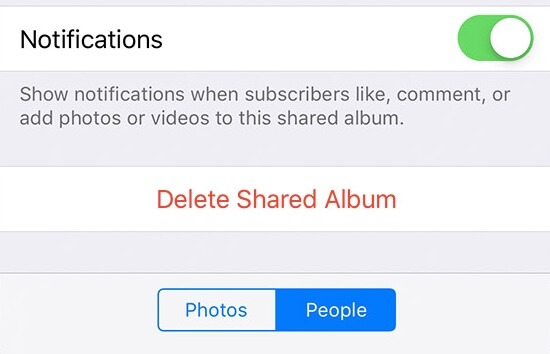
Step 3. Choose the shared album you want to delete.
Step 4. Go to the "People" tab.
Step 5. Tap "Delete Shared Album" to delete a shared album on iPhone.
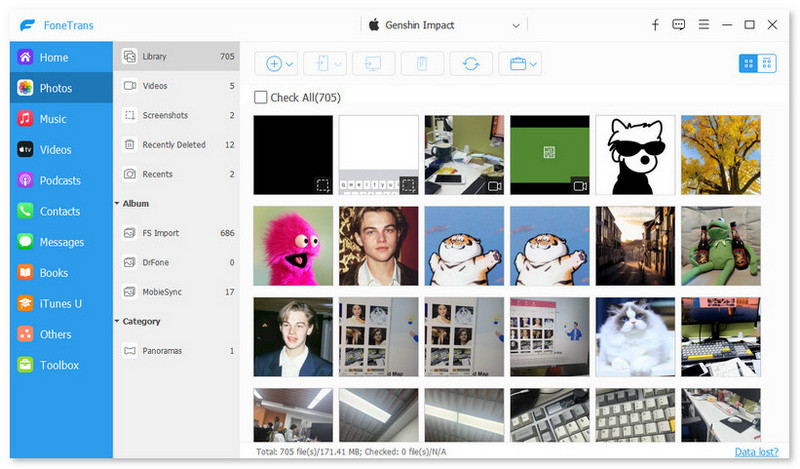
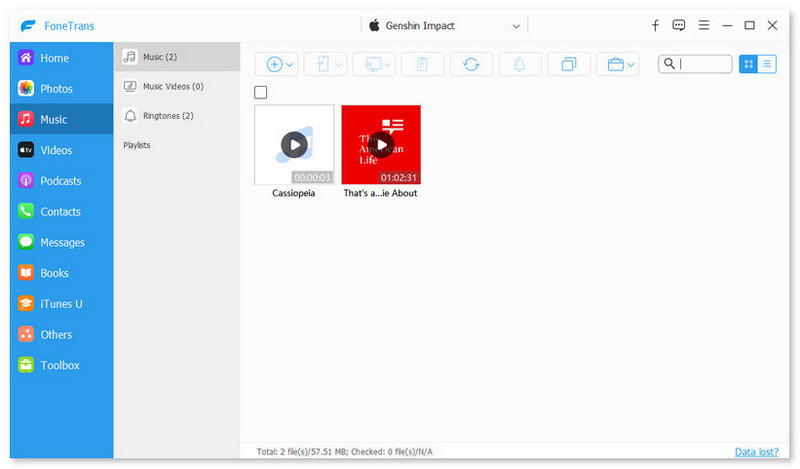
There are still many problems about sharing photos with iCloud, like iCloud photo sharing link not working, iCloud photo sharing grayed out and more. If you want to share photos on iCloud between iPhone and iPad, why not use an iPhone transfer to solve the problem quickly? Actually, you can transfer and manage all iOS files by using FoneTrans seamlessly. It works really fast when you transfer data to your new iPhone or iPad.

Downloads
Main Features of the iPhone Transfer Software
![]() 100% Secure. No Ads.
100% Secure. No Ads.
![]() 100% Secure. No Ads.
100% Secure. No Ads.

You can use iCloud photo sharing to share interesting photos and videos with groups of people. The invitee and inviters can share likes and comments remotely. If you want to get hundreds of thousands of photos from iPhone to elsewhere, you do not need to back up iPhone to iCloud. FoneTrans can always bring you the fastest transferring speed and highest output quality. It is worth to free download and have a try.
 How to Delete Photos Pictures Images from iCloud
Deleting pictures from iCloud backup can be easy after you read this article.
 How to Retrieve iPhone/iPad/Photos from iCloud
Retrieving iPhone/iPad photos from iCloud is very easy. Reading this article, you can restore your iPhone/iPad photos from iCloud backup by yourself.
 How to Access iCloud Photos in Different Ways
How do you access iCloud photos on iPhone, Mac, PC or Online? This post will show you the details.
iCloud Sharing
iCloud Photo Sharing Not Working iCloud Family Sharing Fix iPhone Unable to Share Photos iCloud Photo Sharing Share Calendars and Events on iPhone
The best iOS Transfer software to manage and transfer iOS files from iPhone/iPad/iPod to your computer or reversely without running iTunes.
![]() 100% Secure. No Ads.
100% Secure. No Ads.
![]() 100% Secure. No Ads.
100% Secure. No Ads.
*Required field
*Please enter a valid email
