I know that Family Sharing allows family members to share purchases from App Store, iTunes, iBooks, and more without sharing accounts. But how to set up and use this function? How to switch from an individual iCloud account to iCloud Family Sharing? Do I have to pay for the iCloud Family Sharing?
Family Sharing was introduced in 2014 with iOS 8 and Mac OS X Yosemite. It enables families share content purchased with each individual account and remain their separate Apple ID. You can easily share apps, music, movies, books and more among your family members.
However, many iOS and Mac OS users still don't know how to use this feature. Are you one of them? This post will give you a detailed introduction about Family Sharing. In addition, we will tell you how to set up the iCloud Family Sharing, invite others join the Family Sharing service, and more.
As it mentioned above, Family Sharing was introduced in 2014 alongside iOS 8 and Mac OS X Yosemite. Actually, it is an extension of the standard Family Sharing plan. Family Sharing enables 6 family members to share purchases from App Store, iTunes, iBooks, and Apple Music subscription. iCloud Family Sharing enables all members in the Family Sharing plan to share and store pictures, various app content, and more.
To join Family Sharing plan, all family members need an iOS device running iOS 8 or higher, or a Mac running OS X Yosemite or newer. There will be a family organizer to manage the specific storage, payment method, shared content and more. All types of data can be shared, such as iTunes and App Store purchases, Apple Music subscription, iCloud Storage, location info, Apple News+, and photos and so on.
Family Sharing requires one credit card shared by everyone for the iTunes and App Store purchases. You can pay for the higher storage plan for families. After switching to Family Sharing, all purchases that family members made previously won't be removed.
Apple iCloud Family Sharing helps you easily share content purchased and downloaded with other family members. Everyone in the Family Sharing circle can use the same iCloud account. Family Sharing isn't complicated to set up. Here's everything you need to know about how to use the iCloud Family Sharing.
To share iCloud storage, your iOS device should run iOS 11 or a higher version. So you are suggested to upgrade iOS to its latest version first. Then you can take the following guide to set up your Family Sharing.
You are allowed to set up shared storage for your existing family members on both iOS devices and Mac.
Share a storage plan on iPhone/iPad/iPod
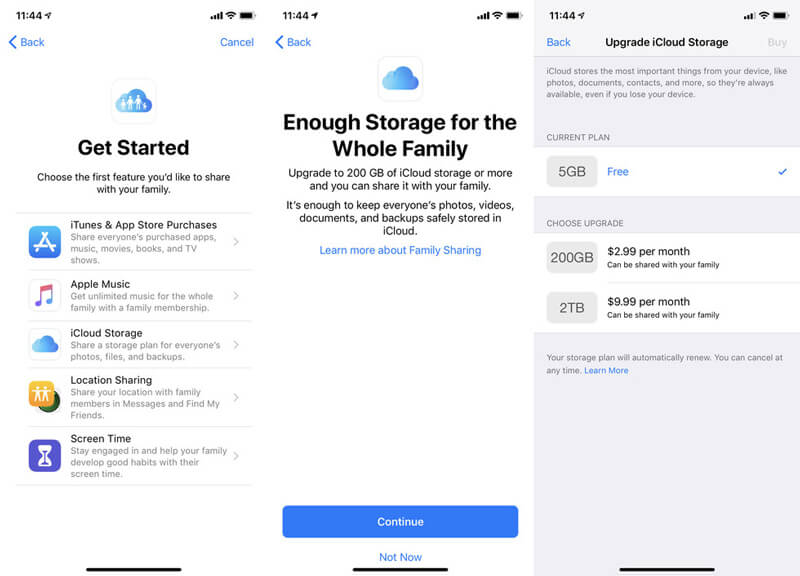
You can send a message to let other family members know that they can switch to your shared storage plan. Here you can upgrade to a 200GB or 2TB plan according to your need.

Share a storage plan on Mac
First, you need to set up your family with a Family Sharing plan. After that, you can easily add iCloud to the plan. To add family members to the plan, you need to subscribe to the $2.99 200GB iCloud plan or higher.
After sharing your iCloud storage with other family members, you can check the detailed information about used and left storage space with the iCloud storage map. Actually, you can easily manage the space available in the iCloud storage plan.
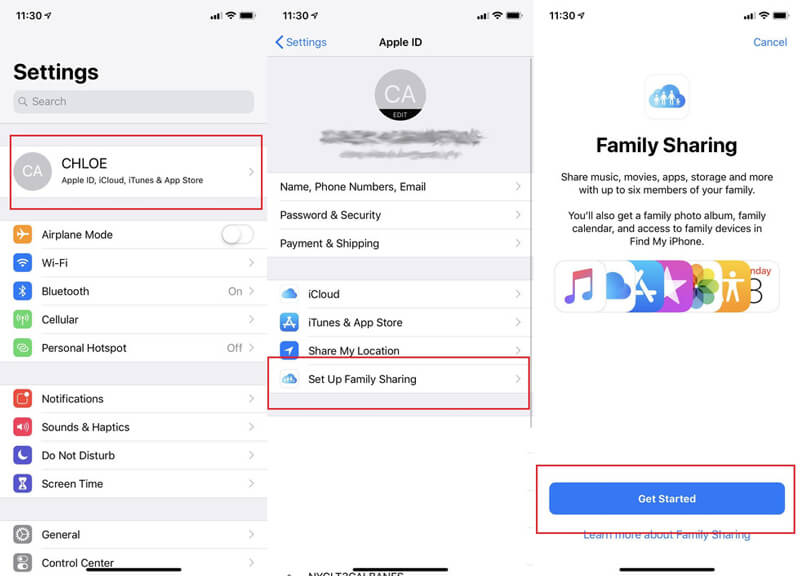
Step 1. Open "Settings" app on your iOS device and tap your "iCloud account".
Step 2. Tap "Family Sharing" > "iCloud Storage" to manage set the specific iCloud storage for each family member.
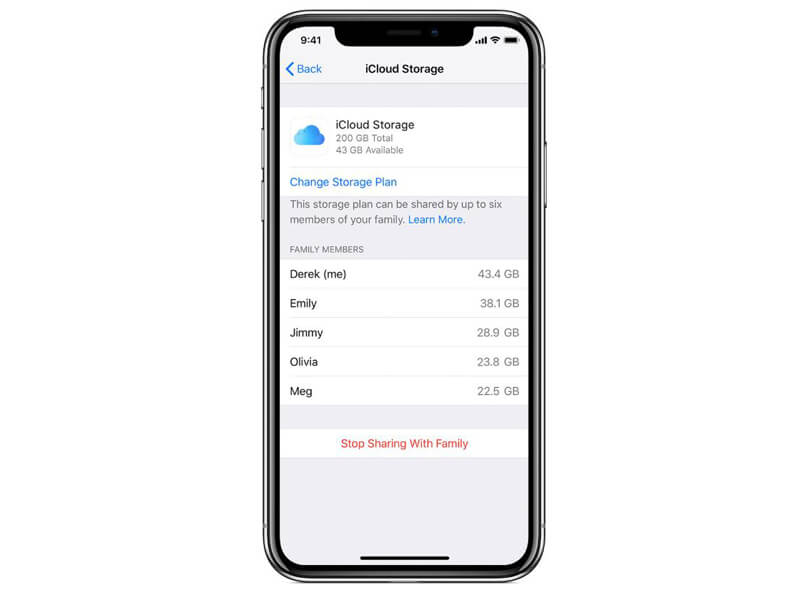
All family members will get a notification when your family is low on iCloud storage. At that time, you can upgrade your iCloud storage plan.
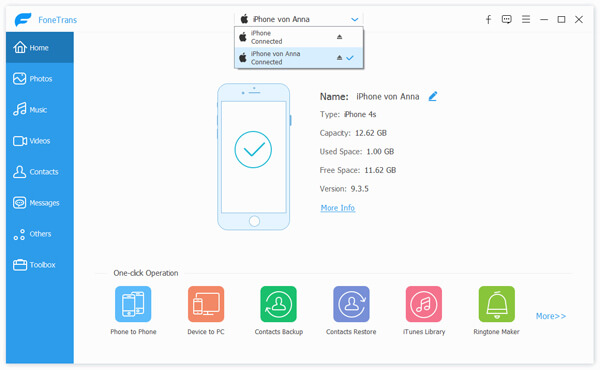
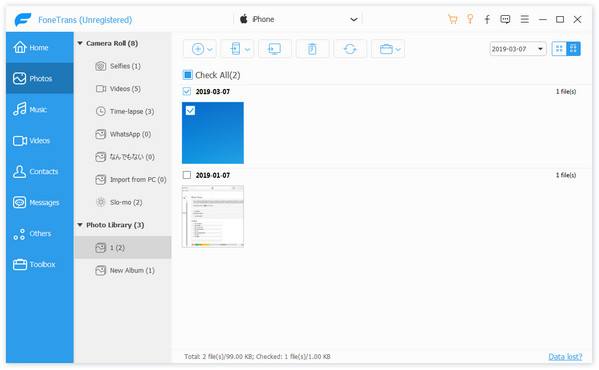
Family Sharing provides a great way to share various purchases with other family members. In case you want to share more iOS data, or worry about some privacy leaks, here we introduce you with a great iOS data transfer, FoneTrans. It has the capability to share all requently-used iOS data like pictures, videos, songs, contacts, messages, etc. between iOS devices and PC/Mac.

Downloads
FoneTrans - Best iOS Data Transfer/Manager
![]() 100% Secure. No Ads.
100% Secure. No Ads.
![]() 100% Secure. No Ads.
100% Secure. No Ads.
After reading this post, you can know more information about iCloud Family Sharing. You can learn what Family Sharing is and how to use it. If you still have any questions, leave us a message in the comment part.
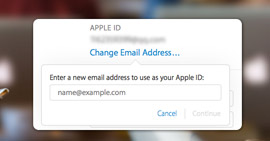 iCloud: Change/Reset iCloud Account
How to change your iCloud Apple ID, email address and password? Here we show you how to change iCloud account on iPhone/iPad/iPod and iCloud control panel.
 How to Access iCloud Photos in Different Ways
How do you access iCloud photos on iPhone, Mac, PC or Online? This post will show you the details.
 6 Solutions to Fix iCloud Sign-in Keeps Popping up for Password
iCloud sign-in keeps popping up for asking for password? Read this post and learn from 6 solutions to fix repeated iCloud sign-in requests in details.
iCloud Sharing
iCloud Photo Sharing Not Working iCloud Family Sharing Fix iPhone Unable to Share Photos iCloud Photo Sharing Share Calendars and Events on iPhone
The best iOS Transfer software to manage and transfer iOS files from iPhone/iPad/iPod to your computer or reversely without running iTunes.
![]() 100% Secure. No Ads.
100% Secure. No Ads.
![]() 100% Secure. No Ads.
100% Secure. No Ads.
*Required field
*Please enter a valid email
