It will be helpful to DFU mode sometimes. Using DFU restore to solve your iOS problems is a good way that can resolve various issues. You can simply restore your iOS device after you put it into DFU mode. If you are finding the tutorial of how to DFU restore your iOS device, then you come to the right place. In this article, we list the guides of how to DFU restore your iOS device in detailed, as well as the best way to restore your device.

The ways of putting iPhone into DFU mode and restore them are different from the different models of iPhone. You can follow the next two guide and use the suitable way to DFU restore your iPhone.
Step 1 Connect your iPhone to computer which have iTunes installed. And then run iTunes.
Step 2 Turn off your iPhone firstly. Then press and hold the power button, which is on the right side of your iPhone for 3 seconds.
Step 3 Press and hold the volume down button and don't release the power button.
Step 4 Keep holding the two buttons for 10 seconds. Then release power button but keep holding the volume down button for about 5 seconds.
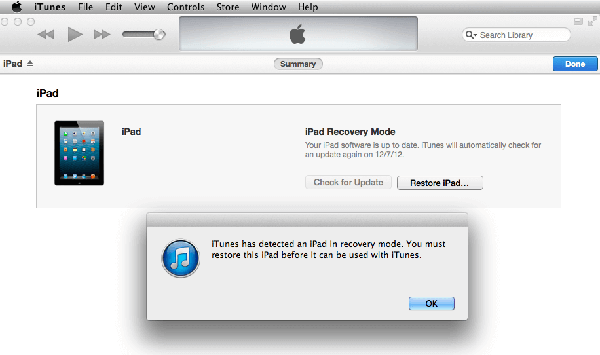
Step 5 Then release volume down button as soon as you see the pop up message on your computer's screen that says "iTunes has detected an iPhone in recovery mode".
Step 6 Just press OK and then click on the Restore button to DFU restore your iPhone.

Step 1 Connect your iPhone with computer via a USB cable. And then launch iTunes on your computer.
Step 2 Press and hold both the power button and home button for 8 seconds. If you use iPhone 7, you need to hold power button and volume down button.
Step 3 After 8 seconds, you need to release the power button, while continuing holding the home button (for iPhone 7, hold volume down button) until you see a pop up message on your computer's screen, which says "iTunes has detected an iPhone in recovery mode".
Step 4 Just press OK and then click on the Restore button to DFU restore your iPhone.

You can also restore your iPod touch or iPad by putting them into DFU mode. The way to DFU restore your iPad or iPod touch is very similar with the way to DFU restore iPhone. You can follow the next steps.
Step 1 Connect your iPad or iPod to computer via a USB cable. Then launch iTunes on computer if it doesn't pop up automatically.
Step 2 Press and hold both power button and home button for 8 seconds.
Step 3 Then release the power button but continue holding the home button until you see a pop up message on your computer's screen which says "iTunes has detected an iPad (iPod) in recovery mode".
Step 4 Click on OK and then choose Restore button to DFU restore your iOS device.
Here we want to recommend the best software called FoneLab iPhone Data Recovery to you. It is a professional recovery software which you can use to recover lost data from iOS device, iTunes, iCloud easily and safely. You can use it to recover up to 19 kinds of data, including text messages, iMessages, photos, contacts, call history and so on. Before recover your data, you are able to scan and preview as you want with this powerful software. And it supports all models of iPhone, iPad and iPod. But only windows users can download this software on Windows computer.
In what follows, we list the detailed steps of how to recover data from iOS device, iTunes backup and iCloud backup. After you download and install Aiseesoft iPhone Data Recovery, you are able to restore iOS device following the next guides.
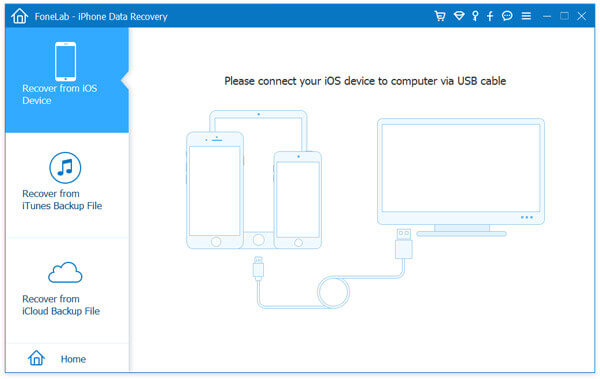
Step 1 Connect iOS device
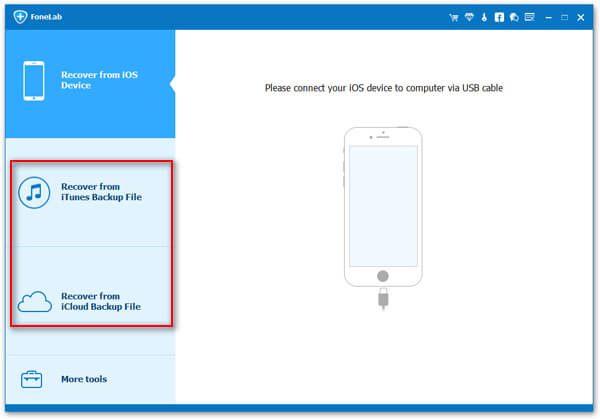
Launch this software on your computer and then choose Recover from iTunes Backup File. Next you need to connect your iOS device with computer via a USB cable.
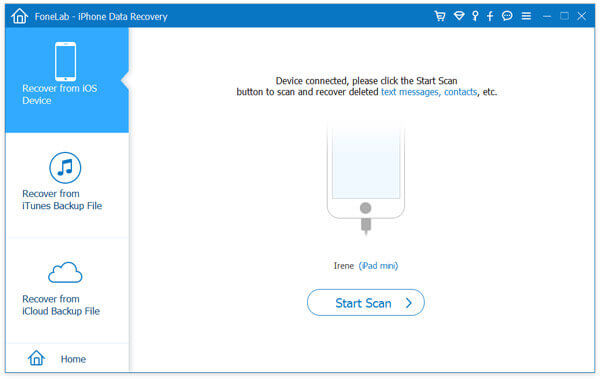
Step 2 Start to scan data
After you connected your iOS device, it will detect your device and show detailed information of your iOS device. Now you can click on Start Scan button to scan your device. And it will take a few time to get the results.
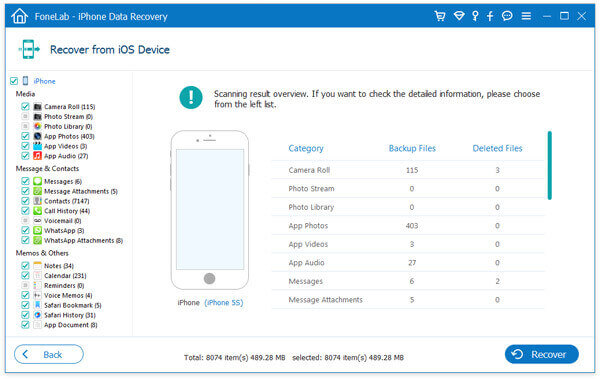
Step 3 Begin to recover data
When the scanning process finished, it will list all data of your iOS device to you. You can preview them firstly and then choose what you want to restore and click on Recover button. Wait for the recovery process patiently.
Step 1 Choose recover from iTunes
Launch Aiseesoft iPhone Data Recovery on your computer then choose Recover from iTunes Backup File, which is the second option you can choose in the left list.

Step 2 Scan iTunes backup
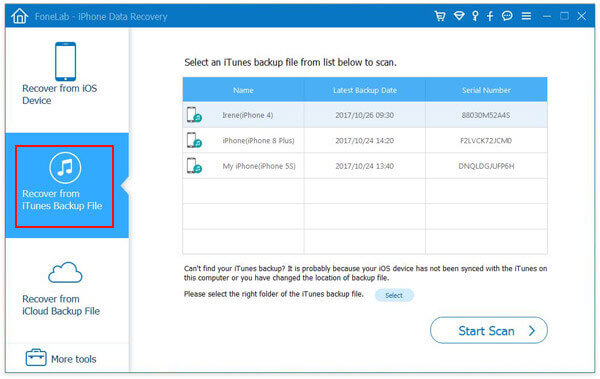
Step 3 Restore data from iTunes
After iTunes backup scan is complete, you can click the data type and view the details. Then just choose what you want to recover and click on Recover button to save these data to your computer.

Step 1 Choose recover from iCloud
Run Aiseesoft iPhone Data Recovery on your computer. Then click on Recover from iCloud Backup File which is the third tab on the left part.
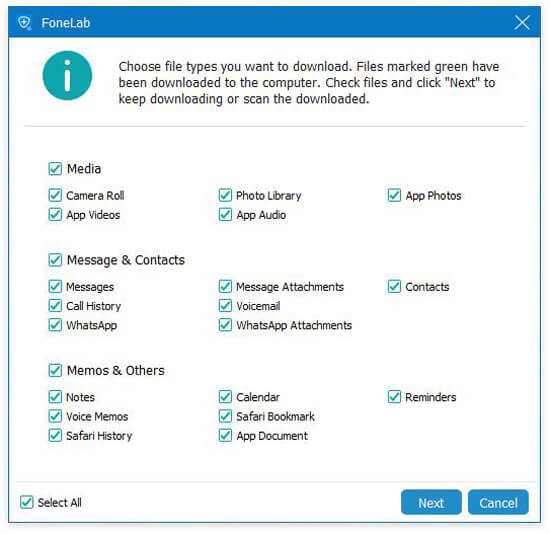
Step 2 Download iCloud backup
Now you need to log in your iCloud with Apple ID and password. Then choose one of the iCloud backups you want to recover and click on Download button. Next you need to choose the data type what you want to restore. Click on Next button.
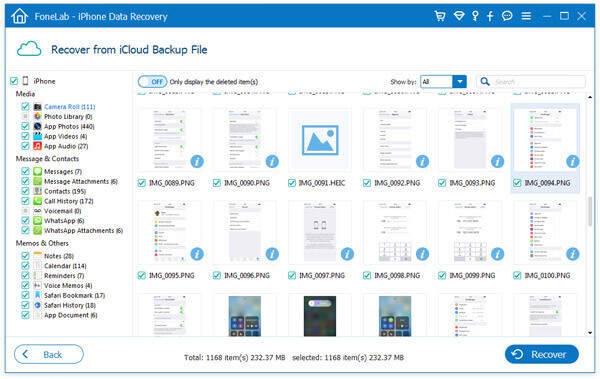
Step 3 Restore data from iCloud
When you see your iCloud backup show in the interface, you can preview them by clicking the file type. Choose what you want to recover and restore them by Recover button.
Now you can know how to DFU restore iOS device clearly. And you also know the best software that can help you restore your iOS device in an easy yet professional way. If you like this article and think it is useful, just share it with your friends.

June 25, 2018 09:28 / Posted by Louisa White to Fix iOS Problems
 My iPhone Won't Update? Here Is the Fix
Why my iPhone won't update and what to do if iPhone won't update to the newest version? Read this article and find the answer.
![[Fix] iPhone Won't Turn Off? Learn How to Fix](/images/more-reading/iphone-wont-turn-off-s.jpg) [Fix] iPhone Won't Turn Off? Learn How to Fix
[Fix] iPhone Won't Turn Off? Learn How to Fix
What to do if your iPhone won't turn off? Read this post and learn the quick solutions to fix iPhone wont turn off.
 iPhone Won't Turn on – How to Fix iPhone Black Screen
iPhone won't turn on or charge, what to do? Read this article to fix iPhone X/8/7/6s Plus/6s/6 Plus/6/5s/5c/5/4S/4 won't turn on problem, and restart iPhone easily.
