Getting Started
Introduction
If you have some 4K videos and want to convert these 4K videos to lower video resolution, you are highly recommended with this 4K Converter for Mac. With the Mac version of 4K Converter, you can easily convert your 4K video to any other video formats on your Mac.
As the most professional and multi-functional 4K video converter on Mac, this program allows you to convert, edit 4K videos with ease. We will tell you how to use Aiseesoft 4K Converter following three parts:
Part 1. How to Convert 4K Videos
You can use 4K Converter to convert 4K video to other 4K formats, downscale 4K to 1080p and 720p, or convert 4K video to other common video formats. Taking 4K to 1080p converting as an example, this program will tell you how to use this 4K Converter for Mac correctly.
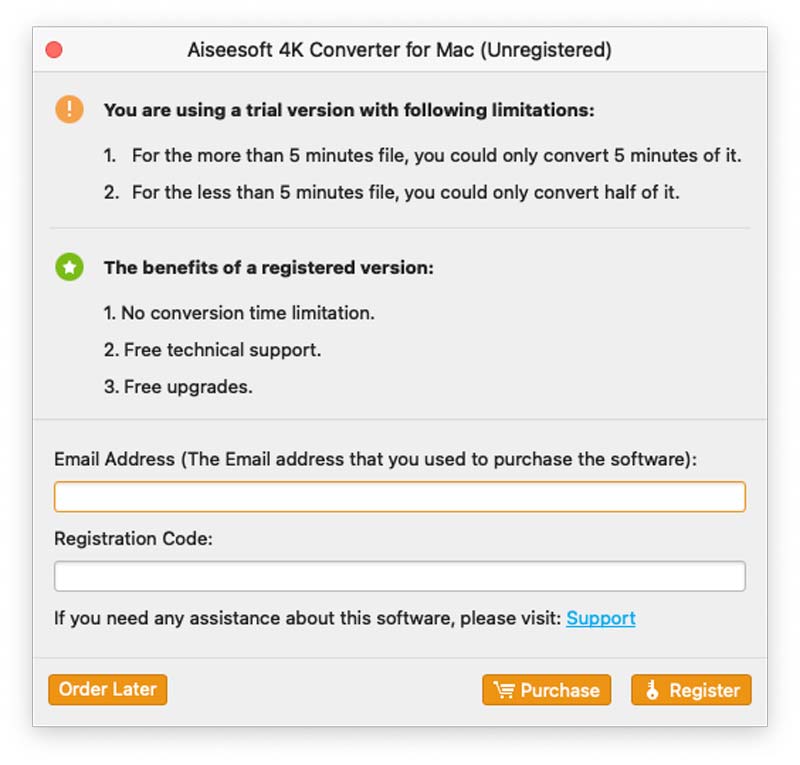
Step 1 Install and launch this Aiseesoft 4K Converter for Mac on your Mac computer. Register with your email address and registration code which you received from us.
Step 2 Add your 4K video file(s) to this 4K Converter for Mac, or just drag-and-drop the 4K videos to this program directly.
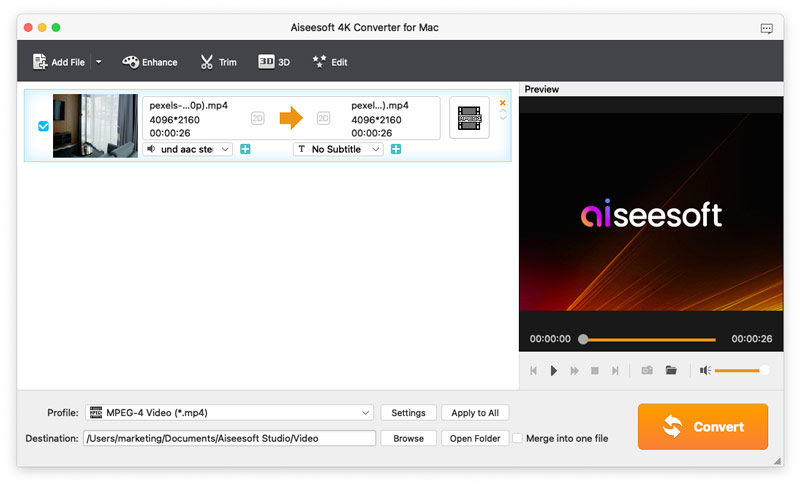
Step 3 Click the drop down button of Profile, you will find all video and audio formats. You are able to find the 1080p from the search bar, and click the one you want.

Step 4 Set the output destination and click the Convert button to get the result.

Part 2. How to Edit 4K Videos on Mac
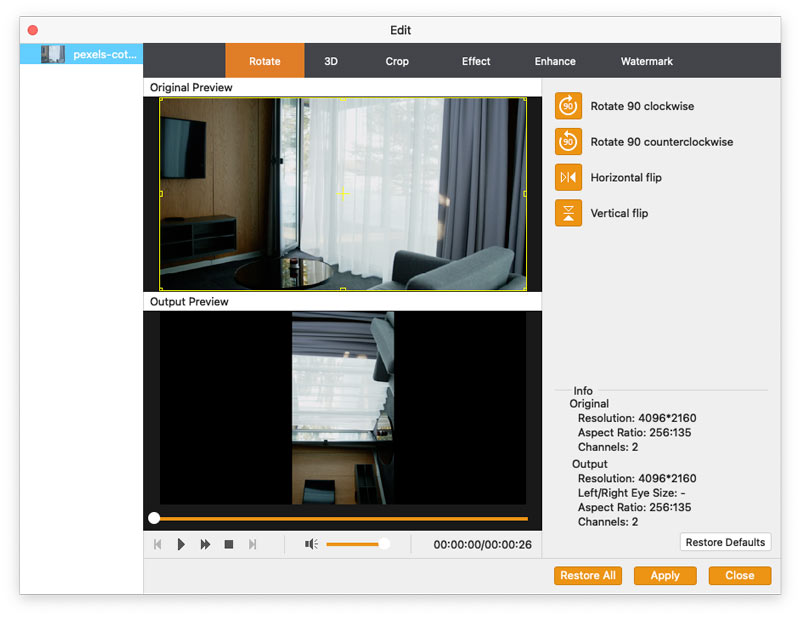
Before you convert the 4K videos on Mac, 4K Converter for Mac gives you options to edit video effects. Choose the video you want to enhance, then click the Edit button to enter video editing interface, you'll see the editing functions as below.
Rotate/flip video angle
There provides four ways to rotate or flip your video to the right angle: including Rotate 90 clockwise, Rotate 90 counterclockwise, Horizontal flip, and Vertical flip. With only one click and choose Apply to get your expected video.
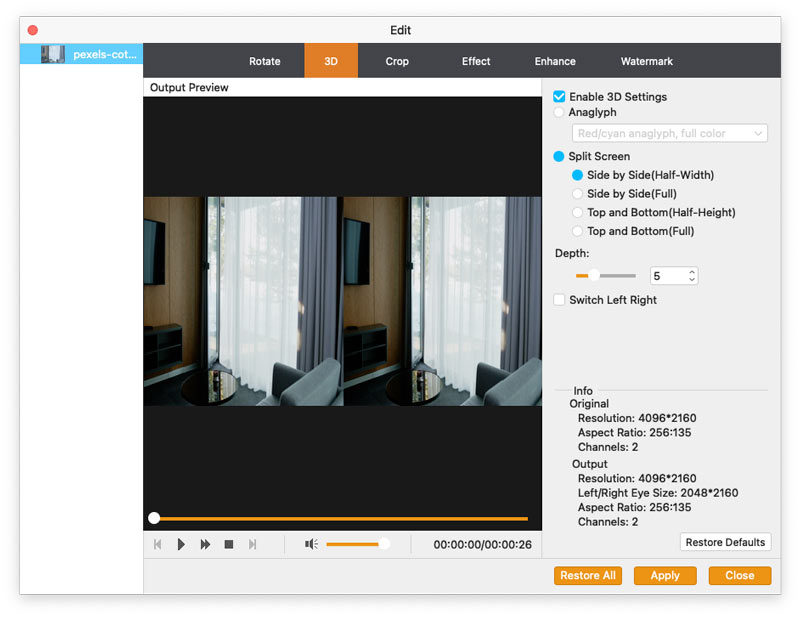
3D video
If you intend to convert 2D video to 3D, you can click the 3D button to customize 3D settings here. Here you can set 3D as Anaglyph or Split Screen as you like.
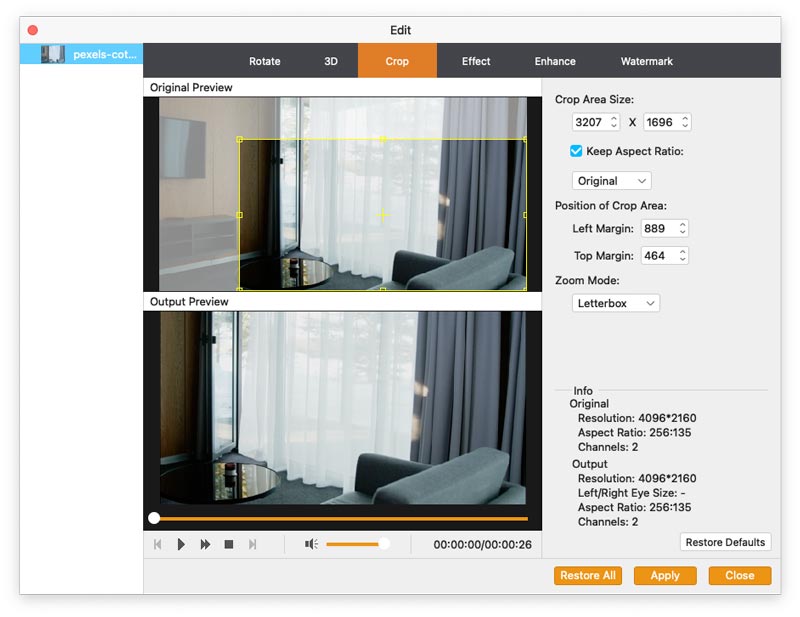
Crop video
Click Crop to select the zoom mode as Letterbox, Center, Pan & Scan, or Full to get rid of the unwanted edges or capture the wanted parts.
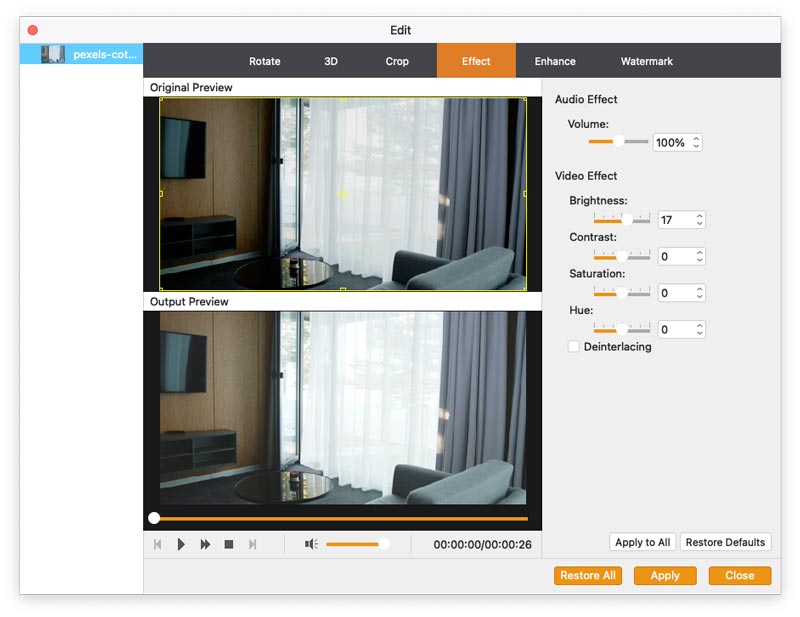
Change Effects
Click Effect to change effects here. You can adjust brightness, contrast, saturation, hue, volume and more video/audio effects.
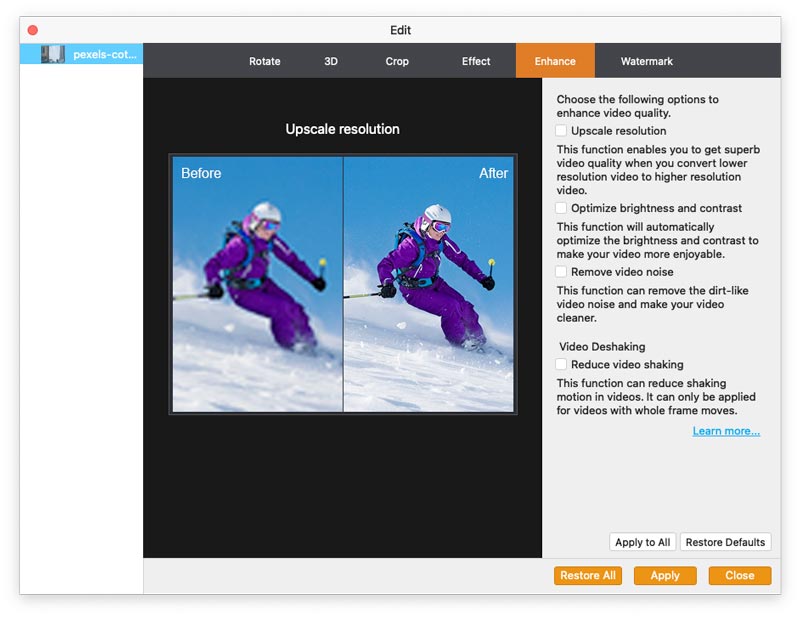
Enhance
Select the Enhance button to impro your video quality. In this function, you can upscale your video resolution, remove noise from your video, optimize the brightness and contrast of your video, and reduce your video shaking.
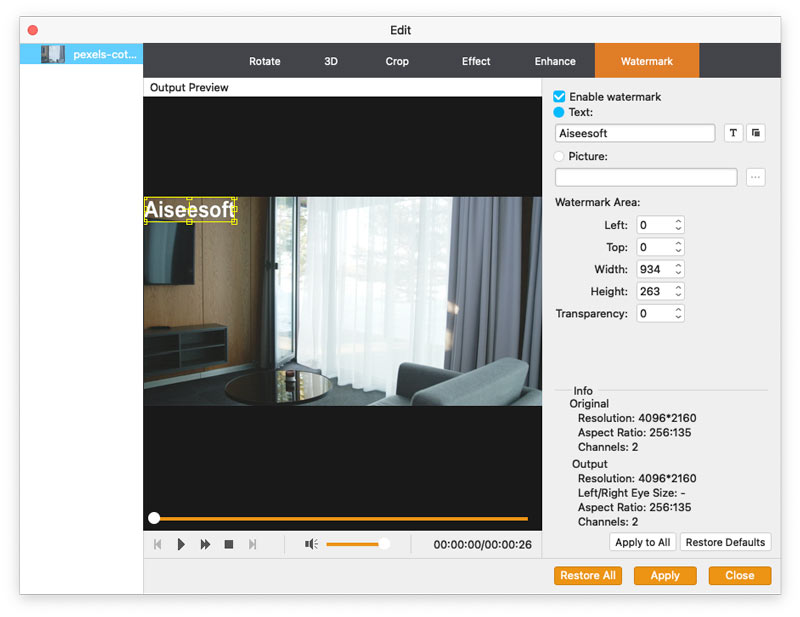
Watermark
If you want to add your own mark to the video, you can click Watermark to add text or images as the watermark on your video files.
Part 3. How to Add External Subtitles or Audio Tracks to Video
4K Converter for Mac provides you the option to add external subtitle and audio track to the 4K video. You can do this follow the steps below:
Step 1 Open 4K Converter software on your Mac. Click the Add File button to import 4K video(s) to this program.
Step 2 Click the audio track option to add or remove external audio tracks in the video. Click the Add Subtitle button to add the external subtitle to your 4K video.
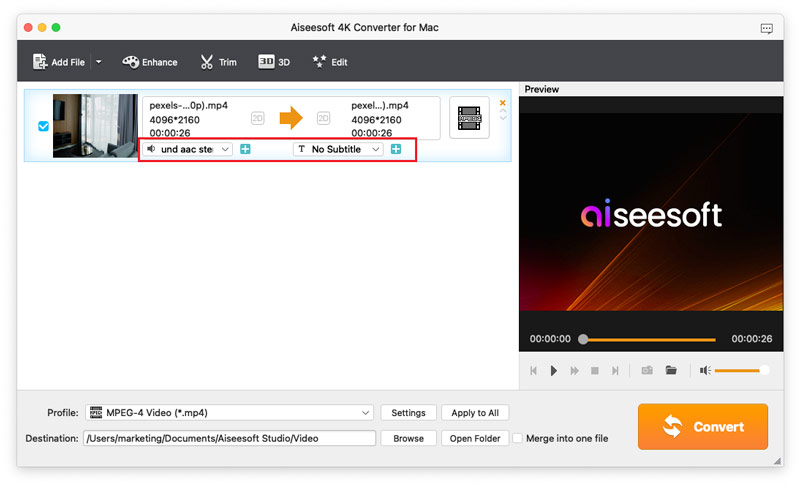
Step 3 Choose the suitable output video format and save the video file.
-
What You Should Know about 3D
This article shows what 3D is and conveys information about 3D TV and 3D glasses.
 Posted by Jenny Ryan | 24.08.2012
 -
How to Convert 4K to 1080p Videos
The best 4K video converter helps you convert 4K resolution video to 1080p video formats, such as MP4, MOV, AVI, WMV with excellent image quality and fastest speed.
Posted by Jenny Ryan | 24.08.2012 -
How to Convert Video to 4K
Here provides you the easiest way to convert your 1080P video to 4K. With only 4 steps and a few minutes, you can get the converted video with ease.
Posted by Jenny Ryan | 24.08.2012 -
How to Convert 4K UHD to 1080p HD Videos With Ease
The best 4K video converter helps you convert 4K resolution video to 1080p video formats, such as MP4, MOV, AVI, WMV with excellent image quality and fastest speed.
Posted by Jenny Ryan | 24.08.2012 -
Top 5 4K Video Editing Software for Mac and Windows
Here we list 5 best video editors that support 4K editing on Mac and Windows. If you want to edit your 4K videos, you will find your favorite 4K editing program here.
Posted by Jenny Ryan | 24.08.2012 -
Two Ways to Play 4K Videos & Blu-ray Movies on Windows/Mac
This article mainly introduces the best 4K media player and tells you how to play 4K videos and Blu-ray movies on PC and Mac with it.
Posted by Jenny Ryan | 24.08.2012 -
Best 5 4K Monitors in 2017
We list 5 hot 4K computer monitors for gaming and movies from 5 brands. Read before upgrading your computer to 4K display.
Posted by Jenny Ryan | 24.08.2012 -
Find Your Suitable 4K TVs from LG, Samsung, VIZIO, Sony, Seiki
As the best 4K TVs manufacturers, LG, Samsung, VIZIO, Sony and Seiki are playing a leading role for their suitable price and high quality.
Posted by Jenny Ryan | 24.08.2012 -
Ultra HD 4K TV unveiled by Sony at CES 2014, which one impressed you most
At CES 2014, Sony released several types of 4K UHD TV and we make a list here for your reference.
Posted by Jenny Ryan | 24.08.2012 -
How to Use 4K Camcorder to Make 4K Content
This article introduces the 4K camcorder released by Sony on CES 2014 - FDR-AX100, which can help you make your own 4K content.
Posted by Jenny Ryan | 24.08.2012 -
List of 4K Phones/Tablets Supporting 4K Playing and Recording
Here we list the main 4K smart phones and tablets on which you can play or record 4K videos.
Posted by Jenny Ryan | 24.08.2012
