Is Nexus Root Toolkit able to root my Nexus 5?
Nexus Root Toolkit is capable of rooting Nexus devices. How to use Nexus Root Toolkit? Rooting an Android smartphone or a tablet allows users to attain some privileged control over various Android subsystems. In other words, when you root your Android device appropriately, you are able to get more accessibility and make the better use out of the device. For instance, you can delete some built-in system apps or shut down some annoying advertisements during the gameplay on Android. In this article, we pay much attention to how to root Nexus 7/6/5 with Nexus Root Toolkit.
For most users who want to root Nexus 7/6/5 phones, they would like to choose Nexus Root Toolkit, a useful rooting choice that can both root your device and perform other features such as unlocking or relock it based on your needs. Users like this tool as this software is very simple and efficient to use. It can also selectively back up and restore your Nexus phone according to your need.
Just download Nexus Root Toolkit on your computer and connect your Nexus phone with computer via a USB cable. Allow the USB debugging on your phone. Wait for the computer to install the drivers and allow the USB debugging on your phone. Follow the guide in the next part to root your Nexus phone or tablet.
Step 1 Install and open Nexus Root Toolkit. Choose the phone model type and the Android edition. If you don't know about them, check "Settings" > "About phone" to learn more.

Step 2 In case the leakage of your phone data, you'd better back up Android. Nexus Root Toolkit provides a "Backup" button for you to choose.
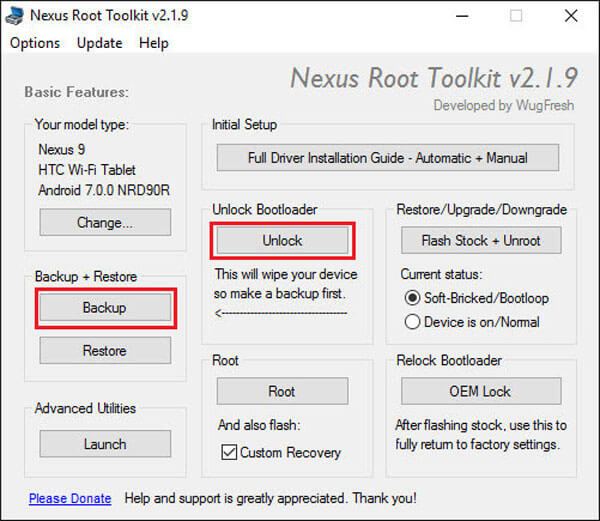
Step 3 Click "Unlock" to proceed the rooting. Unlock bootloader on your Nexus if asked. Your device will be going to perform a factory resetting.
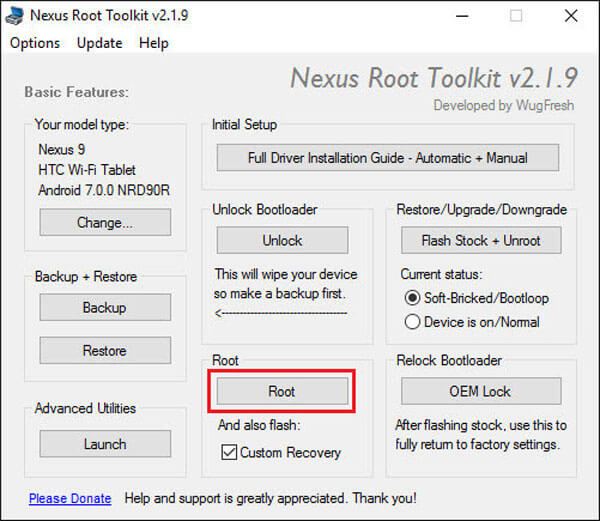
Step 4 You should choose whether you want to activate CWM on your Nexus device. Simply select "Do not flash CWM" and click "Root" button.
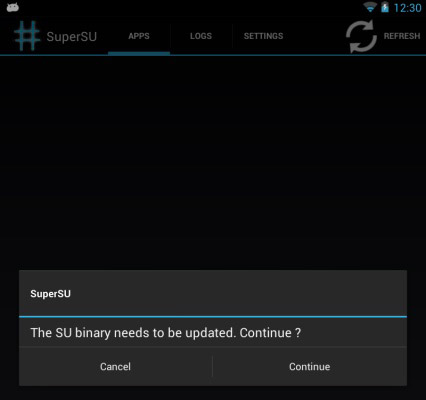
Step 5 Launch the SuperSU app on your Nexus and get ready to update the SU binary. When it is finished, launch the BusyBox app, and you will be prompted to grant the root permission. Confirm it for an installation.
Now, you have managed to use Nexus Root Toolkit to root Nexus phone. Check your Nexus device to check it out.
Designed to help Android users to back up/recover Android files, FoneLab for Android highly supports various brands of Android phones and tablets, such as Sony, Samsung, Motorola, HTC, HUAWEI and so on. Just with several clicks, this brilliant software helps you make a backup or recover Android contacts, photos, messages, and more.
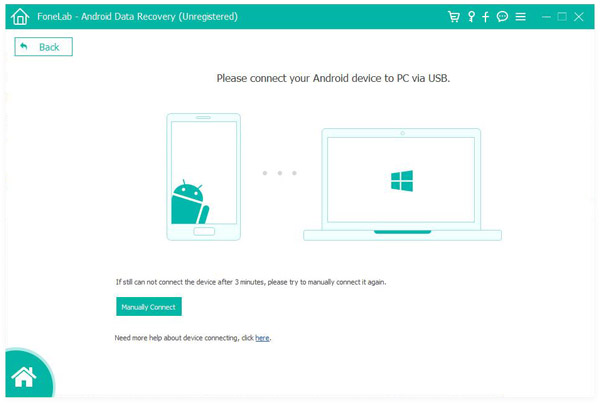
Step 1 Connect Android device to computer
Launch FoneLab for Android, and connect your Android phone or tablet to computer.
Step 2 Allow USB debugging
A pop-up message prompts you of allowing USB debugging. If not, you can manually trigger it.
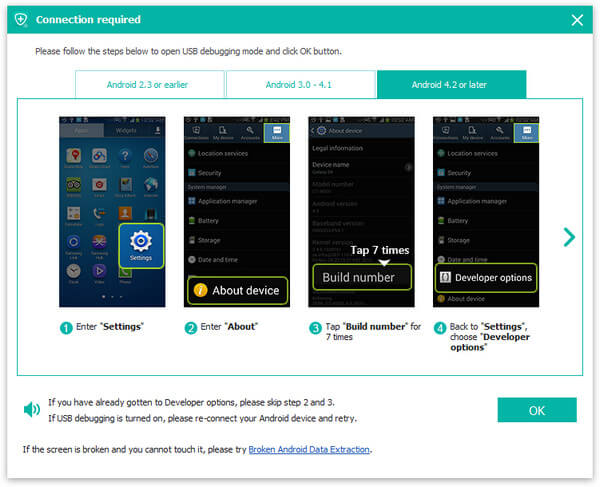
For Android 2.3 and former versions: Tap "Settings" app > "Applications" > "Development" > "USB debugging".
For Android 3.0 - 4.1: Navigate to "Settings" > "Developer options" > "USB debugging".
For Android 4.2 and later versions: Choose "Settings"> "About phone". Choose "Build number" for several times until the message of "You are under developer mode" shows. Return to "Settings" > "Developer options" > "USB Debugging".
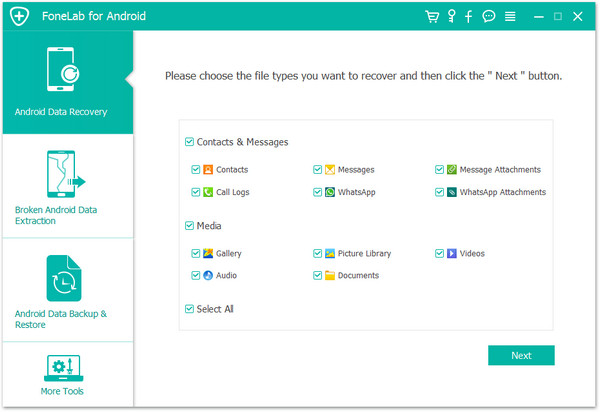
Step 3 Select Android files to back up
You will enter the window where you need to choose file types to back up, including contacts, messages, call logs, pictures, videos, audios, documents, etc. Tick what you need and hit "Next" button.
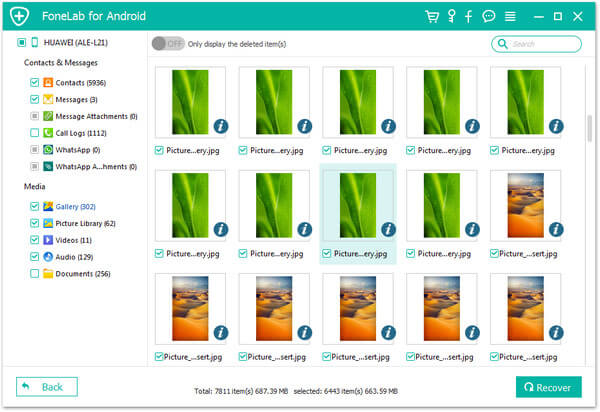
Step 4 Preview and recover Android files
Within moments, the scanning process will be done. You are able to preview the files before backup. Tick the files you want. When the selection is done, click the button of "Recover" and choose a final destination folder. Within seconds, you will find Android files you choose will be saved on your computer.
Can't Miss: How to Root Android


In this article, we mainly introduce Nexus Root Toolkit for rooting Nexus device. In addition, you can try FoneLab for Android we recommend if you want to back up or recover Android data.

December 14, 2020 18:00 / Updated by Iris Walker to Recover Android Data
 Root Explorer APK and Root Explorer Alternatives
This post will show you how to use Root Explorer APK to manage the file on rooted phone and get more free download Root Explorer APK replacements.
 How to Recover the Deleted Contacts on Android Phone
Get the access denied for user root@localhost error? Get the way to change or reset MySQL root password on your Windows, Linux, Unix, Ubuntu or Mac.
 Make an Android Backup with Phone Screen Broken
How can you make an Android backup with its screen broken? This article is going to introduce you with Broken Android Data Recovery. Read this article.
