Most iPhone users have the habit to sync their iPhone with computers. Maybe you are one of them. But when you change your computer to a new one or you lost the old one, you may face so many issues when you want to sync your iPhone to a new computer. The biggest problem is whenever you will connect your iPhone to another new device, it will erase all your data saved on iPhone because the iTunes on your new computer is blank with nothing there. In such a situation, you need to unsync your iPhone from iTunes firstly. If you don't know how to unsync iPhone from iTunes, or how to unsync photos from iPhone, you can read this article, where we list 2 ways for you to solve this problem.

Unsync Photos from iPhone
Some users want to know how to unsync photos from iPhone to original computer and sync it to a new one, here we recommend the best transfer software to you. Aiseesoft FoneTrans - iOS Transfer is the best way you can choose to sync your iPhone data to your new computer. With this software, you don't rely on iTunes to transfer photos, music, contacts or other files from iPhone or other iOS devices to computer anymore. And when you change an iPhone or change your computer, you won't be worried about how to transfer all your data and files to the new one. You can also regard this software as a manager which can help you manage your iOS device.
![]() 100% Secure. No Ads.
100% Secure. No Ads.
![]() 100% Secure. No Ads.
100% Secure. No Ads.
If you want to use this software, you can free download it, and then follow the next guides of how to unsync photos from iPhone.
First of all, you need to download FoneTrans iOS Transfer from Aiseesoft website. You can free download this software to try. Then install this software on your computer following the guides it gives to you.
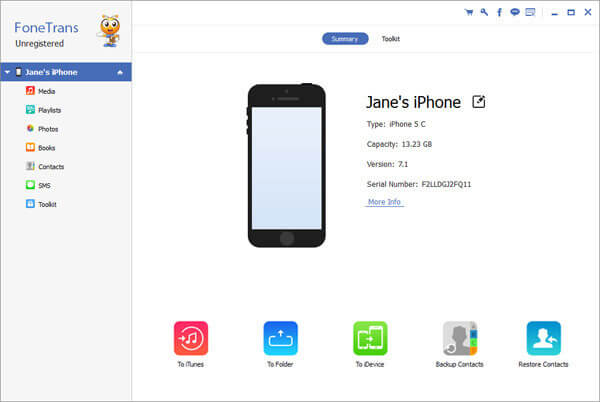
When this software is installed, you are able to launch it on your computer. At this point, you need to connect your iPhone with computer via a USB cable. When your iPhone is detected by Aiseesoft FoneTrans iOS Transfer, you can see your iPhone's name and basic information show in the interface.
Here you can see a list on the left part of interface. You need to click "Photos" in this list and choose which one you want to unsync. Wait for seconds and all the photos will be showed to you. If you want to unsync other files like media or contacts, you can also choose them on the left of the main interface.
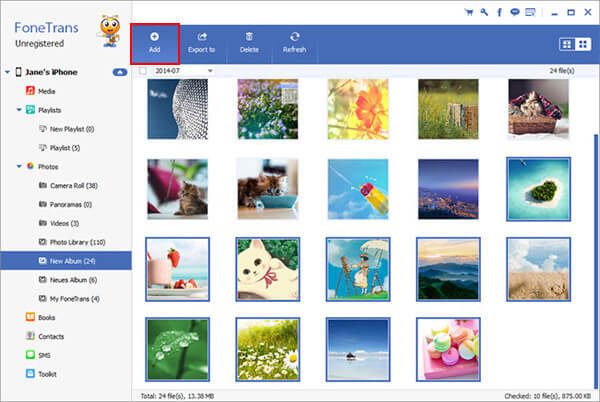
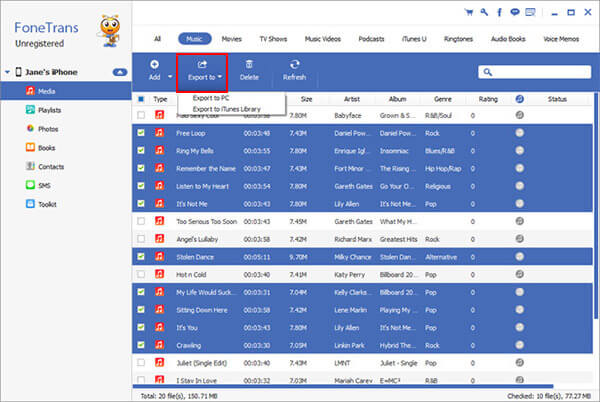
Now you need to select the photos you want to unsync from iPhone. When you finish selected, you need to click "Export to" button and choose Export to iTunes Library to copy these photos to iTunes but unsync iPhone from computer. You also need to choose the destination and destination folder where the file will be exported.
Just wait for a moment, all the photos you selected will be exported to your computer. And you finish the process of how to unsync photos from iPhone. And you can view these photos in the folder you chose just now.
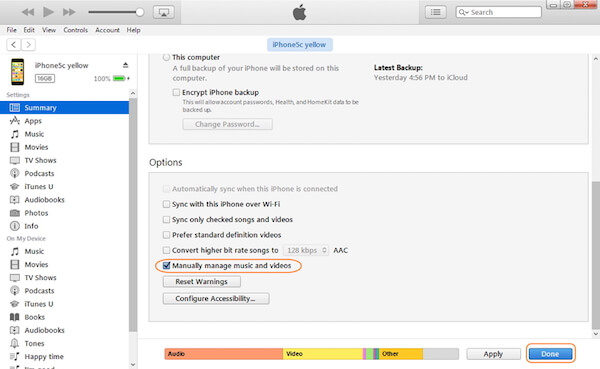
Transferring data from an old computer to a new one is also possible with iTunes. And most people choose iTunes to sync data. Except the best software we recommend to you, you can also finish the process of how to unsync photos from iPhone with iTunes manually. Generally speaking, manual management of your content is the default behavior of your iTunes. that means if you haven't change the settings, your iPhone won't sync any data to your computer with iTunes. If you have your iTunes automatically sync your data rather than manage your content manually, you can follow the next steps to learn how to unsync the iPhone from iTunes manually.
When you want to change computer and use another computer to manage your iPhone, you need to unsync your iPhone from the current computer firstly. In this article, we teach you how to unsync your iPhone from iTunes manually, as well as how to unsync photos from iPhone with the best software we strongly recommend to you. When you meet a similar situation, you can follow this article to unsync your device and then sync your data to a new one. Hope you can gain what you need in this article.
 Send Large Video Files from iPhone to iPhone, PC, Mac or Android
How to send a large video from iPhone directly? This post shares the best ways to send large video files from iPhone to computer, Android or another iOS device.
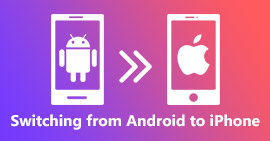 Switching from Android to iPhone - Transfer Android Data to iPhone
Is it hard to switch from Android to iPhone? How do I transfer from Samsung to iPhone? Switch from Android to iPhone and want to transfer all files to the iOS device? This post shows all useful information about switching from Android to iPhone.
 Top 5 Android to Android Transfer Reviews [Transfer Data from Android to Android]
Want to transfer data from Android to Android phone free but don't have a suitable Android to Android transfer? This post shows 5 great Android to Android transfer apps for you to choose from.
Manage & Backup iPhone Photos
Send Large iPhone Photo Files Unsync Photos from iPhone Upload iPhone Photos to Google Drive Delete Duplicate Photos on iPhone iCloud Photos to Android Delete Albums on iPhone
The best iOS Transfer software to manage and transfer iOS files from iPhone/iPad/iPod to your computer or reversely without running iTunes.
![]() 100% Secure. No Ads.
100% Secure. No Ads.
![]() 100% Secure. No Ads.
100% Secure. No Ads.
*Required field
*Please enter a valid email
