My friend's Lenovo computer was crushing unexpectedly, so he tried to run a system restore. Now, his laptop boots up, displays the Lenovo splash screen, shows the system restore status as 64% and then crashes. It then reboots and repeat this cycle… The Lenovo laptop stuck on system restore…
If you have problems in Lenovo recovery, then you just come to the right place. This article is your complete guide of how to create a Lenovo recovery disk on different Windows operating systems. So you can read and choose the specific solution for Lenovo recovery partition here.
Once your Lenovo computer is corrupted or damaged, you can repair it and get the Lenovo recovery download to solve the problem. Actually, there is a hidden partition for Lenovo Idea series models, which are laptops, desktops (IdeaPad and IdeaCentre) and more. Therefore, this section takes Windows 7/8/10 as examples to create Lenovo recovery disks or partitions. Just read and follow.
Create a Lenovo Recovery Disk Windows 7
Choose “Start” to get its menu. Find the search bar and enter “factory recovery” in the blank. Press the “Enter” key to get the result. Later, you can click the “Lenovo – Factory Recovery Disks” option.
When the “User Account Control” dialog pops up, click “Yes” to exit the window. Then choose “OK” when you are notified with “The recovery media you are going to create can only be used on this system. Do you want to continue?”.
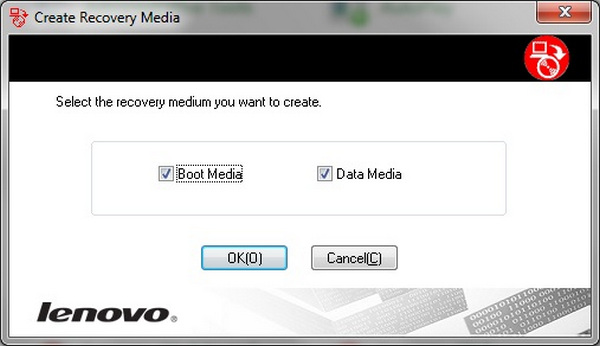
Mark before the “Boot Media” and “Data Media” option, then choose “OK” to move on. During this time, insert a blank DVD into your Lenovo computer. Set the optical drive and then choose “OK”. Wait for a while to complete the Lenovo recovery disk creation.
Create a Lenovo Recovery Disk Windows 8
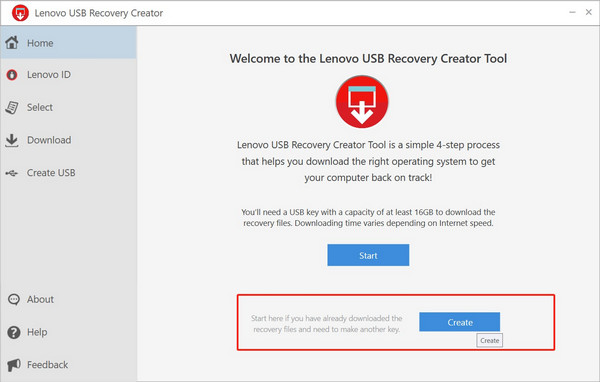
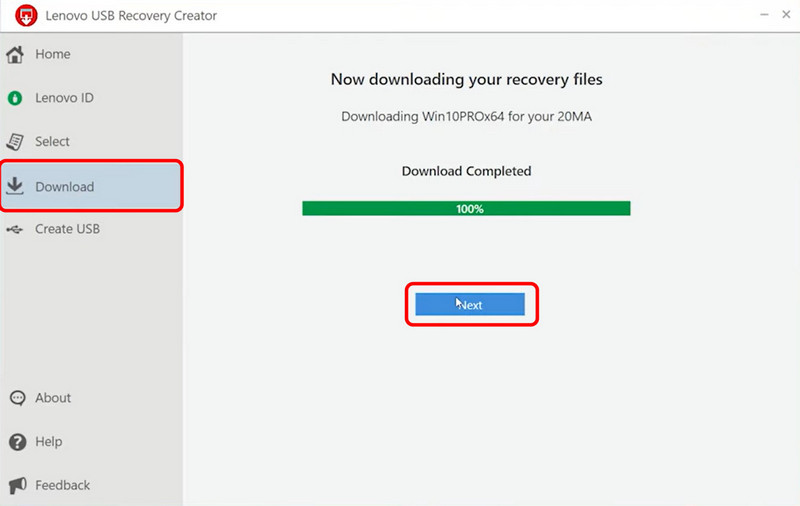
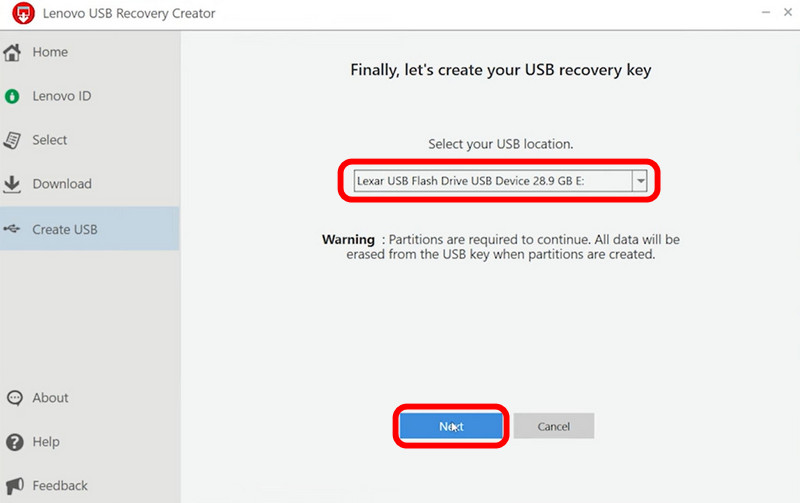
Prepare a USB drive no less than 16GB first. Then insert this USB drive to the Lenovo USB port. Hold and press "Windows" and "X" keys simultaneously. Later, click "Control Panel", "Recovery", "Advanced recovery tools" and "Create recovery drive" options in order from the popping-up list.
Choose “Yes” when you see the “User Account Control” window. Then click the small box before “Copy the recovery partition from the PC to the recovery drive”. Select your USB drive from the list. After that, wait for about an hour to complete the process. Remove the USB drive after you have created a Lenovo recovery disk. Also, this method can be used to recover your hard drive data from a dead or broken laptop.
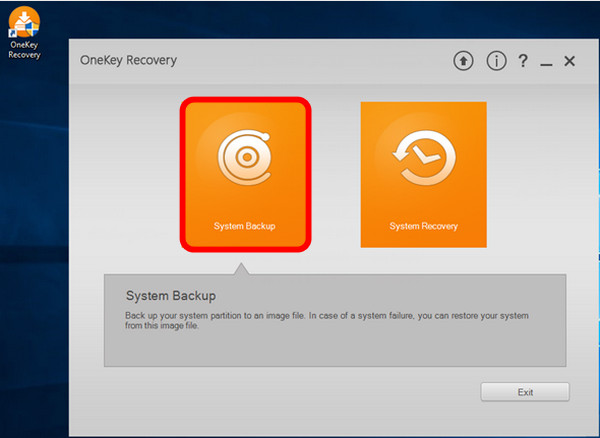
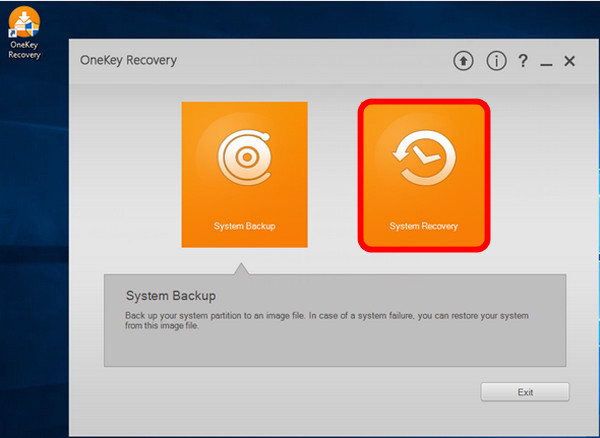
Find the “OneKey Recovery” software on your Lenovo computer. Well, you can head to “Start” and then choose “All Programs” to access this program. Choose the “Create Recovery Disc” option. Then click “Factory Default Recovery Disc”.
Prepare up to 3 DVDs or 17 CDs to back up all files stored in your Lenovo computer. Select a certain drive location. Then insert the DVD or CD you use. When the burning process of the first one is finished, you will be prompted to insert the second disk. Just do as it told. At last, keep all those DVDs or CDs safe.
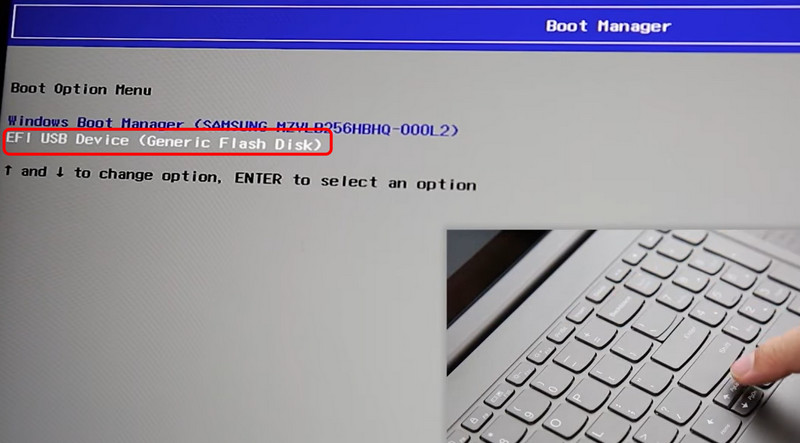
Put your CD or DVD in the tray on your Lenovo computer. Then, boot your computer. During the process, press “F12” several times until you see the “Boot Manager” screen. Later, choose “ODD” and press the “Enter” key to move on.
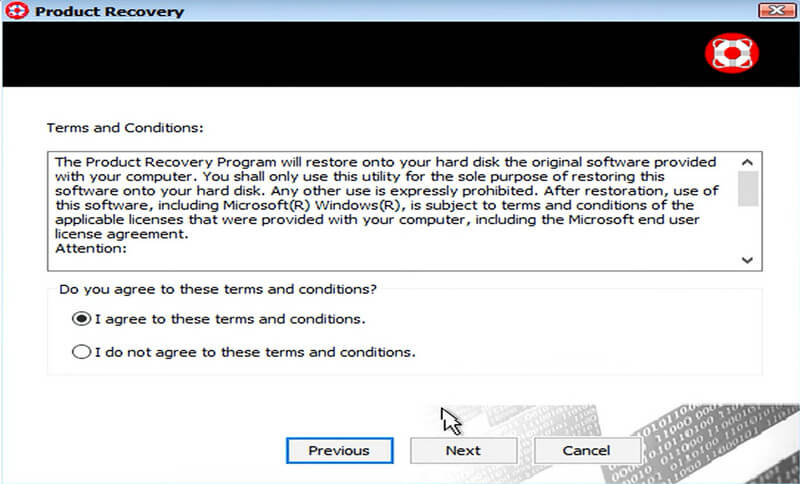
When you get a notification saying, “Press any key to boot from CD or DVD”, you can press any key on your keyboard to get the Lenovo recovery boot. Mark before “I accept the terms of the license agreement”. Then click the “Next” option. You will be prompted with several messages. Just click “OK” for several times. Well, the final step is to wait for the Lenovo recovery process to finish.
Note: If you use the Lenovo recovery partition instead, then you can recover the Windows operating system with the “Boot Menu” screen. Just choose “Full Restore”, “Factory Restore”, and “Restore” to save Lenovo from the factory settings.
A U disk can also be used to recover your Lenovo PC when no CDs are around.
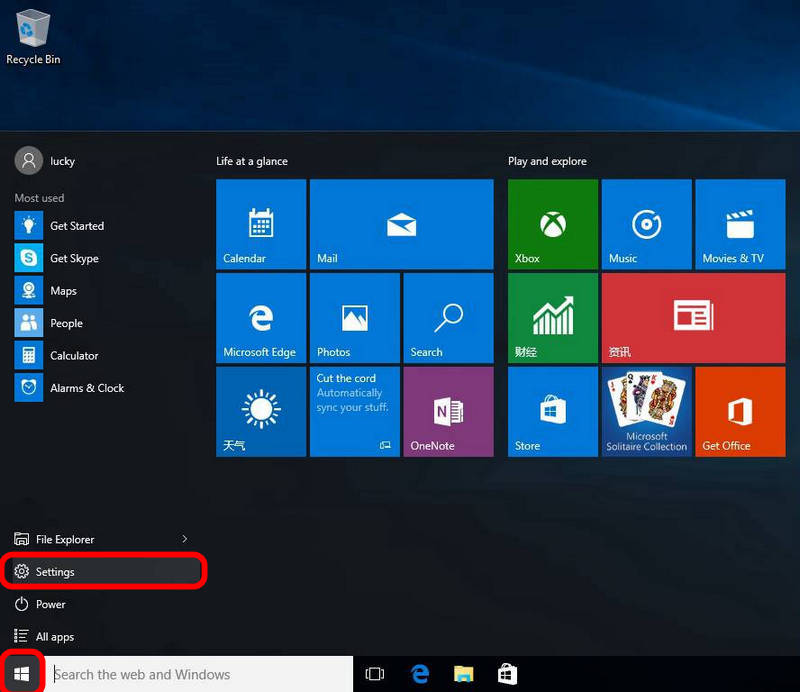
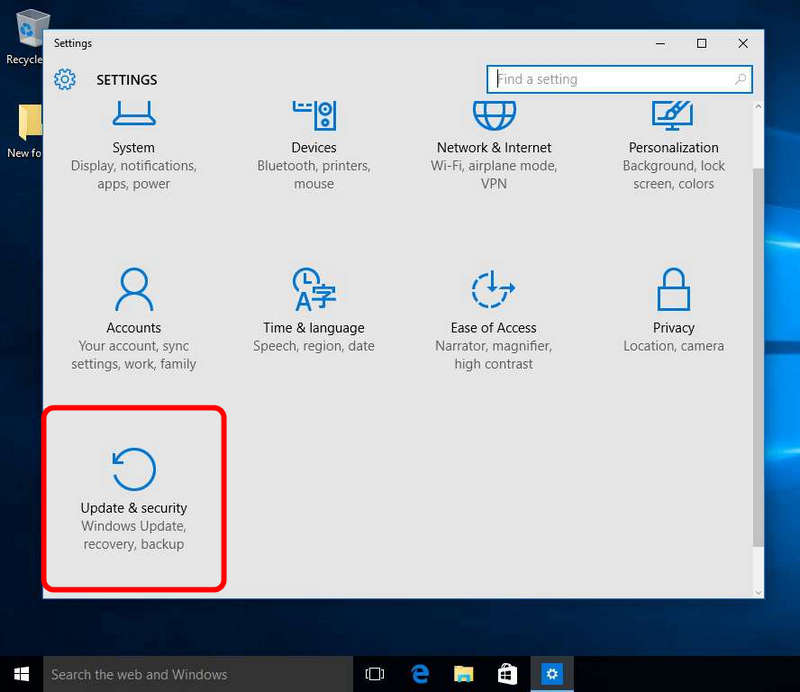
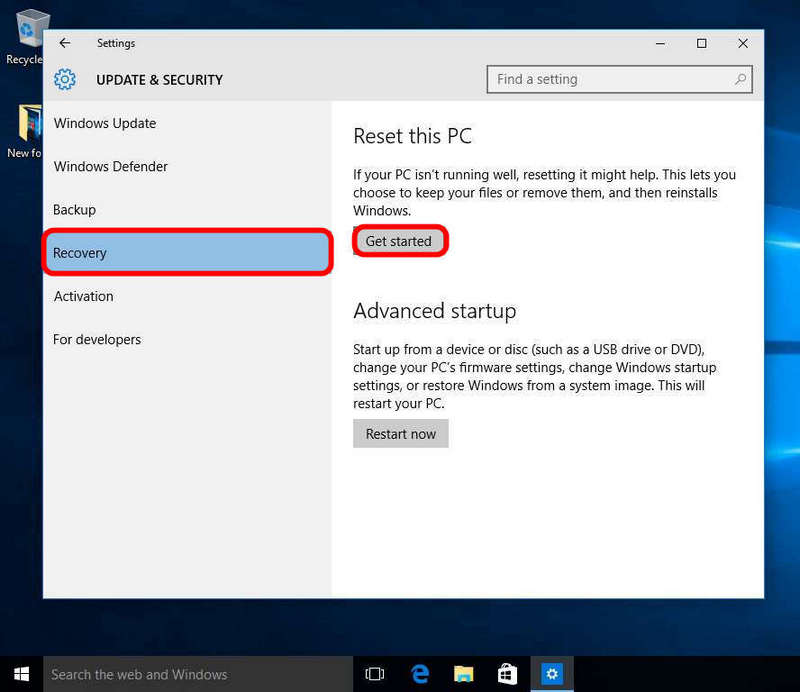
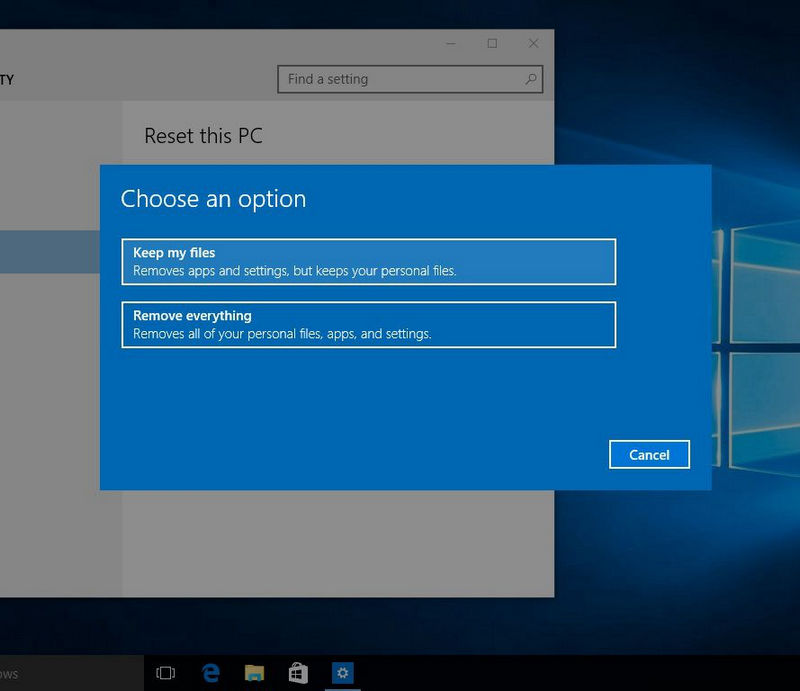
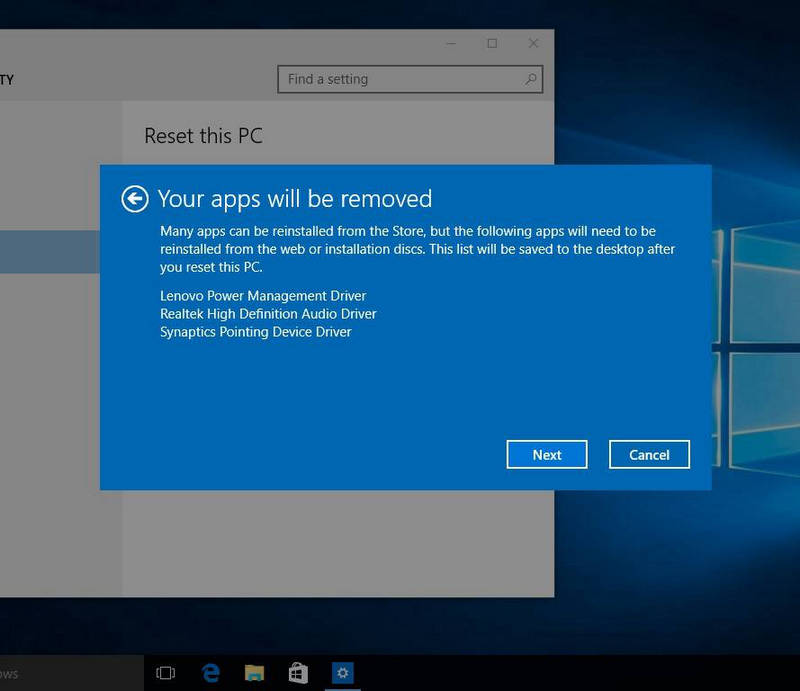
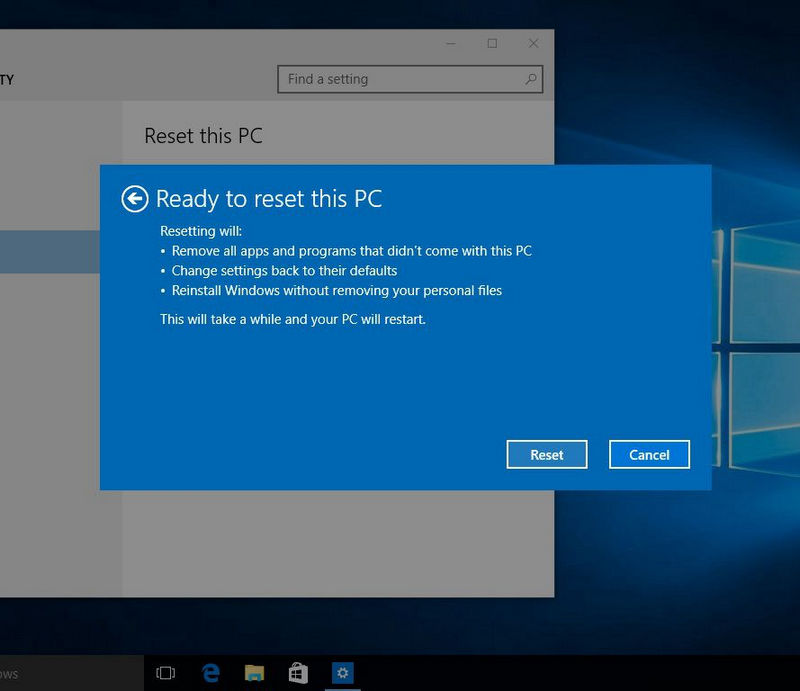
Well, if you don’t have a disk or USB, you can also use the tool that is inserted in Windows to factory restore your Lenovo in Windows.
Some Lenovo laptops are preinstalled with the OneKey recovery app. In that case, you can recover your Lenovo laptop just with one click.
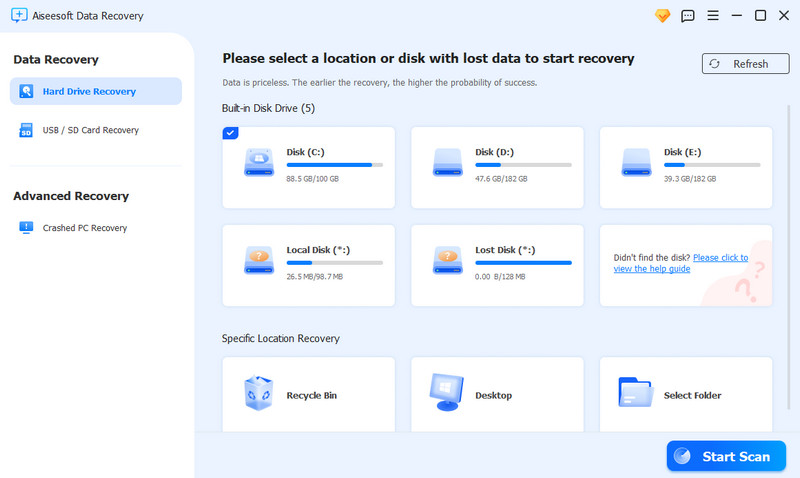
In spite of downloading Lenovo recovery media with hassle, you can use Aiseesoft Data Recovery to get an easier solution. What's more, this powerful data recovery software supports users to recover deleted or lost files from various digital devices, including computers, hard drives, memory cards, camcorders, etc.
![]() 100% Secure. No Ads.
100% Secure. No Ads.
![]() 100% Secure. No Ads.
100% Secure. No Ads.
Thus, you can backup and restore with several Lenovo recovery media such as recovery disk, DVD, Lenovo OneKey Recovery, etc. Furthermore, it is also supported to recover the selected files from your computer with no data loss.
Will my data remain after the Recovery?
No, your data inside the Lenovo PC will be all cleared once you launch the recovery process. However, you can use Aiseesoft Data Recovery to help you get your data back.
What if I need to recover to a different operating system version?
Well, this is a little bit tricky. First, you need to download your target OS installation package. Next, copy it and replace the current package in a recovery U disk. Then, follow its guide to complete it.
Can I get my data back after my Lenovo is recovered?
Yes, you may choose a data recovery tool like Aiseesoft Data Recovery tool to help you get your data back from the Lenovo recovery.
Conclusion
Last but not least, you had better back up important files in advance. If not, then you can free download Aiseesoft Data Recovery software to recover the specific file individually and quickly or you can take the official methods like Lenovo OneKey Recovery. Well, feel free to contact us if you still have any problems with Lenovo recovery backup and rescue here. We are glad to help you solve any problem whenever you need it.
 Top 5 SD Card Managers to Manage Android Files
When you need to manage files and folders in Android SD card, you can learn more detail about the best 5 SD card managers.
 Basic Knowledge and Recovery of LOST.DIR Folder on Android
What is LOST.DIR folder on Android? How to recover LOST.DIR files? This page shows you the full guide of the information about LOST.DIR and the solutions to get LOST.DIR recovery.
 How to Convert AVCHD Video to SD
Convert AVCHD video to SD – Guide about how to convert AVCHD video to SD video, like AVI, MP4, MOV, 3GP, etc. Free download AVCHD Video Converter to convert AVCHD to SD video.
Recover Various Data
1. Free Data Recovery Software
2. Recover Deleted Files in Windows
3. Recover Deleted Files from Recycle Bin Windows
4. Recover Permanently Deleted Emails
Aiseesoft Data Recovery is the best data recovery software to recover deleted/lost photos, documents, emails, audio, videos, etc. from your PC/Mac.
![]() 100% Secure. No Ads.
100% Secure. No Ads.
![]() 100% Secure. No Ads.
100% Secure. No Ads.
*Required field
*Please enter a valid email
