Perhaps you have images with large media sizes that make them difficult to send to email or share online. That is the common reason why people resize photos. Their purpose is to reduce the photo size to make it easier to share online or by email. Resizing allows you to alter the dimension of the image without cropping or cutting anything.
Fortunately, you do not need a particular program to handle this task. If you have a PowerPoint installed on your computer, this app should be enough. You read it right. Another way of using PowerPoint is resizing photos. That said, we will demonstrate the process how to resize a picture in PowerPoint. Read below to learn more and get the needed information.
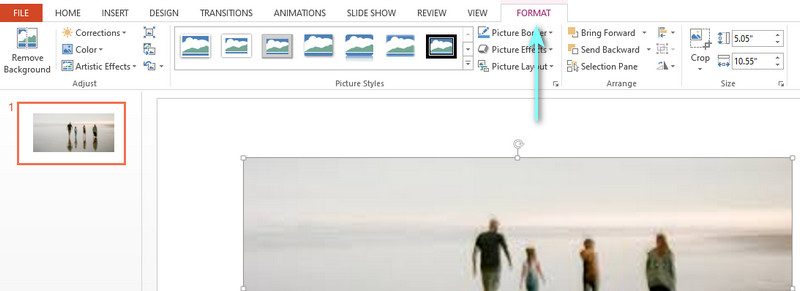
We are well aware of Microsoft Products like MS PowerPoint. We also know how popular their capabilities are for business and personal purposes. One smart way to use this program is to resize photos. Yes, aside from making presentations, it is possible to change the size of your photos using the crop tool and adjust the height and width or aspect ratio. You may also use this program to edit your photos by separating the subject from the background.
Moreover, you can use the color correction option or apply artistic effects. If you are interested in learning how to resize images on multiple slides in PowerPoint, you may refer to the steps below.

PowerPoint is one of the best alternative apps for resizing photos. On the other hand, it is best to learn about the advantages and disadvantages of the program. By then, you will know what to expect in using the program. Without further ado, check out the pros and cons of using PowerPoint for resizing photos.
Pros of Using PowerPoint To Resize Photos
PROS
CONS
If you are looking for a simple yet effective tool to resize and optimize photos, you can depend on Aiseesoft Image Upscaler Online. This tool works well with photos that are blurred after resizing a photo. In a sense, you can restore the lost color or sharpness of the photo using this program. Moreover, it enlarges small pictures without distorting them.
Since it is an online program, you do not have to install a program. You can use it anytime, anywhere, provided you are connected to the internet. Aside from that, the tool offers you various magnification tools for better image quality. You can apply up to 800% magnification level according to your requirements. The best part is that artificial intelligence technology is applied for users' convenience.
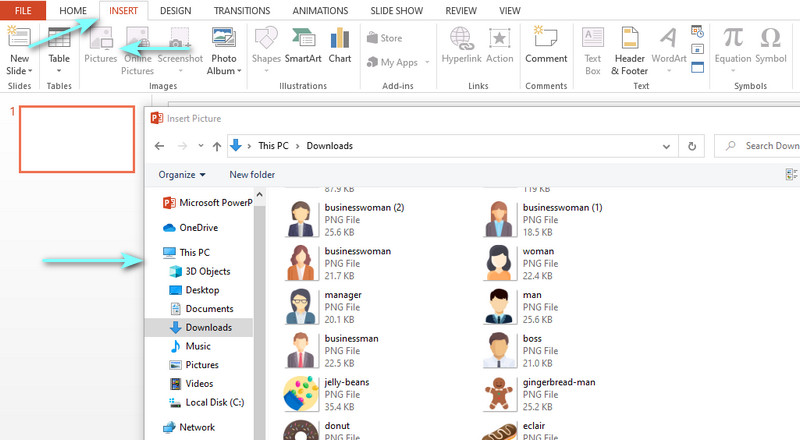
Now, here is a step-by-step instruction on how to resize a picture in PowerPoint.
Begin by opening your preferred browser on your computer. From your browser's address bar, type the link of the tool to enter its main page.
From the main page, you should see an upload button. Click on the Upload Image button, and your file explorer will appear. Optionally, you may set the magnification level in advance. Now, select and double-click on your target photo to upload.

After loading the photo into the program, it will be automatically upscaled according to the magnification you set. If unsatisfied, you can adjust the magnification until you get your desired outcome.
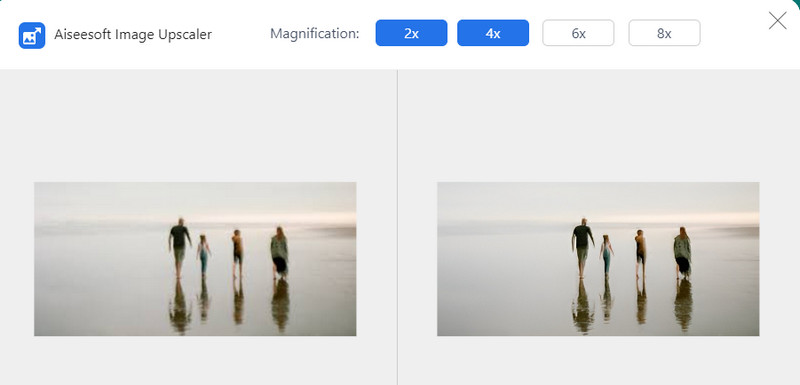
Once you are delighted with the result of your photo, hit the Save button at the bottom right corner of the editor. The photo will be downloaded to your PC automatically. To preview it, simply navigate to the Download folder of your computer.

How to resize images on multiple slides in PowerPoint?
Boot up the app on your computer and add a photo per slide of the PowerPoint. After that, resize each photo from each slide. When you are done, go to the Export section from the File menu. Then, choose a format, set a saving path, and select All Slides from the dialog box that will appear.
How can I avoid the distortion of the photo when resizing it?
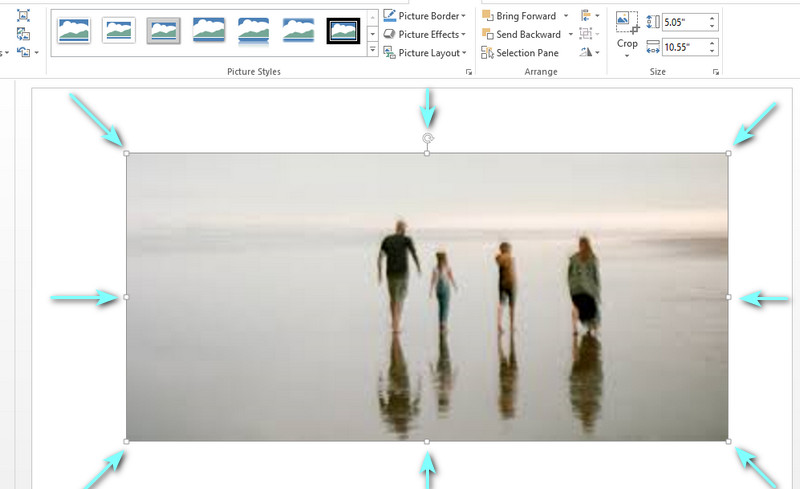
The only cause of distortion when resizing a photo in PowerPoint is when you use the midway handles of the photo to resize. Hence, always use the corner handles of the photo to maintain proportions, and keep the center in the same place. You can also apply this method in Word and Excel.
Can I keep the original quality of the photo after resizing it in PowerPoint?
Yes. Provided that there is no drastic change in the photo, you can keep the quality of the photo. However, say you enlarged an image that is too small, there is no guarantee that the quality is preserved.
Conclusion
PowerPoint is not only a program for making presentations. You can also use this program to edit photos, granting you abilities to resize and crop photos. Therefore, you can refer to the above content if you wish to learn how to resize a picture in PowerPoint. Moreover, an additional program is reviewed to help you upscale photos.
 Top 4 PowerPoint Viewer Online/Windows/Mac
How to open a PowerPoint file without PowerPoint app? Here are 4 PowerPoint viewers (2007, 2010, 2013, 2017, etc.) for Windows/Mac/online to do it easily.
 Simple Guide to Make a Timeline in PowerPoint [The Easiest Way]
How to make a timeline in PowerPoint? You can learn how to create a timeline in PowerPoint 2007 and make a timeline in PowerPoint 2010/2013/2016 in this post.
 Ultimate Guide to Remove Picture Background in PowerPoint
Can I make a picture background transparent in PowerPoint? How do I remove background in PowerPoint? Learn how to remove picture background using PowerPoint.
Change Image Resolution
Increase Image Resolution on iPhone Increase Image Resolution Convert Image Resolution from Low to High Online Increase Image Resolution in Photoshop Increase Photo Resolution Free Online Make Photo Become HD Change Picture Resolution on Android Upscale Image to 4K
Video Converter Ultimate is excellent video converter, editor and enhancer to convert, enhance and edit videos and music in 1000 formats and more.
![]() 100% Secure. No Ads.
100% Secure. No Ads.
![]() 100% Secure. No Ads.
100% Secure. No Ads.
*Required field
*Please enter a valid email
