Unexpected data loss situations are inevitable due to wrong operations or other reasons. It can be frustrating and stressful when you lose valuable files, especially on your Mac. The good thing is, with the right data recovery tools and techniques, you still have a big chance to retrieve your deleted and lost data from your Mac.
This article gives you a complete guide to recover Mac-deleted files. When you accidentally delete important files on a Mac, don’t panic, follow these steps to find them back.

There are several proven methods to recover deleted files from a Mac, even in some cases that they seem to be permanently deleted. However, the final success rate of your Mac data recovery depends on various factors, including the specific file types, how the files were deleted, how long ago they were erased, and backup existence.
Once you notice that some important Mac files are deleted, you should immediately start the recovery. That ensures you have a higher success rate to recover deleted files on a Mac. Moreover, you should avoid using the computer. Newly created data may overwrite the deleted Mac files. If you just accidentally remove files through the regular deletion, you can easily get them back from the Trash.
If the data loss is caused by a sudden system crash, damaged Mac disk, corrupted system updates, software conflicts, and other reasons, the recovery may become more challenging. If you have a recent backup that contains all the deleted Mac files, you can then easily restore them from the backup. That can be the easiest and most reliable method.
Similar to the Recycle Bin on Windows PCs, the Trash Can on your Mac can work as a recently deleted folder to store your erased data. The temporary storage location allows you to easily recover accidentally deleted files.
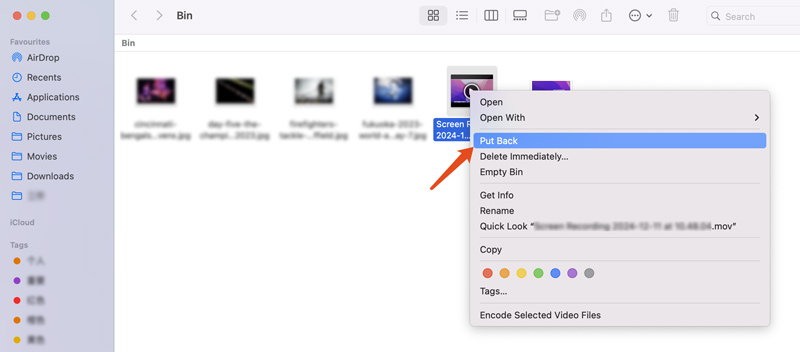
When you mistakenly delete a file on your Mac, you can click the Trash or Bin icon on the bottom Dock to access it. Browse through the contents of the Bin or Trash Can to find the target file you want to recover. Right-click it and choose the Put Back option to easily retrieve the deleted Mac data. You are also allowed to select several files and restore them at once.
Do you have the habitual operation to directly empty your Mac’s Trash Can after deleting data, especially when you manage the storage space and remove many files? In that case, data recovery software can be a lifesaver.
With so many associated programs, you may find it hard to quickly locate one that best suits your recovery needs. Considering that, I would like to introduce you to the reliable Aiseesoft Data Recovery. Compared to competitors, it provides you with a higher success rate of recovering permanently deleted files on your Mac.
![]() 100% Secure. No Ads.
100% Secure. No Ads.
![]() 100% Secure. No Ads.
100% Secure. No Ads.
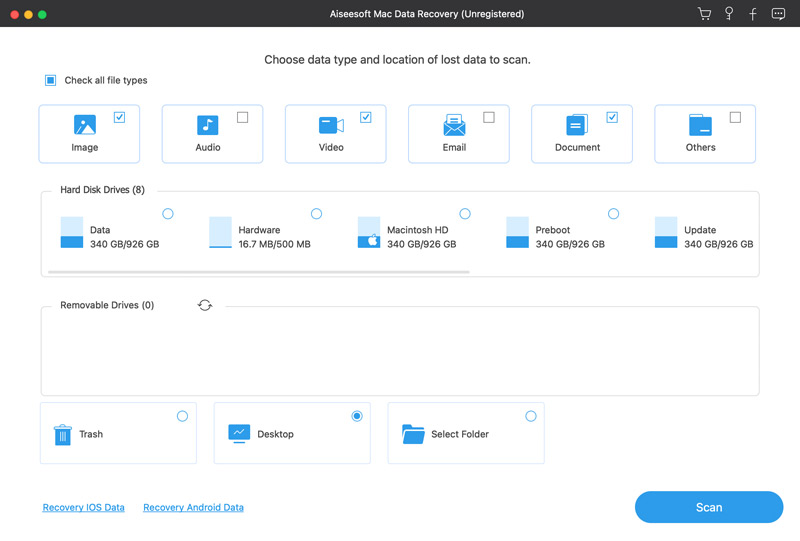
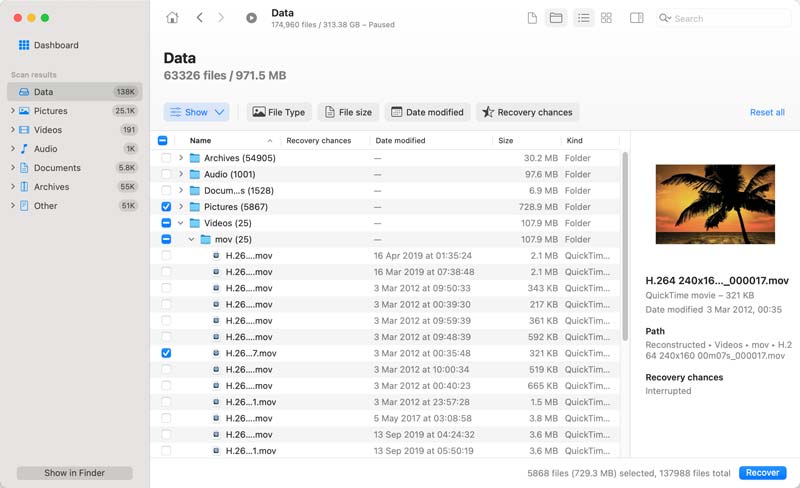
This specially designed data recovery software for Mac supports various common data types. When you lose some important Mac files in different data loss cases, you can rely on it to rescue them with ease. It offers a deep scan function to ensure you can find these deleted Mac files. Besides the internal Mac hard drive, it allows you to recover deleted files from an external SD card or USB device.
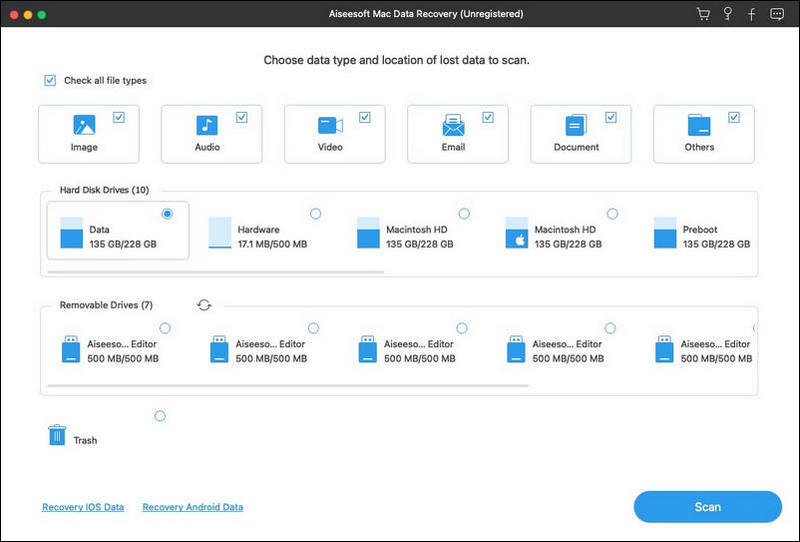
If you need to retrieve deleted files from an SD card, you need to insert it into your Mac and make sure it is detected. Then, select the SD card under the Removal Drivers and start scanning. As you can see, it also enables you to recover deleted Mac files from the Trash, Desktop, or selected folders.
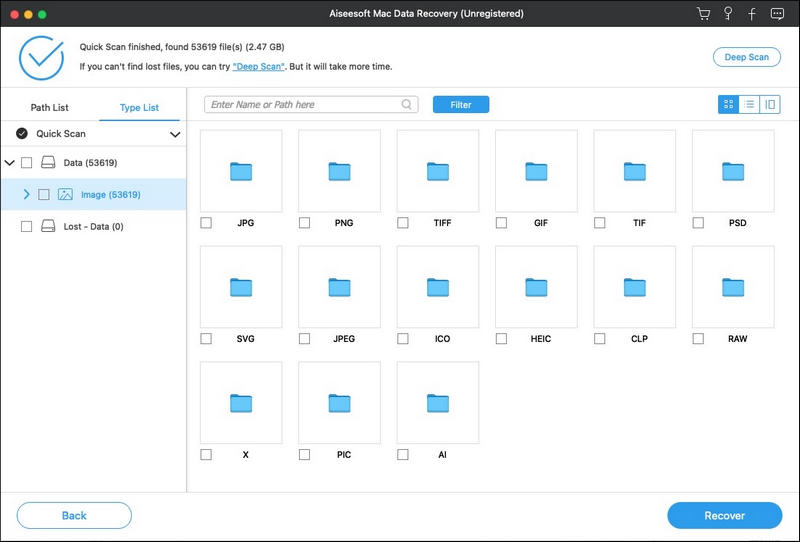
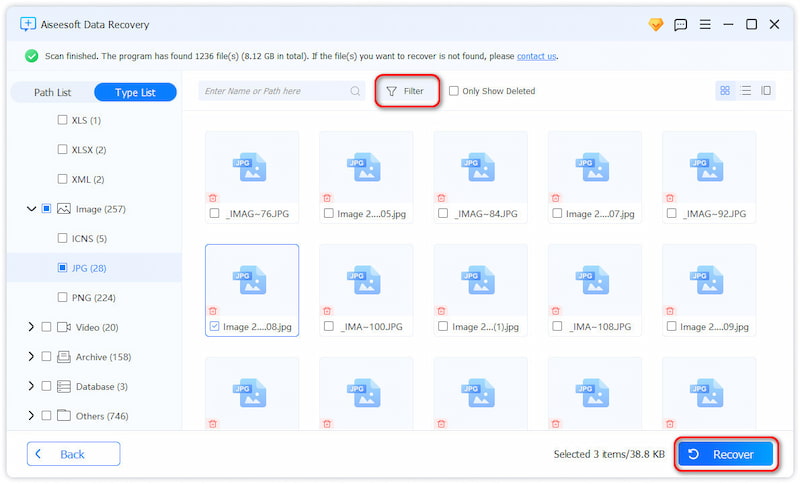
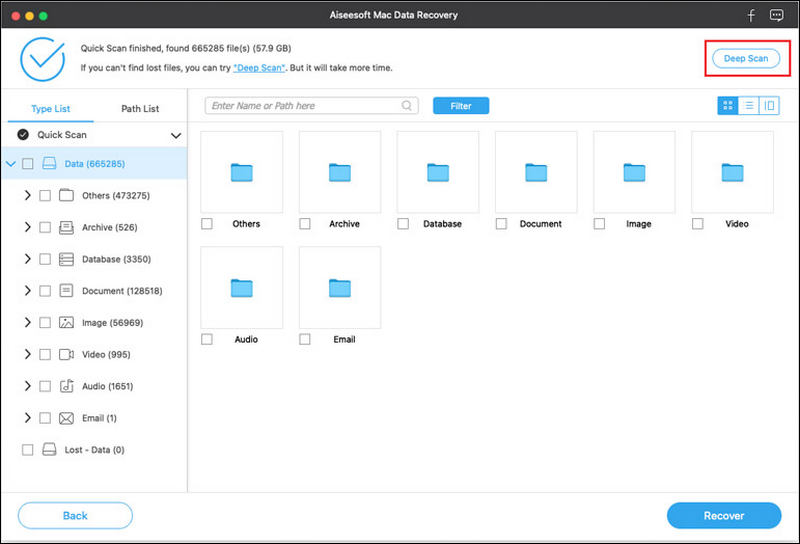
If you can’t find target files from the scan results, you should turn to deep data scanning. Click the Deep Scan button in the top-right corner of the window. Compared with quick scanning, deep scanning takes a much longer time to finish.
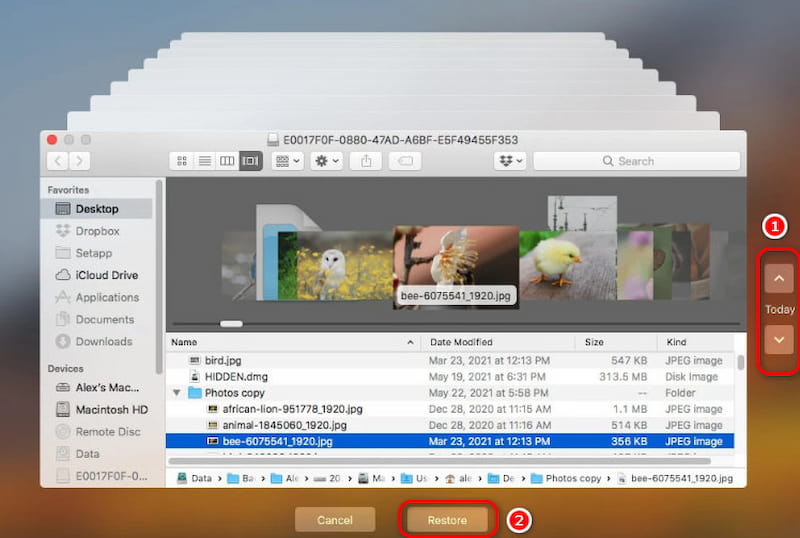
Your Mac has a default backup tool called Time Machine to back up various commonly used data, such as photos, videos, documents, and settings. It lets you create regular backups of your entire system, including files and folders. If you have Time Machine set up, you can easily restore deleted Mac items using it.

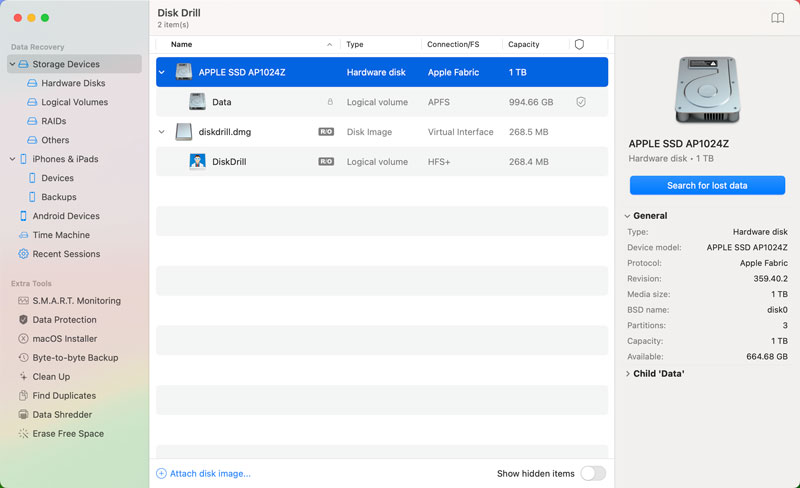
If you don’t have a suitable Time Machine backup to restore deleted files from your Mac, you may still need to perform the Mac data recovery using a third-party tool like Aiseesoft. Disk Drill is another powerful data recovery software for both macOS and Windows. Like Aiseesoft, it allows you to restore deleted and lost files from different storage devices, including the internal hard disks of your Mac and PC, external hard drives, SD cards, and more.

Download its Mac version and install it by following the setup instructions. Then, open Disk Drill and take the following guide to retrieve your deleted Mac files.
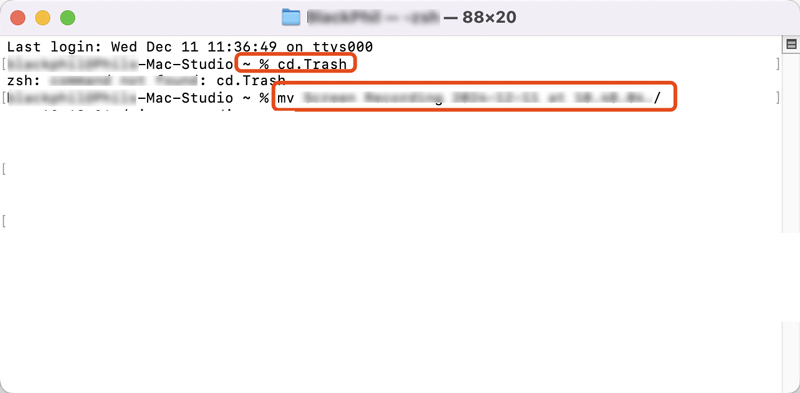
Recovering deleted files on a Mac using Terminal requires technical expertise and may potentially damage your system if not used correctly. So, you’d better use specialized data recovery software or Time Machine to retrieve Mac data.
Question 1. Where do Mac files go after being deleted?
Once you delete a file on a Mac, it will be initially moved to the Trash. The Trash Can on your Mac is a temporary holding area where you can restore these mistakenly deleted data. It will keep your deleted files for about 30 days in case you change your mind. When you empty the Trash, all files in it will be marked as deleted. In that case, they are not immediately erased from your hard drive. They are not permanently removed until they are overwritten by new files. This is the key reason why data recovery tools still have a chance to recover files from a Mac, even after they are deleted from the Trash.
Question 2. Does MacBook have recently been deleted?
Yes, Apple designed a Recently Deleted folder for Macs and iOS devices to recover deleted files. However, unlike other systems, a MacBook only has a Recently Deleted folder in specific apps like Photos, Messages, and Notes. When you delete a picture, message, or note, you can navigate to the Recently Deleted folder to restore it with ease. These deleted data will stay in the Recently Deleted folder for 30 days. For other types of deleted files, try recovering them from the Trash Can.
Question 3. Why is there no delete key on my Mac?
You may feel confused that there is no dedicated Delete key on your Mac keyboard, especially when you are accustomed to Windows keyboards. When you press Delete on a Mac, it moves the cursor back one character like a backspace. Unlike Microsoft, Apple encourages you to use key combinations to effectively perform related deletions. You can press Command + Delete to move a file to the Trash and use Fn + Delete to erase characters to the right of the cursor.
Question 4. Can I recover Mac deleted files using Disk Utility?
No, Disk Utility is not designed for data recovery. It is mainly used to manage and repair disk volumes on a Mac. If you have a suitable Time Machine backup, you can recover lost data from it. Otherwise, you need specialized data recovery software to retrieve deleted or lost files from your Mac.
Conclusion
Try using the five helpful solutions in this guide to recover Mac-deleted files. You should select a reputable software like Aiseesoft Data Recovery with a high success rate. To avoid future data loss, you’d better regularly back up these important Mac files.
 How to Sync/Recover (Deleted) Notes from iPhone to Mac
What is the best software for creating an HTML email signature? How do you make a professional email signature? Check the top 7 email signature generator tools.
 8 Best Mac Undelete Software to Restore Deleted Files [2025 Updated]
What is the best Mac undelete tool? Don't know how to choose suitable Mac undelete software to restore your deleted files? Just read and follow this article to get find what you need.
 Back up Photos on Mac in the best 3 Ways
How do you reduce the size of a video to email it? How can I reduce the MB size of a video file? Learn three ways to compress videos for smooth email delivery.
Recover Various Data
1. Free Data Recovery Software
2. Recover Deleted Files in Windows
3. Recover Deleted Files from Recycle Bin Windows
4. Recover Permanently Deleted Emails

Aiseesoft Data Recovery is the best data recovery software to recover deleted/lost photos, documents, emails, audio, videos, etc. from your PC/Mac.
![]() 100% Secure. No Ads.
100% Secure. No Ads.
![]() 100% Secure. No Ads.
100% Secure. No Ads.
*Required field
*Please enter a valid email
