Important files on your Mac’s SSD can get lost, which can be stressful if you don’t have a recovery plan. Fortunately, Apple’s native backup utility, Time Machine, is a solid way to protect and restore data when needed. Upgrading and moving to a new SSD, accidentally deleting stuff, or seeing your system fail, Time Machine makes sure you can fix everything relatively easily. In this article, we’ll take you through everything you might need to know about how to restore an SSD from Time Machine, from what you need to know about what Time Machine can do for Mac SSD data to back up your system after you installed a new SSD well explore it all! We will also guide you through the step-by-step process of restoring your SSD. In the end, you will have a clear picture of how to maintain the safety of your Mac data and revive it when needed.
SSD drives are an important component of modern Mac devices because they outperform traditional hard drives (HDDs) in performance, efficiency, and reliability. However, like all storage devices, SSDs are subject to data loss through accidental deletion, hardware failure, or system crashes. Regular backups will keep important files, applications, and system settings secure.
Apple includes Time Machine, an internal backup solution for macOS to safeguard user data. Time Machine automatically backs up Mac users' files, so when you need to restore a lost or previous version or migrate to a new SSD, you can do so with relative ease. Time Machine, a backup software application in Mac OS X, provides data protection for Mac users. Here’s what it does for your SSD:
• Automatic Backups:Time Machine automatically backs up your files, giving you a recent copy of your data.
• File Versioning:If you accidentally modify or erase an important file, you can restore earlier iterations.
• System Full Restore:If an SSD fails or a new SSD fails, you must install it. Time Machine can restore the full system, including macOS, apps, and settings.
• Migrate to a New SSD:Upgrading your Mac’s SSD is a great way to maximize its speed and performance gains. If you have a spare SSD or want to connect an SSD to your Mac via an external drive, Time Machine helps you migrate everything to the new SSD without a hitch.
Using Time Machine, Mac users can restore lost data, undo changes, and switch to new hardware, guaranteeing that their SSD remains a dependable storage location.
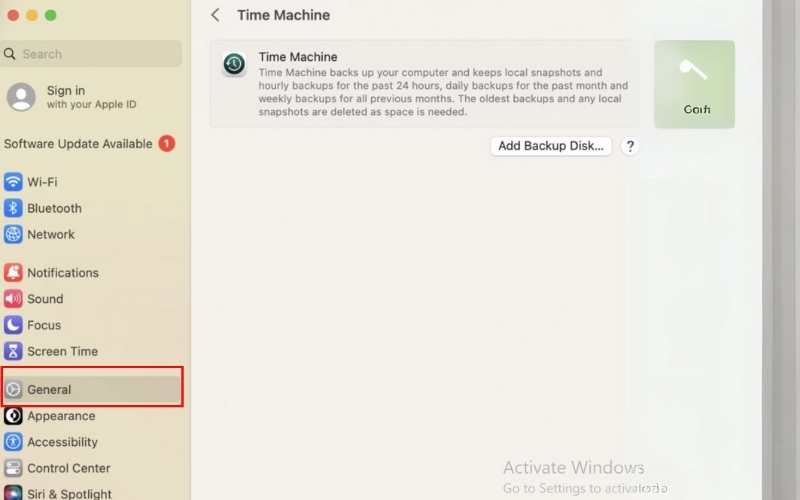
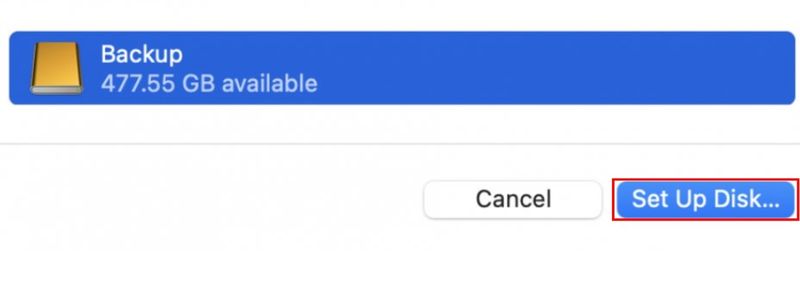
When you install a new SSD on your Mac, setting up a Time Machine backup is important. By automatically backing up copies of your files, applications, and system settings, Time Machine makes the backup process easy. It helps with seamless recovery across Time Machine: restoring or creating a backup. Once you’ve installed a new SSD, there are two ways to go: Restore from a previous Time Machine backup or create a new backup to protect any new data. Understanding Time Machine about an SSD upgrade properly will keep your Mac safe and all your files available when it is necessary to get them back.
How to Backup from the Time Machine After Install New SSD
Note:
• Your Mac may ask whether you want to erase the storage device for use with Time Machine, erase it, or choose a new backup disk or volume.
• Your Mac may prompt you to decide whether this computer should own existing backups from another computer.
• Enabling Encrypt Backup prompts you to set a backup password to help protect your backup from unauthorized access. You'll need this password if you try to restore files from the backup later.
Restoring a Time Machine backup is the best option to move data to a new drive, reinstall macOS, or recover deleted files from your SSD. Apple's built-in backup tool, Time Machine, guarantees a smooth restoration process, allowing users to restore their whole system or specific files or apps easily.
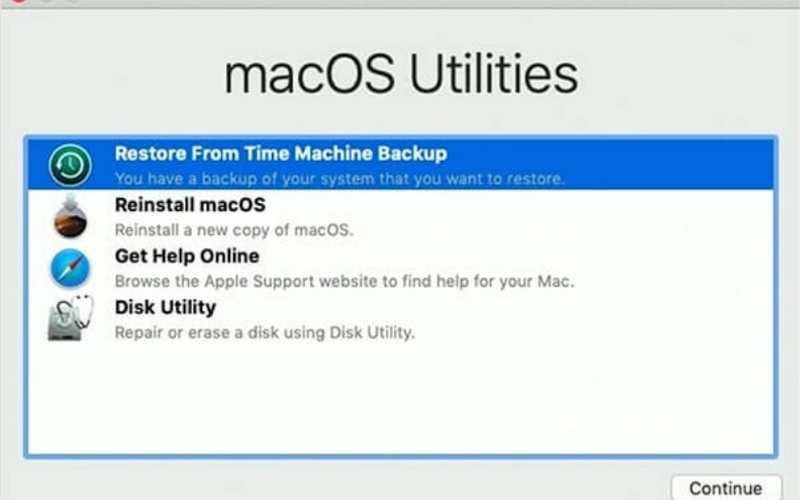
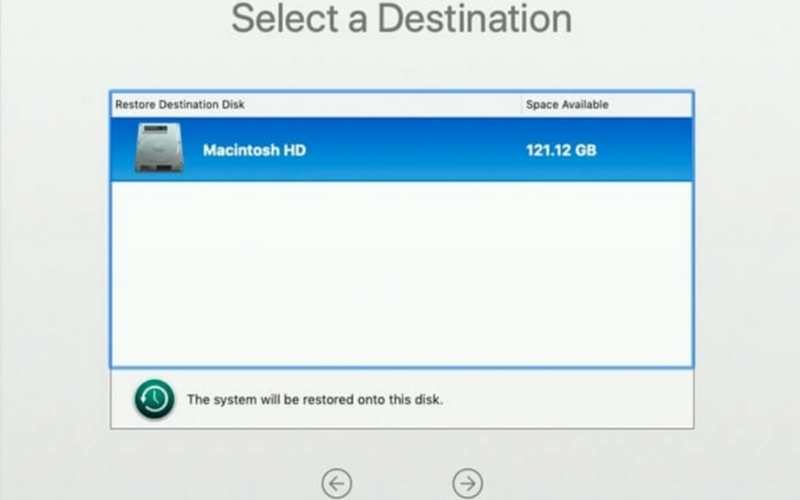
How to Restore an SSD From a Time Machine
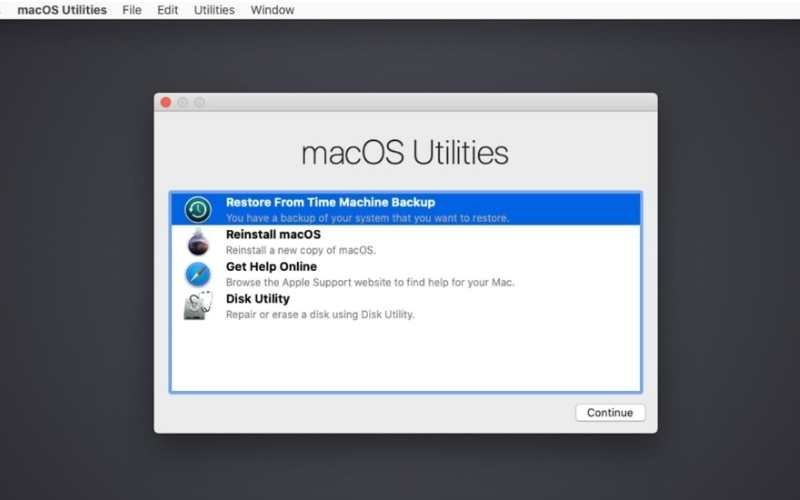
Following these steps, you can easily restore an SSD from a Time Machine backup, restoring your Mac to its previous state without losing any essential data.
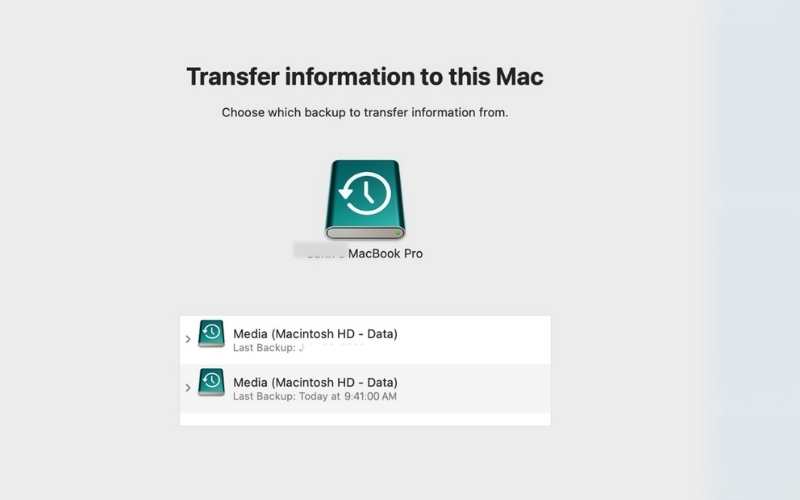
After following our guide and upgrading your Mac with a new SSD, you’ll want to restore your data using Apple Time Machine, the company’s built-in backup solution. Time Machine allows you to smoothly transfer files, applications, and system settings to your new drive. Whether replacing a failing SSD or upgrading to a larger, faster one, restoring from Time Machine simplifies the process.
How to Restore From Time Machine to New SSD
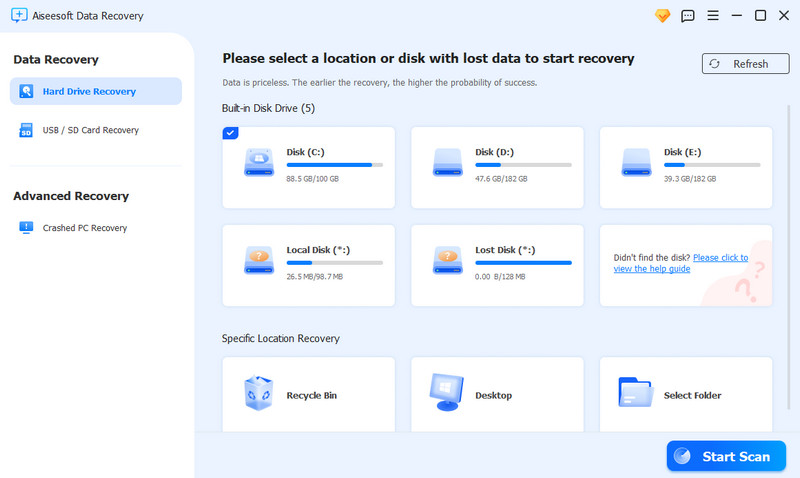
If you’ve lost important data from your SSD and don’t have a Time Machine backup, don’t worry — Aiseesoft Data Recovery can help you retrieve lost files quickly and efficiently. Whether your SSD has been accidentally formatted, suffered a system crash, or experienced corruption, this powerful tool can scan and recover lost data, ensuring you don’t lose valuable files permanently. Let us have a look at how to restore an SSD without Time Machine using Aiseesoft Data Recovery:
![]() 100% Secure. No Ads.
100% Secure. No Ads.
![]() 100% Secure. No Ads.
100% Secure. No Ads.
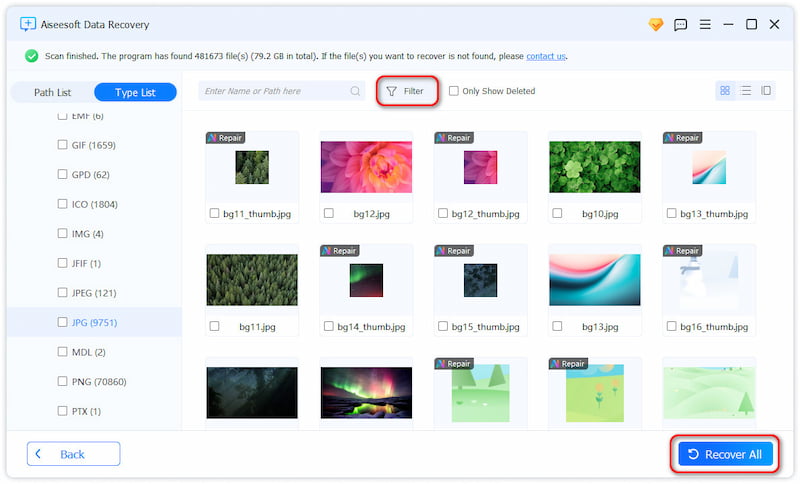
By following these steps, you can recover lost data from your SSD and restore it to working condition without needing a Time Machine backup.
Do I need to format the new SSD before restoring from Time Machine?
Yes, format the new SSD as APFS or Mac OS Extended (Journaled) before restoring the backup to ensure compatibility.
How long does restoring a Time Machine backup to an SSD take?
The time depends on the size of the backup and SSD speed, but it can take anywhere from 30 minutes to several hours.
What should I do if Time Machine doesn’t recognize my new SSD?
Ensure the SSD formats properly in Disk Utility. Check if the SSD is connected correctly. Restart your Mac and try again.
What if my Time Machine backup corrupts or missing files?
If your backup is incomplete or corrupted, you may need to use data recovery software, such as Aiseesoft Data Recovery, to recover missing files.
Can I use a different Mac to recover a Time Machine backup?
Yes, you can restore your backup to a different Mac, but due to hardware differences, some system files and settings may not transfer correctly.
Conclusion
A quick and easy way to recover lost data, reinstall macOS, or move information to a new SSD is to install macOS from Time Machine to SSD. Apple has a built-in backup solution that can transfer your system, apps, and personal files, so it doesn't have any data loss during the transition process. Whether upgrading your Mac with a new SSD or working through an unexpected failure, Time Machine takes some of the pain out of the process. However, you should perform a backup from the Time Machine after the new SSD to maximize efficiency, avoid future data loss, and keep your system running smoothly. Frequent backups offer protection and facilitate speedy file repair in case of hardware failure or unintentional deletion. As long as you know what you're doing and have correctly formatted your SSD, you should have no problem restoring your system so you can continue using your Mac as usual.
 Get 5 Helpful Computer Data Recovery Programs and Services
How can I find the computer data recovery near me? Is it worth paying for Apple computer data recovery? Get to know computer data recovery software and services.
 [100% Work] 5 Solutions to Fix SSD Not Showing Up in Windows 11
Have you ever encountered the problem of a PC not recognizing SSD? This post offers five proven ways to fix the issue and recover your deleted data from SSD.
 SSD Data Recovery - How to Recover Data from a Failed SSD Hard Drive
Is it possible to recover data from a failed SSD? Are you facing the SSD failure situation and looking for the best way to restore your lost data? Best SSD data recovery tool is recommended here to help you make the SSD data recovering.
Recover Various Data
1. Free Data Recovery Software
2. Recover Deleted Files in Windows
3. Recover Deleted Files from Recycle Bin Windows
4. Recover Permanently Deleted Emails
Aiseesoft Data Recovery is the best data recovery software to recover deleted/lost photos, documents, emails, audio, videos, etc. from your PC/Mac.
![]() 100% Secure. No Ads.
100% Secure. No Ads.
![]() 100% Secure. No Ads.
100% Secure. No Ads.
*Required field
*Please enter a valid email
