Contents
What should be the recommended method to transfer Samsung photos to a PC, especially when you need to move a large number of images from your Samsung Galaxy phone to a computer?
If you simply copy and paste the Android photos via email or instant messages, you might lose or duplicate some important photos. The article shares seven approaches for you to transfer photos from Samsung to PC or Mac efficiently.

| Method | Best For | Requirements | Transfer Speed | Pros | Cons |
| Aiseesoft MobieSync | Selective transfers, Bulk files transfer, Android data backups, cross-platform use | Mac/PC + USB + Software | Very Fast | Transfer data among iOS, Android, and computer Selective transfer High speed File conversion |
Requires the third-party software installation |
| USB Cable | Everyone Common file transfer |
Windows PC + USB | Very Fast | Direct file access Fast, stable, and reliable No internet needed |
Requires a cable Can be less convenient |
| SD Card | Users with expandable storage | Card Reader + PC | Fast | Direct SD card access, doesn’t require the phone. | Requires a card reader |
| Google Photos/Drive | Mac users, wireless convenience, occasional transfers | Google Drive/Photos App + Internet | Variable | Wireless, accessible from anywhere | Requires internet connection Free storage is limited |
| Samsung Smart Switch | Samsung users Full system backups |
Smart Switch App + USB Cable | Fast | Official Samsung tool Great for full backups and restores |
Overkill for simple photo transfers |
| Samsung Cloud | Accessing cloud backups | Samsung Account + Internet | Variable | Integrated into Samsung phones | Being phased out in favor of other cloud services |
| Kies | Owners of very old Samsung devices | Kies App + Internet | Slow | Supports legacy devices | Outdated, replaced by Smart Switch |
If you want to find an easy and quick method to add Samsung photos to your computer, you can use Aiseesoft MobieSync. It is specially designed for effortless management and transfer of all types of mobile data. You can transfer various files like photos, videos, songs, contacts, etc. from your Samsung Galaxy phone to your computer.

Downloads
![]() 100% Secure. No Ads.
100% Secure. No Ads.
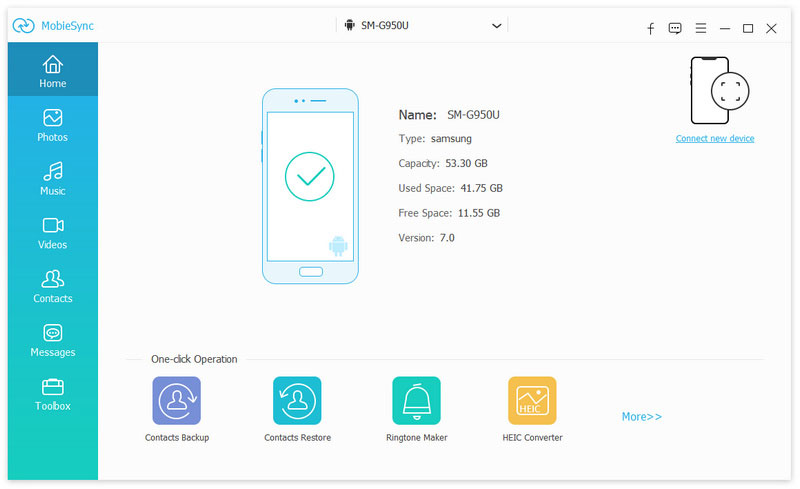
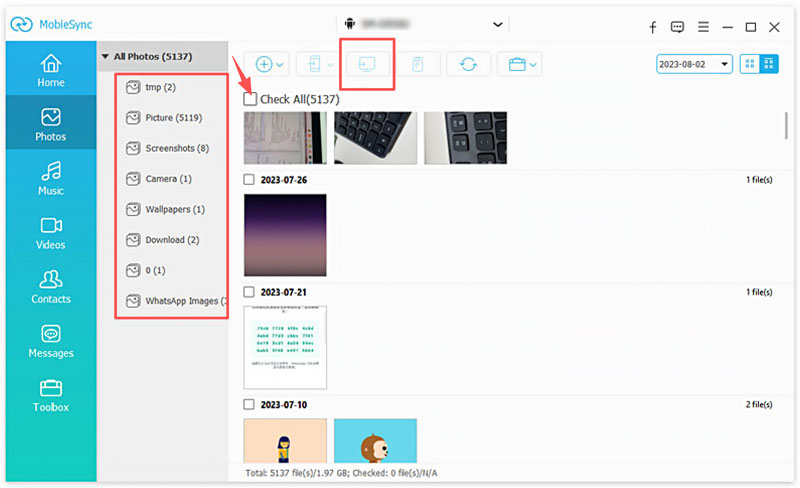
If you want to add photos to your Samsung device, you can click “Add File(s)” in the top menu to add image files to the phone. Besides, MobieSync allows you to transfer data between a Samsung phone and an iPhone.
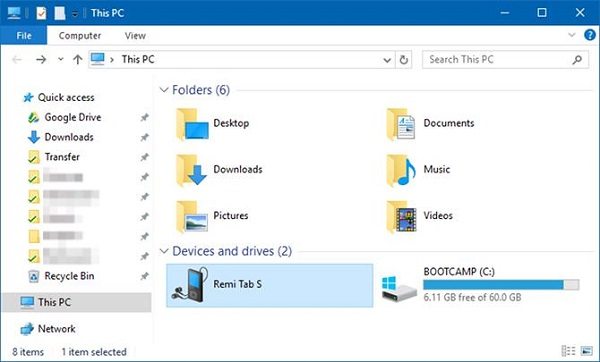
USB is one of the easiest methods to transfer photos from a Samsung to a PC. Moreover, it is most likely to work with most Samsung Galaxy phones. But the method is not valid to sync photos that you stored in other folders.
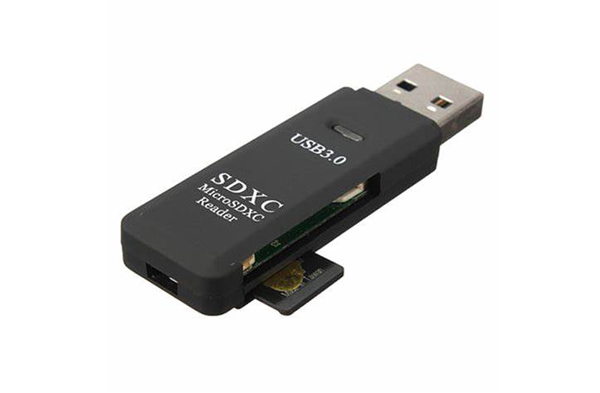
You can use a micro SD card to expand the storage capacity of your Samsung phone. It is also a good way to transfer videos and photos from a Galaxy phone to a PC. All that you need is an SD card reader.
Note: It is recommended to open your antivirus software when transferring pictures from your Samsung to your PC.
Google Photos is a nice solution you can take into consideration. It offers 15GB of free storage to each account if you do not care about the resolution. Here is the detailed method to transfer photos from Samsung to Mac via Google Photos. You can also find other methods to transfer photos from Android to Mac.
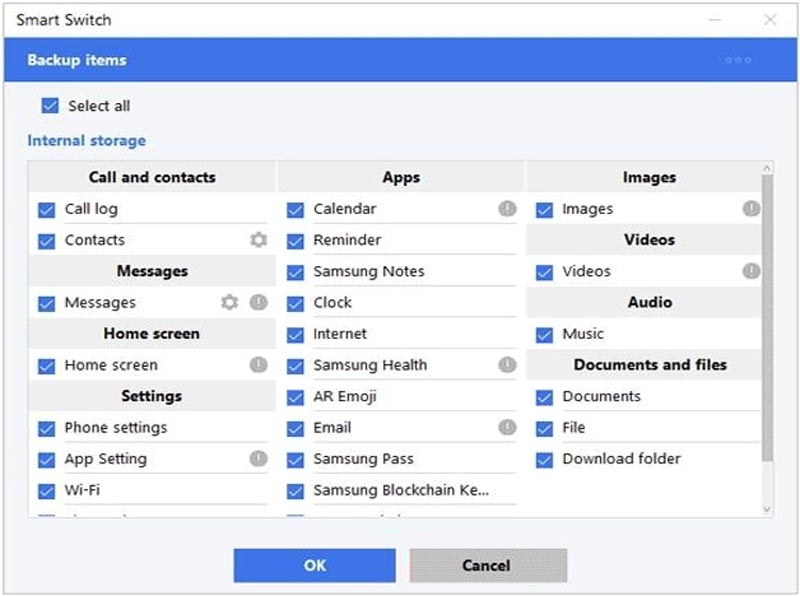
Samsung’s Smart Switch app is an official tool that is known for efficient phone-to-phone transfers. It can also help you transfer various pictures from a Samsung phone to a computer for backup and restore purposes.
Samsung Cloud is natively integrated into Samsung devices, offering a cloud backup service similar to iCloud for iPhone users. Note that Samsung Cloud has been replaced by Microsoft OneDrive.
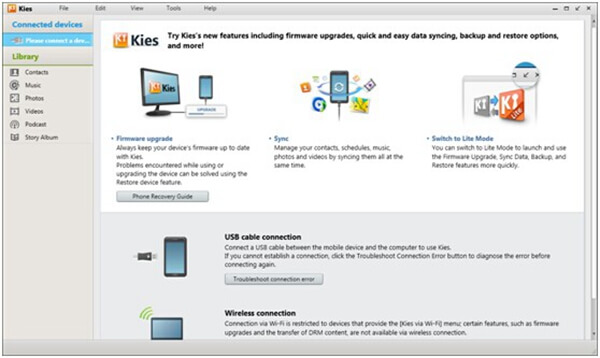
Samsung Kies was once a default solution to sync photos from Samsung devices to computers. It is available to phones and tablets released before the Galaxy Note III. But it does not work with modern Samsung phones running a newer Android version.
Conclusion
Based on the tutorial above, you can get the top 7 approaches to transfer photos from Samsung to PC or Mac computer. Just connect your Samsung phone to a computer with a USB cable, and you can transfer the pictures directly. Of course, you can sync photos with a cloud service online. Smart Switch is also a good solution for transferring images from a Samsung device to a computer.
 The Simplest Method on How to Transfer Photos from Android to Mac
Want to transfer photos from Android to Mac? You can learn how to transfer photos/pictures from Android to Mac in this post.
 Android Recycle Bin - Restore Files from Android Recycle Bin
Is there an Android recycle bin on Anroid mobile phone? Actually, no. But how to restore deleted files on Android? This post is right for you.
 Data Loss Averted! How to Back Up Your Android Phone to PC
How to back up your Android phone to PC? This guide is aimed at showing you several useful ways to help you easily make an Android backup to Windows PC.
Transfer Android File
Transfer Photos between Samsung Mobile Samsung and iPhone Transfer Tools Transfer Android SMS to iPhone Easily Transfer Android Photos to iPhone Transfer Android SMS to iPhone Easily Transfer Music from Android to iPhone Transfer Contacts from BlackBerry to iPhone Transfer Contacts from Samsung to iPhone Backup Android SMS to Computer Transfer Photos from Samsung to Computer
The professional iPhone/Android data manager and transfer to transfer various files between iOS/Android phone and computer and between two mobile phones in 1 click.
![]() 100% Secure. No Ads.
100% Secure. No Ads.
*Required field
*Please enter a valid email
